xtraCHEF: Assign Invoice Date as Invoice ID
Last updated: Apr 8, 2026, 10:19 AM
Question
How do I assign the invoice date as the invoice ID in xtraCHEF?
Answer
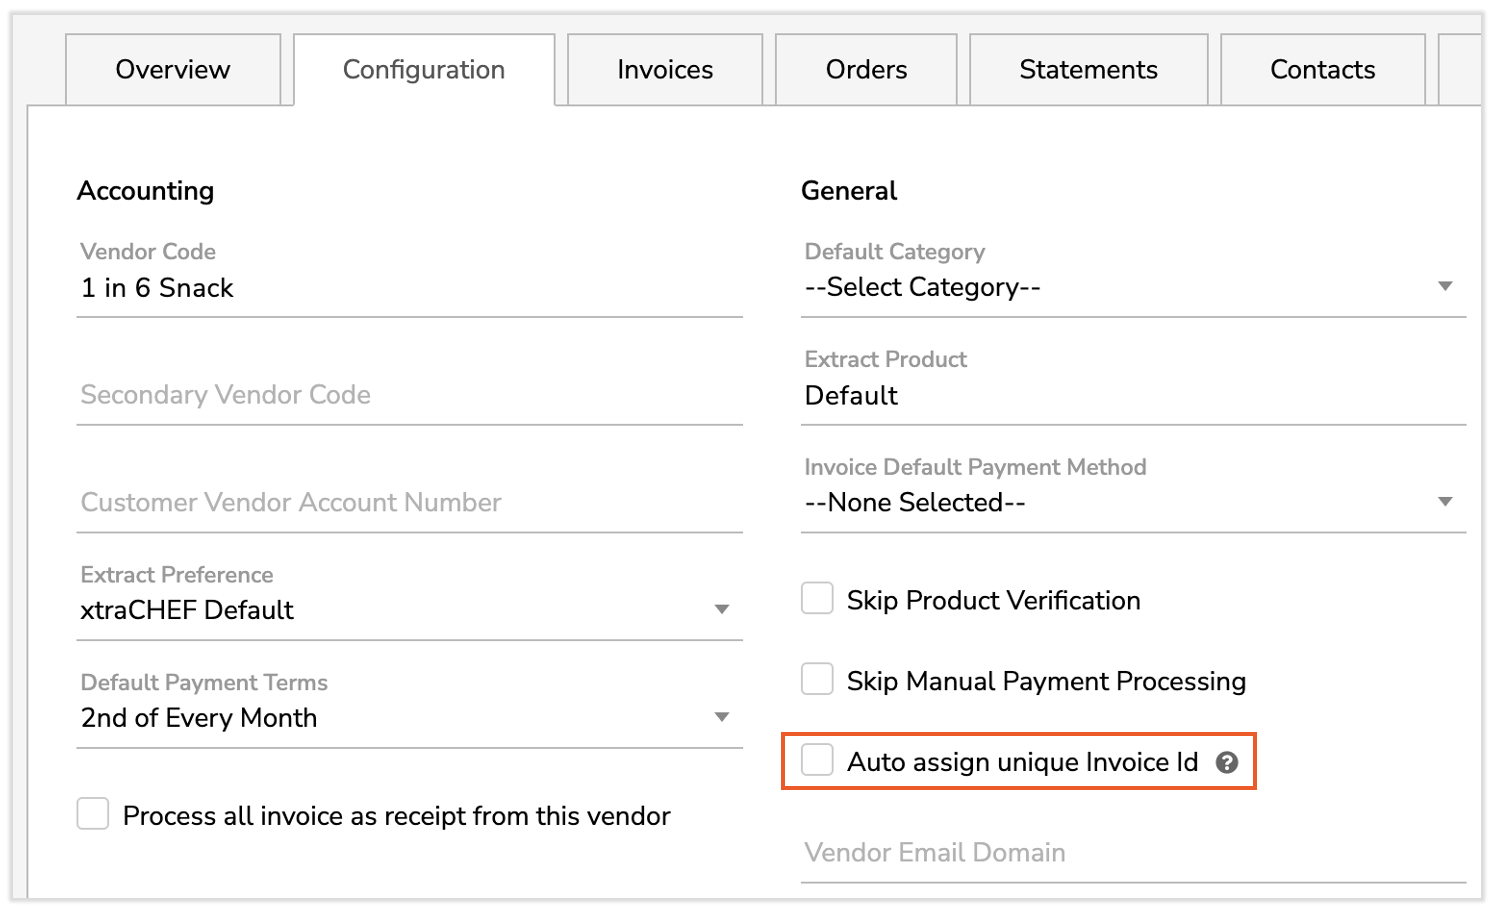
The Invoice Date can now be set as the Invoice ID from the Vendor Hub, eliminating the need to create a support ticket.
- Navigate to Vendors in the left-hand navigation rail.
- Select the Vendor you wish to apply this change to.
- Once the Vendor is open, navigate to the Configuration tab.
- Select the checkbox for Auto assign unique Invoice ID.
- Once complete, going forward, the system will automatically take the Invoice Date as the Invoice ID for this vendor.
Notes:
- This process should be done for vendors that do not use Invoice IDs or Invoice Numbers. Following these steps will prevent invoices from being routed to exceptions with every upload.
- Invoices uploaded before marking the Auto assign unique Invoice ID checkbox will not be updated to have the Invoice Date as the Invoice ID.
- This change only applies to invoices uploaded after the checkbox is marked.
- If past invoices need to be reprocessed, contact Customer Care.