Get Started With EpsonNet
Last updated: Sep 17, 2026, 9:05 AM
Learn how to install and use the EpsonNet config.
Install and Open EpsonNet Config
To begin, you'll need to install EpsonNet Config on your computer.
Follow the steps below to install and open EpsonNet Config based on your operating system:
- Windows 8.x
- Navigate to the Apps screen and select EpsonNet Config under EpsonNet.
- Other Windows Versions
- Select Start, and select All Programs or Programs. Next, select EpsonNet and choose EpsonNet Config.
- OS X (Apple)
- Open the Applications folder.
- Open the Epson Software folder, then select EpsonNet.
- Next, select EpsonNet Config, and double-click the EpsonNet Config icon.
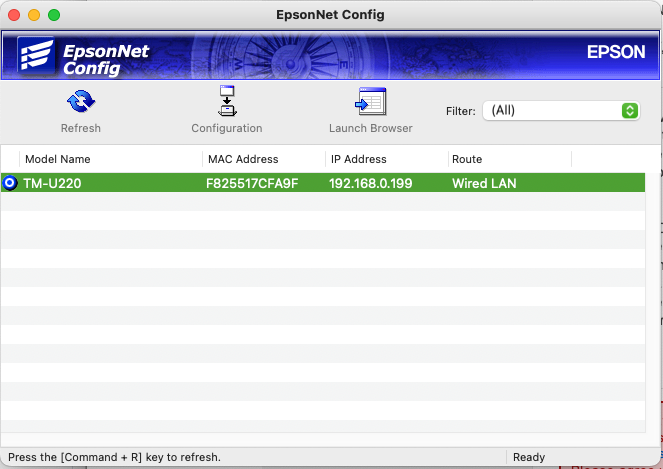
Once installed, power on your printer and connect it to your computer using an Ethernet cable. If your computer doesn't have an Ethernet port, an Ethernet to USB adapter will work.
Configuration Menu
- Select the printer that you wish to configure.
- To ensure you are looking at the right printer, look at the serial number.
- Double-click the printer or select configuration to open the printer configuration.
- From the menu on the left, select Network Interface.
- Select TCP/IP, and choose Basic.
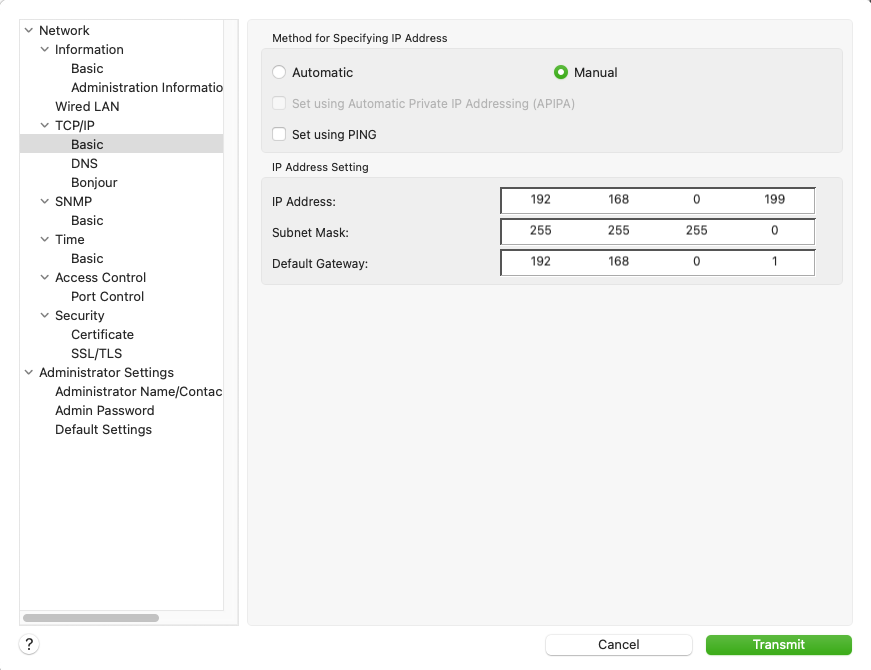
DHCP Enabled/Disabled
- To disable DHCP and assign a static IP:
- Select Manual.
- Enter the IP, subnet mask, and default gateway
- Select Transmit.
- To enable DHCP:
- Select Automatic.
- Select Transmit.