Install Your Replacement Toast Flex Terminal
Last updated: Apr 28, 2026, 4:20 PM
| Congrats, your new Flex terminal has just arrived! |
Follow the steps below to install and set up your replacement Toast Flex and make sure your terminal is ready to take payments.
- Step #1: Record Your Current Device Settings
- Step #2: Unplug & Uninstall Your Current Hardware
- Step #3: Install Your New Toast Flex & Other Devices
- Step #4: Configure Your New Toast Flex
- Step #5: Return Your Old Flex Terminal
Step #1: Record Your Current Device Settings
The device setup tool is available on each device running Toast. The settings are device-specific and can only be edited from the device itself.
It's important that your new Toast Flex is set up identically to your current device. To make sure that's the case, take some time to download and fill out this form here.
To access the Device Setup screen on your device, navigate to the main menu of the Toast app, scroll down and select Device Setup under the Setup header.
Step #2: Unplug & Uninstall Your Current Hardware
Next, go ahead and uninstall your current Toast Flex by following these steps:
- First, power off your Flex terminal and unplug the power adapter from the wall outlet. If your Flex is plugged into a Toast Printer/Hub, make sure to unplug the power adapter for the Toast Printer from the wall outlet.
- Remove the power plug (orange) from the bottom of the terminal and make sure to unscrew the thumbscrew and remove the cable.
- If you have an Ethernet cable (yellow), please disconnect it from the terminal. (Note: Keep all ethernet and power cables handy for your new terminal.)
- If you're using your existing card reader, disconnect it and unscrew it from the terminal. If your card reader is attached to your Toast Printer/Hub, there is no need to unplug it.
- If you have a Flex for Guest with a wedge (on-counter) Guest-Facing Display, go ahead and disconnect the Guest-Facing Display from the Flex.
Step #3: Install Your New Toast Flex & Other Devices
Follow the steps below to install your new Flex based on your current combination of devices at your restaurant.
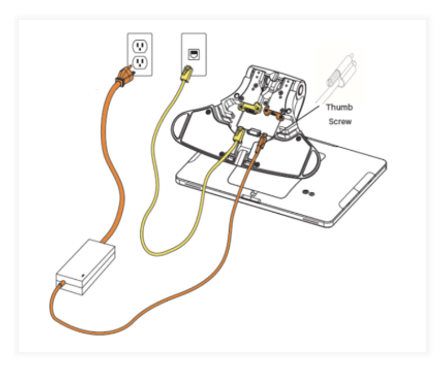
Connecting Power (Orange) and Ethernet (Yellow)
- Using your existing power adapter or the power cable from your Toast Printer/Hub, plug the power cord into the orange port at the base of the Toast Flex terminal stand (labeled in orange as Power In).
- Use the thumbscrew to secure it.
- If using an Ethernet cable, go ahead and plug that into the bottom of the terminal.
- Plug the power adapter into the wall outlet.
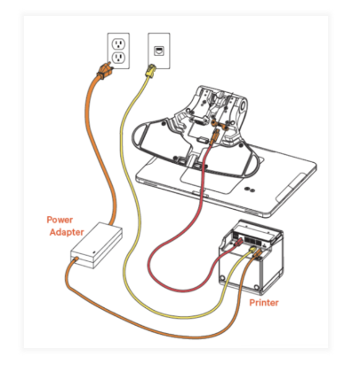
With Toast Printer:
Connecting Your Toast Tap™Card Reader
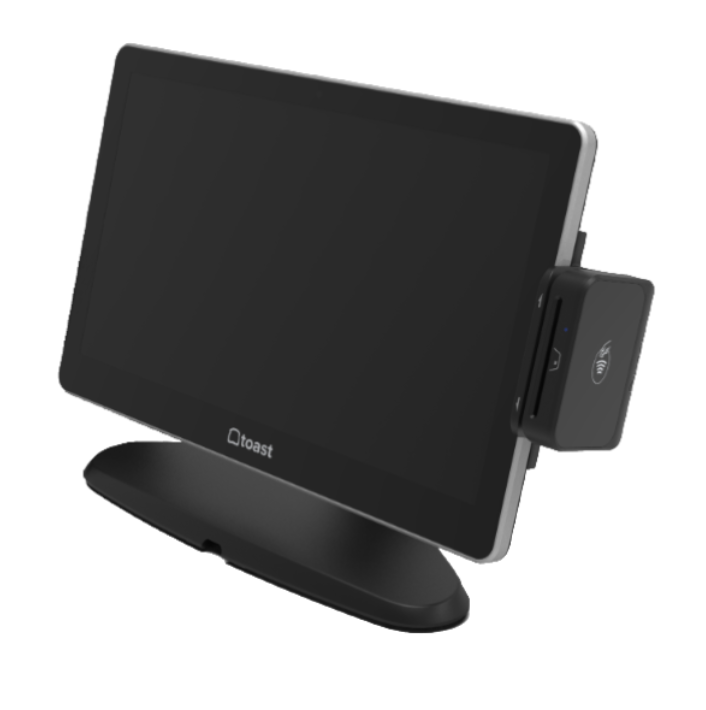
If you're attaching your Toast Tap™(On-Counter) to the Toast Flex terminal:
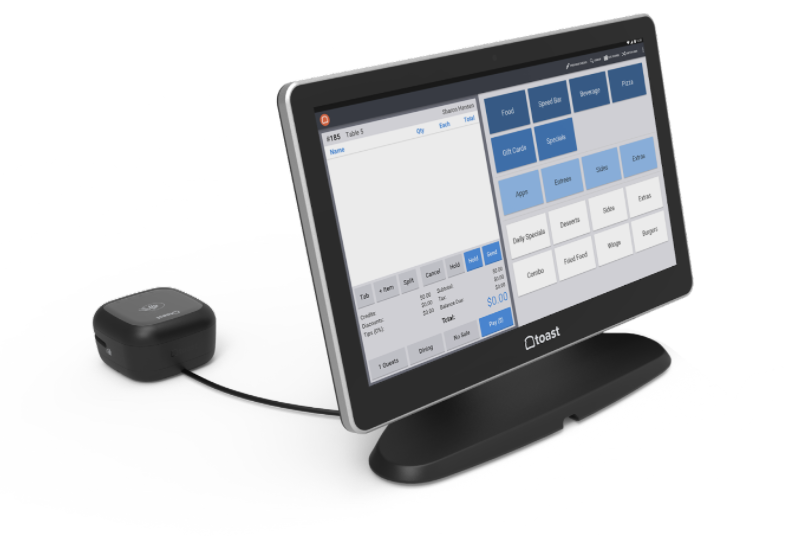
- Remove the plate covering the power on the side of your terminal. Any of the 3 ports (left, right, or on top) will work.
- Plug in the end of the Micro-USB cable that has the plate attached. Then screw the plate into the terminal.
- If your terminal stand has a neck to hide the cable, feed it through for a cleaner look.
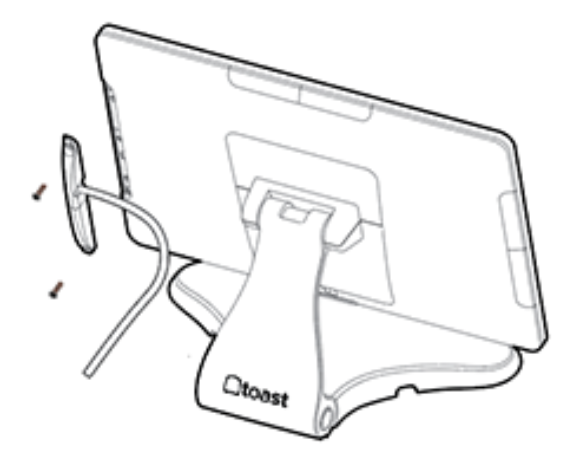
If you're attaching your Toast Tap™(Direct Attach) to the Toast Flex terminal:
- Remove the plate covering any of 3 ports on the sides (left, right, or on top) of your terminal.
- Attach your Toast Tap™(Direct Attach) reader by plugging it into the now exposed open port. Note: Keep the plate somewhere safe in case you'd like to switch positions of the reader at a later date.
- Then, use the provided three screws to adhere the reader. These will be inserted from the bottom up.
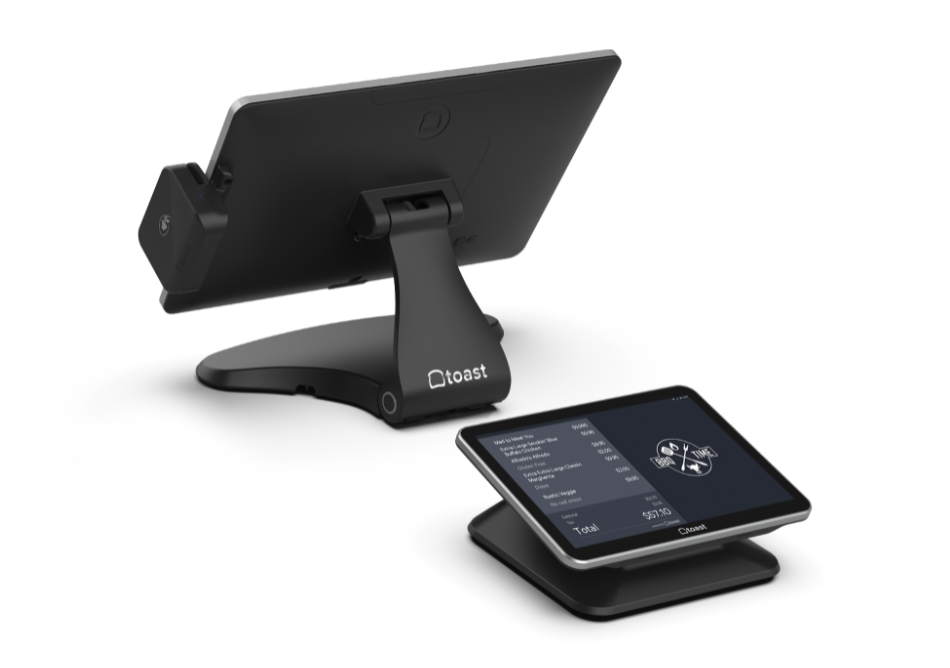
Connecting Your Toast Flex for Guest (Wedge)
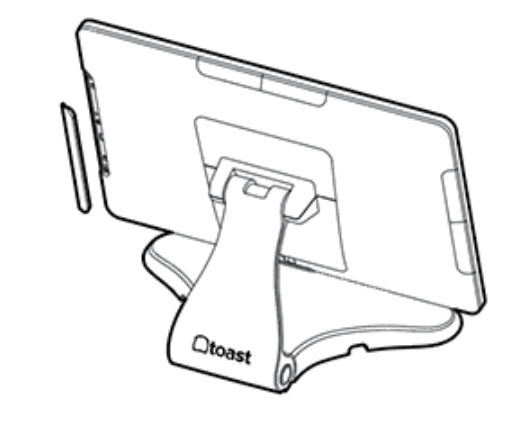
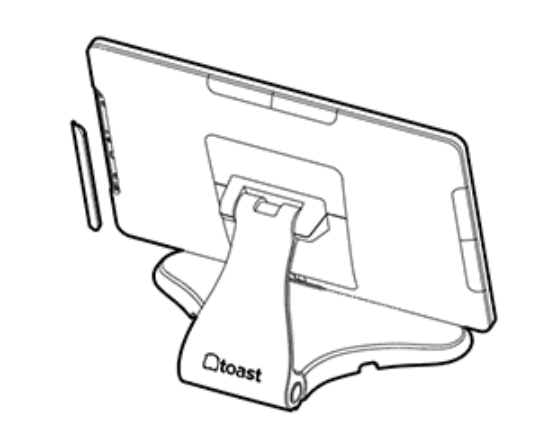
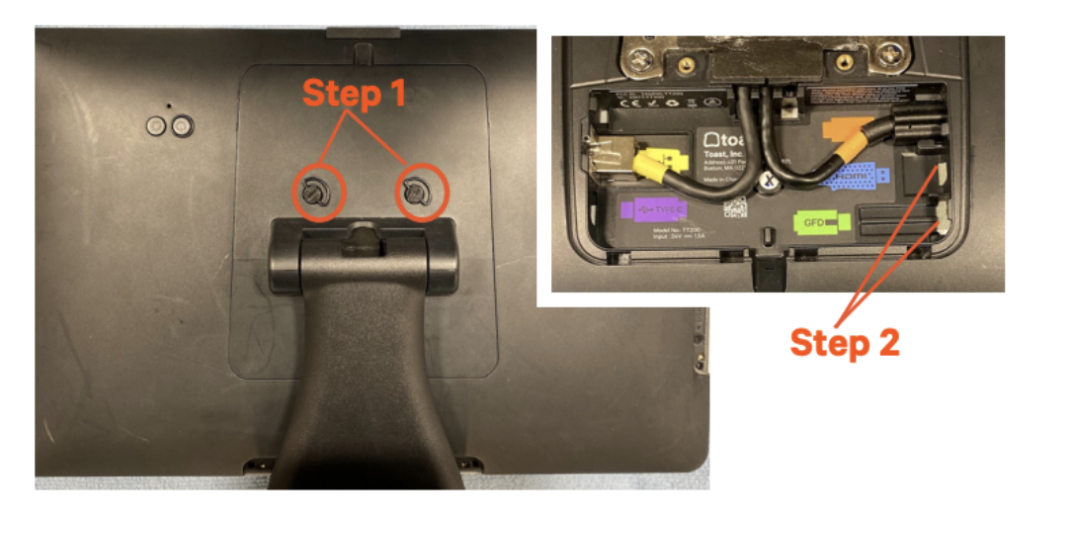
- Gently flip and place your Flex terminal so that the display faces down and you can access the thumbscrews on the back. Unscrew the two thumbscrews and lift up to remove the backplate.
- Unplug the green (GFD) (Guest Facing Display) and blue (HDMI) (High-Definition Multimedia Interface) cables and remove this cable from the terminal by guiding it back through the stand or leaving it. Note that there may not be any cables plugged in. If nothing is plugged into the green and blue ports, move on to step 3.
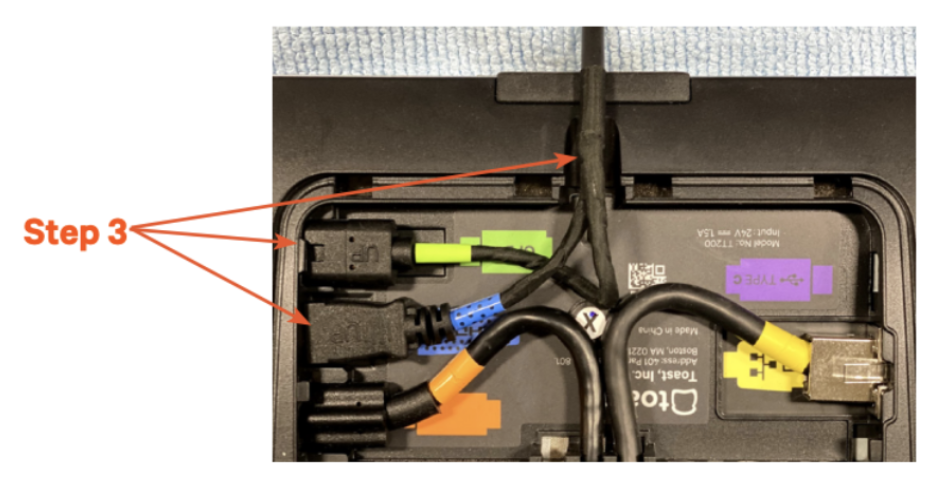
- Grab the free ends of 5 ft extension cable and connect the green (GFD) and blue (HDMI) cables to the Flex terminal. Make sure the 'UP' text is facing up when plugging in. Place the cable through a slot at the top of the terminal to make it easier to put the backplate on.
- Put the backplate back on the Flex terminal. Put on at an angle and push down—screw in the two thumbscrews.
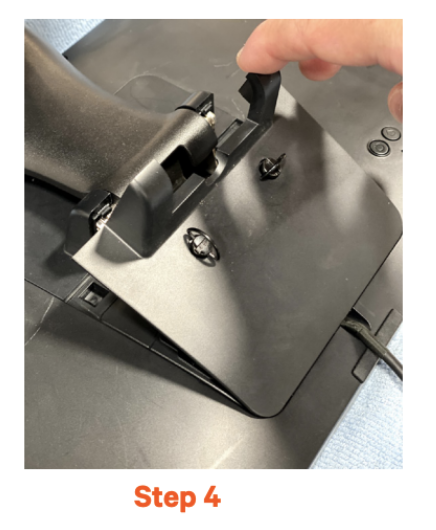
- Flip the Flex terminal right side up and position your terminal and Toast Flex for Guest in your desired location.
- Power on the Toast Flex.
- Log into your restaurant in the Toast app and power cycle the device. Press the power button on the bottom of your device for 10-15 seconds.
- Select Power Off, then select Ok when prompted. Then, press the power button again to turn the device back on.
- Log into your restaurant in the Toast app and complete the basic setup. Complete the basic setup for your device and its accessories on-screen in Step #4 below.
Step #4: Configure Your New Toast Flex
Now that you have everything connected and installed, we'll want to configure your new Toast Flex.
Follow the steps or watch the video in this Support Center article, Device Setup Overview.
Step #5: Return Your Old Flex Terminal
Now that everything is in place and set up correctly, please return your old Toast Flex using the packaging material sent and the shipping label included in the box within 30 days to avoid being charged.