Manage Accounting Sync: Accounts Payable
Last updated: Sep 2, 2026, 11:50 AM
Manage Accounts Payable Accounting Sync in Toast Web, including Activity, Bill Assignments, Settings, and QuickBooks Online Connections.
| Before using this article, you must complete the steps in Get Started With Accounting Sync: Accounts Payable. |
- Navigate to Accounts Payable
- View Activity
- Manage Bill Assignments
- Configure Settings
- Manage Connections
- Related Articles
Navigate to Accounts Payable
In Toast Web, there are four pages for the Accounts Payable Accounting Sync. Navigate to Finance > Accounting and select one of the following pages:
- Activity
- AP Bill Assignments
- Settings
- Connections
View Activity
The Activity page in Toast Web offers a calendar view that displays each sync event, whether successful or unsuccessful. Use the drop-down menus in the upper-right corner to filter by group and location. You can view more than one group and location at a time.
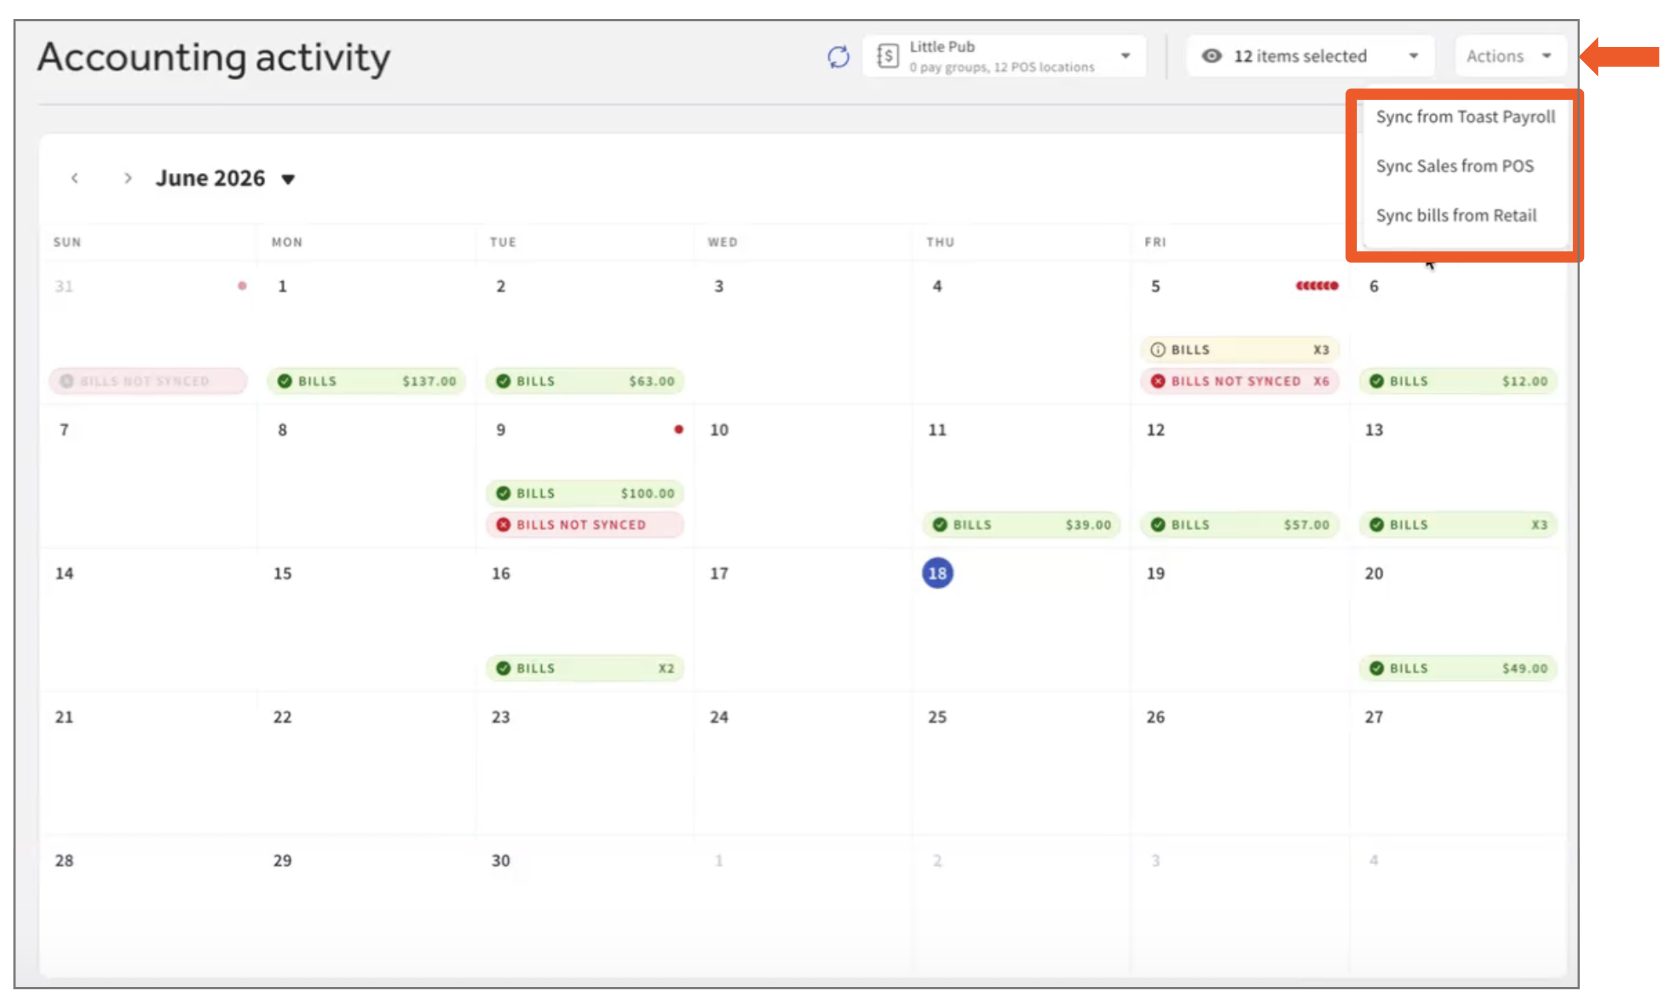
If an error requires your attention, a banner appears at the top of the page with the required action. This can occur due to GL, mapping, connection, or sync issues. Address these action items to successfully sync your Toast data with QuickBooks Online. Learn more about Accounts Payable sync errors by reading Get Help With Accounting Sync.
Select a date to open the details of all syncs that occurred on that day.
- When an entry syncs to the connected QuickBooks Online account, it appears in green on the calendar.
- Unsuccessful syncs appear in red and display a red dot in the upper-right corner of that day on the calendar.
- When this occurs, the financial contact(s) at your restaurant receive an email with more details and instructions to resolve the issue. For example, if a new line item does not have a GL code assigned, the email directs you to the GL mapping page.
Manage Bill Assignments
To access AP Bill Assignments in Toast Web, navigate to Finance > Assignments > AP Bill Assignments.
Note: Accounts Payable bill assignments are based on Connections, not by location.
- Classes: Choose a class for each location to group bills in QuickBooks Online.
- Expense categories: Assign a GL code to each expense category for bills in QuickBooks Online.
- Vendors: The list is based on the Retail Suppliers list in Toast Web.
Configure Settings
Log in to Toast Web and navigate to Finance > Accounting > Settings.
Note: Any changes made to Sales Sync location connections also affect Accounts Payable Sync, and vice versa.
When you make changes in this section, be sure to select Save before exiting the window.
- Post to accounting system: A daily Accounts Payable journal entry is posted to the connected account for each Toast POS location.
- Sync start date: All journal entries on or after this date are posted. Verify that entries have not already been added to QuickBooks Online to avoid duplicates.
- Bill posting method: Choose how much Toast includes when posting bills to your accounting system.
- Summarized by Expense Category: Combines purchased items by expense category. Each category posts as one bill line item to its assigned GL code.
- Detailed by Product: Each product posts to the GL code assigned to its expense category, and the product name appears in the description.
Manage Connections
When Accounts Payable is synced with QuickBooks Online, entries appear here grouped by your QuickBooks Online account. View the connection status and the associated group(s) for each account.
- Verify that the QuickBooks connection status field displays Connected.
- Select the edit pencil to connect or disconnect groups from a QuickBooks Online account.
- Select the three-dot (overflow) menu to reconnect or re-establish the connection. You may need to do this after a billing lapse, when QuickBooks Online errors occur, or when you change your QuickBooks Online credentials (email and/or password).
If you want to link a new QuickBooks Online account to Accounts Payable, navigate to Finance > Accounting > Connections and select Add QuickBooks Online account.
Related Articles