Replace Your Toast Go® 2 Handheld Card Reader or Battery
Last updated: Jul 9, 2026, 2:46 PM
- Replace the Toast Go® 2 Handheld Card Reader
- Replace the Toast Go® 2 Handheld Battery
- Additional Resources
Replace the Toast Go® 2 Handheld Card Reader
Your reader repair kit will contain:
- 1 Toast Go® 2 card reader with protective cover
- 1 screwdriver
- 2 extra screws
- Instruction guide
| Before swapping out the card reader, please make sure to power off your device. |
Check out the printable PDF of the steps below here.
| The gel located in the USB port should not be removed as this is used as a waterproof seal for the reader. Removing the gel could cause damage to the replacement and can void any warranty. |
| Using a screwdriver, remove the 2 screws at the bottom of your Toast Go® 2. If possible, place these screws in a small cup or other safe container and set aside to keep track of them while the device is open. | 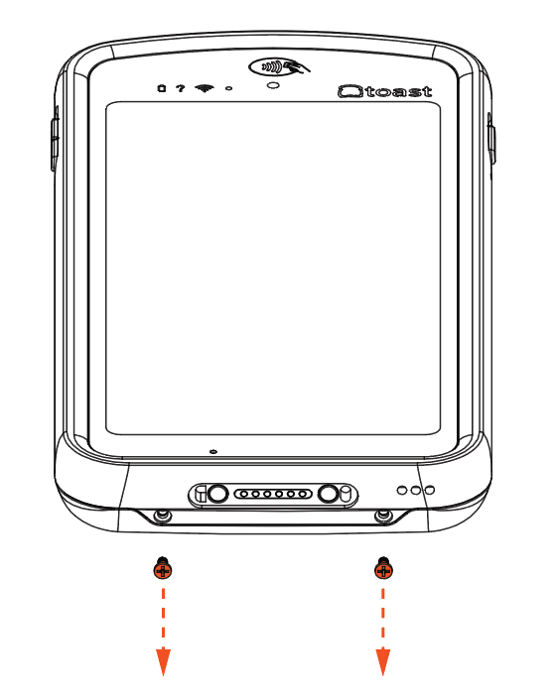 |
| Push down and slide the back of the Toast Go® 2 upward in order to open the device. | 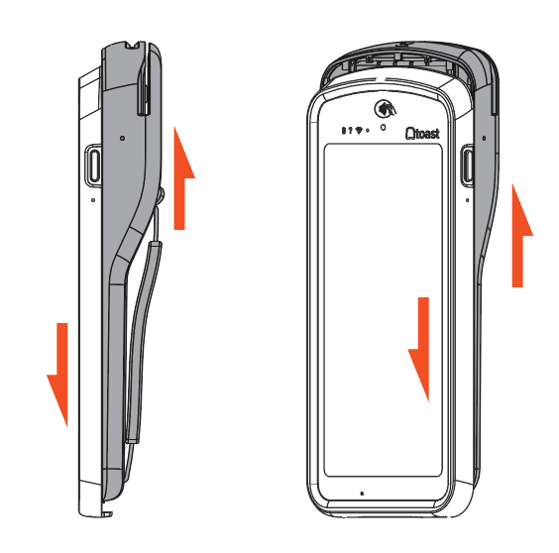 |
| At the top of the Toast Go® 2, loosen the 4 screws on the card reader cover.
Note: These screws will not come out and will remain attached to the card reader cover. | 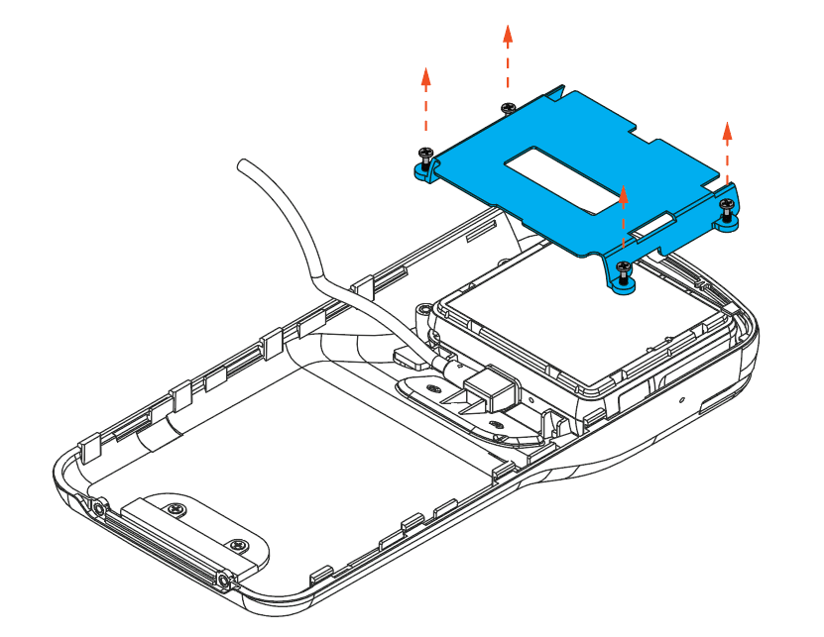 |
| Remove the card reader cover and set aside.
Gently remove the card reader and unplug the USB cable. | 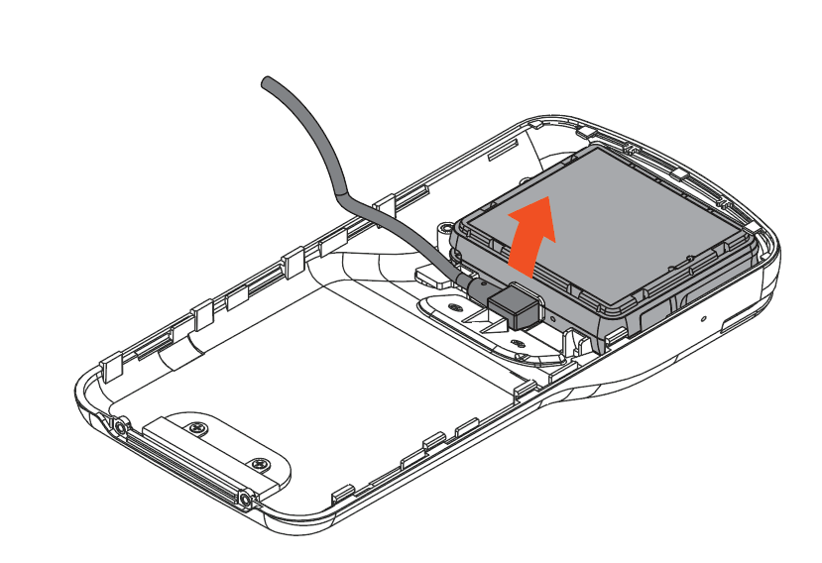 |
| Plug the USB cable into the new card reader and gently pop the card reader back into place. The barcode on the card reader should face out. | 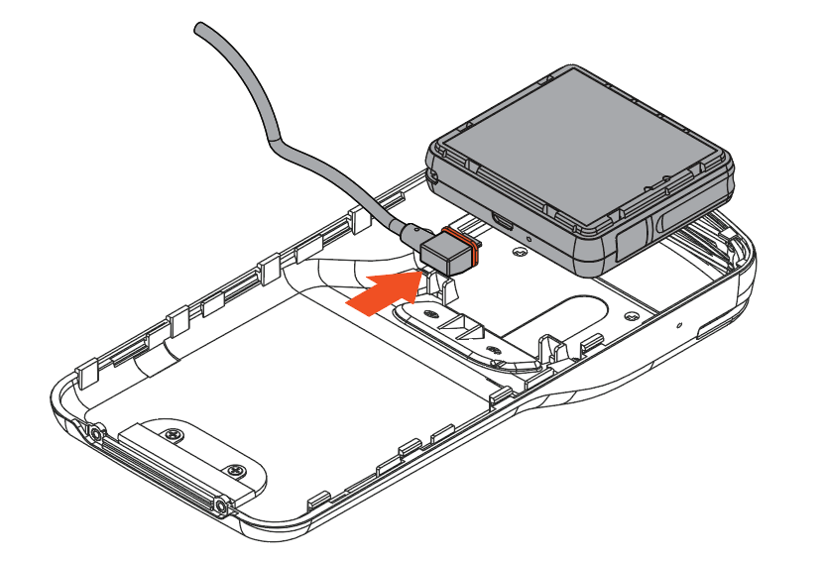 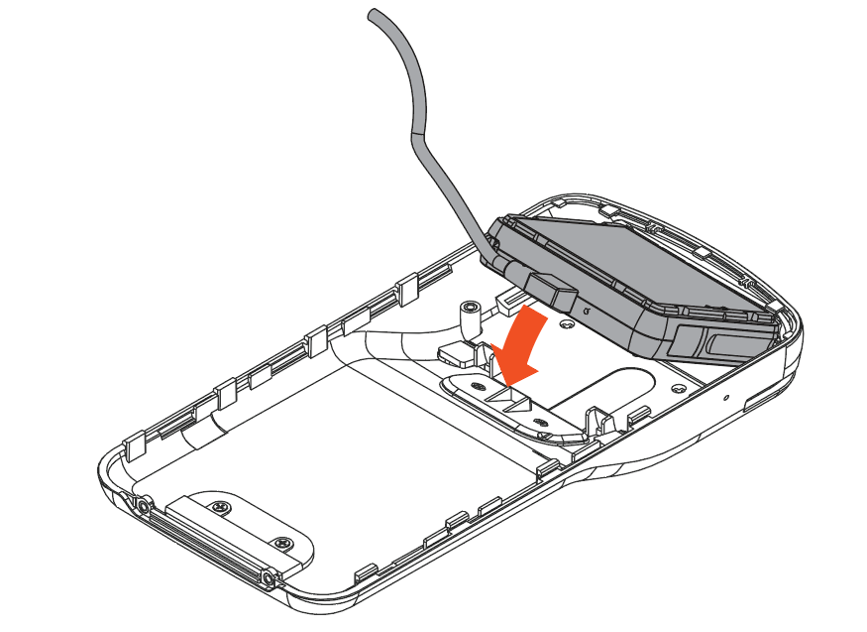 |
| Place the card reader cover over the new card reader and tighten the 4 screws. | 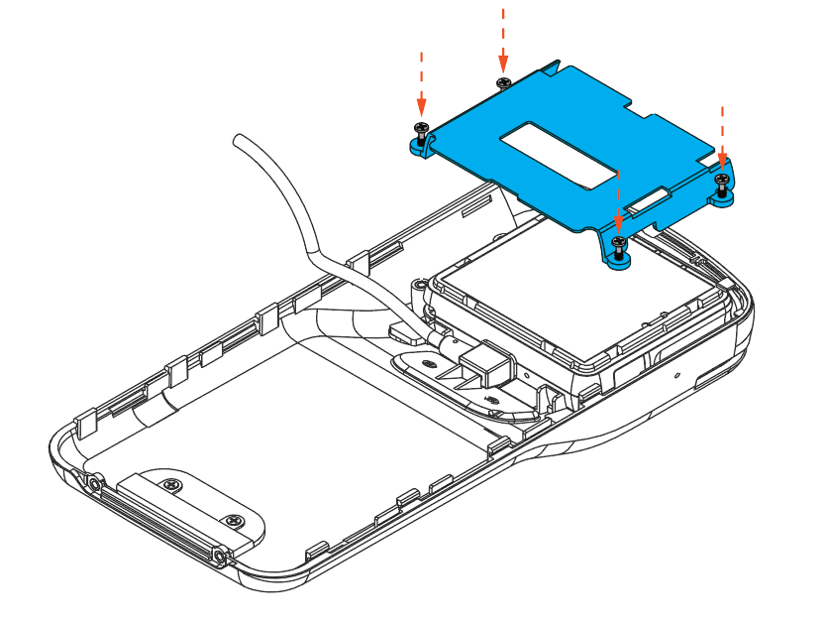 |
| Place the Toast Go® 2 screen down on a flat surface and align the interior stickers of the device. | 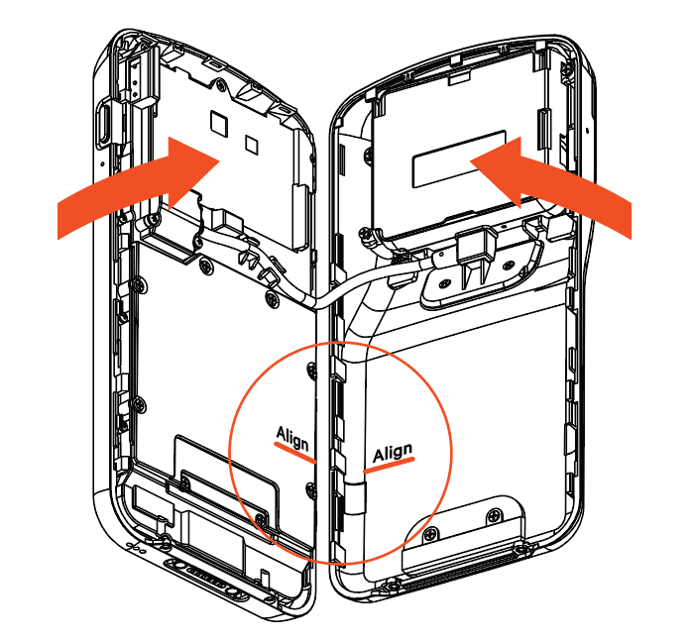 |
| Press both halves together, pushing down and sliding the back of the Toast Go® 2 in a forward motion until you hear a click. | 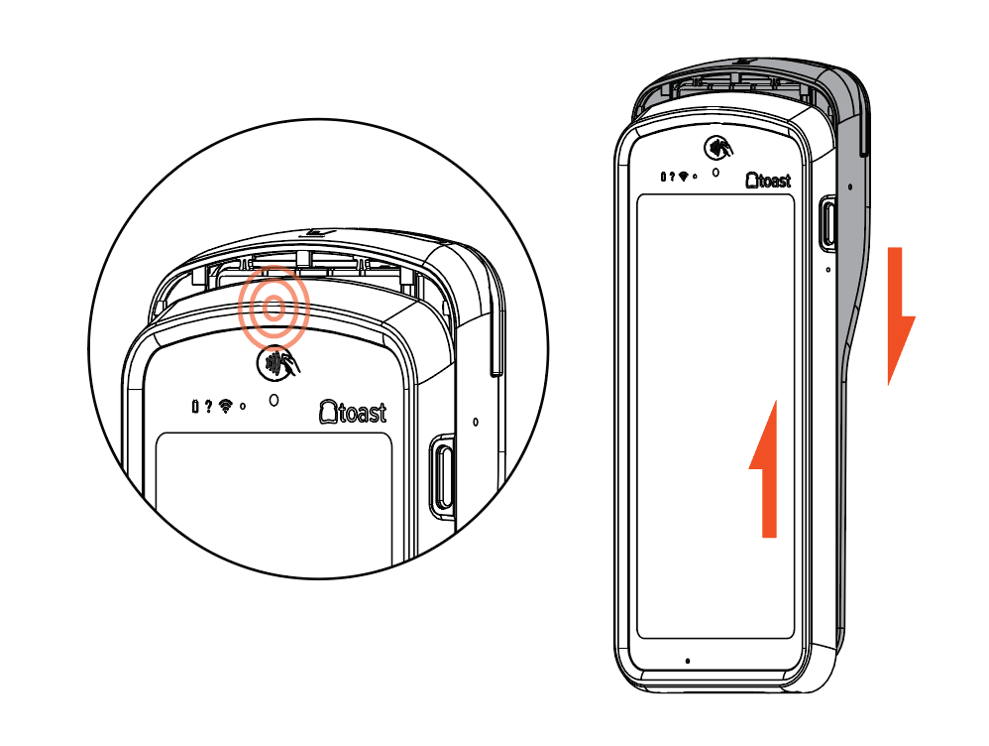 |
| Re-insert the two screws at the bottom of the device. | 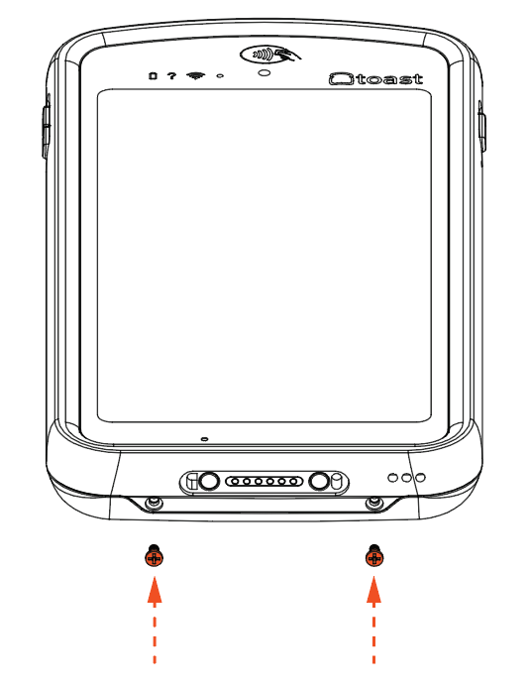 |
Replace the Toast Go® 2 Handheld Battery
Your replacement battery kit will contain:
- 1 Toast Go® 2 replacement battery
- 1 screwdriver
- 2 extra screws
- Instruction guide
| Before swapping out the battery, please make sure to power off your device. |
Check out the printable PDF of the steps below here.
| Using a screwdriver, remove the 2 screws at the bottom of your Toast Go® 2. If possible, place these screws in a small cup or other safe container and set aside to keep track of them while the device is open. | |
| Push down and slide the back of the Toast Go® 2 upward in order to open the device. | |
| Remove the screws holding down the battery cover. If possible, place these screws in a small cup or other safe container and set aside to keep track of them while the device is open. | 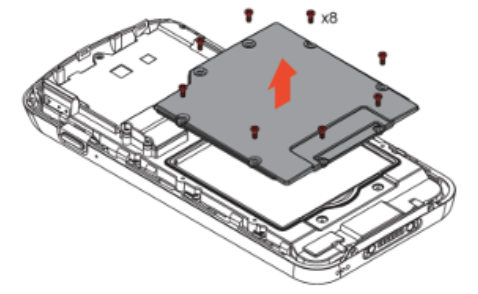 |
| Remove the battery cover and gently pry the battery out of the bottom of the device. | 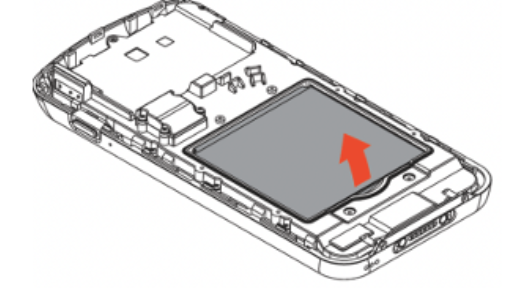 |
| Insert the new battery. Make sure to line up the contact point on the battery with the device and push the battery in and then down until you hear a click. | 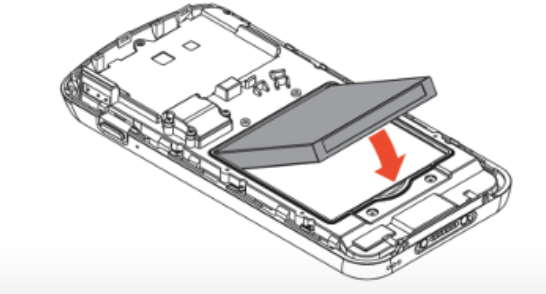 |
| Put the battery cover back on and re-insert the screws using your screwdriver. | 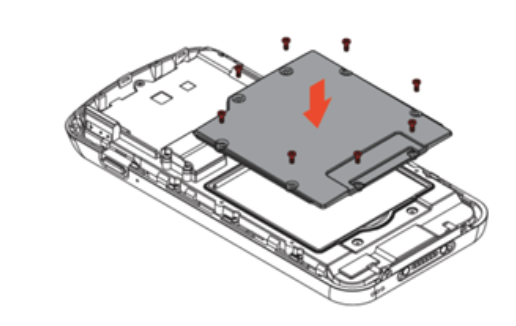 |
| Gently tuck the cable into the grooves of the front of the Toast Go® 2, and be sure that they are not in the way of the battery cover. | 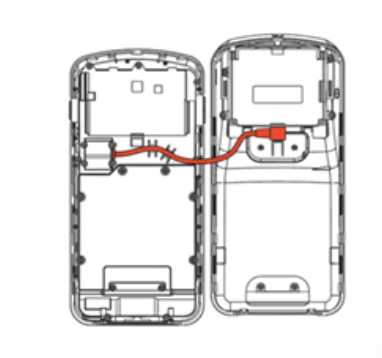 |
| Place the Toast Go® 2 screen down on a flat surface and align the interior stickers on the device. | 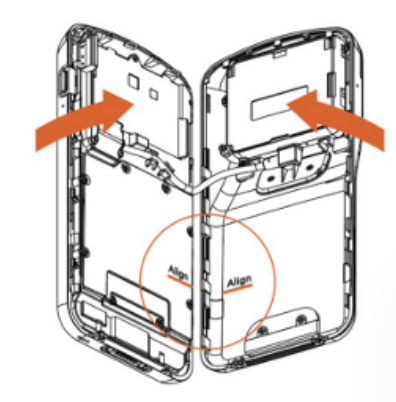 |
| Press both halves together, pushing down and sliding the back of the Toast Go® 2 in a forward motion until you hear a click. Re-insert the 2 scores at the bottom of the device. | 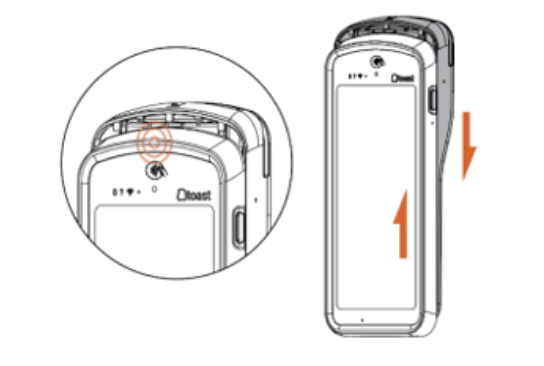 |
Note: If, after installing the Toast GO 2 card reader, in the card reader test app still says Can't Find USB Reader, then it is likely the cable between the Toast Go 2 tablet and the reader is damaged. The last step would be to unplug the cable on the tablet side and plug it back in as sometimes it can become loose. Toast currently doesn't offer a replacement cable if that cable is damaged
Additional Resources