Set Up Your Meraki Router
Last updated: Feb 12, 2026, 9:47 AM
Follow the steps in this article to set up your Meraki router.
| The steps below are intended for Meraki router users. If you are a Toast Router user, please see Set Up Your Toast Router. |
Site Readiness – Before You Get Started with Your Meraki Router
| Before you get started with setting up your Toast router, review the Networking & Devices Site Readiness Guide. |
Note: Restaurants are required to purchase new networking equipment when establishing a new Toast account. This could be a new restaurant opening, an existing restaurant that is new to Toast, or an existing Toast restaurant that is adding a new location.
| Toast does not support repurposing, reusing, or transferring network equipment between previous Toast locations. |
Meraki Router Details
The front side of your Meraki has an LED display that indicates the router's operational status, and the back has five Ethernet ports.
Below are examples of what your Meraki router devices might look like.
| Toast-Provided Cisco Meraki Routers | |
| Meraki Z3 Router | 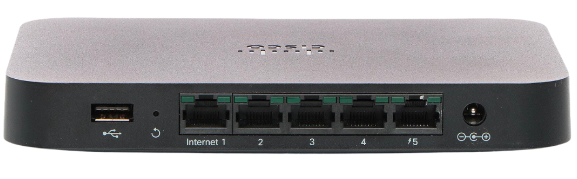 |
| Meraki MX64* and MX67 Router | 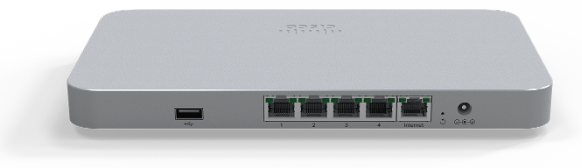 |
| Meraki MX84* and MX85 Router |  |
| Meraki MX95 Router | 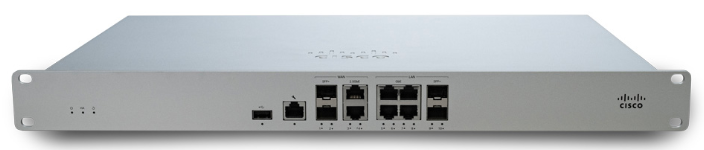 |
*Note: Meraki MX64 and MX84 have since been replaced with their direct replacement.
Meraki Router Installation Steps
- Using the Ethernet cable provided, you can connect one end into an open port on your cable modem (the box provided by your internet service provider) and the other end into the Internet port of the Meraki router.
- Plug in the Cisco Meraki router's power adapter, included in the box, into an outlet. The devices will automatically turn on when power is connected. The LED display will be solid orange as there is no internet connectivity currently. After about 30 seconds, the LED display should change colors as it tries to establish internet connectivity through the cable modem.
- Once the LED display turns into a solid white, the Meraki router will have established internet connectivity through the cable modem. The Meraki router usually takes a few minutes to connect to the internet, but sometimes, it can take up to an hour. The light on your Meraki might also change colors during this time.
- Once the router is connected to the internet, a solid white light will appear on the LED display. If the router changes colors or blinks white, it's still trying to connect. If the router displays a solid orange light, there are connectivity issues, and the connection needs troubleshooting. Toast recommends calling your internet service provider and verifying that you have the correct information for adding a new device. If the Meraki doesn't connect immediately, something may need to be configured on the internet service provider's side.
Toast-Provided Cisco Meraki Routers Meraki Z3 Router Meraki MX64* and MX67 Router Meraki MX84* and MX85 Router Meraki MX95 Router
- Once the router is displaying the solid white light, connect all Ethernet lines (Cat5e or Cat6 cables) that run to the Toast devices into the LAN ports of the Meraki router. If you only have one Wireless Access Point (WAP), then you won't need to use the PoE (power over Ethernet) injector and you'll be able to connect it directly to the 5th port on the Meraki directly.
Lastly, if you have more than four lines that need to connect to the router, utilize one of the switches provided in your Toast hardware order. You can connect the switch to one of the LAN ports and connect the remaining Ethernet cables to the switch. If you have more than one WAP, then you will need to use the PoE and connect it to the switch instead.
Additional Resources