Get Started With Toast Mobile Order & Pay®
Last updated: Jul 7, 2026, 2:40 PM
Set up Toast Mobile Order & Pay® so guests can scan a QR code at their table to browse the menu, order, and pay from their phone. This article walks you through enabling the subscription, completing the in-product setup wizard, generating QR code signs, routing orders to the kitchen, and adjusting menu visibility before you go live.
- Toast Mobile Order & Pay® Overview
- What You'll Accomplish
- Before You Begin
- Step 1: Subscribe to Toast Mobile Order & Pay®
- Step 2: Complete the Setup Wizard in Toast Web
- Step 3: Create Signs With QR Codes
- Step 4: Set Up Your Auto-Firing Device for Kitchen Routing
- Step 5: Adjust Menu Visibility for Toast Mobile Order & Pay®
- Step 6: Configure the Guest Ordering Experience
- Step 7: Modify Tip Settings for Toast Mobile Order & Pay®
- Step 8: Train Your Staff and Go Live
- Adjust Menu Availability by Time of Day
- Related Articles
Toast Mobile Order & Pay® Overview
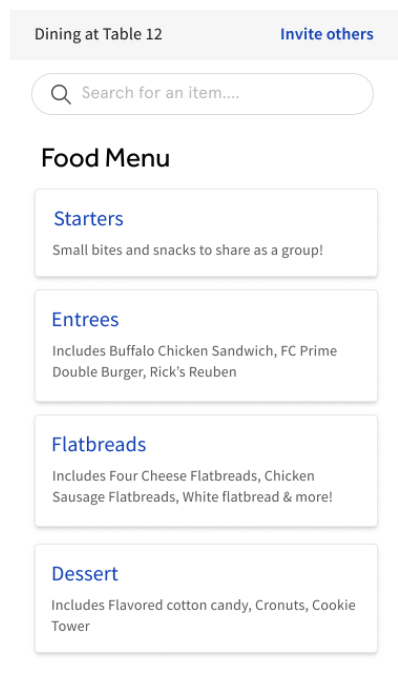
With Toast Mobile Order & Pay®, guests can easily scan a QR code to browse the menu, order, and pay, all from their mobile device. Plus, with Apple Pay, guests can pay in less than 10 seconds.
By putting your guests in control of their dine-in experience, Toast Mobile Order & Pay® can help you reduce your labor costs, improve table turn times, and increase sales. For a full conceptual overview, see Toast Mobile Order & Pay® Overview.
Note: Toast Mobile Order & Pay® Pre-Authorization is not currently available in Canada, Ireland, and the UK.
What You'll Accomplish
By the end of this article, your restaurant will be ready to accept guest orders through Toast Mobile Order & Pay®. You will have:
- Subscribed to Toast Mobile Order & Pay® in the Toast Shop
- Completed the in-product setup wizard
- Generated QR code signs for each table
- Configured an auto-firing device so orders print to the kitchen
- Made the right menus visible to Toast Mobile Order & Pay® guests
- Chosen your guest ordering experience (Tabs or Pay-as-you-go)
- Set up tip allocation for staff
- Trained your team on the new workflow
Before You Begin
Applies to: Toast Web, Toast Mobile Order & Pay®, Toast POS
Permissions needed:
- Access to Toast Web with permission to edit Front of house and Menus settings
- 4.5 Edit full menus (owners and employees who need to maintain and update the descriptions, prices, preparation, and organization of menu items and modifiers, and to open items.)
- 4.6 Tables (managers and employees who need to update the number, size, and positioning of seats in existing service areas.)
What you'll accomplish: Your restaurant will be ready to accept guest dine-in orders through Toast Mobile Order & Pay® QR codes at the table.
You also need:
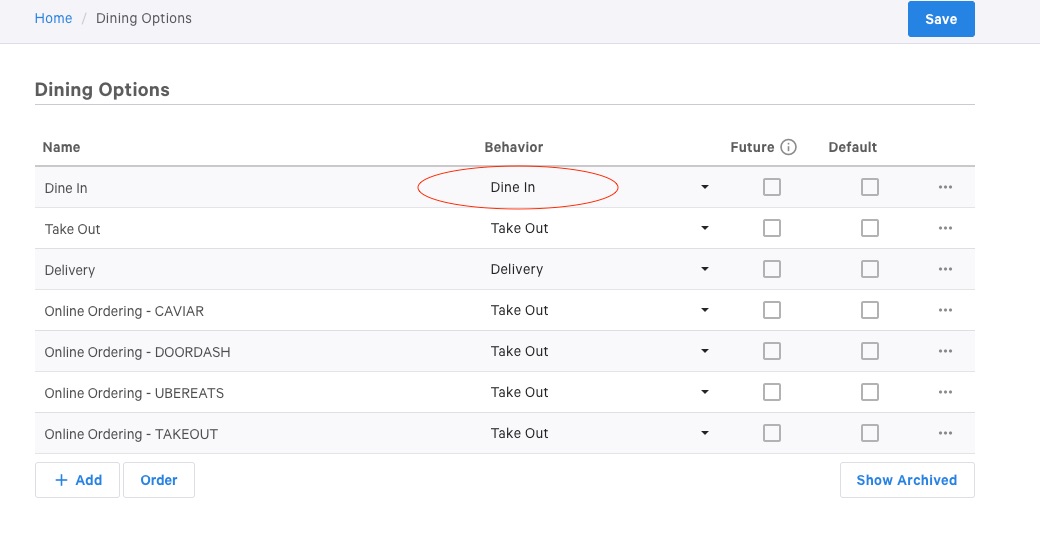
- At least one dining option with Dine In behavior set in Toast Web. Without this, guests will see a cart error when they try to add items. See Toast Mobile Order & Pay® Troubleshooting Guide.
- At least one service area with one table created in Toast Web (each QR code is linked to a table). See Create Service Areas and Table Setup.
- A Toast device available to act as the auto-firing device for kitchen tickets. We recommend choosing a device that is connected to Ethernet.
Step 1: Subscribe to Toast Mobile Order & Pay®
Toast Mobile Order & Pay® is a paid module that must be added to your account before the setup pages appear in Toast Web.
- Open the Toast Shop and select Get Toast Mobile Order & Pay®.
- Complete the subscription checkout in the Toast Shop.
- Return to Toast Web. The Toast Mobile Order & Pay® setup pages will be available once your subscription is active.
Expected outcome: You can see Toast Mobile Order & Pay® under Front of house > Mobile dining solutions in Toast Web.
Note: If you cannot complete the subscription checkout in the Toast Shop, contact Customer Care for help adding the module to your account.
Step 2: Complete the Setup Wizard in Toast Web
The setup wizard is the fastest path to a working Toast Mobile Order & Pay® configuration. Follow these steps:
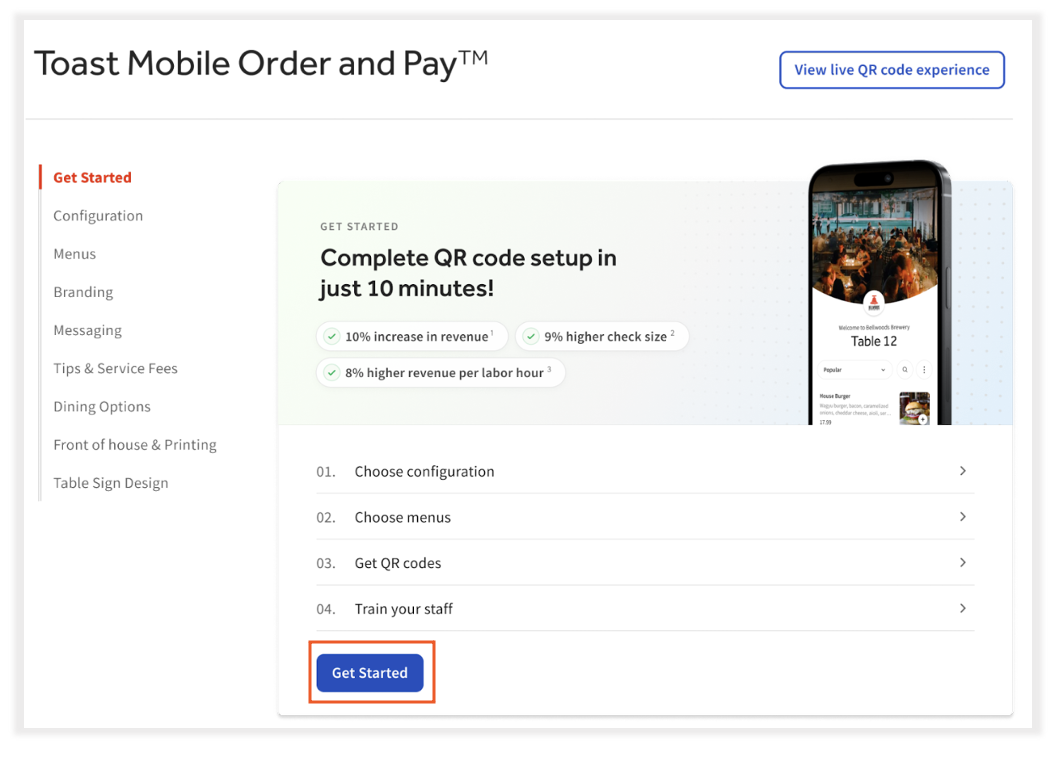
- In Toast Web, navigate to Front of house > Mobile dining solutions > Toast Mobile Order & Pay®.
- Select the Get Started button to begin your setup.
- Select your guest experience:
- Tabs — Guests may order multiple rounds and pay at the end. Most commonly used for full service, bars, and breweries. On the Order & Pay Settings page, you can choose whether guests must preauthorize a credit card before opening a tab.
- Pay-as-you-go — Guests must check out and pay each time they order. Most commonly used in quick service and cafes.
- Select which menus will be visible to guests by moving the toggle to On. These toggles only affect the top-level menu visibility. To adjust visibility for specific menu groups or items, see Step 5: Adjust Menu Visibility for Toast Mobile Order & Pay®.
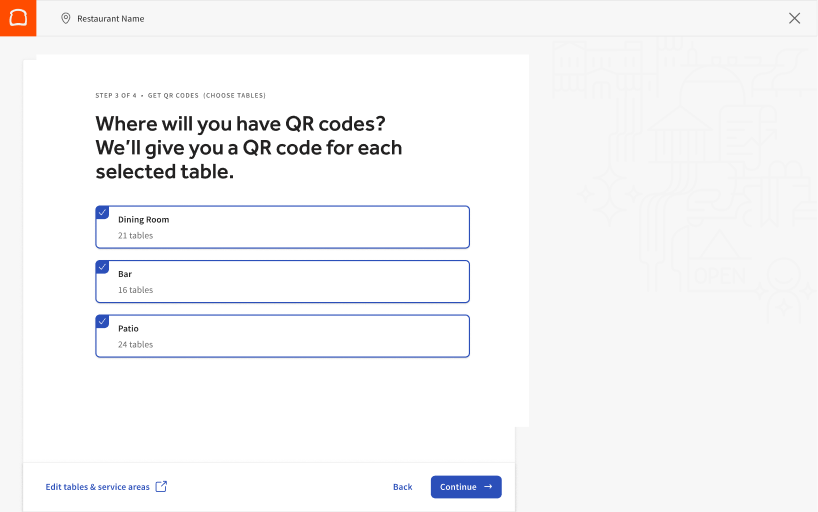
- Select the service areas for your QR codes. Each QR code is linked to a table, so you must create at least one service area and table to complete this step. If you only want to print QR codes for specific tables within a service area, exit the wizard and use the Table Sign Design section on the Order & Pay Settings page.
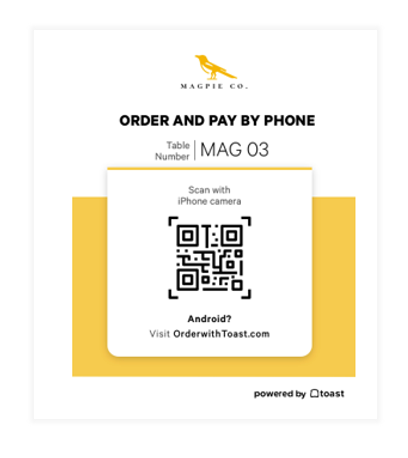
- Select your sign branding by choosing a color and restaurant logo. You can order through the Toast preferred vendor, download the table designs, or download the QR code only.
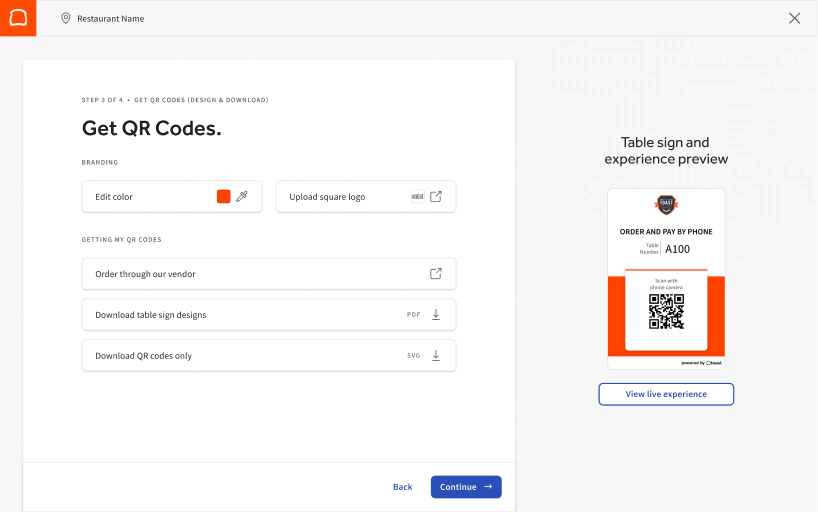
- Before confirming your selections, preview how your guests will interact with the QR code.
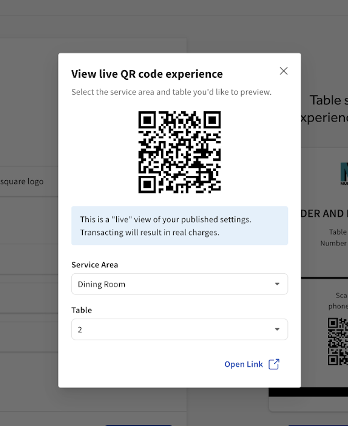
- Confirm your selections to finish the wizard.
Expected outcome: Toast Mobile Order & Pay® is configured with a guest experience, visible menus, and at least one service area mapped to QR codes.
| Important: Tables with duplicate names cannot be assigned a QR code. Tables with names that include a space immediately followed by a capital "H" cannot be assigned a valid QR code (URL encoding does not permit those characters). Rename affected tables before generating signs. |
| Important: If you change your Online Ordering page URL via Takeout & delivery > Restaurant Info > Online Ordering in Toast Web, it will also break all existing Toast Mobile Order & Pay® QR codes. Guests will not be able to use any existing QR codes. You will need to configure and generate new QR codes again. |
Note: Toast Mobile Order & Pay® Pre-Authorization is not currently available in Canada, Ireland, and the UK. Customers in Ireland and the UK cannot order signs through the Toast preferred vendor at this time.
Step 3: Create Signs With QR Codes
You can use a customizable Toast Template for your table signs or make your own from scratch. If you use the Toast Template, Toast generates the files for unique signs for each table and provides a recommended printing solution. If you want to design your own signs, you can download the QR codes for each table and import them into your sign template.
To create your Toast Mobile Order & Pay® signs using the Toast Template:
- In Toast Web, navigate to Front of house > Mobile dining solutions > Toast Mobile Order & Pay®.
- Select the Service Areas and Tables for which you want to create signs.
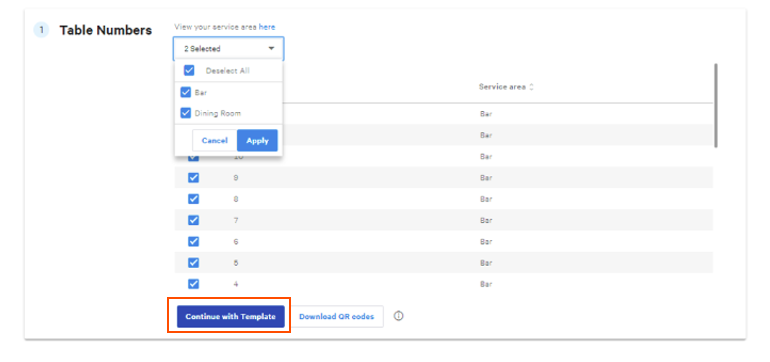
- Select Continue with Template. If you would rather print the signs independently, select Download QR codes to get unique QR codes for each table selected.
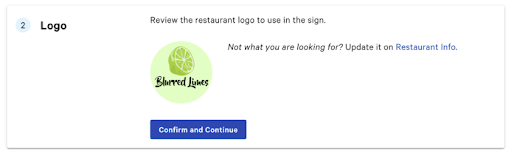
- Review the logo pulled from your Restaurant Info page. If this is correct, select Confirm and Continue.
- Choose a color to complement your logo. This will appear at the bottom of the template. Use the color picker or enter a hex code, then select Next.
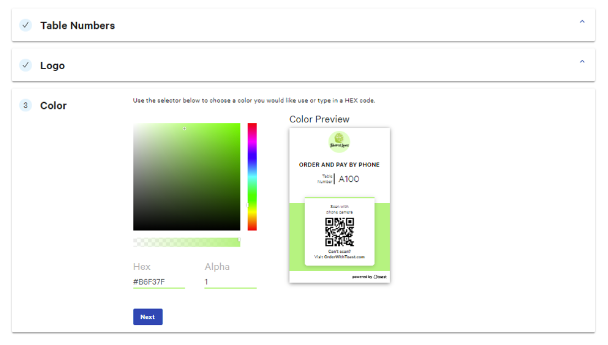
- Select Place Sign Order to print your signs through Toast's recommended printer, Conquest Graphics. You will have the option to print professional table cards, table tents, or table towers. Or, select Download PDF file to download the signs to your computer and print them yourself.
Expected outcome: You have a set of unique QR codes — one per selected table — ready to place at each table.
Note: Tables named "Welcome" do not allow orders to be placed from Order & Pay® table signs. Table signs only allow ordering when associated with a table number. "Welcome" tables will display the menu only.
Note: At this time, the recommended printer, Conquest Graphics, is only available for customers located in Canada. For customers in Ireland and the UK, select Download PDF file to print locally or on your own.
Step 4: Set Up Your Auto-Firing Device for Kitchen Routing
Printing is a common source of challenges. You will need to set up an auto-firing device so Toast Mobile Order & Pay® orders fire directly to the kitchen, and you will need to revisit any non-printing prep stations on that device.
Enable Auto-Firing on a Device
- In Toast Web, navigate to Takeout & delivery > Availability > Online Ordering.
- In the Approval section, select Send orders directly to kitchen.
- Next to Auto-fire Device, select Update and choose a device. We recommend choosing a device that is connected to Ethernet.
- Select Save and Publish your changes.
Expected outcome: Toast Mobile Order & Pay® orders fire directly to the kitchen on the device you selected, without requiring a server to approve each order.
Revisit Non-Printing Prep Stations
Toast Mobile Order & Pay® orders print according to the print settings of your auto-firing device. If your auto-firing device prints to the kitchen, your Toast Mobile Order & Pay® orders will route to the same kitchen printers. Confirm you do not want tickets to print to all prep stations listed as non-printing on this device.
- Log in to the device selected to auto-fire.
- Select the Toast icon in the top left corner.
- Navigate to the Setup section and select Device Setup.
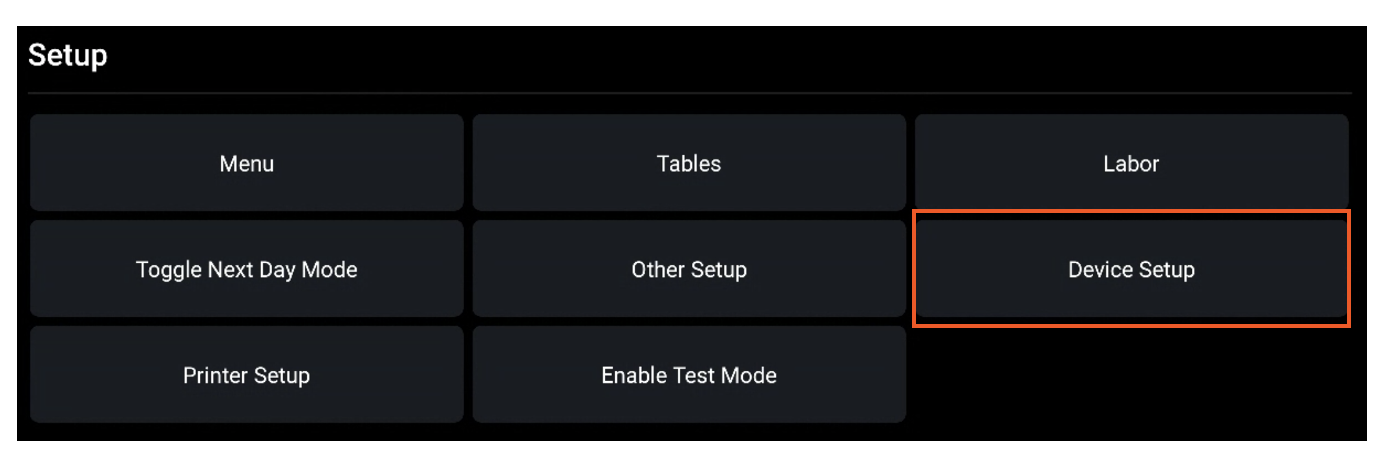
- Scroll down and select Non-Printing Prep Stations.
- Confirm that you do not want any of these prep stations to print. You may need to choose a different auto-firing device if you need to keep some of these stations as non-printing.
Expected outcome: Only the prep stations you want printing for Toast Mobile Order & Pay® orders are printing.
Adjust the Orders Send Only After Check Is Paid Setting
If Orders Send Only After Check Is Paid is set to Yes, Toast Mobile Order & Pay® orders using tabs will not be sent to the kitchen when they are placed. To adjust:
- On the auto-firing device, select the Toast icon in the top left corner.
- Scroll to Setup and select Other Setup.
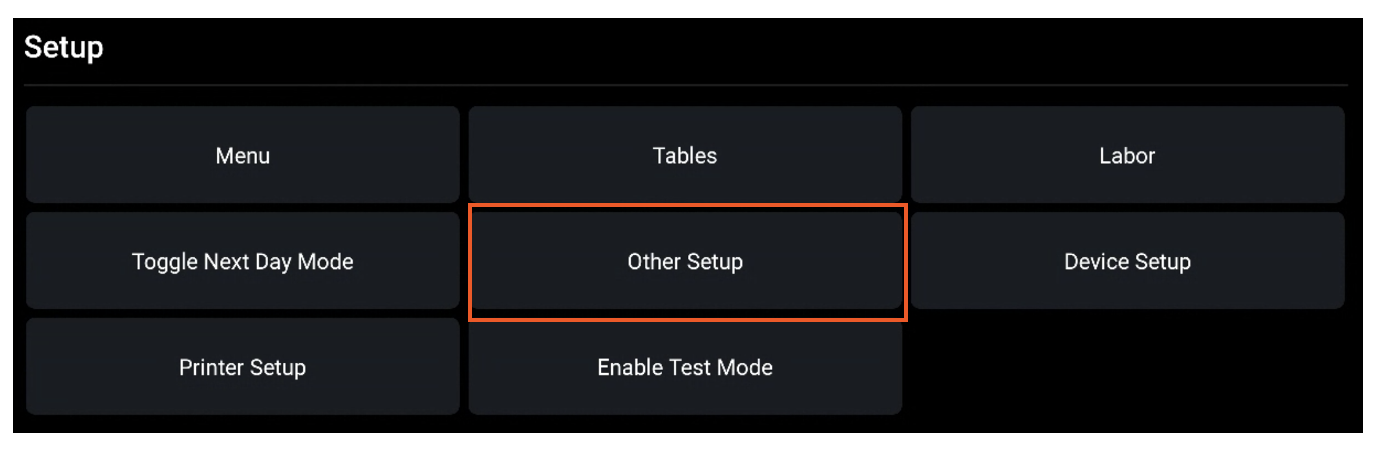
- Navigate to UI Options.
- Scroll to Orders Send Only After Check Is Paid and ensure it is set to No.
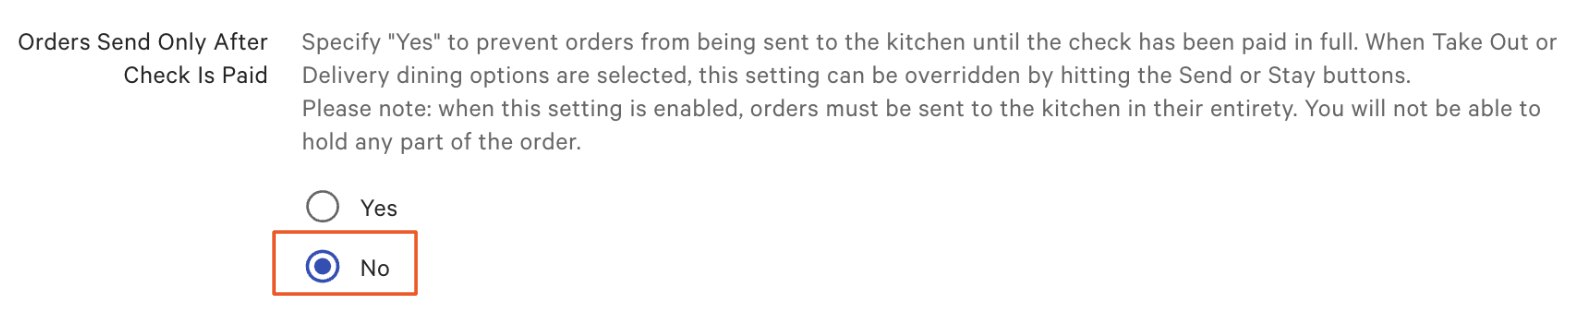
Expected outcome: Tab orders fire to the kitchen as soon as guests submit them, not after the check is paid.
Note: For routing items to different printers by service area, see Toast Mobile Order & Pay® Troubleshooting Guide.
Step 5: Adjust Menu Visibility for Toast Mobile Order & Pay®
You decide which menus are available for guests ordering by phone by adjusting your menu visibility settings.
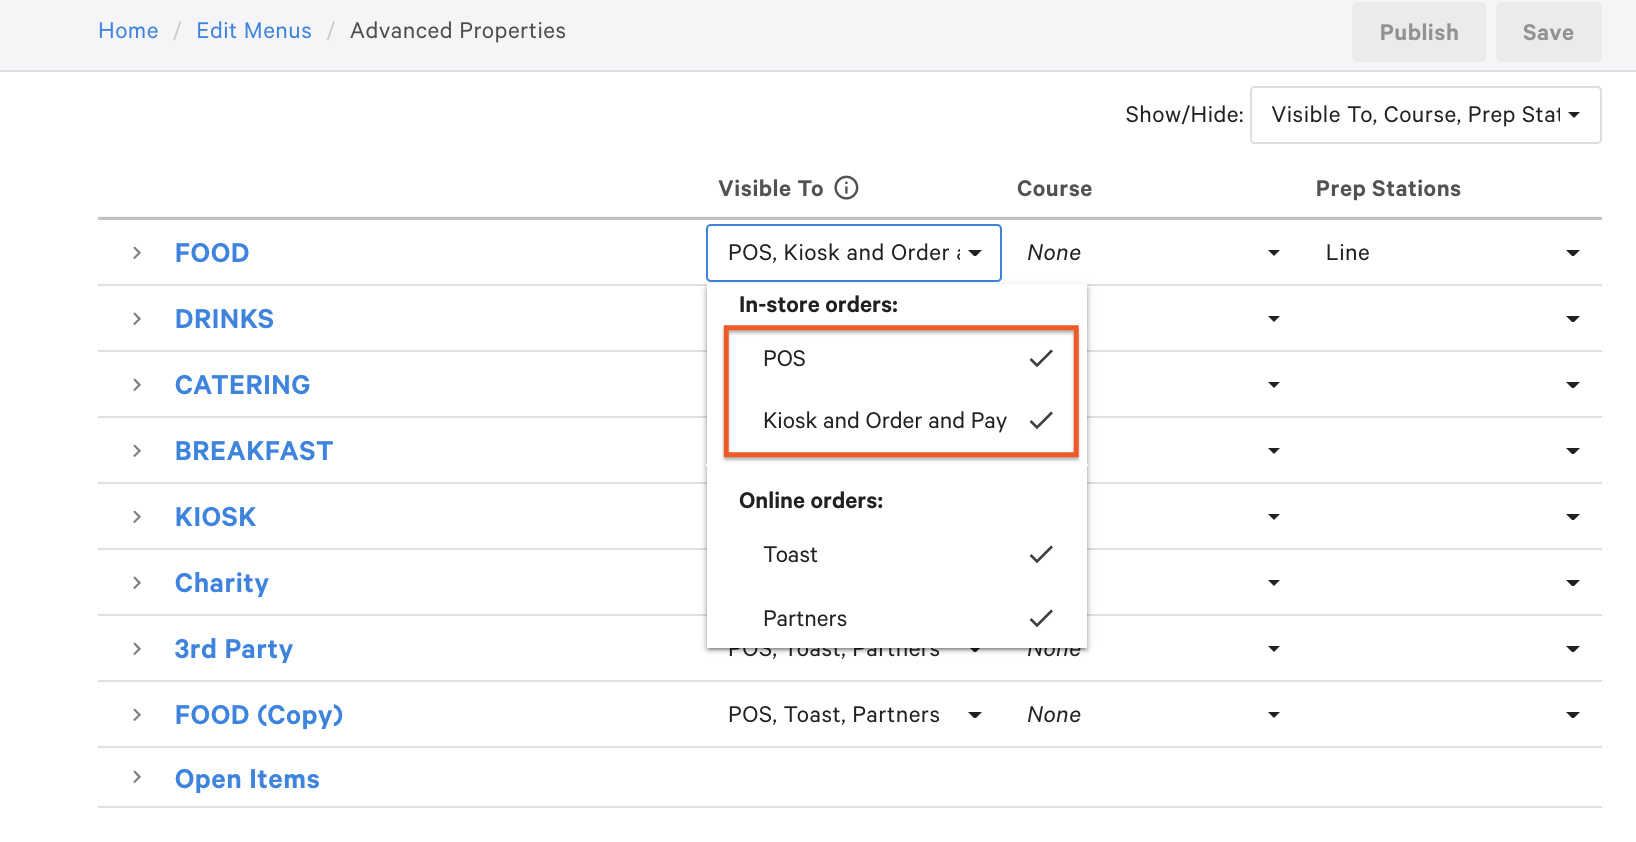
- In Toast Web, navigate to Menus > Advanced properties.
- Use the Show/Hide filter in the top right corner of the page and select Visible To.
- Next to the menu you want to appear, change the Visible To setting to In-store orders: POS and Kiosk and Order and Pay. Complete this step for all menu components you want your guests to see.
- Select Save.
- Select Publish Now to finalize your changes.
Expected outcome: The menus you marked as visible will appear when guests scan the QR code.
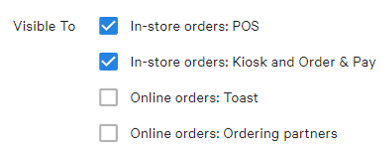
Note: If you select the item or group from Advanced Properties instead, scroll down to the Properties section and, next to Visible To, select In-store orders: POS and In-store orders: Kiosk and Order & Pay.
Show Different Menus by Service Area
If you need different menus to be visible in different sections of your restaurant — for example, a bar menu in a 21+ section — you can use menu availability by service area:
- Create a dedicated service area. See Create Service Areas and Table Setup.
- In Toast Web, navigate to Front of house > Mobile dining solutions > Toast Mobile Order & Pay®.
- Scroll down to the Menu availability by service area section.
- Select the menus that should show for the dedicated service area.
- Select Save and Publish.
Expected outcome: Different menus appear based on which service area's QR code the guest scans.
Note: The Menu availability by service area list shows a limited set of service areas, not every service area created in your restaurant. If you need to map more service areas than the list displays, contact Customer Care.
Guest-Friendly Menu Recommendations
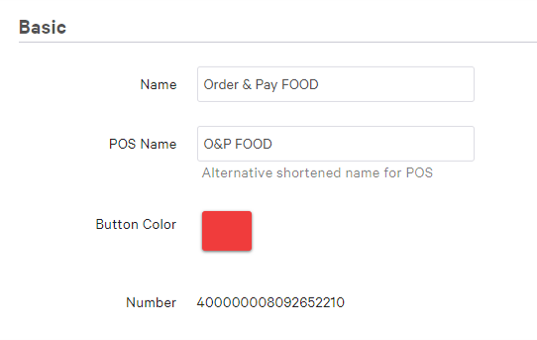
Guests will be looking at your menu, not your staff. Review the names of your items and the modifiers available to make sure they are guest-friendly:
- Reduce the number of modifiers available to guests.
- Change menu item names so they are clear to guests.
- Add descriptions to groups so guests understand what they will find.
- Use the POS Name field for the abbreviated server-facing name and the Name field for the full guest-facing name (for example, "Californian Chicken Sandwich" in Name and "CHX SAND" in POS Name).
Step 6: Configure the Guest Ordering Experience
After setup, you can configure which features are available to your guests. These settings can be toggled at any time.
Choose Tabs or Pay-as-You-Go
- In Toast Web, navigate to Front of house > Toast Mobile Order and Pay® > Ordering Experience.
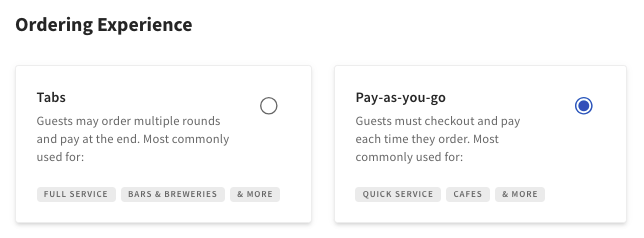
- Under Ordering Experience, select one of the following:
- Tabs — Guests may order multiple rounds and pay at the end. Most commonly used for full service, bars, and breweries.
- Pay-as-you-go — Guests must check out and pay each time they order. Most commonly used for quick service and cafes.
- Select Save and Publish all changes.
Expected outcome: Guests scanning a QR code will see the ordering experience you selected.
For deeper detail on Tabs and Pre-Authorization configuration, see Set Up Tabs & Pre-Authorization for Toast Mobile Order & Pay®.
Enable Group Ordering
Group Ordering allows multiple guests to join a single tab from their own device and submit orders to the kitchen all at once on the same ticket. Enable this in conjunction with Tabs or Preauthorized Tabs for the best experience.
- In Toast Web, navigate to Front of house > Toast Mobile Order and Pay® > Configurations.
- Next to Group Ordering, switch the toggle to the On position.

- Select Save and Publish.
Expected outcome: Guests at the same table can join an existing group order from their own device and send orders to the kitchen together.
For what the guest sees during group ordering and how the group pays, see Guest Experience for Toast Mobile Order & Pay®.
Step 7: Modify Tip Settings for Toast Mobile Order & Pay®
There are two options for allocating tips from Toast Mobile Order & Pay® to servers:
- Virtual server assigned to the auto-firing device. If you use Online Ordering, this is the same virtual server already collecting Online Ordering tips. If you do not use Online Ordering, you will need to create a new virtual server.
- Server Assignment — assign a server to tables at the start of each shift from the POS terminal. During the shift, all Toast Mobile Order & Pay® tips will be allocated to the respective server. Server-to-table assignments will override the virtual server. Tips from tables not assigned to a server will still pool to the virtual server.
If you want to apply an automatic service charge to a Toast Mobile Order & Pay® check, see Customize Service Charges and Mandatory Gratuity.
Add a New Virtual Server for Tip Pooling
To pool tips among servers using a virtual server:
- Add a new virtual employee in Toast Web and name it "Tip Pool Server".
- Assign the new employee under the server selection section of the Online Ordering settings page so it collects tips for orders placed through Toast Mobile Order & Pay®.
- Redistribute pooled tips when you process payroll. We recommend taking a quick note at the end of each shift showing what quantity of tips should go to each server.
Expected outcome: All Toast Mobile Order & Pay® tips accumulate to the virtual employee for end-of-shift redistribution.
Note: If you only have one server each shift who should receive Toast Mobile Order & Pay® tips, you can select Assign by auto-firing tablet under the server selection section of the Online Ordering settings page instead of creating a virtual server.
Assign Servers to Tables
To assign servers to tables so they receive tips earned on their assigned tables. This is an alternative to Tip Pooling.
Item-Level Discounts
With Toast Mobile Order & Pay®, you can create a discount for specific items that guests can apply with a promo code at checkout. To configure discounts and promo codes.
Step 8: Train Your Staff and Go Live
When using Toast Mobile Order & Pay®, we recommend staff providing table service follow these steps:
- Greet the guest and seat them at a table.
- Explain ordering by phone and help them load the menu using their table's unique QR code.
- Let guests know they can place their order and payment through the website, or place their order with you later.
- Remind guests that you are available to answer questions.
Expected outcome: Guests are oriented to Toast Mobile Order & Pay® and feel comfortable ordering from their phone. Successful restaurants using Toast Mobile Order & Pay® position ordering by phone as the default way to order and see, on average, 60% of their guests or more choosing to order this way.
For full talk tracks, FAQ scripts, and rollout messaging, see Staff Training Guide: Toast Mobile Order & Pay®.
Adjust Menu Availability by Time of Day
Toast Mobile Order & Pay® does not have a built-in schedule that turns ordering on or off at a specific time. To disable Toast Mobile Order & Pay® menus during certain hours (for example, after the kitchen closes), create a copy of your current menu, change its visibility to Order & Pay, and set its availability time range to match your service hours:
- Navigate to Menus > Edit menus in Toast Web.
- Select the three-dot icon next to the menu's name and select Copy.
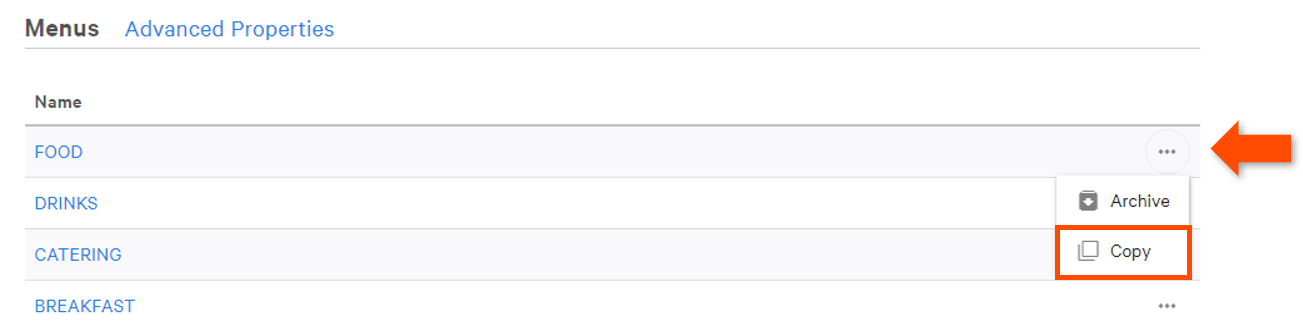
- Select the copied menu and edit the Name field to remove "copy". Give the menu a new title to differentiate it from other active menus.
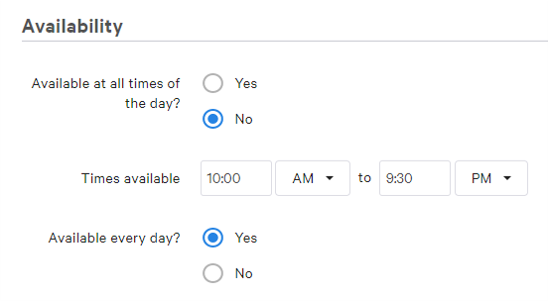
- Scroll down to the Availability section of the page and select No next to Available at all times of the day?
- Enter your restaurant's opening and closing time in the time fields.
- Scroll down to the Properties section and ensure In-store orders: POS and In-store: Kiosk and Order & Pay are selected next to Visible To.
- Select Save and Publish Now.
Expected outcome: Your Toast Mobile Order & Pay® menu is only available within the time range you set. Outside that window, guests scanning a QR code will see that the menu is not available.
If you want to set menu availability by service area instead, see Enable and Configure Menus by Service Area.
Note: There is no native on/off schedule for Toast Mobile Order & Pay® itself. The menu availability workaround above is the supported method for time-based control.
Related Articles
- Toast Mobile Order & Pay® Overview
- Toast Mobile Order & Pay® FAQ
- Toast Mobile Order & Pay® Troubleshooting Guide
- Set Up Tabs & Pre-Authorization for Toast Mobile Order & Pay®
- Guest Experience for Toast Mobile Order & Pay®
This content is for informational purposes and is not intended as legal, tax, HR, or any other professional advice.