Sling by Toast: Customize Schedule Settings
Last updated: Jun 11, 2026, 10:17 AM
Configure how the schedule is laid out for your account and how employees see it: visibility, breaks, shift acceptance, exchanges, and labor compliance.
- Schedule Settings
- Breaks
- Shift Acceptance
- Shift Exchanges and Available Shifts
- Unavailability
- Labor Compliance
- Hide Employees, Positions, or Locations from the Schedule
Schedule Settings
This is where you will designate how the schedule is laid out for the account and how employees will see it.
First Day of the Week
This setting lets you choose which day starts your work week and changes the layout of the schedule, unavailability, reports, and more.
Hours of Operation
This setting defaults to 12:00 a.m. - 12:00 a.m., but you can adjust this to change the layout of the day view, unavailability, and even the times that appear in the create shift window on the schedule. Once you set the hours of operation, you can also choose whether shifts crossing between two days will have hours split according to the date on which the hours occur, or whether they are all attributed to the date on which the shift started using the Cutoff time for overnight hours setting.
Visibility of Schedules for Employees
This setting lets you choose how much or how little of the schedule your employees can see. When disabled, employees will see just their own schedules while managers and admins can still see the full schedule. When enabled, you will be presented with additional options for how much data they can see. Remember, if the visibility across locations setting is disabled under the company settings, you will not see options to allow employees to view other locations, here.
Visibility of Time Off and Unavailability
This setting is included with Sling Premium and Sling Business only.
This allows managers to keep this information hidden from employees' view. If enabled, employees can see approved time off and unavailability for others under the Full schedule.
Visibility of Schedules for Managers
This setting is included with Sling Premium and Sling Business only.
This allows you to hide other locations' schedules from managers who should not be concerned. When disabled, they will only be able to view schedules for the location(s) assigned within their profile. When enabled, they can view other locations, but cannot make any changes.
Breaks
The Breaks setting allows you to choose whether or not the option to add a break to your shifts appears as you're scheduling. If disabled, you will not be able to add a break to a shift at all. Employees also will not see the option to start a break when using our internal time clock.
You have the option to enable Standard breaks or Automated breaks.
- If Standard breaks are enabled, you will choose additional options:
- Paid or unpaid breaks: This lets you choose whether the breaks are paid or not. This is an all-or-nothing setting, so if set as paid, any break duration added to a shift will be counted as paid. However, employees can clock out for additional break time beyond the duration added to a shift, which will be counted as unpaid.
- For example, if a shift has a 30-minute break added and the employee takes 40 minutes, 30 minutes are counted as paid while the remaining 10 are unpaid.
- Default break length: This lets you set the duration that will automatically populate for each shift. It is still possible to change the duration of a break so it's shorter or longer as you're creating shifts. Just remember that any break time scheduled for a shift while the breaks are set as paid will be counted as paid, regardless of the default length.
- You will also notice that the list of break lengths is limited, but you have the option to type any duration into the field.
- Paid or unpaid breaks: This lets you choose whether the breaks are paid or not. This is an all-or-nothing setting, so if set as paid, any break duration added to a shift will be counted as paid. However, employees can clock out for additional break time beyond the duration added to a shift, which will be counted as unpaid.
- If Automated breaks are enabled, you will choose additional options:
- Attestation: This lets you allow your employees to attest to taking their required meal and/or rest breaks. This means that if employees miss a break during their shift and attempt to clock out, they will be prompted to answer if they took their required break or were prevented from taking their break. In addition, you can enable the waiver setting, which will allow your employee to select that they opted out of taking their required break.
- Meal break: You can choose to allow a meal break. You can set this as paid or unpaid. You'll also need to set the automation rule for this break. You can decide whether or not to allow employees to waive meal breaks. You can also decide whether or not to allow early return from meal breaks.
- Rest Break: You can choose to allow a meal break. You can set this as paid or unpaid. You'll also need to set the automation rule for this break. You can decide whether or not to allow employees to waive rest breaks. You can also decide whether or not to allow early return from rest breaks.
- Premium Pay: This lets you stay compliant with their local labor laws. If there are break violations according to automated break rules that have been set, this setting will pay an additional hour of pay equivalent to the employee's hourly wage.
Note: Enabling automated breaks does not mean that the breaks will automatically be counted on timesheets. Employees will still need to start and end their breaks using the time clock for Sling to register them correctly.
Shift Acceptance
When enabled, this will send a notification to employees when shifts are published that asks them to confirm their schedules. They can accept to confirm or deny to point out any scheduling issues. Denied shifts are not automatically removed from the employees' schedules.
Shift Exchanges and Available Shifts
Allow Employees to Give Away Their Shifts
This setting lets you choose whether or not employees can make a shift available or offer a shift. When disabled, employees won't be able to access either option, but admins and managers are still able to make these changes on behalf of an employee.
Allow Employees to Swap Shifts
This setting is included with Sling Premium and Sling Business only.
This setting lets you control access to shift trades. If disabled, swaps will be unavailable to all users, including admins and managers.
Restrict Offers and Swaps by Location and Position
When enabled, employees can only offer or swap a shift if the other employee is also assigned to the location and position of the shift. When disabled, employees can offer or swap shifts across locations and positions.
Note: This will automatically be enabled and cannot be changed when the Visibility of coworkers across locations option is restricted.
Automatically Approve Applicants
This setting lets you choose whether employees can pick up and exchange shifts freely or whether you want to have managers approve any exchanges. When disabled, a manager's approval is required.
Unavailability
This setting lets you enable or disable the feature for your employees. When disabled, employees cannot access the settings at all, but managers and admins are able to adjust an employees unavailability on their behalf.
Sling Premium and Sling Business accounts can also choose whether or not changes to unavailability require approval. Changes made by an employee would then go to management for review before appearing on the schedule.
Labor Compliance
The clopening setting lets you designate whether a minimum number of hours is required between one shift and the next.
When enabled, you will receive a warning if you attempt to schedule an employee with a shorter rest time between shifts than the number specified here.
Hide Employees, Positions, or Locations from the Schedule
If you have employees, positions, or locations you don't need to see on the schedule at all, you can hide them rather than using filters. Only admins and managers have access to hide employees, positions, or locations from the schedule.
Note: This will hide the employee, position, or location for all users on the account.
Hide Employees
This is useful when you have managers or admins who are not scheduled for shifts, or when you want to simplify the account view and reduce clutter.
To hide an employee:
- Navigate to Dashboard > Employees.
- Select the employee’s name from the list.
- Go to the Work tab.
- At the bottom of the page, enable the Hide from the schedule setting.
- Select Save.
The employee then appears in the main employee list with an icon indicating that the profile is hidden.
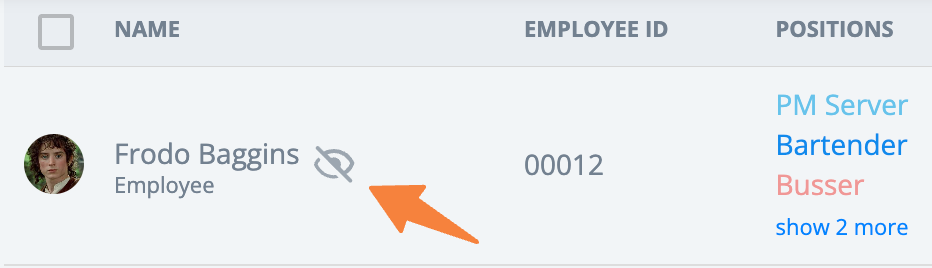
Hidden employees are also hidden from the Schedule, Reports, and Timesheets until they are unhidden.
Hide Positions
This is useful if you no longer use a position but want to keep the information for past shifts assigned to it.
To hide a position:
- Navigate to Dashboard > Positions.
- Select the position name from the list.
- Go to the Settings tab.
- At the bottom of the page, enable the Hide from the schedule setting.
- Select Save.
The hidden position appears in the list with an icon indicating that it is hidden from everyone.
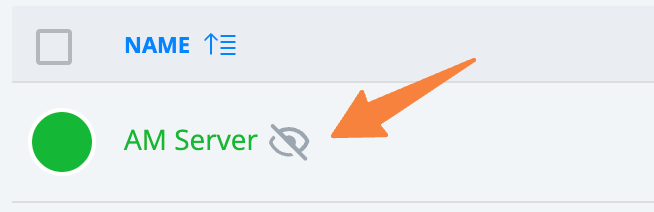
The position remains hidden on the Schedule page until you unhide it using the same steps.
Note: You cannot see any shifts assigned to positions that are hidden from view. Position details are also hidden on other pages, including Reports and Timesheets.
Hide Locations
Hiding a location helps simplify the account view, reduce clutter, and remove details about that location from the information available through your login.
To hide a location:
- Navigate to Dashboard > Locations.
- Select the location name from the list.
- Go to the Settings tab.
- At the bottom of the page, enable the Hide from the schedule setting.
- Select Save.
The location then appears in the list with an icon indicating that it is hidden from view.

The location does not appear on the Schedule page until you unhide it using the same steps.