xtraCHEF: Get Started With Accounting Periods
Last updated: Apr 28, 2026, 4:20 PM
In this Article:
Accounting Periods Overview
Before you can begin utilizing some xtraCHEF reporting (such as Budgets, COGS, and Operating Summary), you must first configure an Accounting Period for each of your locations.
In the bookkeeping world, an Accounting Period refers to the time in which financial records are created. You can base your Accounting Period on the calendar year, or follow your organization's fiscal year if you have one.
Add a New Accounting Period
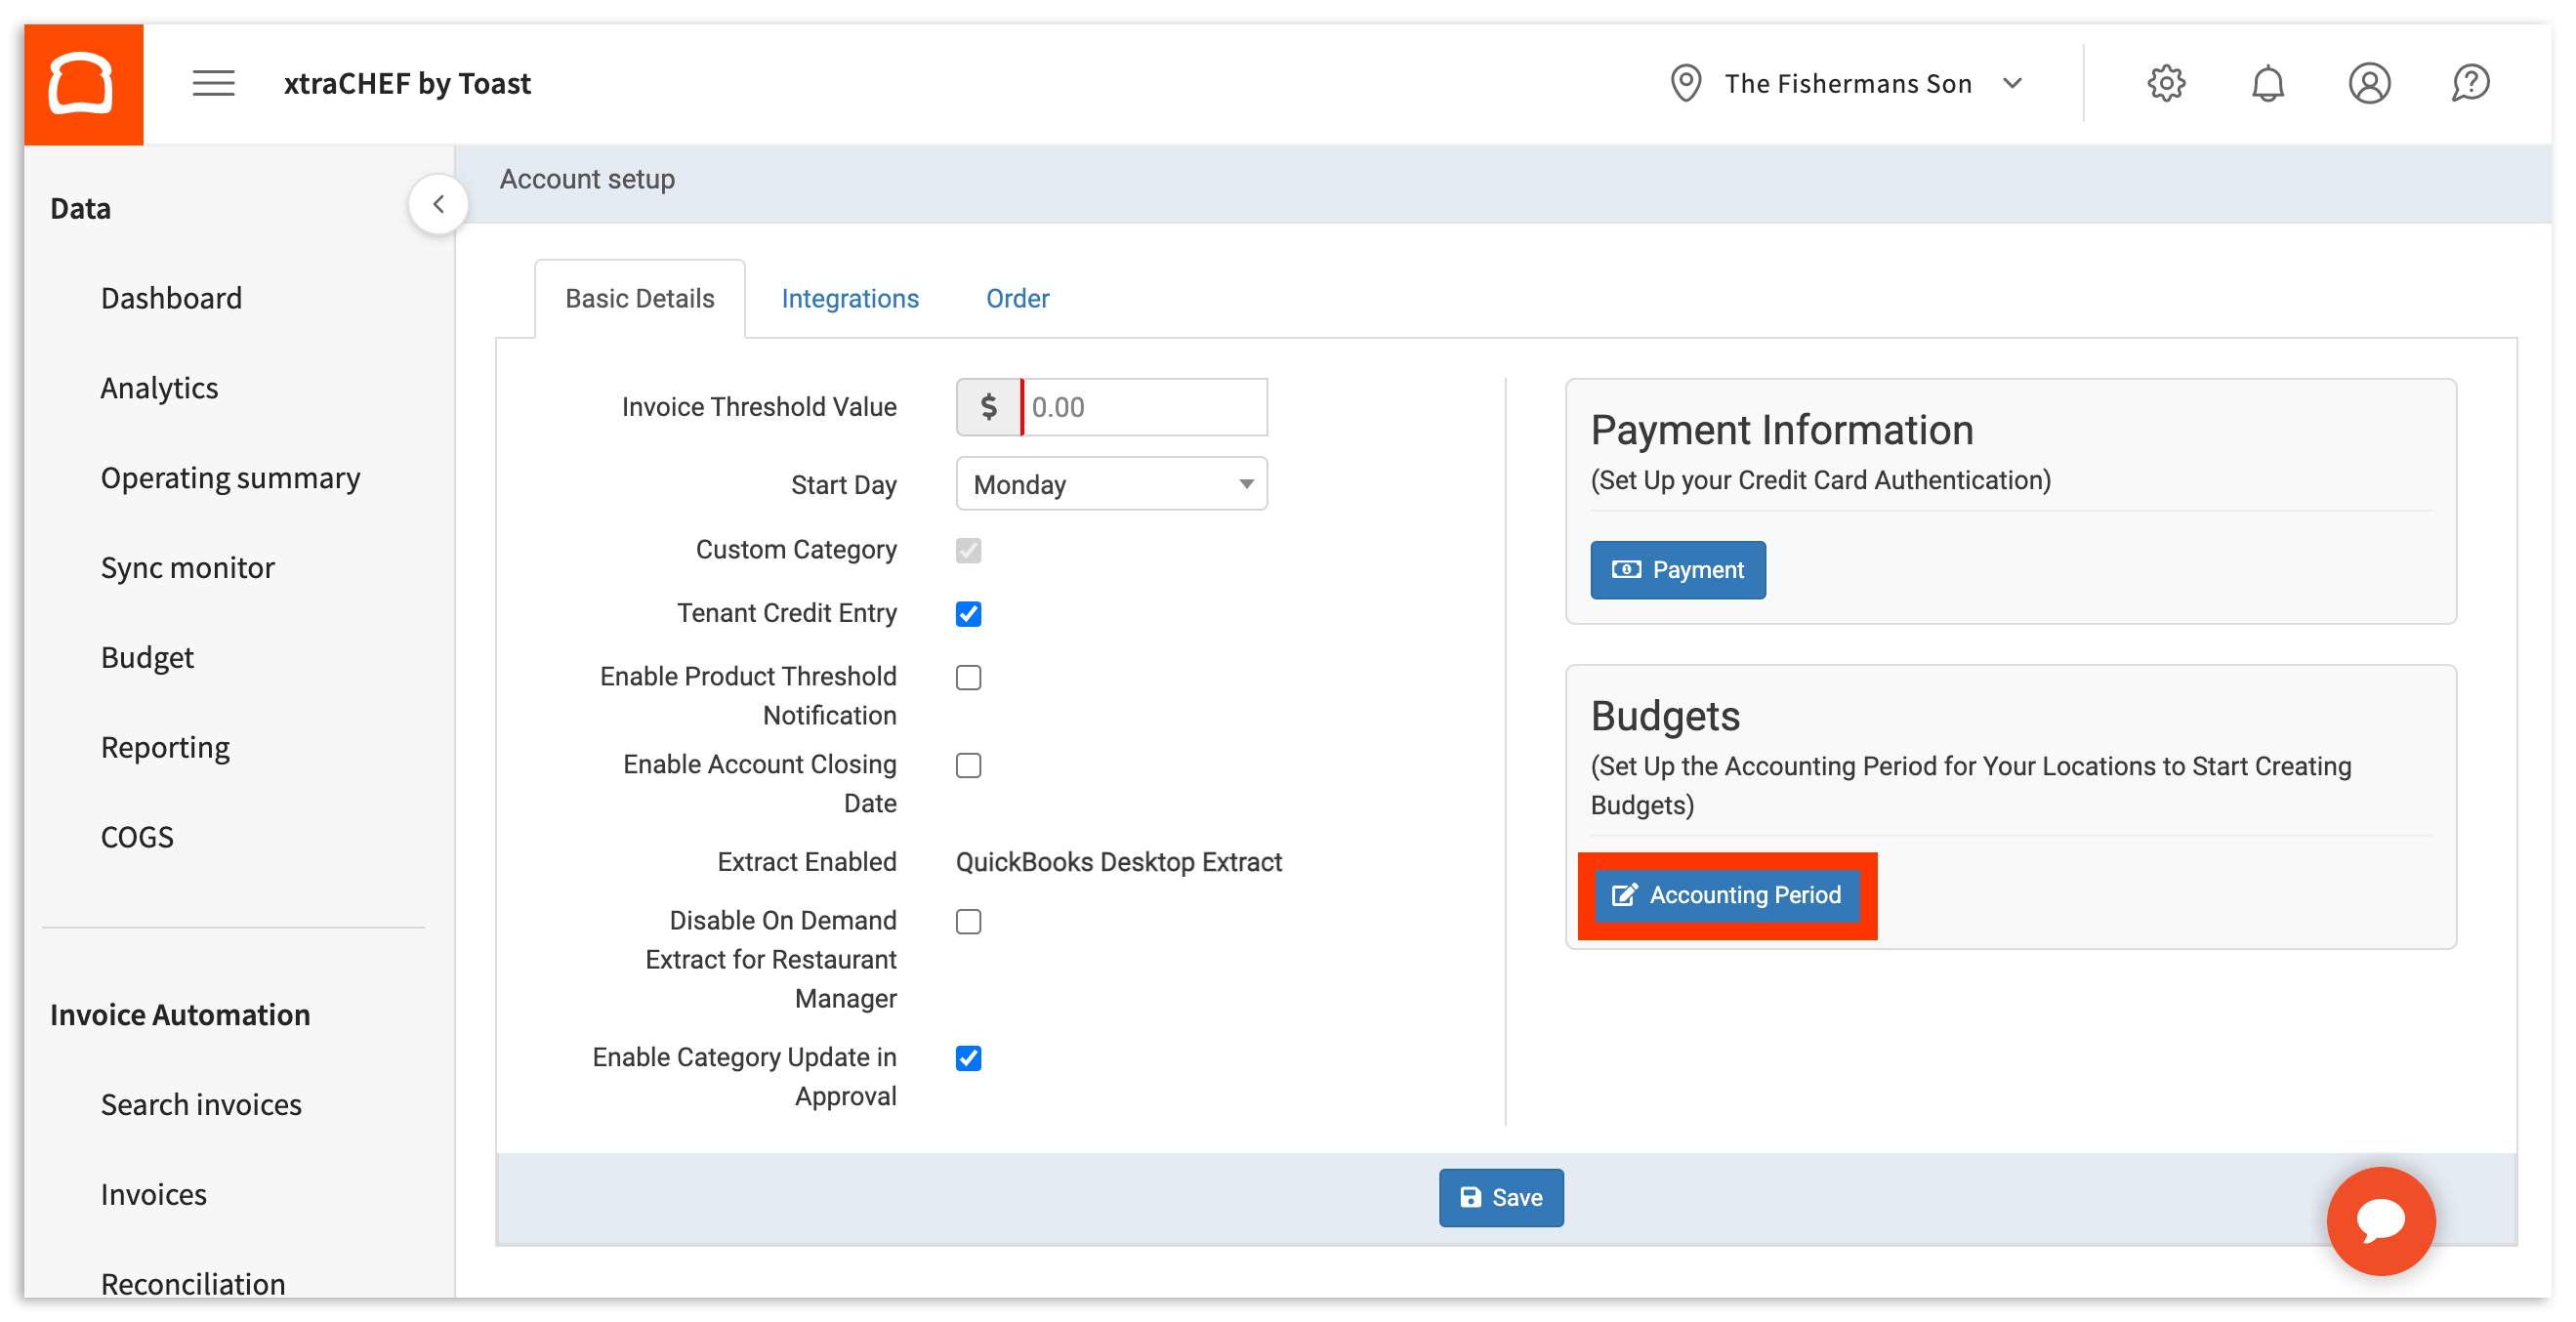
To create a new accounting period for a location, select the gear icon in the top-right corner of the page and choose Account Setup. This will take you to your Account Setup page. Next, select Accounting Period, located under Budgets on the right side of the screen.
As you might have guessed, this will take you to the Accounting Period page. From here, you'll be able to view all existing periods for your locations. To create a new Accounting Period, select + Add New Period on the top right corner of the page.
This will pull up a pop up window with the fields you'll need to fill out to create a new Accounting Period (pictured below).
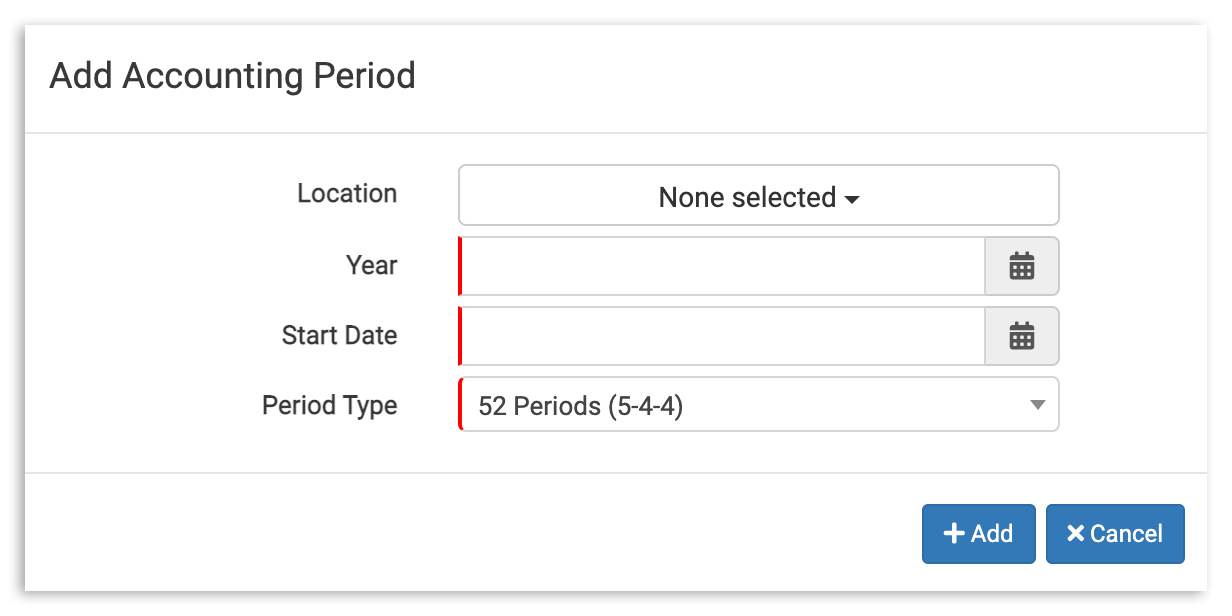
First, select the Location this Accounting Period is for. Then, select a Year. If you are concluding a current Accounting Period fiscal year, you can select the previous year. Or, if you are starting a new Accounting Period, select the current year.
Next, select a Start Date. This will indicate:
- The date and day of the week your period begins
- The day of the week your period will turnover/reset on
Note: You must create a new accounting period for each location, even if the Accounting Period is the same across all your venues. You will be able to choose the year and selected start date for your period.
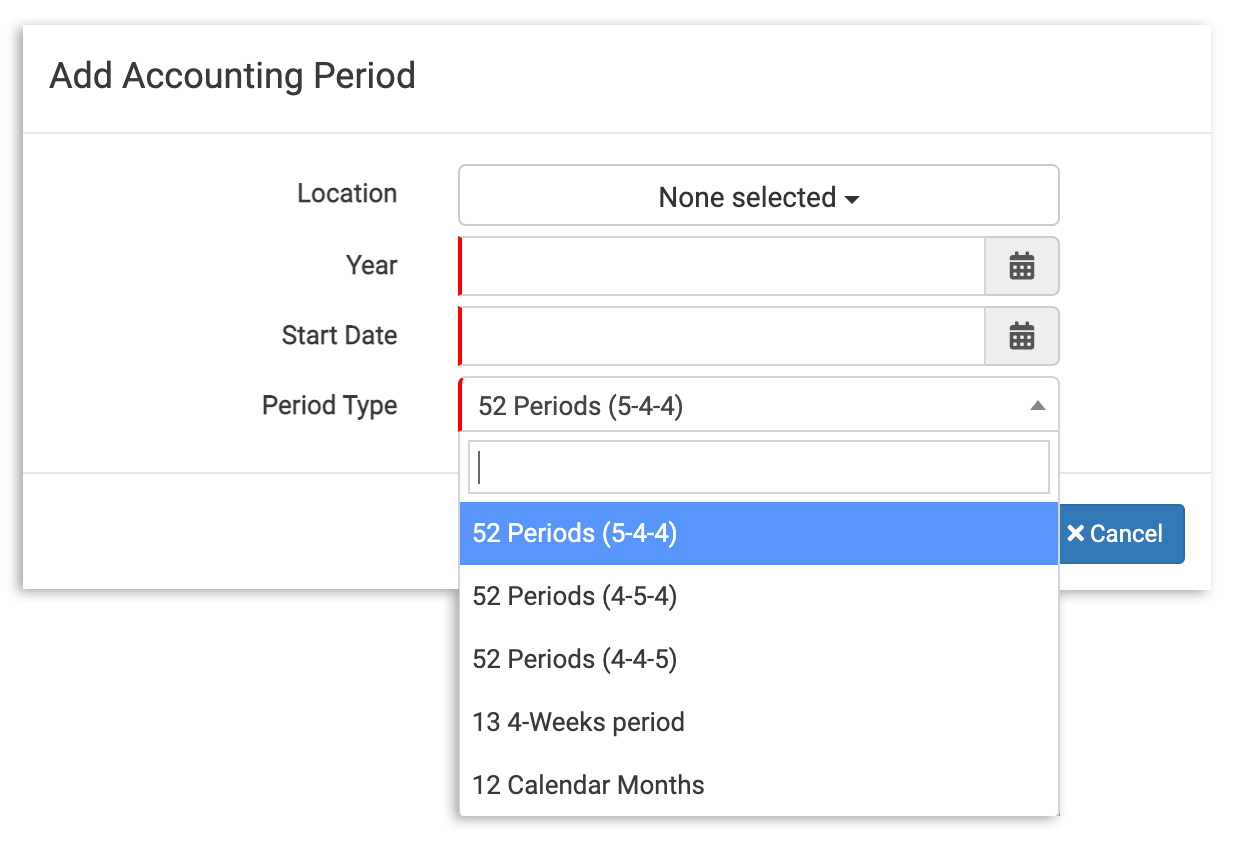
Last of all, you'll be able to select the type of Accounting Period you want to use from the following options:
The table below will define each of the period options available to you:
| Period Type | Definition |
| 52 Periods (5-4-4) | Divides your fiscal year into four 13-week quarters, with each quarter containing one five week "month" followed by two four week "months" |
| 52 Periods (4-5-4) | Divides your fiscal year into four 13 week quarters, with each quarter containing a four week "months", a five week "month", and another four week "month" |
| 52 Periods (4-4-5) | Divides your fiscal year into four 13 week quarters, with each quarter containing two four week "months" followed by a five week "month" |
| 13 4-week Periods | Divides your fiscal year into 13 "months" of 28 days each |
| 12 Calendar Months | Your fiscal year is divided into 12 calendar months |
Choose the system that works best for your organizational needs. If you're using an accountant or accounting system such as QuickBooks, you should ensure that your period types are consistent.
Note: Don't have an accounting period system already in use, and don't know which option to choose? 12 Calendar Months is often a great starting point, as it allows you to reflect on your accounting periods monthly.
When you've made your selections, select the + Add button at the bottom of the pop up. This will automatically save your new Accounting Period and add it to your list of existing periods.
Edit an Existing Accounting Period
Once an Accounting Period has been created, it's 'locked in', and you will not be able to make changes by yourself. However, xtraCHEF support is equipped to make these changes in the back-end of your account on your behalf.
To initiate an edit to or have an Accounting Period removed, contact the xtraCHEF care team at support@xtraCHEF.com.