xtraCHEF: Set up QuickBooks Class or Location Tracking
Last updated: Apr 8, 2026, 10:11 AM
Learn how to set up the QuickBooks class or location tracking setting in xtraCHEF.
- Set up Class or Location Tracking Prerequisites
- xtraCHEF: Class Tracking
- xtraCHEF: Location Tracking
Set up Class or Location Tracking Prerequisites
Before class or location tracking can be set up in xtraCHEF, first, you need to enable one of those settings in your QuickBooks (QB) account. xtraCHEF will only be able to use one or the other. You can not have both Class and Location Tracking turned on in QuickBooks.
To verify if class or location tracking has been turned on in your QuickBooks account, Select the Gear Icon > Account Setup. Then select the Integrations tab. From there, you will be able to see if Class Tracking or Location Tracking is turned on by looking at the boxes to the left of each option.
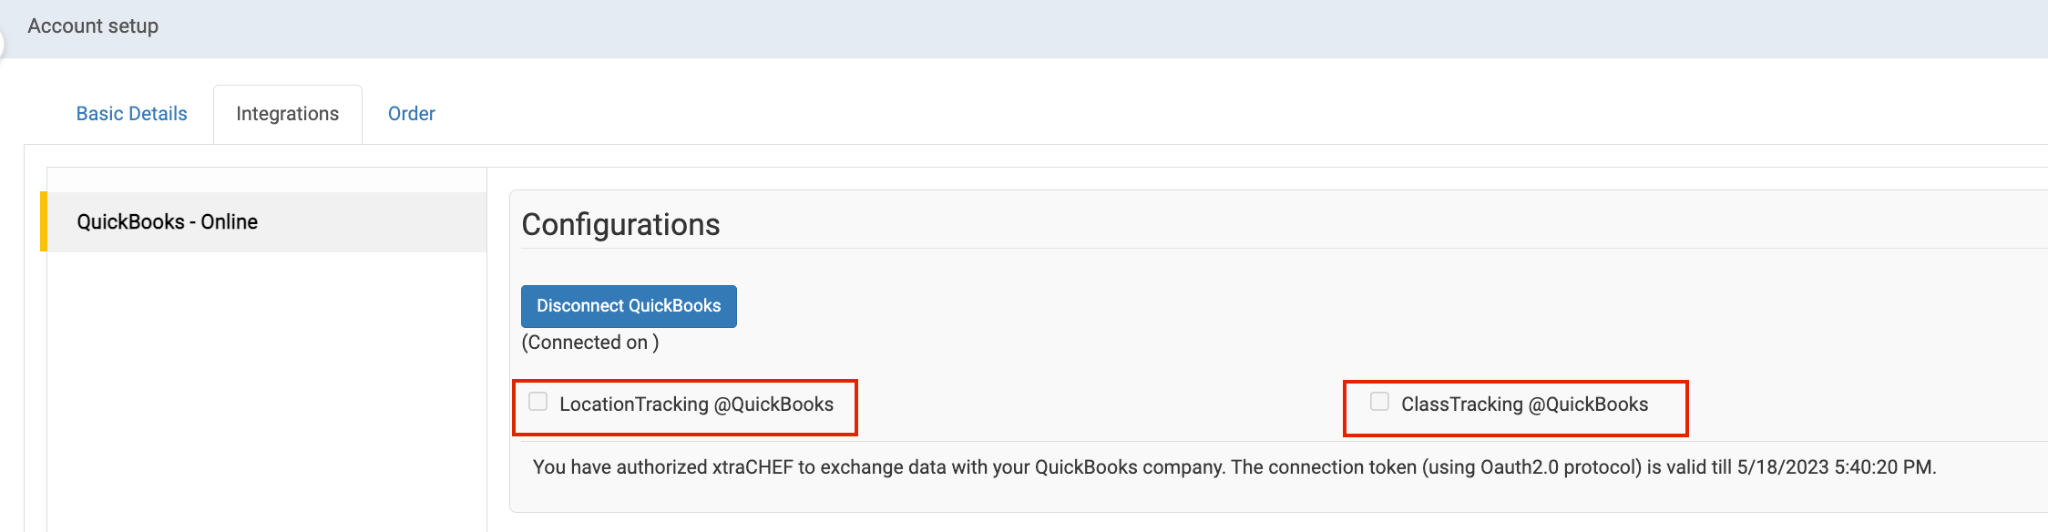
What does each setting do?
- Class Tracking specifies a different class for each detail line of a transaction.
- Location Tracking allows you to assign a location to an entire transaction.
xtraCHEF: Class Tracking
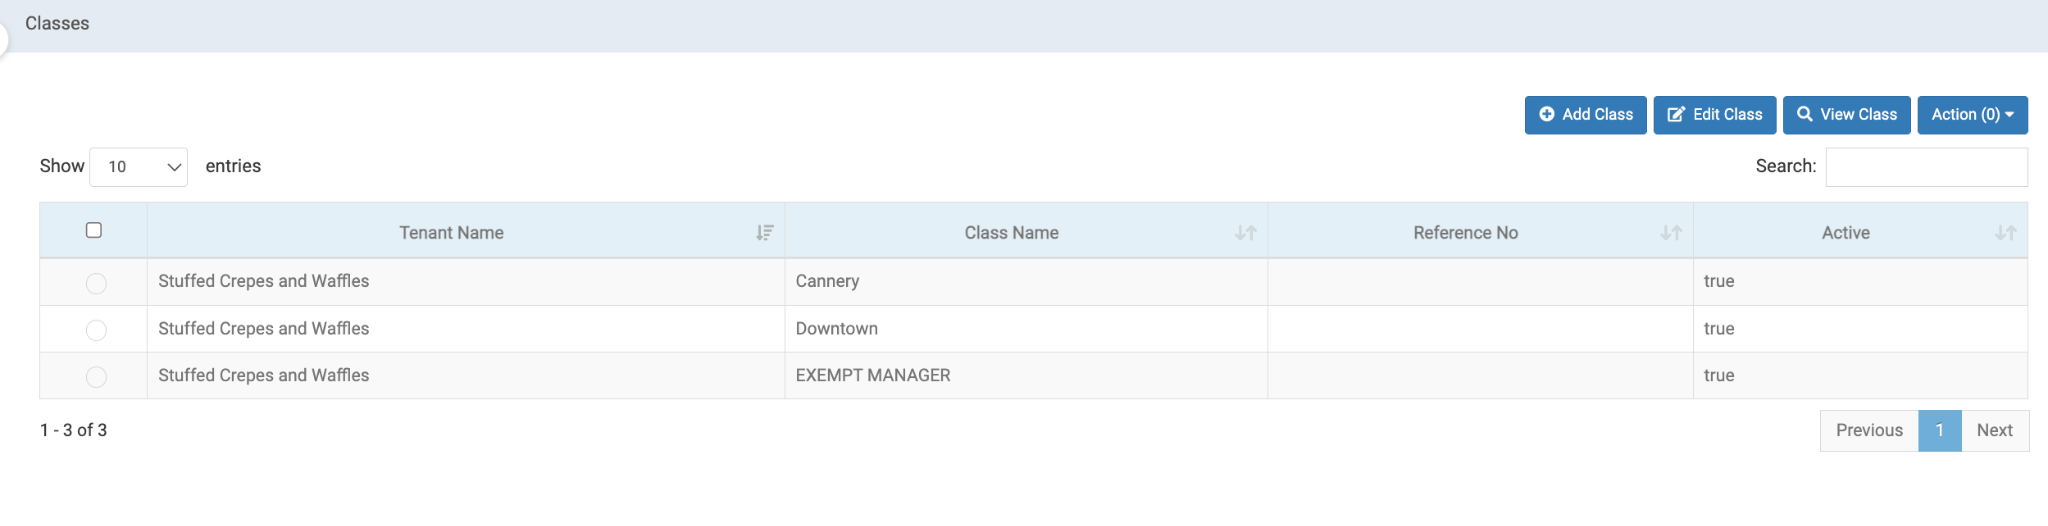
If class tracking is turned on, you will need to first add classes into xtraCHEF.
- In xtraCHEF, select the Gear icon > Classes.
- Add the classes. You can sync from QuickBooks or manually add them by selecting Add Class.
- The classes will then be listed on this page.
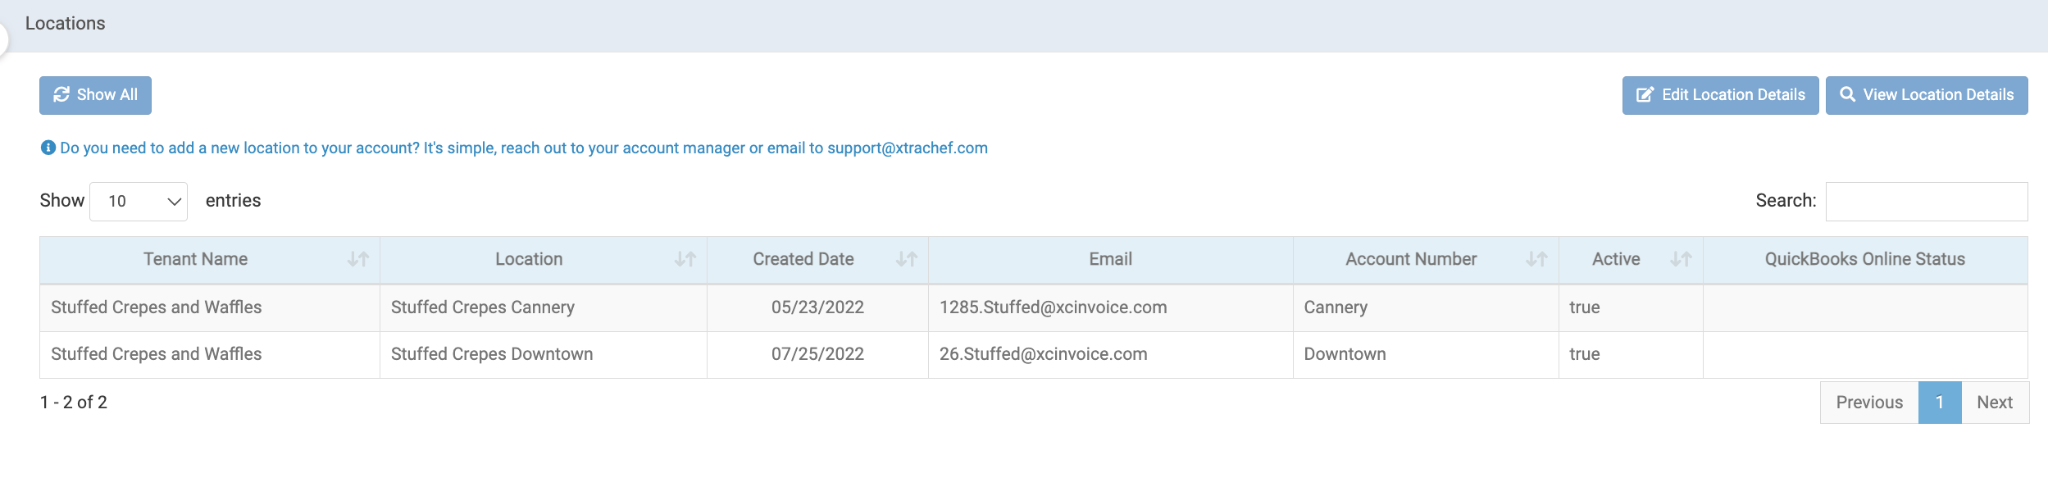
- Next, the classes will need to be assigned to xtraCHEF locations.
- Select the Gear icon > Locations.
- Select a location (when it's selected, it will be highlighted blue).
- Edit the location with the Edit Location Details button.
- Add the class name in the Account Number field.
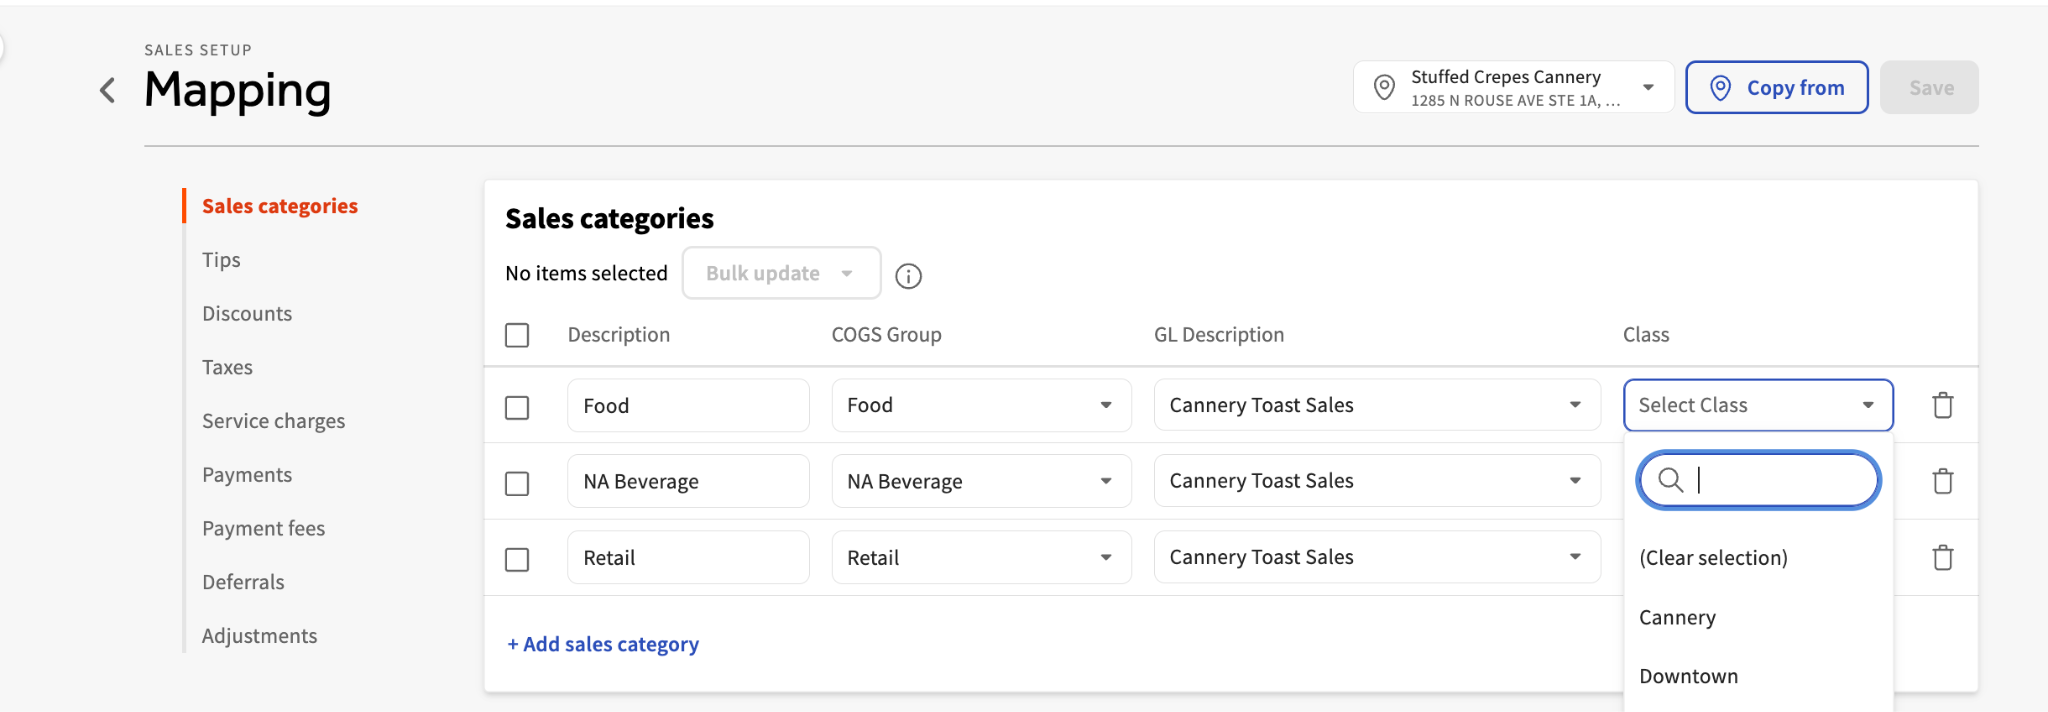
- Finally, you can map the invoice detail line items to each class.
- Select the Gear icon > Sales Setup.
- Open Sales Mapping.
- Use the Class column to assign the class to each sales category.
xtraCHEF: Location Tracking
xtraCHEF also offers the ability to manage QuickBooks at the location level. This function best serves everyone who can use multiple logins for QuickBooks Online (only QuickBooks Online can use location tracking).
If you use multiple logins while using classes across other locations, you can follow the steps below to set up Classes for accounts that use the same login while QuickBooks at a location level is enabled (which doesn't offer a Class Tracking or Location tracking checkbox in the Integrations tab).
The following tasks allow customers to sync invoices and sales to classes:
- Import classes from QuickBooks
- Enter appropriate classes in the account name field under Edit Location Details
- Map Sales Categories to Classes
After location tracking has been turned on in QuickBooks, you will need to add the QuickBooks location name to the matching xtraCHEF location.
- Select the gear icon > Locations.
- Select a location (when it's selected, it will be highlighted blue).
- Edit the location with the Edit Location Details button.
- Add the QuickBooks location name in the Account Number field.