xtraCHEF: Ver y editar ubicaciones
Última actualización: 8 abr 2026, 10:17 a.m.
Ver tus ubicaciones
Para acceder a tus ubicaciones, ve al ícono de engranaje >Ubicaciones en la esquina superior derecha de xtraCHEF. La página Ubicaciones mostrará todas las ubicaciones asociadas con tu inquilino y tendrá información básica para cada ubicación, incluidos el nombre de la ubicación, la fecha de creación y el número de cuenta.
También verás una dirección de correo electrónico para cada ubicación. Si alguna vez necesitas cargar una factura, recibo u otro documento en una ubicación y no tienes acceso a tu cuenta de xtraCHEF, simplemente envía el documento por correo electrónico a la dirección de correo electrónico indicada y xtraCHEF procesará el documento como de costumbre. No es necesario iniciar sesión.

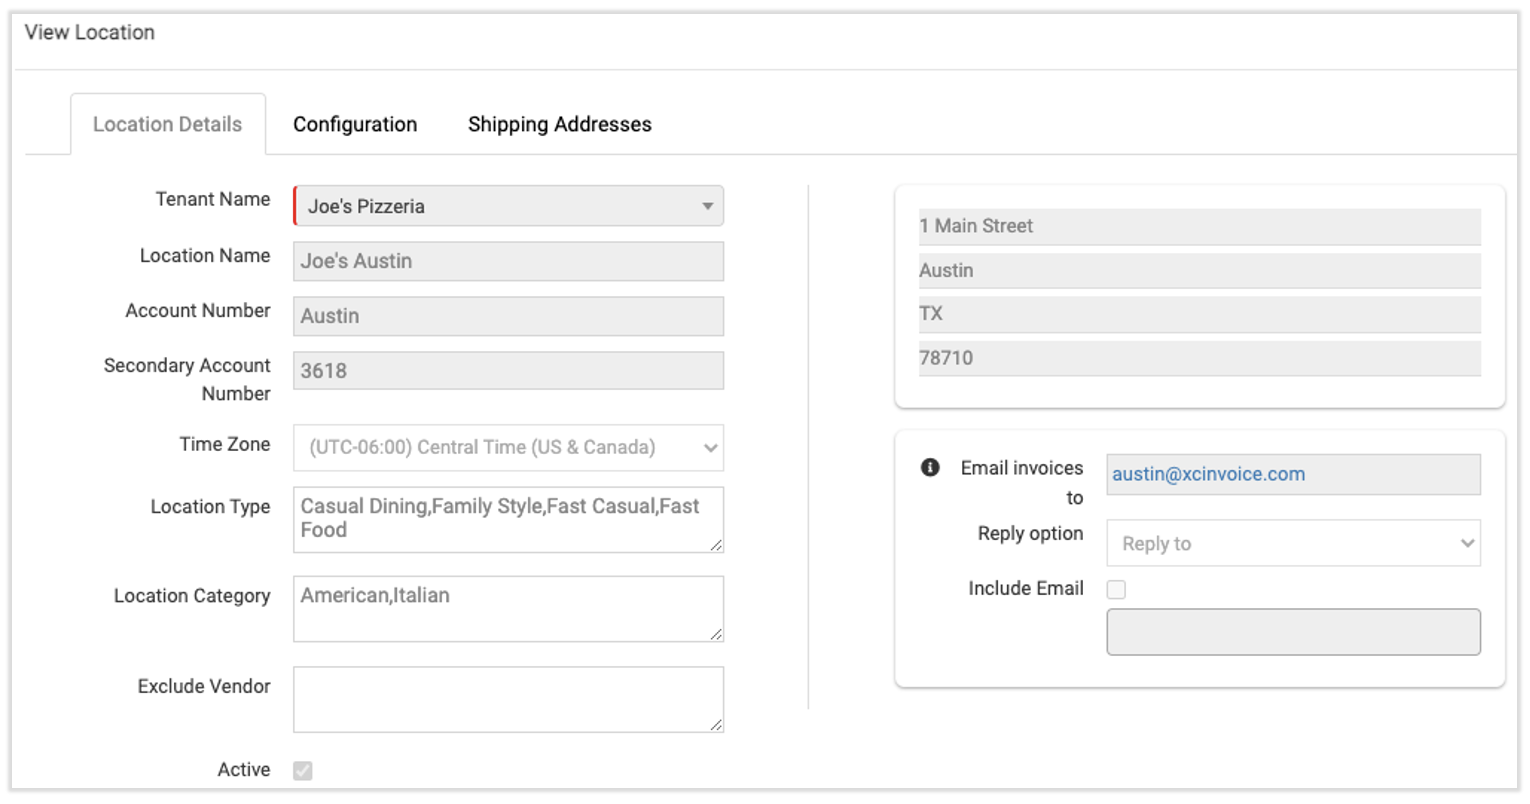
Si deseas verificar detalles más detallados de una ubicación, como su dirección física, dirección de envío o categoría, selecciona el nombre de la ubicación antes de seleccionar Ver detalles en la parte superior derecha de la página. No podrás seleccionar ninguno de los botones sin primero seleccionar una ubicación. Esto te permitirá ver toda la información que xtraCHEF tiene guardada para esa ubicación en particular.
Editar detalles de la ubicación
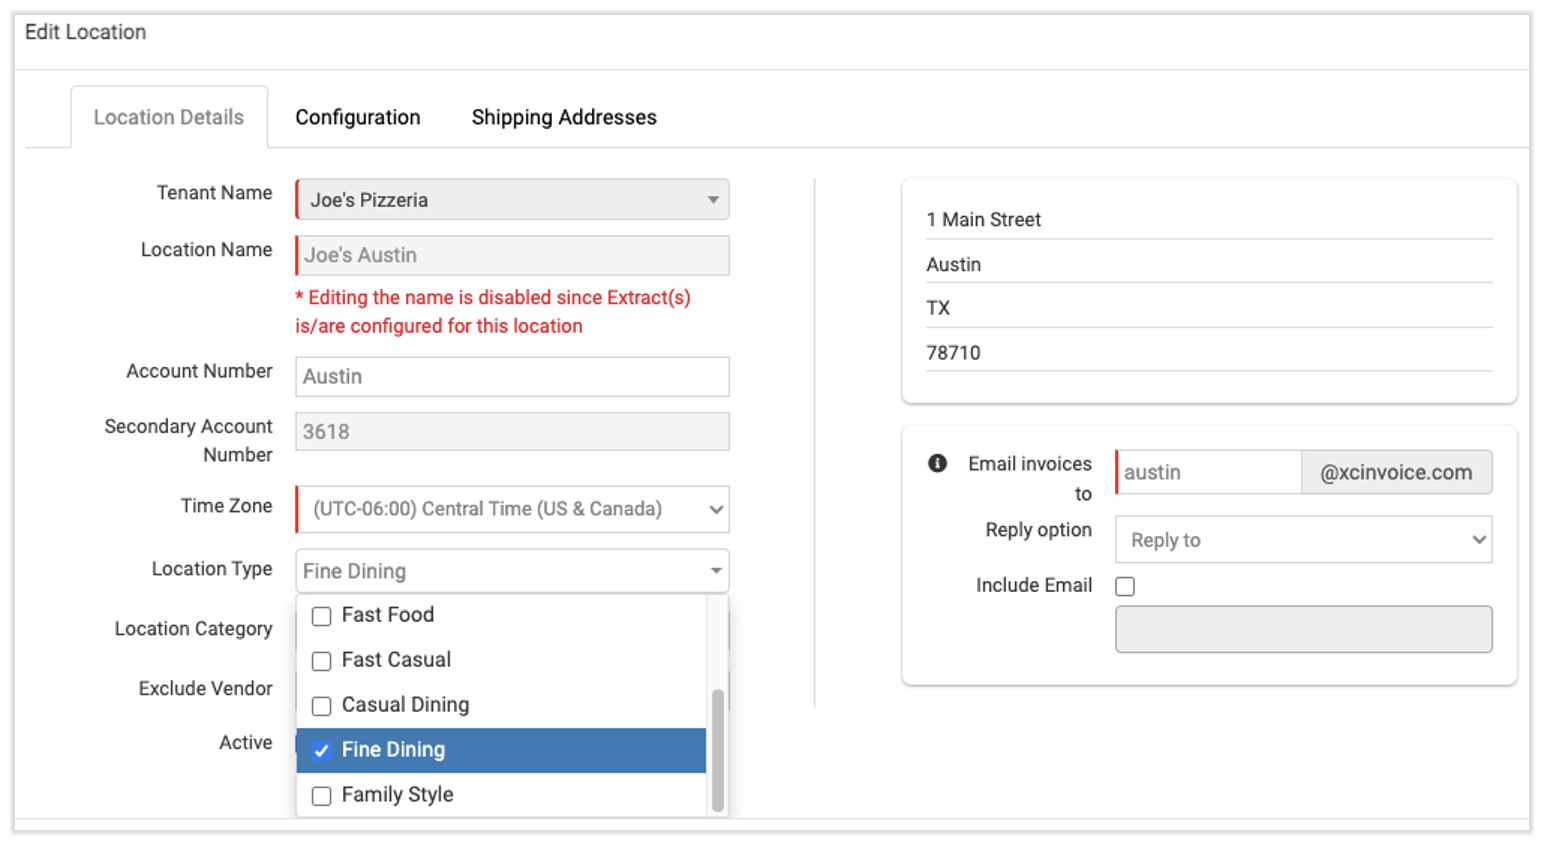
Todos sabemos que el cambio es la única constante en el mundo de los restaurantes y que tus ubicaciones evolucionan constantemente a través de actualizaciones del menú, movimientos físicos o incluso revisiones completas del concepto. Para mantener tu información actualizada en xtraCHEF, selecciona Editar detalles.
Se abrirá el mismo formulario que vimos en Ver detalles de la ubicación, pero notarás que ahora puedes hacer cambios en la información de tu ubicación. Supongamos que tu equipo ejecutivo decidió cambiar el nombre de la ubicación de Joe's Pizzeria en Austin de un local de comida rápida informal a un destino de lujo para amantes de la comida. Puedes reflejar ese cambio seleccionando el Tipo de ubicación que mejor describa tu nuevo concepto.
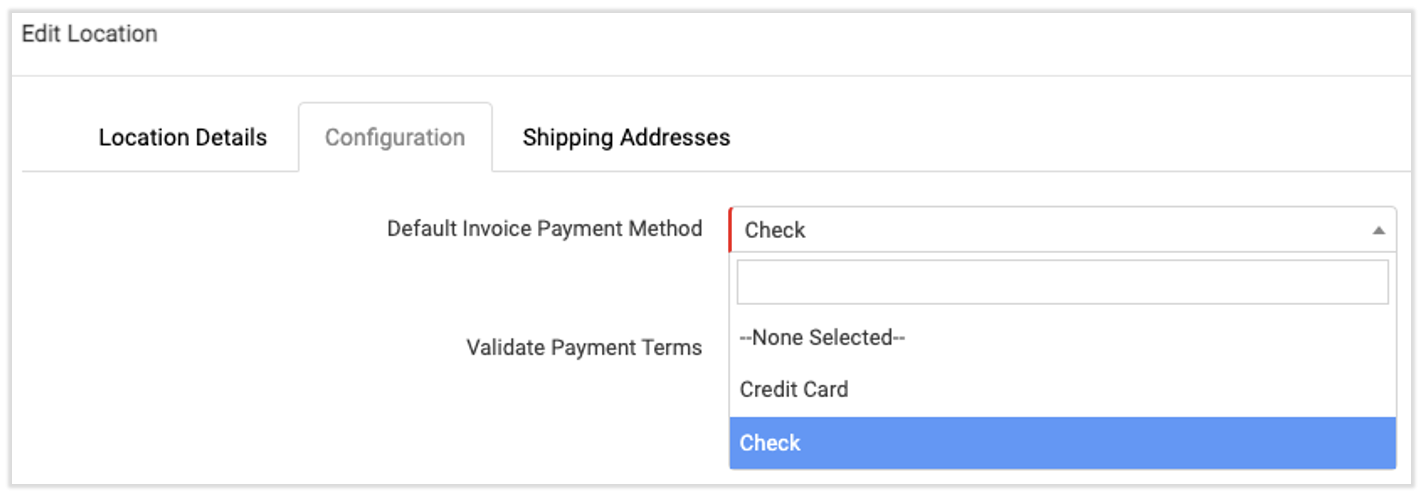
Al seleccionar la pestaña Configuración, también puedes actualizar el método de pago o la dirección de envío de cada ubicación según sea necesario.
Una vez que estés satisfecho con tus cambios, selecciona Guardar, que entrarán en vigor de inmediato. No importa cómo evolucione tu restaurante con el tiempo, xtraCHEF está listo para crecer contigo en cada paso del proceso.
Volver al inicio