Printer Setup Overview
Last updated: Jul 22, 2026, 10:27 AM
Set up, add, replace, and check the status of your Toast printers directly from your POS using the Printer Setup page.
- About the Printer Setup Page
- Permissions and Hardware You'll Need
- Access the Printer Setup Page
- Check Your Printer Status
- Set or Change Your Receipt Printer
- Add or Replace a Printer
- Assign a Printer to a Prep Station
- Frequently Asked Questions
- Related Articles
About the Printer Setup Page
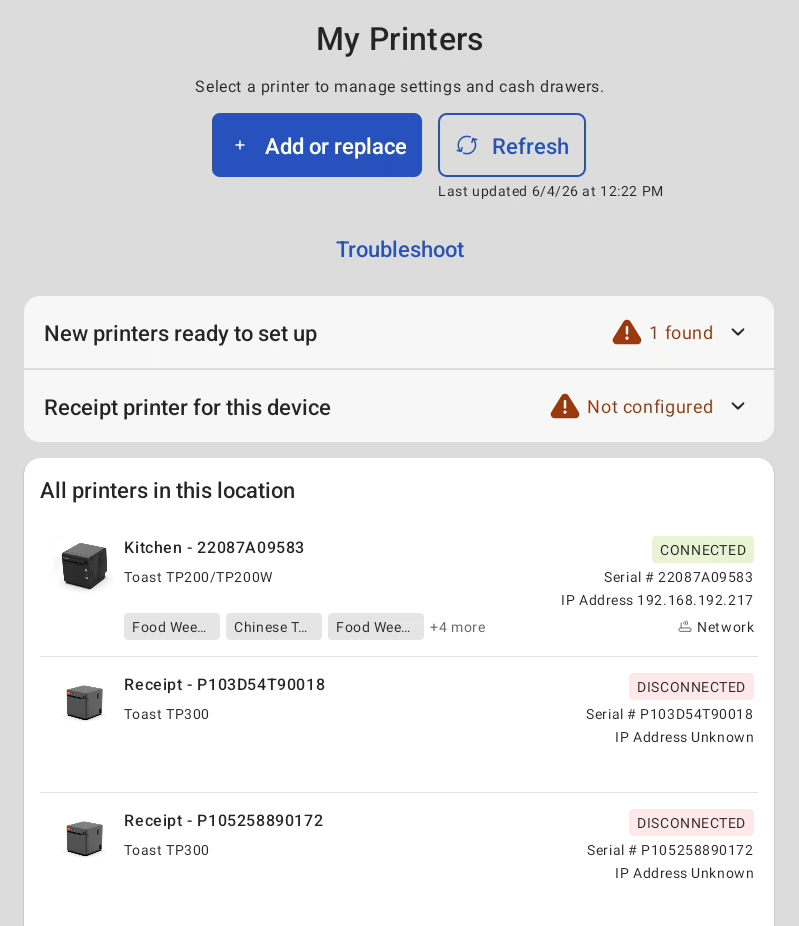
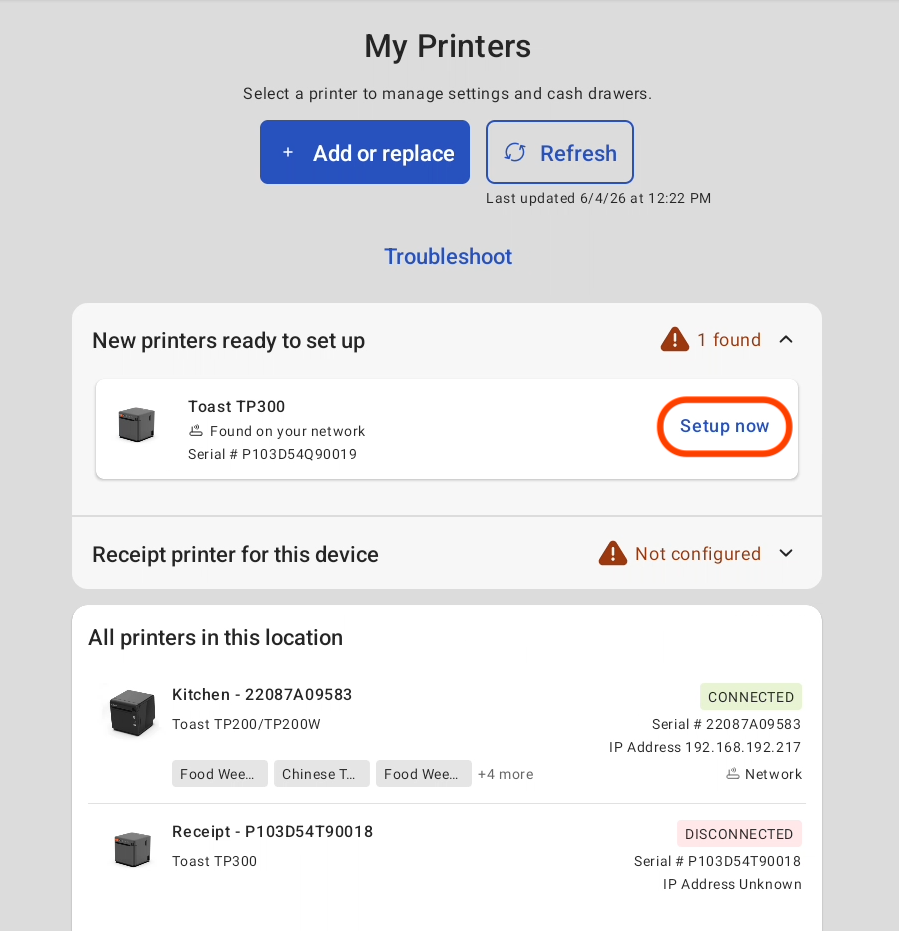
The Printer Setup page is where you install a new printer, replace an old one, check whether your printers are online, and start troubleshooting—all from your Toast POS device. When you power on your Toast hardware for the first time, this setup is built into the guided install. After that, you can return to the page any time to add, replace, or check a printer.
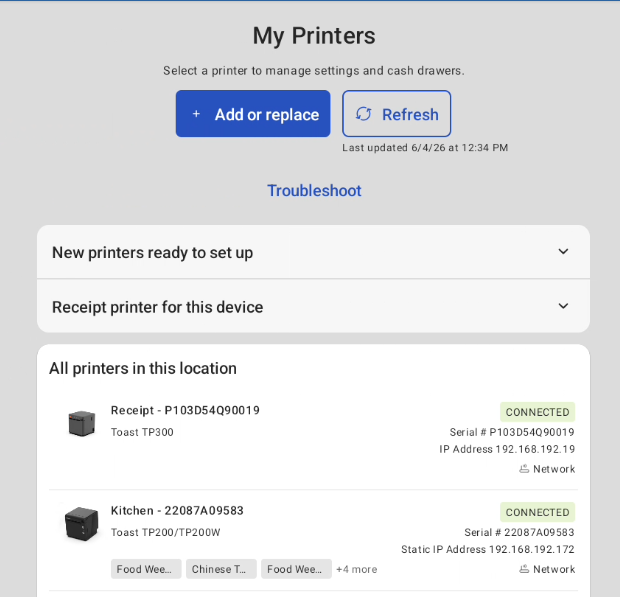
The page shows the overall health of your existing printers, including which ones are connected and which are offline. Any printer that is configured with prep stations also shows those prep stations in this high-level view.
For setup instructions specific to your printer model, search the Support Center for the name of your printer or visit the Toast Hardware Hub.
Permissions and Hardware You'll Need
Applies to: Toast POS
To set up devices from the Printer Setup page, your job role or user account needs the 7.1 - 7.3 Device Setup and 6.10 Printer and Cash Drawer Setup permissions. You cannot assign or edit another employee's permissions unless you hold those same permissions yourself, even if you are an administrator.
Before you set up a printer, connect it to power and to your location's local network, and make sure your network and router are already set up. Your POS device finds printers by scanning the network it is connected to, so the printer must be on the same network to appear during setup.
Access the Printer Setup Page
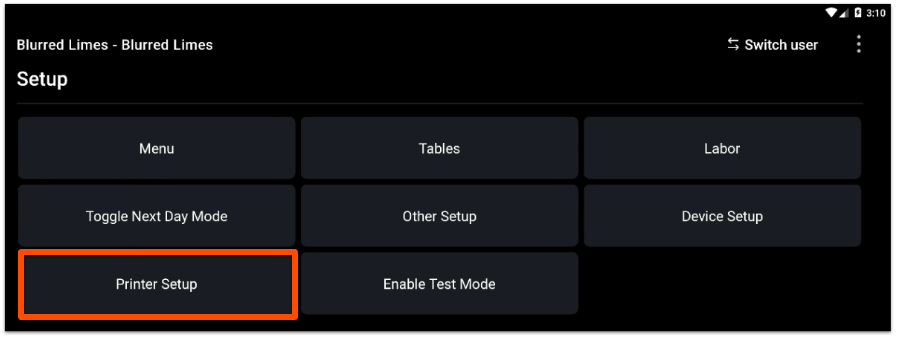
To open the Printer Setup page, select the back arrow in the top-left corner of the screen to reach the main menu of the Toast app on your device, then navigate to Setup > Printer Setup.
Check Your Printer Status
To check your printer status, open the Printer Setup page. It refreshes automatically when needed, and you can select Refresh at any time to see the most current status of your printers. The page shows each printer as connected or offline.
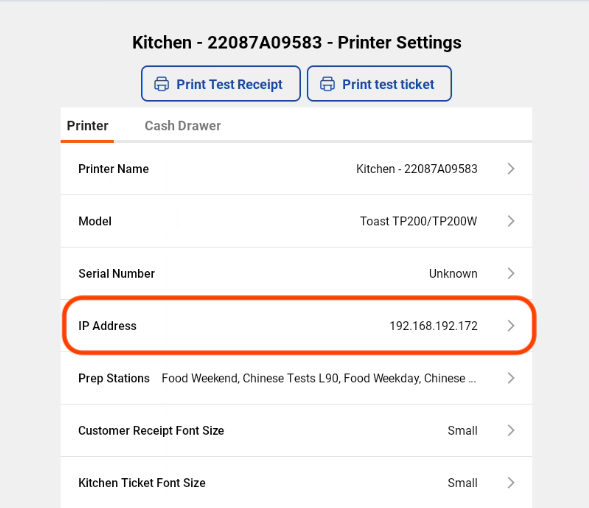
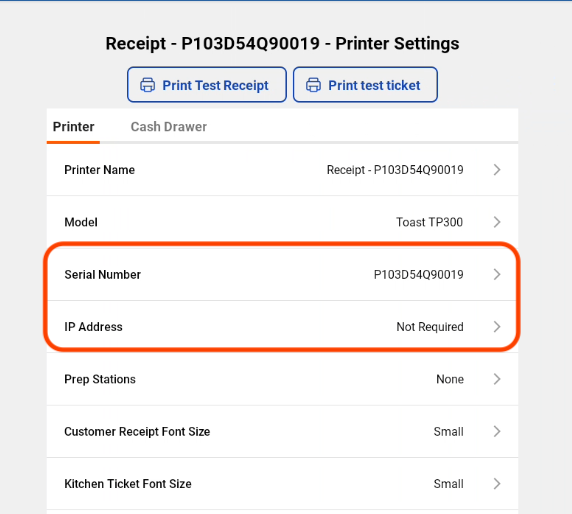
To see all of a single printer's settings, or to print a test ticket or test receipt, select that printer from the list.
Note: To print a test slip manually, see Print a Test Slip.
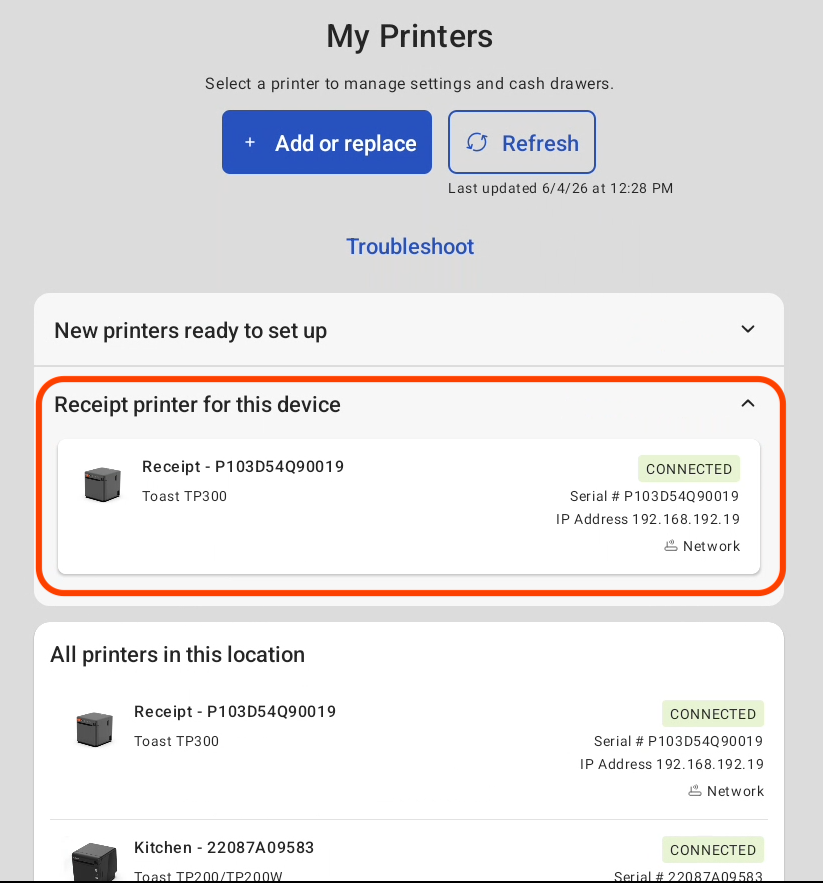
Set or Change Your Receipt Printer
The Printer Setup page includes a Receipt printer section that shows which printer is currently set as the receipt printer for that device. If no receipt printer is set, this section prompts you to add one. To set or change your receipt printer, follow the steps in the Add or Replace a Printer section below.
Add or Replace a Printer
If you have already plugged in a new printer or connected it to your location's local network, it may appear automatically in the New printers ready to set up dropdown at the top of the Printer Setup > My Printers page. Select Set up now and follow the prompts to finish.
If your printer does not appear automatically, set it up manually:
- On the Printer Setup page, select + Add or replace printer.
- Choose whether you are installing a new printer or a replacement printer, then select Continue.
- Choose your path:
- For a new printer, select Wired or Wireless, then select Next.
- For a replacement printer, select the printer you are replacing, then select Continue.
- Select Find my printer. Your device scans the network for printers, which can take up to 20 seconds.
- When your printer appears, follow the prompts to choose how the printer will be used, including whether it needs a prep station (kitchen printer) or a cash drawer (receipt printer), and the font size.
- Print the test ticket. When it prints successfully, you receive a notification that the printer was installed.
Expected outcome: The printer now appears under My Printers on the Printer Setup page.
Note: To set up a wireless Epson M30 or M30II printer, use Set Up Your M30/M30II Wireless Printer on a Toast-Managed Network instead. The M30 follows a different wireless setup flow than other printers.
Note: If you replaced a printer, recheck your prep station assignments afterward, because they can be re-routed during setup. See Configure and Assign Prep Stations. To remove the old printer, see Archive and Remove Printers in Toast Web.
Assign a Printer to a Prep Station
To send a kitchen printer's tickets to the right station, assign the printer to a prep station and route your menu items to it. Both tasks are covered in Configure and Assign Prep Stations.
Frequently Asked Questions
Why isn't my printer showing up when I try to add it?
Your printer may not show up on the setup screen for a few reasons:
-
- The printer is not on the same network as your device. Your device detects printers by scanning the network it is connected to, so set up your network and router before setting up printers. If the printer is on a different subnet from the local network, it also will not appear during a scan. To compare the printer's network to your device's, print a test page and check it against the network information on the Device Status page, which you reach by selecting the three dots in the top-right corner of your screen.
- The printer is already set up. A printer that is already configured in Toast Web does not appear as a new printer to add. Check whether it is already listed under My Printers.
- You do not have the right permissions. See the greyed-out screen question below.
To learn more about networks, see Set Up Your Toast Network, Set Up Your Meraki Router, or Set Up Your Toast Router.
Also asked as:
-
- Why can't my POS find my printer?
- My new printer isn't being detected; what do I do?
- Why won't my printer show up on the setup screen?
How do I know if my printer uses a default (DHCP) configuration or a static IP?
You can tell whether a printer uses a default (DHCP) configuration or a static IP from its entry on the Printer Setup page. A printer that shows a standard IP address is configured as static. To check, select the printer and look at the Printer tab for an IP Address.
If the printer does not show a standard IP address, and its IP Address shows as "Not Required" on the Printer tab, it uses a default configuration (also called DHCP). With a default configuration, the system uses the printer's serial number to recognize it. If the serial number is not listed and you need it, you can find it on the bottom of the printer. For default (DHCP) setup steps, see Add or Replace a Printer above.
Why is everything greyed out on the printer setup screen?
If everything is greyed out on the setup screen, you are likely missing the permissions needed to set up devices. Make sure your job role or user account has the 7.1 - 7.3 Device Setup and 6.10 Printer and Cash Drawer Setup permissions. These can be changed under each job role or user. Remember that you cannot assign or edit another employee's permissions unless you hold those permissions yourself, even as an administrator. To learn more, see Access Permissions Reference Guide and Assign User Access Permissions.
Also asked as:
-
- Why does it say I don't have permission to add a printer?
- Why can't I select anything on the printer setup screen?
Can I set up any printer from this screen?
You can set up any Toast-supported printer from this screen using the plug-and-play setup wizard, with one exception: the wireless Epson M30 printer. To set up a wireless M30 or M30II, see Set Up Your M30/M30II Wireless Printer on a Toast-Managed Network.
I still can't get a test ticket to print. What should I do?
If you still cannot get a test ticket to print from your new printer, select the Troubleshoot option on the Printer Setup page. For more help, see Get Help: My Printer Isn't Working, or contact your Onboarding Consultant or Toast Customer Care.
Why are my receipts showing the wrong currency?
If your receipts show the wrong currency, you can change it by configuring the language pack settings in the printer setup section of Toast Web. For steps, see Configure Your Printers to Display Euro.
Related Articles
- Configure and Assign Prep Stations
- Print a Test Slip
- Set Up Your M30/M30II Wireless Printer on a Toast-Managed Network
- Get Help: My Printer Isn't Working