Complete Your Toast Business Setup Tasks
Last updated: Oct 2, 2026, 11:19 AM
| The information in this article applies to U.S. based restaurants. Customers based in the in Australia, Canada, Ireland, and the UK can check out Business Setup for Restaurants in Australia, Canada, Ireland, and the UK instead. |
- Before you begin
- Step 1: Activate your Toast Web account
- Step 2: Open your Setup Checklist
- Step 3: Complete Business Contacts
- Step 4: Add your FEIN
- Step 5: Add business information
- Step 6: Identify business owners
- Step 7: Connect your business checking account
- Common questions during setup
- Related articles
Activate your Toast Web account and finish the five business setup tasks — business contacts, FEIN, business information, owners, and bank account — so your restaurant can start processing payments and run on Toast.
Quick answer
Business setup actually starts when you sign your Toast agreement, and continues in two phases after that:
- At contract signing, provide your restaurant address and the email address of the person who will log in to Toast Web. Toast uses that email to send your activation link.
- Activate your Toast Web account using the single-use link in the email titled "Activate your Toast Account," sent to that email address within 48 business hours of signing your contract.
- Finish the five business setup tasks in the Setup Checklist (top right of Toast Web): complete business contacts, add your Federal Employer Identification Number (FEIN), add business information, identify business owners, and link your business checking account.
Once your FEIN is verified, the remaining legal-validation tasks unlock automatically. To complete the whole flow you'll need: your IRS form CP-575 (FEIN), Social Security numbers, dates of birth, and ownership percentages for any owner who holds 25% or more, and your business checking account routing and account number. Plaid is the recommended way to link your bank — if your bank isn't supported, select Manually enter account and routing numbers in the same step, or ask your Toast team for an ACH form.
Business setup is the first stage of a longer onboarding journey — Foundation & Kick Off > Build > Train & Engage > Go Live. Completing these tasks unlocks the rest of your Setup Checklist.
Before you begin
You will need:
- At contract signing: your restaurant's address and the email address of the person who will log in to Toast Web. Toast sends your activation email to that address within 48 business hours of signing.
- Your IRS form CP-575, which lists your Federal Employer Identification Number (FEIN), also called your Federal Tax ID. If you cannot find form CP-575, request a replacement directly from the IRS at the IRS Lost EIN page (external link).
- Ownership information for any owner with at least 25% ownership (up to two owners) or for an elected company officer, including full legal name (no nicknames), Social Security number, date of birth, and ownership percentage.
- A business checking account. Personal accounts and savings accounts are not accepted.
- Access to the email address you provided at contract signing. The activation email and the only login that initially has access are tied to that email address.
This article applies to Toast Web business setup. Setting up Toast Payroll is a separate flow — see the related articles at the bottom.
Note: Your company code (used in Toast Payroll) is a different identifier from your FEIN. Bot routing tip — if you came here looking for your FEIN that you've already entered, see How can I view or confirm my FEIN with Toast? instead.
Step 1: Activate your Toast Web account
Your activation path depends on whether you are a new Toast customer or an existing customer adding a new location.
If you are a new Toast customer:
- Find the email titled "Activate your Toast Account," sent within 48 business hours of signing your contract to the address you provided.
- Select the single-use activation link in that email.
- Create a password and complete the prompts to set up your Toast Web account.
If you are an existing Toast customer adding a new location:
The new location is added to your existing Toast Web account automatically. The only login with access at first is the one tied to the email address on your agreement for the new location. To confirm which email that is, reference your Toast agreement or contact your Toast Sales Rep.
To grant other employees or owners access to the new location after you sign in, see Assign User Access Permissions.
If your activation email is missing or the link no longer works:
- If it has been fewer than 3 business days since you signed your contract, allow a bit more time — activation emails go out within 48 business hours.
- Check the inbox, junk, and spam folders for the email address on your agreement. The sender will be onboarding@toasttab.com.
- If it has been more than 3 business days and the email still isn't there, contact your Toast team, or start a live chat with Customer Care from any Toast page (the support button in the lower right of Toast Web or Toast Payroll) and ask for a resend.
- The activation link is single-use.
Expected outcome: you can sign in to Toast Web at toasttab.com/login and see your Toast Web home screen.
Step 2: Open your Setup Checklist
| Please note that the Setup Guide mentioned in this section is in the process of rolling out and is currently in a limited release for select Customers. If you do not see the guide depicted below you can still access your Setup Checklist by selecting Setup in the top right corner of Toast account. |
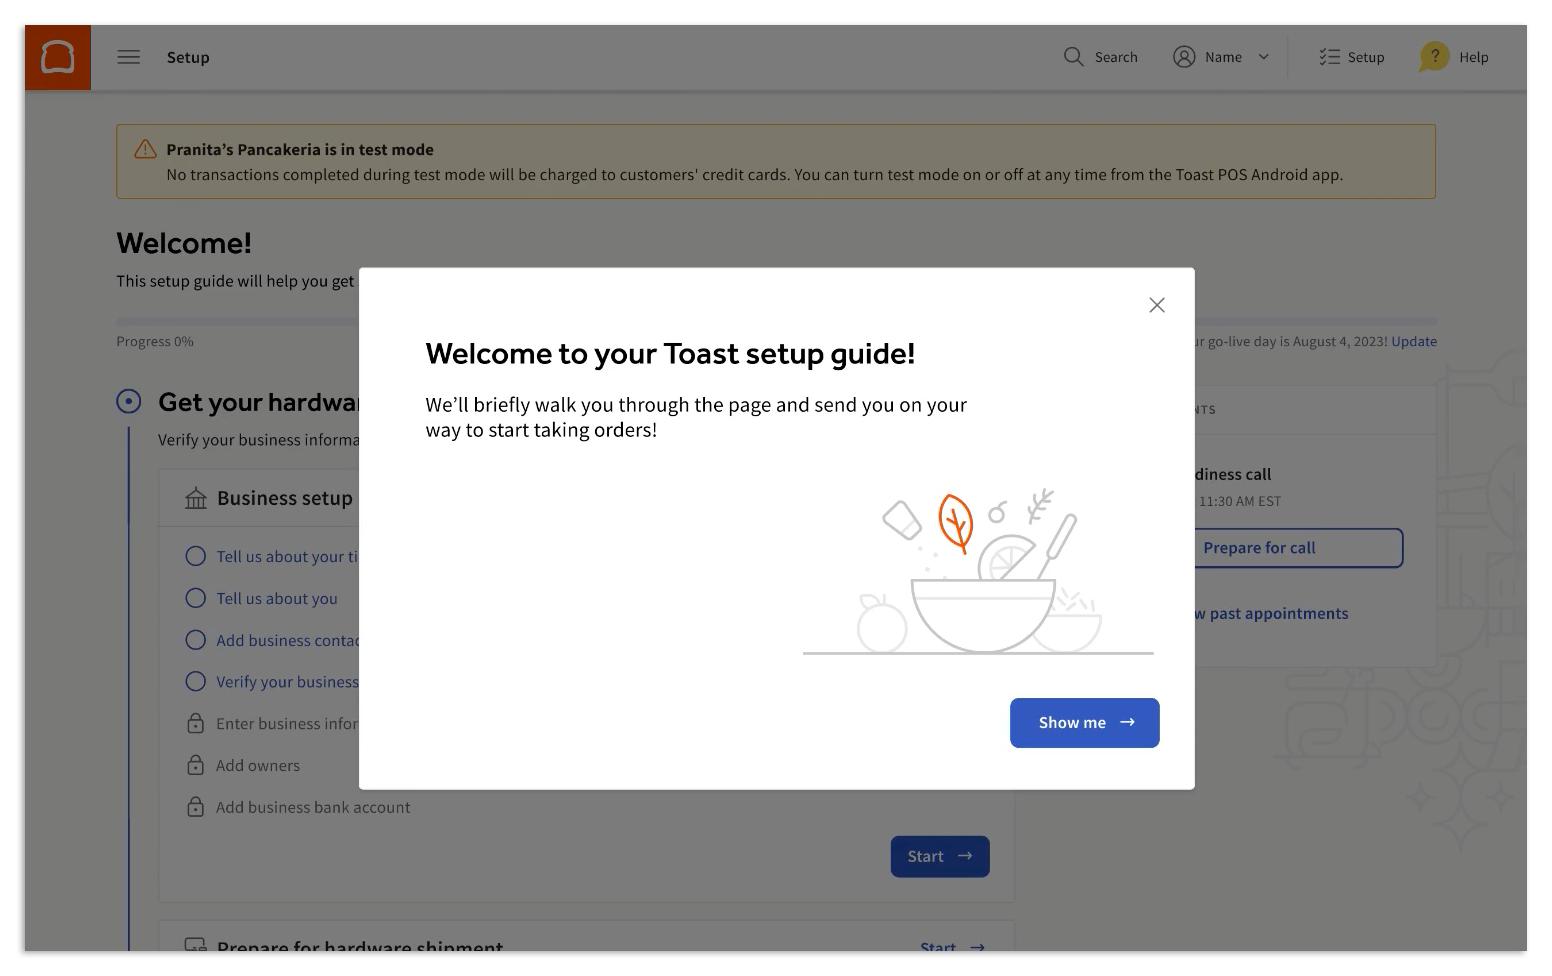
After you sign in for the first time, Toast Web shows a welcome message that introduces your Setup Guide. Select Show me for a guided tour, or close the message with the X to proceed on your own.
To open the Setup Checklist later, select Setup in the top right corner of Toast Web. Work from the top of the checklist down — Toast suggests the order based on the products you signed up for.
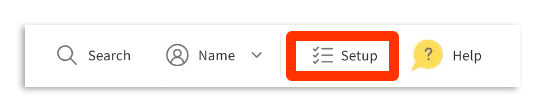
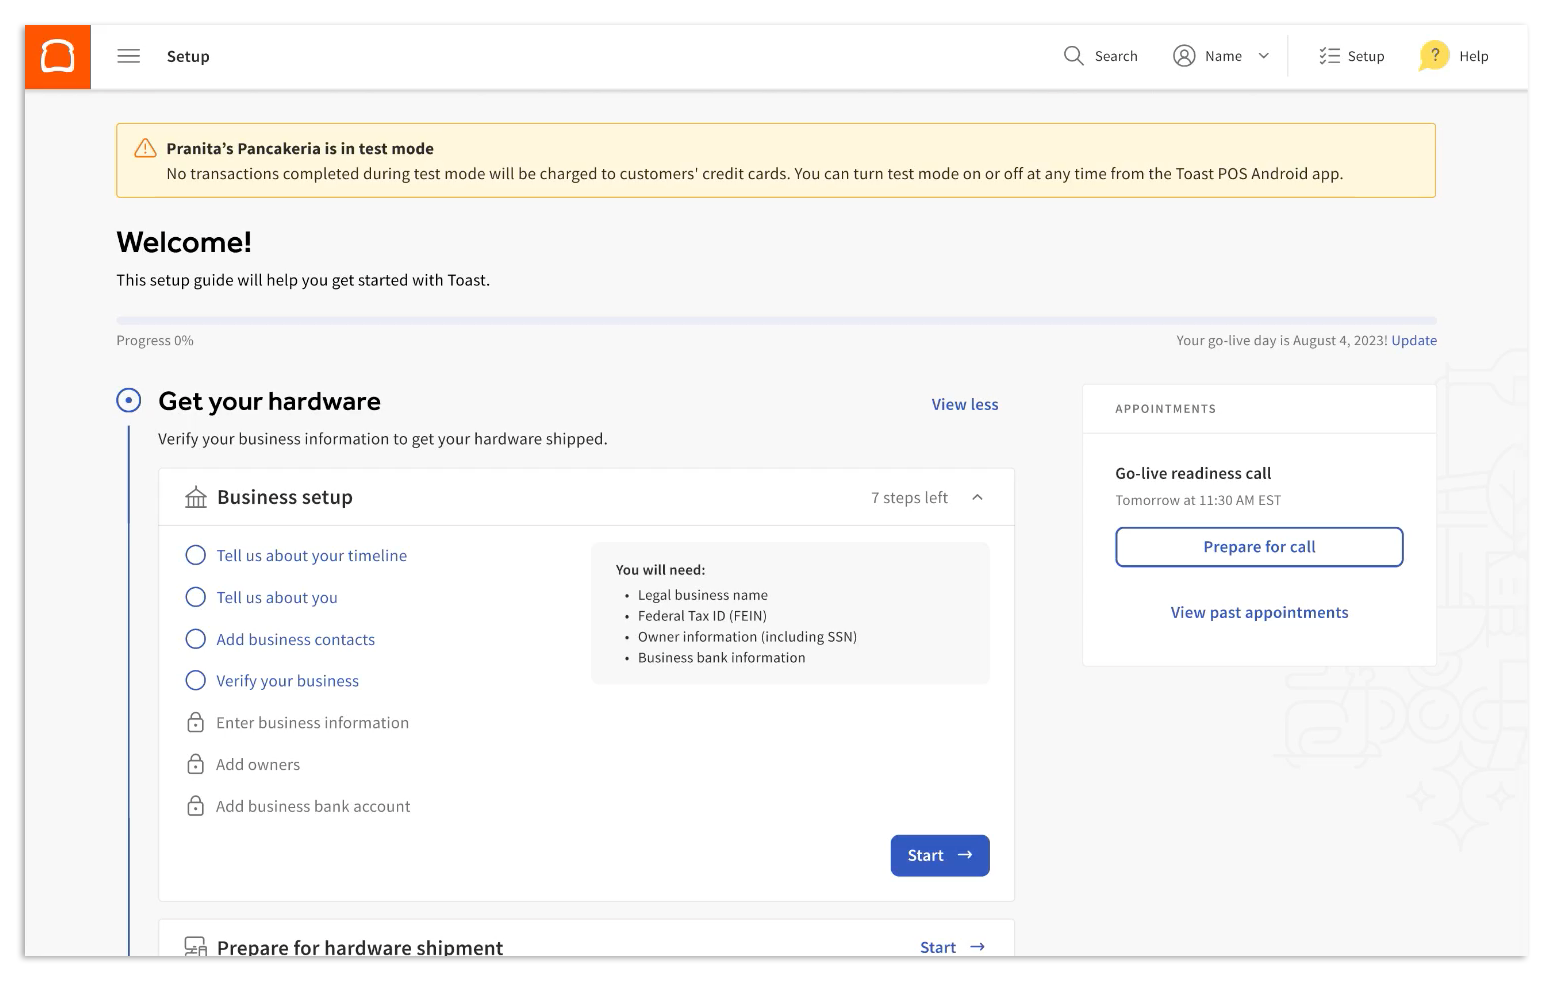
Note: The new Setup Guide is rolling out to a limited group. If you do not see the guided tour, you can still access every task by selecting Setup in the top right corner.
Expected outcome: the Setup Checklist opens and shows Business setup as one of the available task groups.
Step 3: Complete Business Contacts
Before the legal-validation tasks, Toast asks you to confirm who to contact about your account.
- From the Setup Checklist, select Business setup.
- Select the Business Contacts prompt.
- Complete the requested contact details.
- Select Continue to save.
You can add or update contacts later in Toast Web as well, so this step doesn't need to be final — it just needs to be complete to move on.
Expected outcome: the Business Contacts task is marked complete in your Setup Checklist.
Step 4: Add your FEIN
Adding your Federal Employer Identification Number (FEIN) is the next business setup task. Once your FEIN is verified, the remaining legal-validation tasks unlock.
- From the Setup Checklist, select Business setup.
- Select Add FEIN (Tax ID number).
- Enter your Business legal name and Federal Employer ID Number (FEIN). Both come from your IRS form CP-575 — double-check that they match exactly, since incorrect data entry is the most common cause of error messages.
- Select Continue. Your FEIN is verified with the IRS in real time.
If verification succeeds, the task is marked complete and you can move to Step 5.
If verification fails, try entering the data again — most failures come from a typo in the legal name or FEIN.
If verification fails twice, select Click here to let us know on the Something isn't adding up pop-up. This sends the information to the Toast team for manual review.
Note: If your FEIN is already associated with another Toast location, the FEIN field auto-populates and verification is skipped.
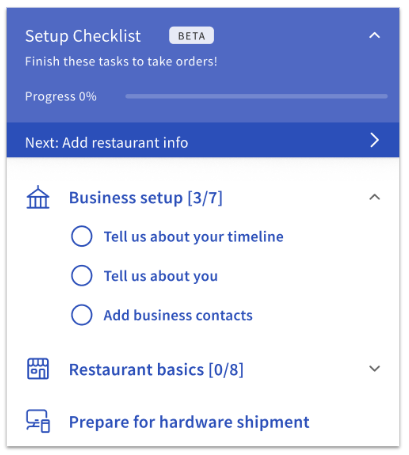
Expected outcome: the Add FEIN task shows a green check mark in your Setup Checklist, and the Add business information, Identify business owners, and Link bank account tasks are unlocked.
Step 5: Add business information
Once your FEIN is verified, you can complete your business information.
- From the Setup Checklist, select Add business information.
- Enter your Type of business, Date business commenced, and Business address.
- Select Continue to save. Every field must be completed correctly to submit your information.
Expected outcome: the Add business information task is marked complete in your Setup Checklist.
Note: If you see an address validation error such as "Mapbox only returned an approximate address," "We were unable to find this address," or "We encountered an error attempting to find this address," double-check your entry against your business filing. If the error persists, select the option to manually enter your restaurant's latitude and longitude in the same form.
Step 6: Identify business owners
Toast is required to collect ownership information, Social Security numbers, and dates of birth under FinCEN beneficial-ownership rules (external link).
- From the Setup Checklist, select Identify business owners.
- Enter the full legal name (no nicknames), Social Security number, date of birth, and ownership percentage for any owner with 25% or more ownership (up to two owners), or for an elected company officer if no individual owner meets the threshold.
- Select Continue. The information is verified automatically against government records.
If verification fails:
- Confirm you used the owner's full legal name, exactly as it appears on their Social Security card.
- If the name has changed (for example, after a marriage), use the name on the current Social Security card.
- If verification still fails after a second attempt, select Click here to let us know on the Something isn't matching up pop-up to request a manual review.
- If an owner does not have a Social Security number, also select Click here to let us know to start manual review.
Note: If your FEIN is already associated with another Toast location, owner information is pre-populated from that location.
Expected outcome: the Identify business owners task is marked complete in your Setup Checklist.
Step 7: Connect your business checking account
The final business setup task links the bank account that will receive your daily credit-card deposits and pay your Toast software subscription fees. Personal and savings accounts are not accepted.
You have two ways to connect:
Option A — Connect with Plaid (recommended)
Plaid is a secure intermediary. You sign in to your bank through Plaid using your bank's standard login credentials; Plaid encrypts your bank credentials and shares only the information Toast needs.
- From the Setup Checklist, select Link bank account.
- Select the recommended Plaid option.
- Search for and sign in to your bank when prompted.
- Confirm the business checking account you want Toast to use.
Option B — Enter your bank manually
Use this option if your bank isn't supported by Plaid, Plaid can't verify your account, or you prefer not to share bank login credentials.
- From the Setup Checklist, select Link bank account.
- Below the Plaid option, select Manually enter account and routing numbers.
- Enter your routing number, account number, and bank name.
- If prompted, upload an image of a voided check or bank letter for manual verification.
If you don't see your bank in Plaid's search results at all, use the We can help link on that screen to message your Toast team — they can send you an ACH form to complete manually instead.
Decision tree — which option fits you?
- My bank is in the Plaid list and I have my standard online banking login → Option A.
- My bank is not in Plaid's list → use the We can help link for an ACH form, or Option B.
- Plaid showed "Couldn't verify account" or "This isn't a business checking account" → Option B (the same screen has the manual fallback).
- My bank uses an authentication method Plaid does not support → Option B.
For Plaid-specific errors (Authorization Failed, Couldn't verify account, This isn't a business checking account, bank website won't load) and the requirements for manual verification documentation, see Update or Add a New Bank Account in Toast Web.
Linking your business checking account in Toast Now
Expected outcome: the bank account appears on your Bank Accounts page with no Pending verification tag, and the Link bank account task is marked complete in your Setup Checklist. If the account requires manual verification, expect 3–5 business days for review.
Common questions during setup
What's next after the business setup tasks?
If you signed up for Toast Payroll, your next steps are in your Toast Payroll setup. If you did not sign up for Toast Payroll, continue to the outage preparedness steps in your Setup Checklist. Business setup is the first milestone in your broader onboarding journey (Foundation & Kick Off > Build > Train & Engage > Go Live) — finishing it unlocks the rest of that checklist.
My activation email went to an address I don't want to use as my login. Can I change it?
Yes. First, complete activation using whichever email received the invitation, then add a new login from inside Toast Web:
- Sign in to Toast Web and navigate to Team > Employees.
- Select + Add New Employee.
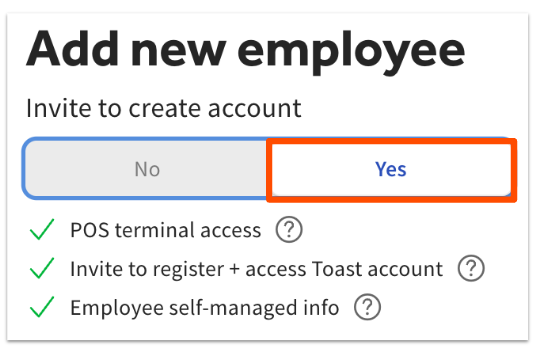
- In the panel that opens, toggle Invite to create account to Yes.
- Complete the rest of the employee details and select Add. Toast emails the new user an invitation to create a Toast Web login that can complete the business setup tasks.
I can't find my activation email. Can it be re-sent?
Yes. If it's been fewer than 3 business days since you signed your contract, the email may simply not have arrived yet (it goes out within 48 business hours). After that, check your spam folder, then start a live chat with Customer Care using the support button in the lower right of Toast Web or Toast Payroll, or use the Support tab in the Toast Now app. For more options, see Contact Customer Support.
My new location isn't showing under the "switch restaurants" drop-down. How do I get access?
Sign in using the email address you provided on your Toast agreement for the new location. That login is the only one with access at first. To extend access to other employees or owners, see Assign User Access Permissions.
I bought a restaurant and need to change the FEIN — can I do that here?
This article covers initial setup, not changes to an active account's FEIN. To transfer ownership or change FEIN on a live Toast account, see How do I transfer ownership of my Toast account?
I see an address error mentioning Mapbox — what should I do?
Double-check the address you entered against the address on your business filing. If the error persists, select the option to manually enter your restaurant's latitude and longitude in the same form.
What does "guided activation" mean?
Guided Guest Activation is a Toast onboarding service where a Toast Guest expert works with a customer to configure and set up their modules live. Specifically:
- Toast pre-configures some settings
- Then works with the customer live to make additional modifications for their unique needs
Related articles
- Update or Add a New Bank Account in Toast Web — change the bank account on a live Toast account, troubleshoot Plaid errors, manual-verification document requirements.
- How can I view or confirm my FEIN with Toast? — look up a FEIN already on your Toast account.
- Toast Payroll: Federal Employer Identification Number (FEIN) — FEIN setup specific to Toast Payroll (separate product from Toast Web).
- Self-Service Onboarding Guide — full end-to-end onboarding sequence, including pre- and post-setup tasks.
- Assign User Access Permissions — grant employees or owners access after activation.
- Contact Customer Support — chat, phone, and ticket options.
- Printable Toast Business Setup Guide PDF
This content is for informational purposes and is not intended as legal, tax, HR, or any other professional advice.