Customize the Appearance of KDS Tickets
Last updated: Apr 23, 2026, 5:01 PM
- Customize Item / Modifier Colors on KDS Tickets
- Change Border Color for Dining Options on KDS Tickets
- Adjust Font Sizes on KDS Tickets
- Emphasize Table or Check Number on KDS Tickets
- Modifier Consolidation on KDS Tickets
- Hide Items on the KDS
- Additional Resources
Customize Item / Modifier Colors on KDS Tickets
To help kitchen staff read orders on their KDS device, you can customize the background color of your items and modifiers. The items will appear on the KDS highlighted in the designated color.
- In Toast Web, navigate to the Menus > Bulk management > Advanced properties.
- Use the arrow (>) icons (to the right of the empty checkboxes) to expand your menu down to the specific item or modifier you wish to add color to. If you're editing a modifier, keep expanding the menu until you see the white row in the table for the individual modifier. Select the name of the item or modifier to open the setup page.
- In the Basic section, select the KDS Color setting and choose your desired option from the color selector.
- Save and publish your changes.
You'll now see the item or modifier highlighted in color on the KDS. This feature can help point out sizes, types of ingredients, special requests, allergies, and more.
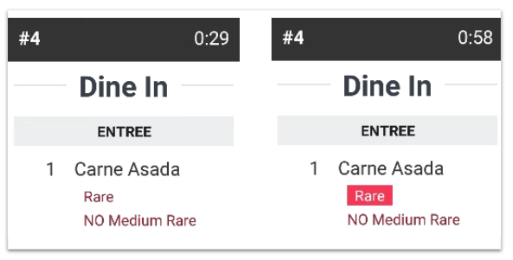
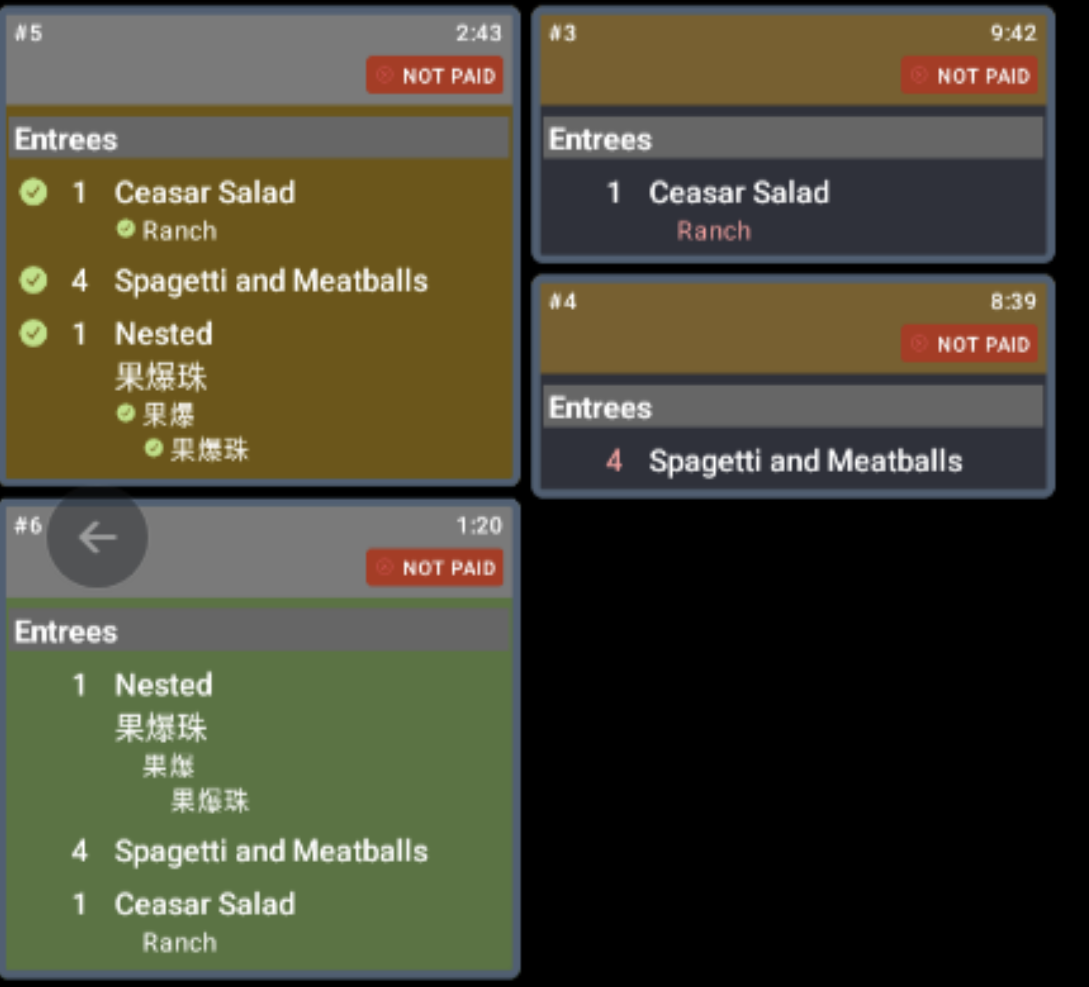
Note: Modifiers without configured background color or tickets without configured background color will be displayed with red text. If a background color was configured for a modifier or if the ticket has a background color (ex. Green for Fulfilled), the modifier text will be displayed in black for readability as seen below.
Change Border Color for Dining Options on KDS Tickets
- In Toast Web, navigate to Kitchen > Printers, tickets, & KDS devices > Kitchen.
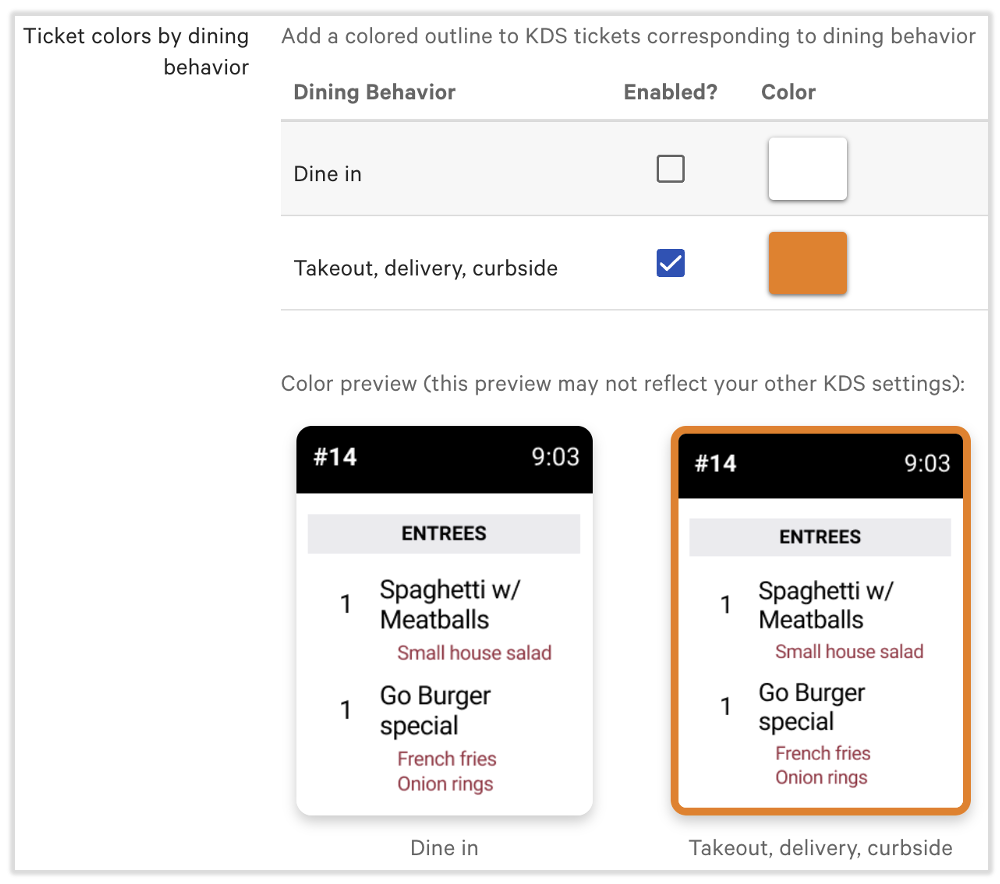
- Scroll down to the section named Ticket Screens and locate the option for Ticket colors by dining behavior.
- You may select to enable a ticket border for two different types of dining behavior: Dine in for on-premise tickets and Take out, delivery, curbside for off-premise tickets. To learn more about dining behaviors set through dining options, click here.
- When you enable a dining behavior, be sure to also select a color. The preview below will instantly update to the colors that are enabled.
- Save and Publish. Go check out the new look on your KDS and print one-pagers in English or Spanish so your staff understands what each color refers to.
Adjust Font Sizes on KDS Tickets
The font size for your printed tickets can be adjusted by completing the following steps:
- While in KDS Mode, select the 3 dots in the top right.
- Select Text size.
- Select one of the four options:
- Small
- Medium
- Large
- Enormous
Medium is the default size.
Small is suited for smaller screens.
Large and Enormous are suited for 22" screens, expos, or other screens that sit farther away from the user.
Emphasize Table or Check Number on Kitchen Tickets
You can configure KDS tickets so that either the table number or the check number is more prominent in the heading.
Note: The setting that you choose applies to only KDS tickets and will not impact printed kitchen tickets.
- In Toast Web, navigate to Kitchen > Printers, tickets, & KDS devices > Kitchen.
- Scroll down to the Kitchen Screens section to find the KDS Ticket Headers setting. Select Check number or Table number to indicate which information should appear in large, bold font in the top left corner of KDS ticket headers. A live preview will appear below the setting.
- Quick-service restaurants may prefer to highlight a check number on the ticket, as table numbers may not be as important. Full-service restaurants may prefer to place the table number in a more prominent location to avoid confusing a check number for a table number.
- Save and publish your changes.
Modifier Consolidation on KDS Tickets
You can consolidate modifiers to group together any identical modifiers that are listed under the same item. To learn how to set this up, see the Consolidate Modifiers section of this Support Center article, Advanced Modifier Configuration.
You may hide items assigned from different prep stations on a KDS, but there are separate directions for a non-expediter KDS and an expediter KDS. To set an existing KDS as an expediter, see the instructions in this section of this article.
On a Non-Expediter KDS
- On your device, select the three dots in the upper right-hand corner of your KDS screen and select Device Setup.
- Select the Prep Stations setting under the Kitchen Setup section.
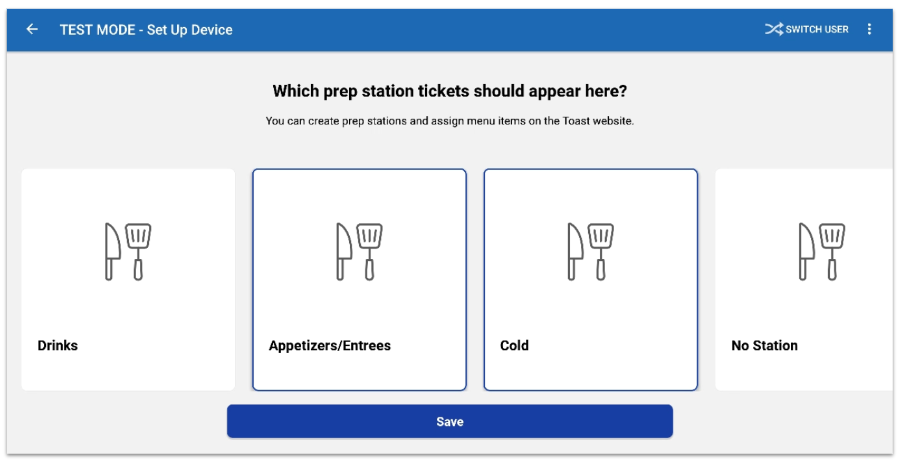
- Select the prep stations you'd like to appear on this KDS device, and leave the prep stations you'd like hidden deselected. You may need to scroll to the side to see all available prep stations set up for your restaurant. In this example, we don't want Drinks or No Station items to appear on our KDS screen, so we've left those deselected.
- Select Save.
- Select the back arrow to return to your KDS screen.
On an Expediter KDS
- In Toast Web, navigate to Kitchen > Kitchen stations > Prep stations.
- Add a checkmark to the prep stations you'd like sent to the expediter screen in the Send to Expediter column, and leave the prep stations you'd like hidden unchecked.
- If no prep stations are checked, then all prep stations will send to the expediter screen.
- Save and publish your changes. Your expediter screen will automatically update to reflect published changes.
Setting a KDS as an Expediter
When a KDS device is set as an expediter, you may wish to coordinate other expediter settings as well. To learn more, check out this Support Center article: Get Started with Kitchen Configuration.
- On your device, select the three dots in the upper right-hand corner of your KDS screen and select Device Setup.
- Select the Kitchen Expediter setting under the Kitchen Setup section.
- Select Expediter.
- Select Save.
Your KDS device is now set up as a kitchen expediter.