Flex 22” Counter Stand Installation Guide
Last updated: Dec 8, 2025, 4:58 PM
Follow the steps in this article to install your Flex 22" Counter Stand to your Flex 22 terminal.
Flex 22” Counter Stand Part Overview
This installation guide provides step-by-step instructions for installing the Toast Flex 22” Counter Stand. It covers both landscape and portrait mounting options, lists the tools and hardware included, and highlights essential safety precautions to help prevent injury or damage to equipment. Use this guide to ensure a smooth, secure installation of your Toast Flex 22" display stand.
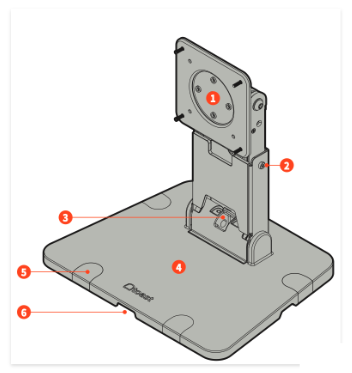
- VESA plate
- Neck length set screws (x2)
- Lower hinge wire hole
- Base
- Base mounting hole screw covers
- Cable exits (x4)
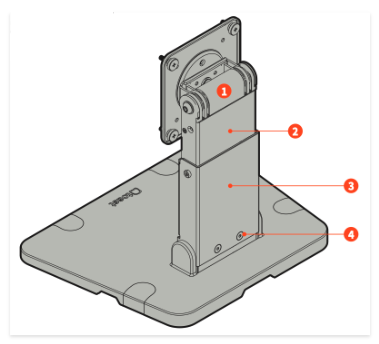
- Upper hinge
- Upper neck
- Lower neck
- Lower hinge set screw (x2)
Flex 22” Counter Stand Installation Position
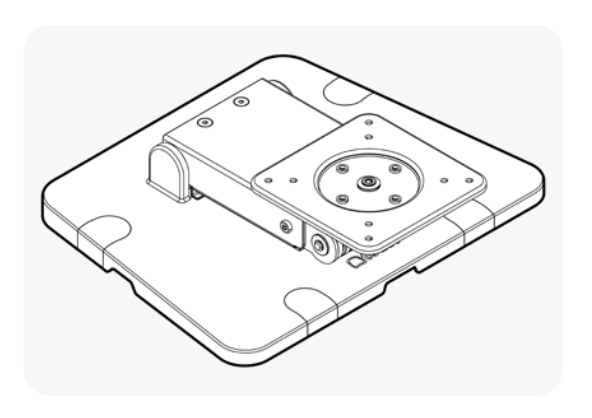
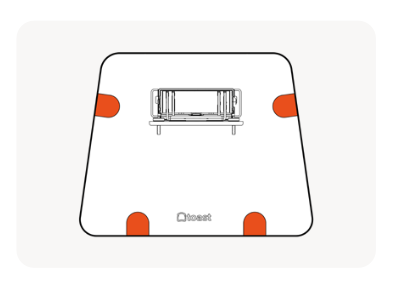
Note: Clear your installation area for your Flex 22” Counter Stand of any obstructions before you get started.
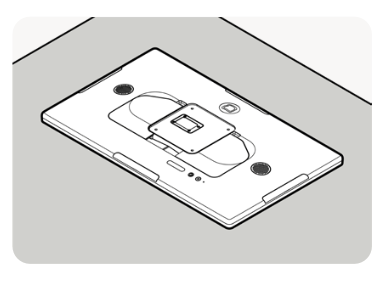
Below is how the Flex 22” Counter Stand will be positioned in the box.
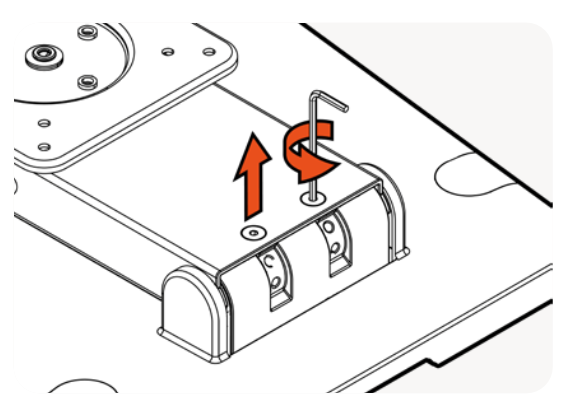
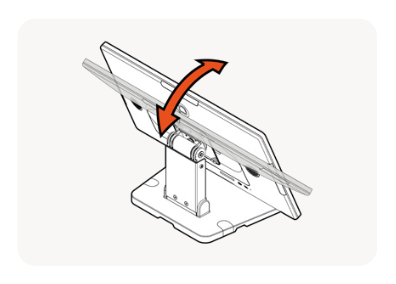
The bottom hinge has three positions: flat, mid, and vertical.
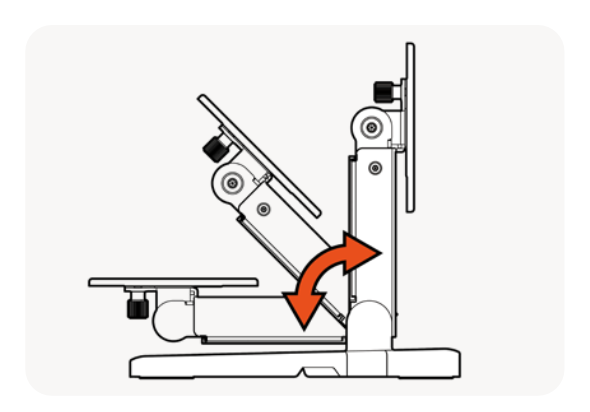
Follow the steps below to the position for your Flex 22" Counter Stand:
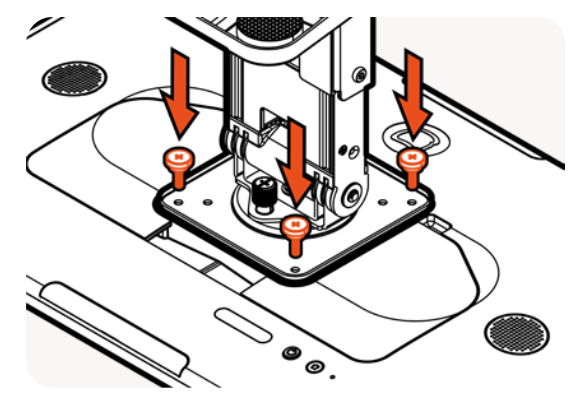
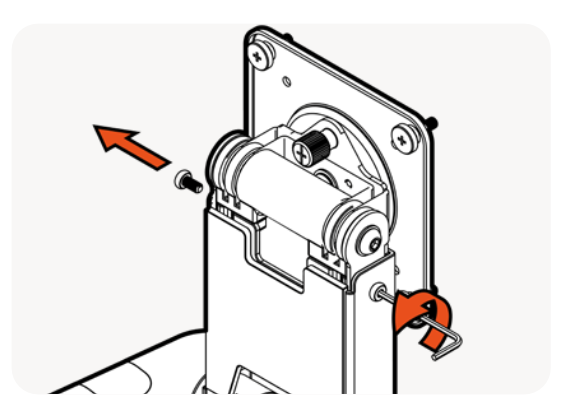
- Unscrew the two Allen screws found on the face of the neck using the provided Allen key.
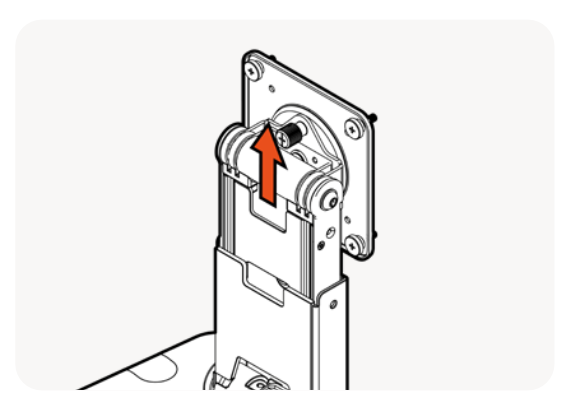
- Adjust the lower neck hinge until the holes align.
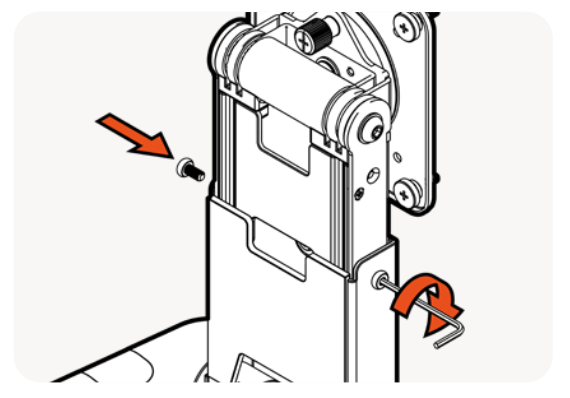
- Screw the two Allen screws back on the face of the neck.
Flex 22” Counter Stand Landscape Position
Follow the steps below to set the Flex 22” Counter Stand in the landscape position:
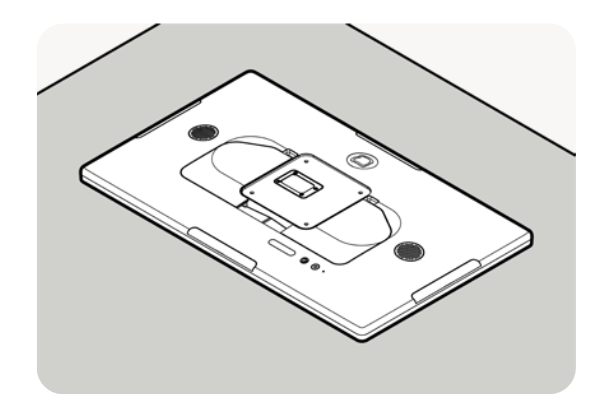
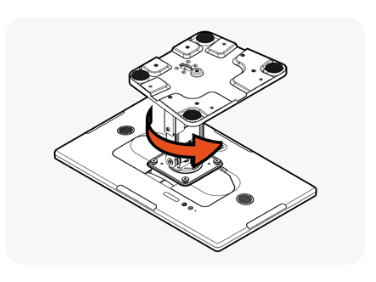
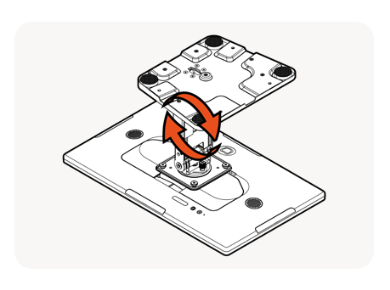
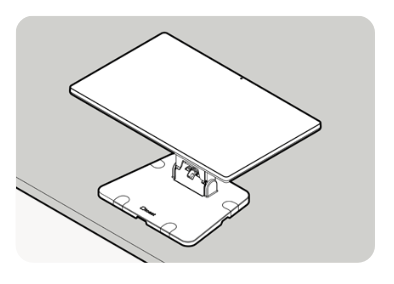
- Place the Flex 22” face down on a clean surface.
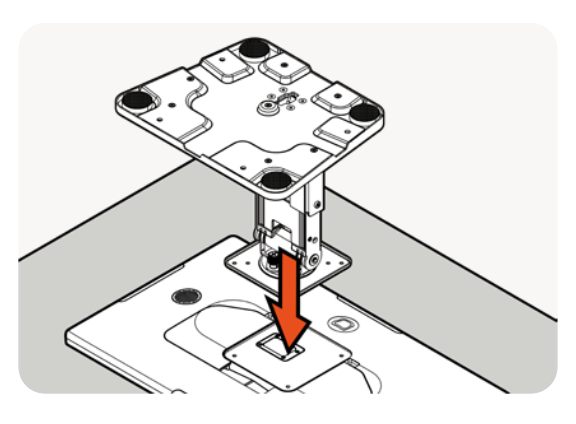
- Position the stand VESA plate against the back of the Flex 22”.
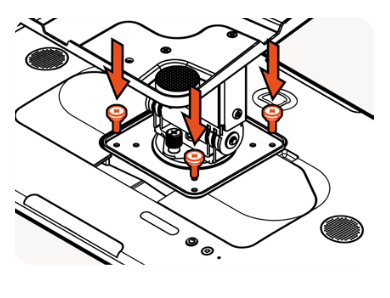
- Using the 4 thumb screws that come with the Flex 22”, screw in the VESA plate to the back of the Flex 22”.
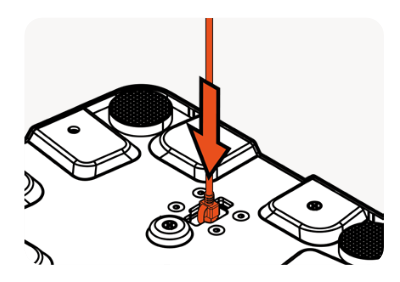
- The power and Ethernet cable can now be run through the hole in the bottom of the stand.
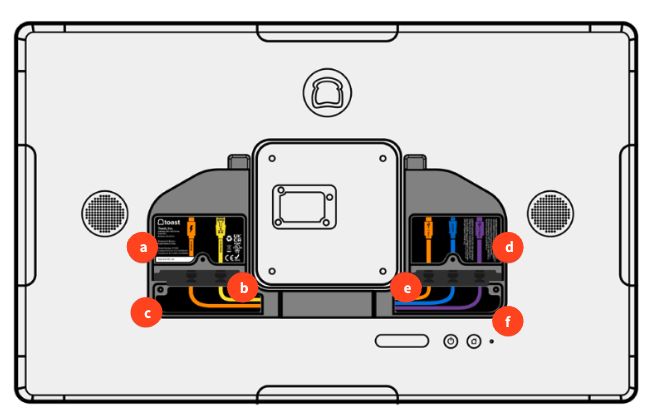
- Connect to power and Ethernet according to the labels on the back of your Flex 22” terminal.
- Power and Ethernet Cables
- Grommet to seal the pocket
- Pocket for cable management
- Accessory pocket
- Grommet to seal the pocket
- Pocket for cable management
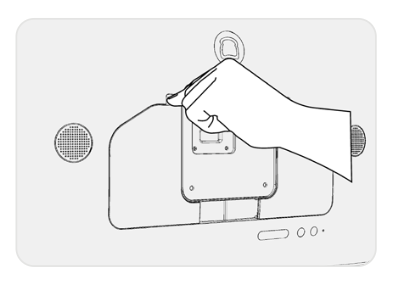
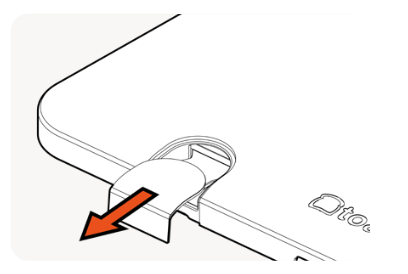
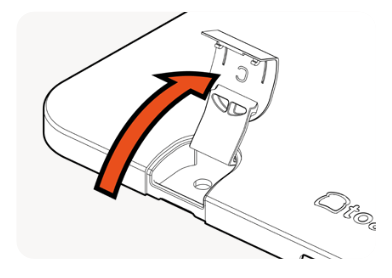
- Remove back panels. Open and remove the back panel from the top cut-outs to expose the back pockets.
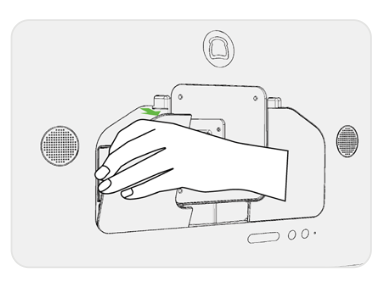
- Plug in your cables. Plug in the USB-C power and the (optional) Ethernet cable in the left pocket as shown.
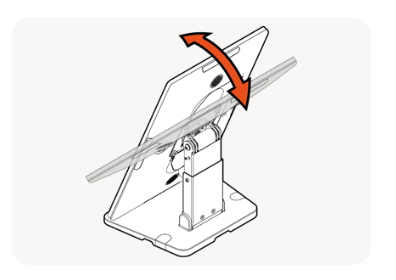
- Flip the stand onto its base and adjust the screen to your preference.


Flex 22” Counter Stand - Portrait Position
Follow the steps below to set the Flex 22” Counter Stand in the portrait position:
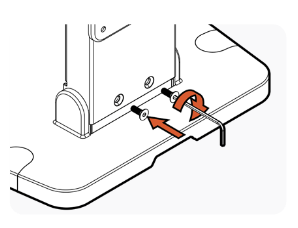
- Using the Allen tool provided, unscrew the two neck length adjustment screws on either side of the top of the neck.
- Pull the neck out until the second set of holes align. Note: Be careful not to pull the neck completely out.
- Screw the two Allen screws on the face of the neck.
- Place the Flex 22” facedown on a clean surface.
- Position the stand VESA plate against the back of the Flex 22”.
- Using the 4 thumb screws that come with the Flex 22”, screw in the VESA plate to the back of the Flex 22”.
- The power and Ethernet cable can now be run through the hole in the bottom of the stand.
- Connect to power and Ethernet according to the labels on the back of your Flex 22” terminal.
- Power and Ethernet Cables
- Grommet to seal the pocket
- Pocket for cable management
- Accessory pocket
- Grommet to seal the pocket
- Pocket for cable management
- Remove back panels. Open and remove the back panel from the top cut-outs to expose the back pockets.
- Plug in your cables. Plug in the USB-C power and the (optional) Ethernet cable in the left pocket as shown.
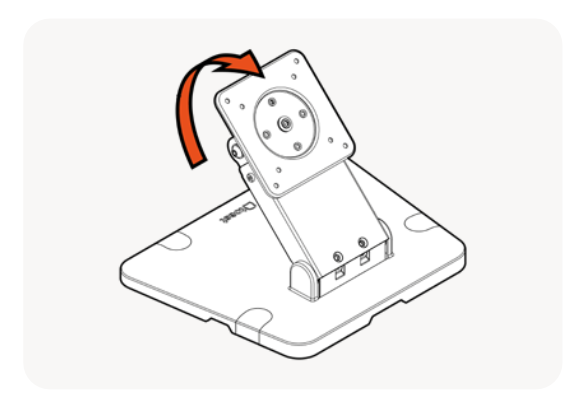
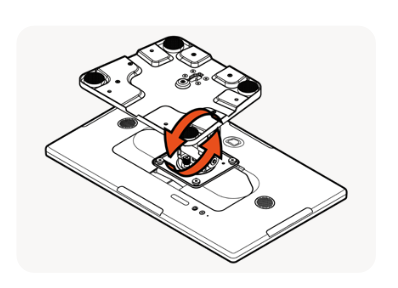
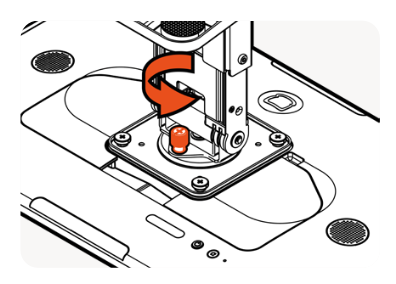
- Unscrew the spring rotation thumbscrew on the back of the VESA plate.
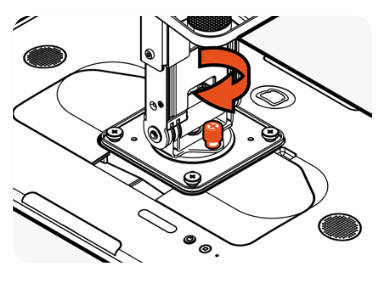
- Rotate the stand from landscape to portrait.
- When aligned with the hole, push the thumbscrew in and tighten until the Flex 22” is locked in place.
- Flip the screen onto its base and adjust the screen to your preference.


Surface Mounting Method for Your Flex 22” Counter Stand
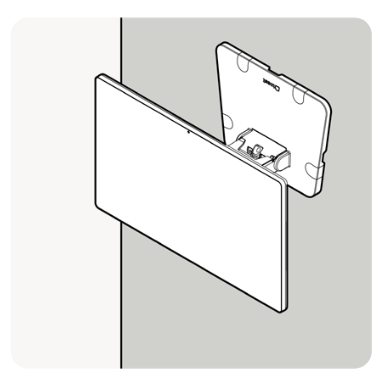
| You are responsible for using appropriately sized mounting screws and mounting to the appropriate structural support if wall mounting. |
You can select between two mounting methods for your Flex 22” Counter Stand: counter mounting and wall mounting.
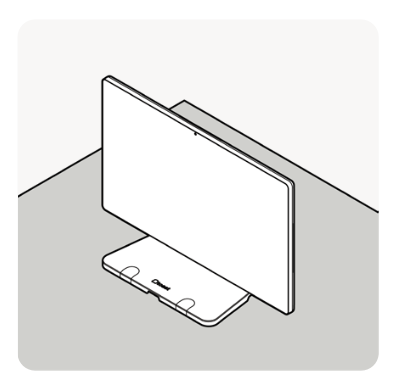
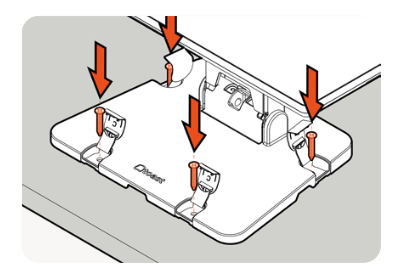
- Located the four covers on the stand base.
- Position the stand onto the surface.
- Pull the covers. Note: Be careful, covers do not completely come off the base.
- Life the covers to expose the mounting holes.
- Screw the stand to the surface (use the provided screws). Then, reinstall covers.
Additional Resources for the Flex 22" Counter Stand