Upload Content in the Insight Engage Platform
Last updated: Jul 2, 2026, 6:03 PM
Get started uploading content to the Insight Engage Platform.
This article covers how to upload content to the Insight Engage Platform. For an overview on how to get started with the Insight Engage Platform, see Get Started With the Insight Engage Platform.
If you have further questions or require technical support, please contact Delphi directly from Monday to Friday, 6:00 a.m. - 3:00 p.m. PT at +1 (800) 456-0060, option 1.
Toast support recommends that you read the Create a Template in the Insight Engage Platform article before reading this article.
- Content Window
- Upload Content to the Content Window
- Edit Content in the Content Window
- Media Properties Screen
- Advanced Settings Screen
- Media Editing (Data Feed) Manager Screen
- Keywords and Advertising Screen
- Best Practices
Content Window (Content Library)
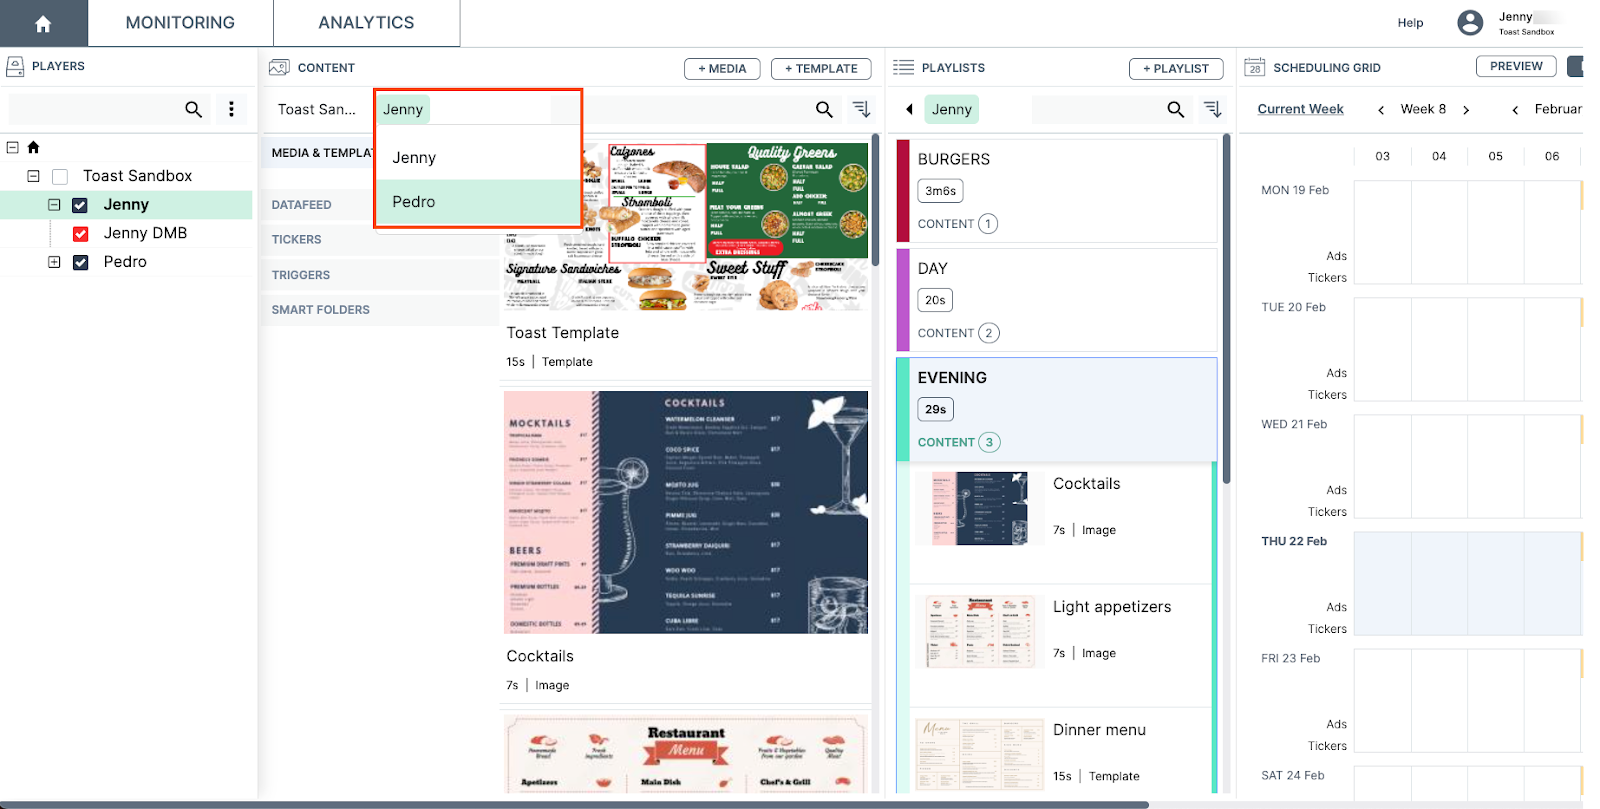
Each Delphi customer has their own content library within the Insight Engage Platform. You can access the content library from the Content window. Within the content library, there are hierarchies with various permissions. The top level is global, and the lower levels are considered “local”. To make content shareable with lower levels, import and share the content at a higher level.
For example, in the image below, the top level is the domain, and “Jenny” and “Pedro” are the groups/restaurant locations.
Note: You can toggle between locations by selecting the group/restaurant name.
Within the Content window, the following default categories are available for easy media editing:
Note: You can create sub-folders under some of the categories by right-clicking on the category. This opens the content menu where you can add a new sub-folder or edit an existing one.
Media & Templates
The Media & Templates category is where you can view your current media assets and upload new assets. You can drag and drop assets from your file directory into the category or you can select the +MEDIA or the +TEMPLATE buttons to upload new assets or templates.
Datafeed
The Datafeed category is where you can view datafeed XML files. For example, this is where you can view the XML file that contains the GUIDs and prices of various items in your menu. To add a new XML file or a Datafeed type, select the +DATAFEED button to open the Feed Manager dialog box.
For more information on datafeed, contact your Toast account manager.
Tickers
| This screen is designed for retailers and retail use. This screen is not used to upload content to the Insight Engage Platform. |
The Tickers category is where you can insert graphics or live tickers, such as news tickers that are commonly seen scrolling at the bottom of a television or computer screen. Tickers are not scheduled playlists and are only displayed when a playlist is configured. The Tickers category is separated into Published and Not Published folders. Content in the Not published folder cannot be used until it is moved to the Published folder.
Triggers
The Triggers category is where you view available triggers (action-based rules). The Triggers category is separated into Published and Not Published folders. The Published folder contains triggers available for use. Content in the Not published folder cannot be used until it is moved to the Published folder.
Smart Folders
The Smart Folders category contains various folders, including:
- Tagged: This folder shows assets that have been tagged.
- Untagged: This folder shows assets that have not been tagged.
- To be approved: This folder shows assets that require approval before they can be published.
- Expired: This folder shows assets that have expired.
- Edited last month: This folder shows assets that were edited in the last month.
Upload Content to the Content Window
Note: There are no limitations on the size or resolution of your media; however, Delphi Support recommends that your media asset be 1088x1920 (portrait) or 1920x1080 (landscape).
You can upload your media assets by either dragging and dropping your assets into the Content window or by selecting the +MEDIA button to open your file directory. Note that you can drag and drop content into the Content window even if your media player is displaying a red or gray connection status.
- In the Content window, navigate to the Media & Templates category.
- Right-click the Media & Templates category to open the content menu. Note that if you are in the top-level (domain) of the hierarchy, and choose to upload content at this level, it will be available for use by groups and media players under the domain.
- From the content menu, select the Add button. The content menu lists the various media types that you can upload. You can upload the following media types:
- Folder
- Media
- URL
- Template
- Video stream
- HDMI input
- Advertising
For example, if you choose to upload Media, this opens your file directory where you can upload .pngs, .jpgs or other file types. When you select your asset to upload, this opens a status bar that shows the status of your upload. Once complete, the uploaded media appears in the Media & Templates category.
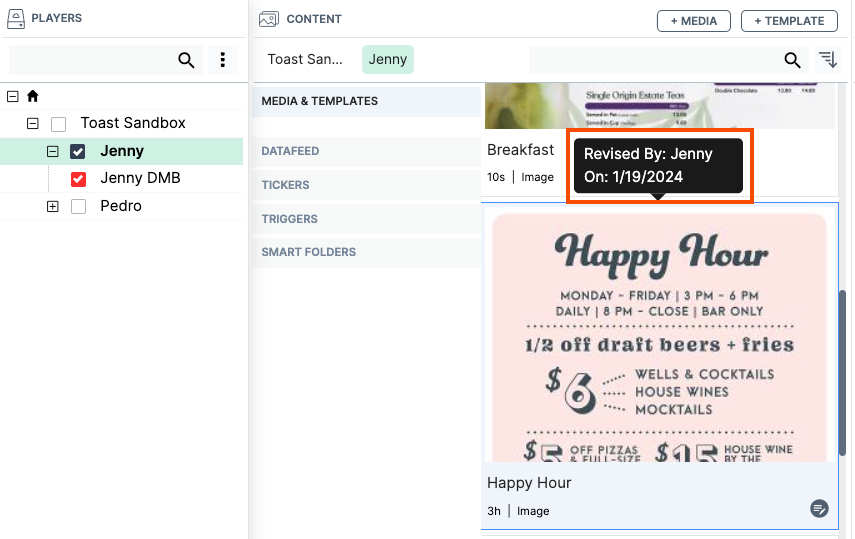
Each uploaded asset displays the following information:
- Asset name
- Default duration time
- Type of asset
Note: If you hover your cursor over the asset, you can view the last user who updated the asset as well as the date of the last update.
Edit Content in the Content Window
You can edit uploaded assets in the Content window.
Note: You can quickly edit your asset by right-clicking the asset to open the content menu. From the content menu, you can add, remove, edit, copy or cut an asset.
- In the Content window, select the asset you want to edit.
- Select the Edit button at the bottom right of the asset to open the content details screen. If you are editing a template, this opens the Template Designer. In the content details screen, you can scroll through four screens that allow you to configure and customize your asset. On these screens, you can:
- Edit your asset
- Preview your asset
- Upload or download your asset
- Configure your asset playback settings
- Configure your Datafeed Manager
- Configure your advertising settings
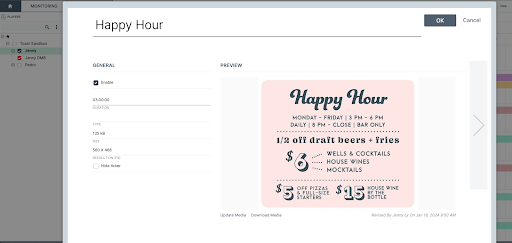
There are four advanced setting screens that you can scroll through to configure and customize your asset:
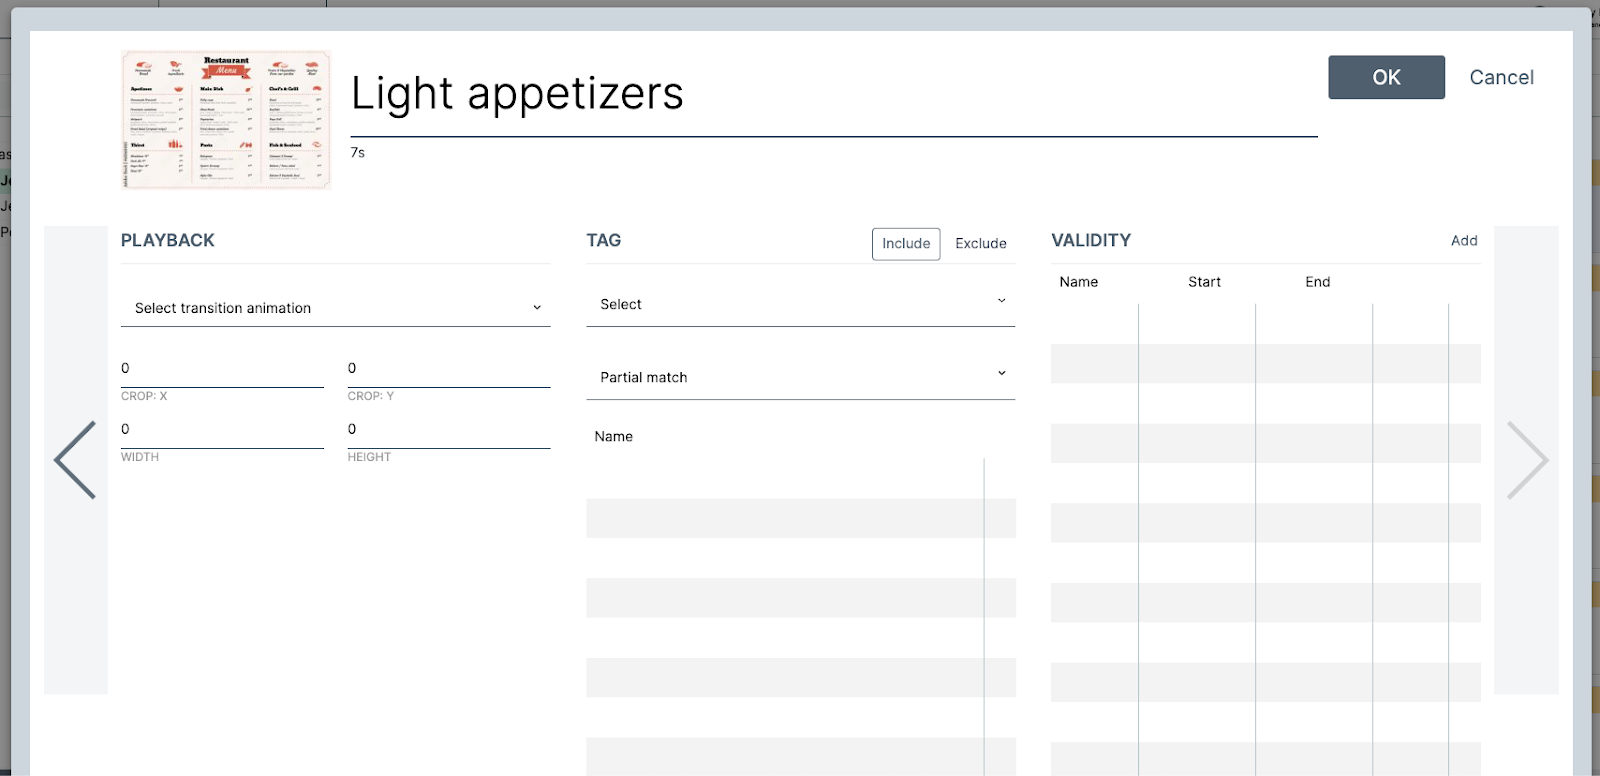
- Media properties screen (as seen in the image above)
- Advanced settings screen
- Media editing screen
- Keywords and advertising screen
Click on the side arrow at the right of the content details screen to scroll through screens.
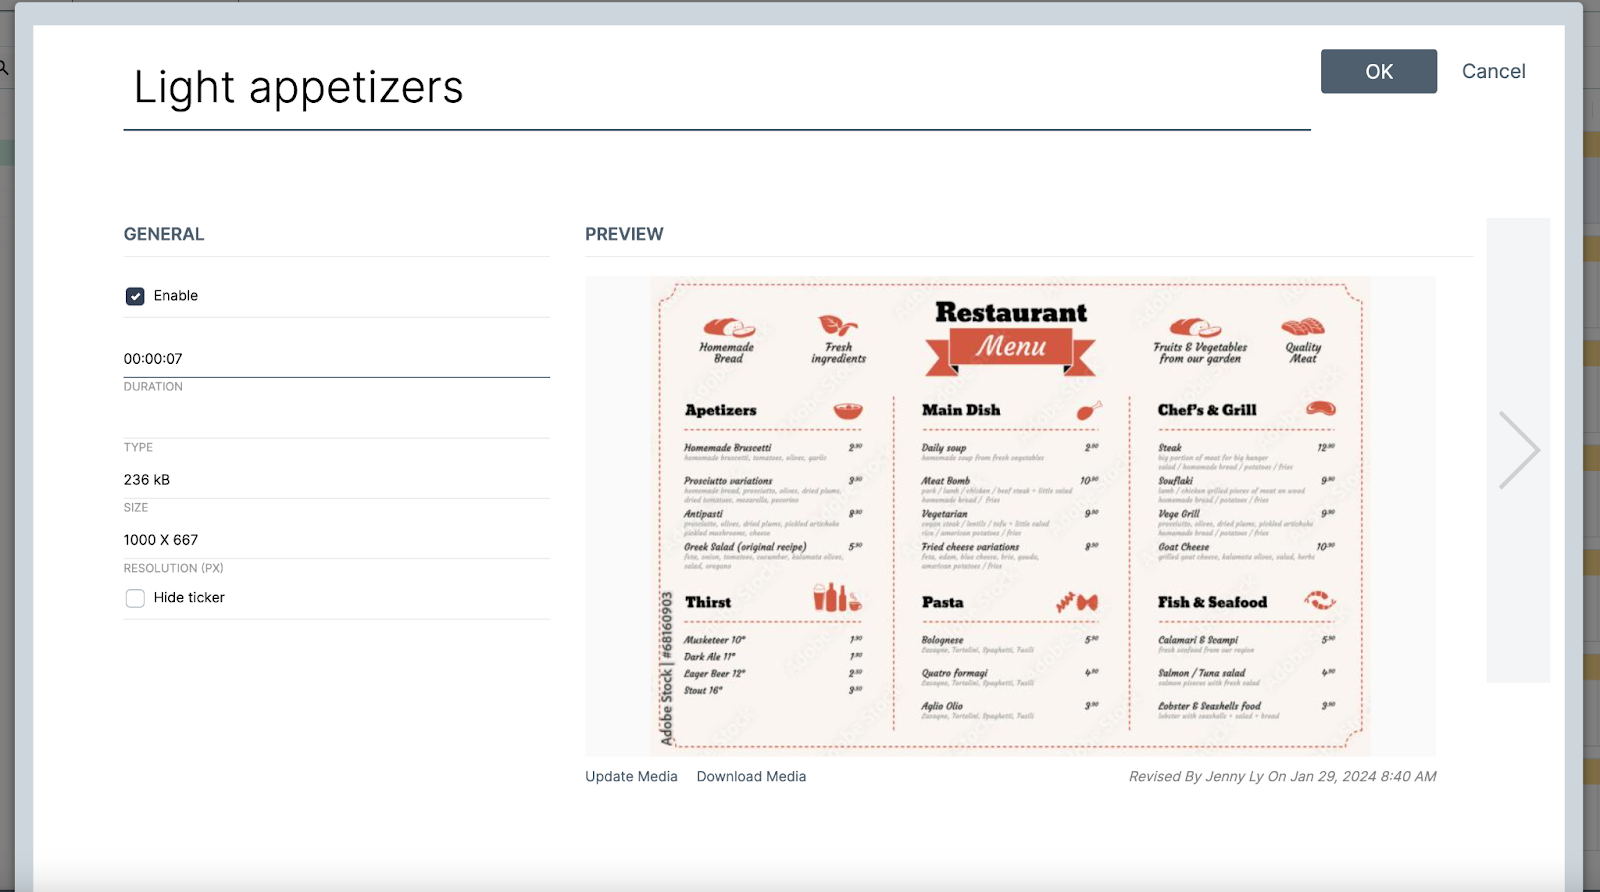
Media Properties Screen
On the Media properties screen, you can:
- Rename the asset
- Choose to enable or disable the asset. If the Enable box is checked, this means the content is playable. All new content is enabled by default.
- Set the duration that the asset will play on a playlist. The default duration is seven seconds.
- Note: If you have multiple assets in a playlist, the duration is the time that the asset will play before transitioning into the next asset.
- View asset details (size and resolution) and total bit rate and frame rate (for video only)
- Hide ticker. If the box is checked, this means the published ticker is automatically removed from the screen.
- Update or download the asset.
- Preview the asset.
- View the date and time the asset was last updated.
Select the OK button to save your changes or the Cancel button to cancel out of the screen.
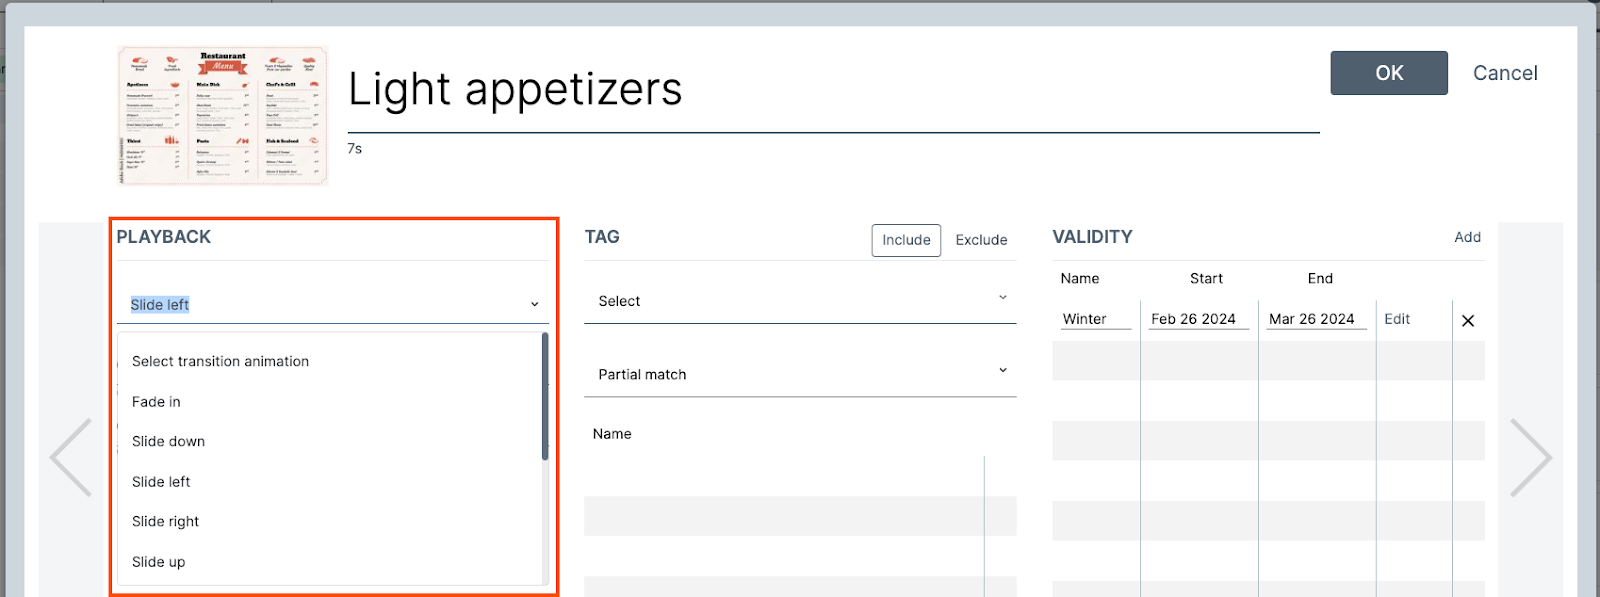
Advanced Settings Screen
On the Advanced settings screen, you can:
- Select your transition animation
- Select what frame you want to begin and end the video (for video only)
- Adjust the size of your asset
- Create tags for easier organization of assets
- Set your validity periods
Setting transitions
You can set transitions to play between your assets:
- On the Advanced settings screen, under the Playback section, select your transition from the dropdown menu.
- Select the OK button to save your changes or the Cancel button to cancel out of the screen.
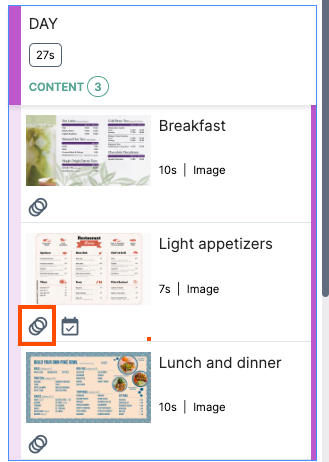
- The asset displays a gray three-ring icon at the bottom of the asset. This indicates that the asset has a transition associated with it.
- The asset displays a gray three-ring icon at the bottom of the asset. This indicates that the asset has a transition associated with it.
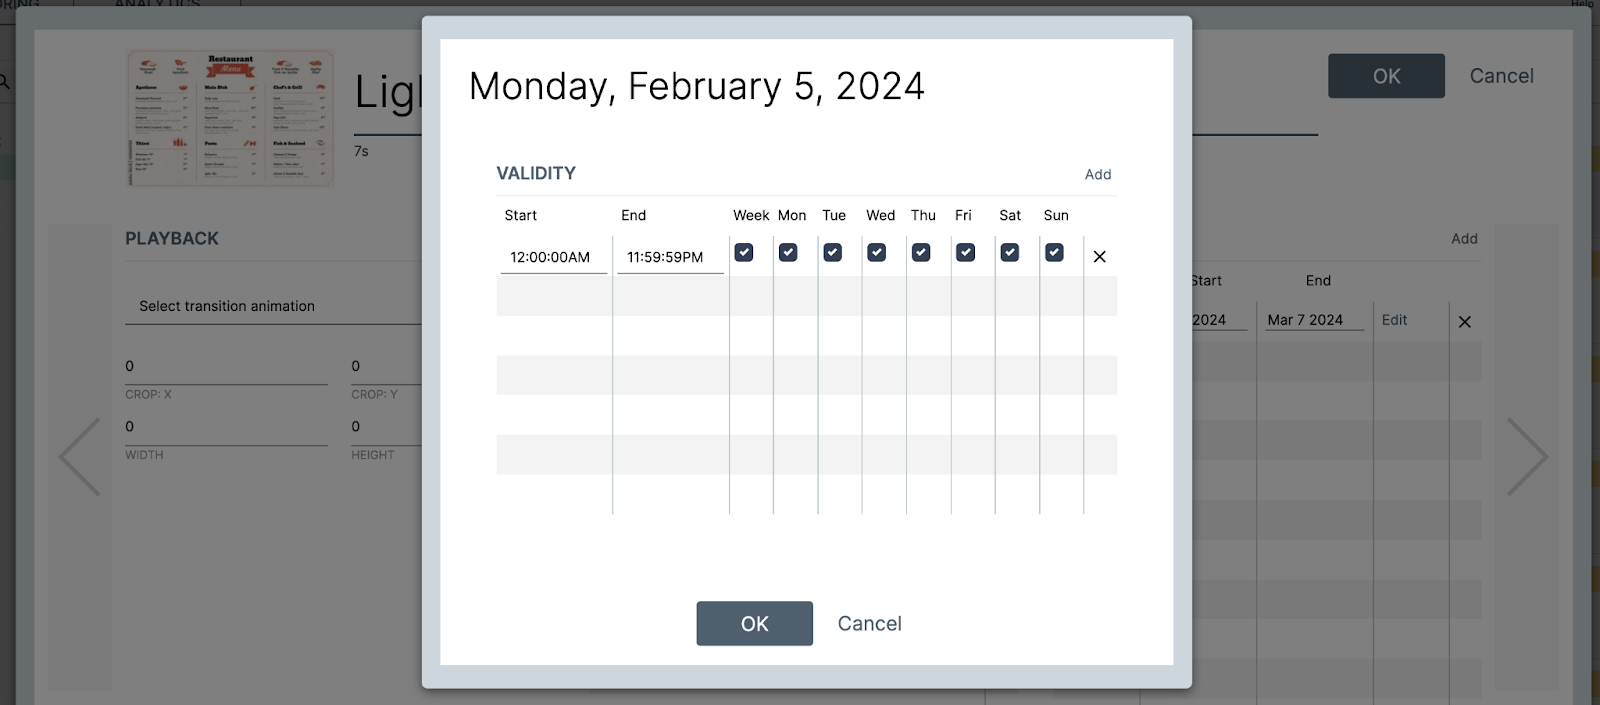
Set a Validity Period
Setting your validity period allows you to preload content or a playlist and have it only play on certain specific days or times. For example, you can have a holiday menu that is set to play from December 25th to December 31st, ending at 11:59 PM. You can set this to repeat yearly as needed.
Note: If you set a validity period, it will not appear as blocked off on the Scheduling Grid.
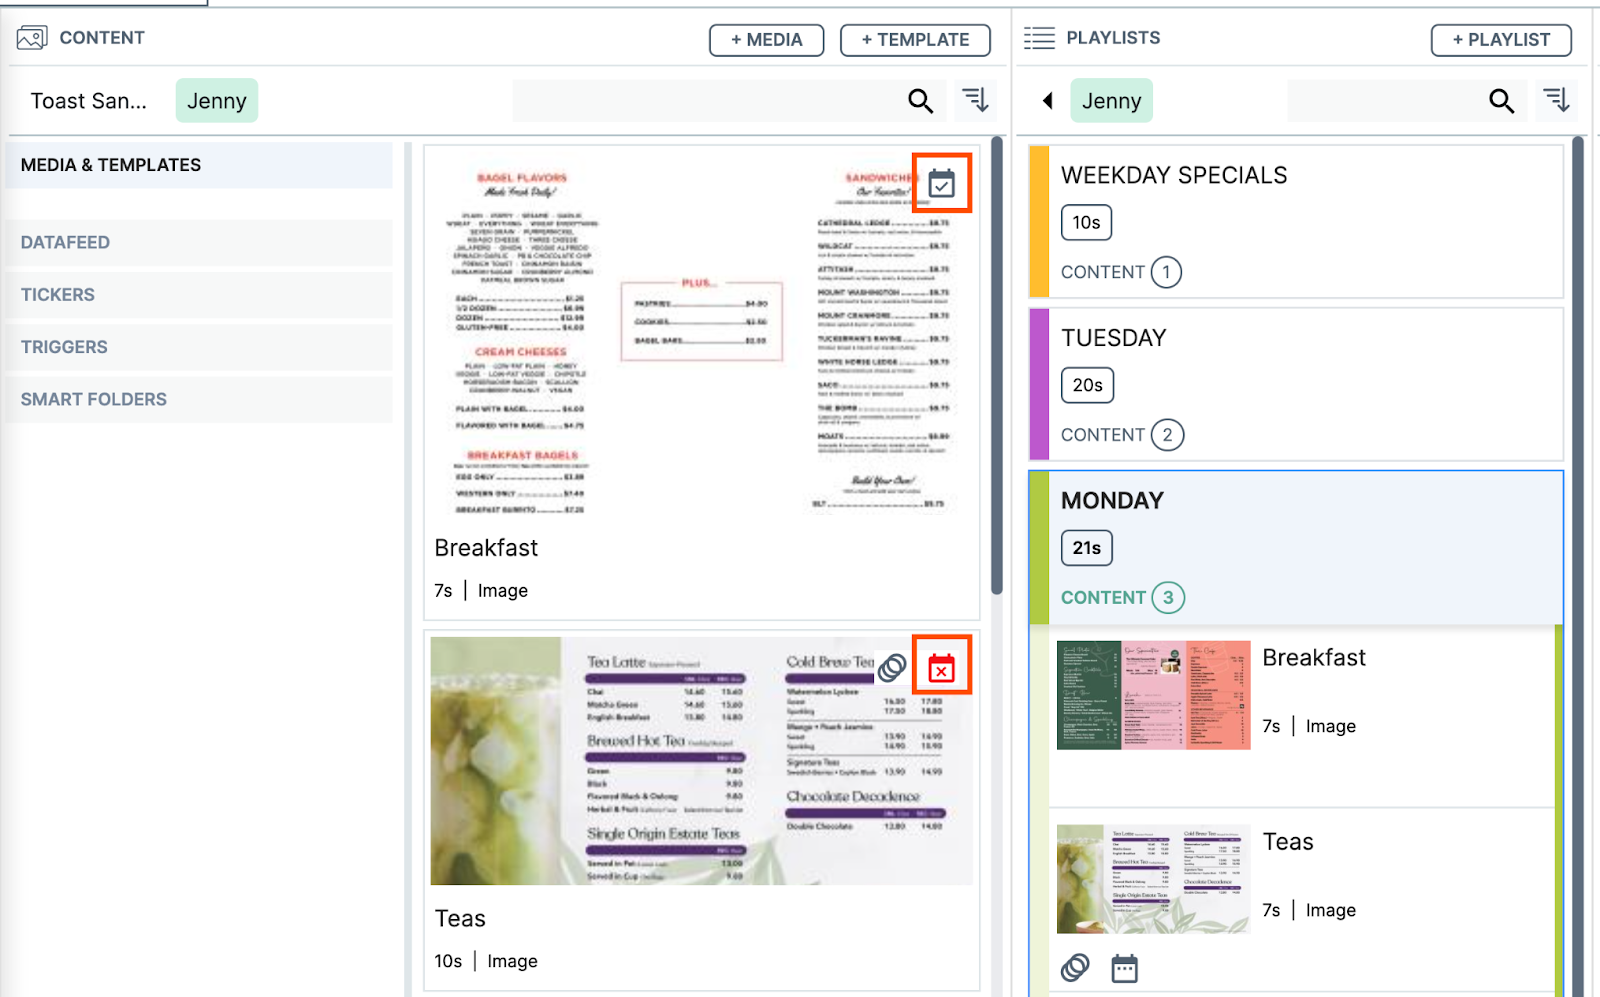
If you set a validity period, a checked calendar icon appears at the top of the asset. You can check the validity period for an asset by scrolling over the calendar icon to display a details window. If the validity period has expired, then the calendar icon displays a red "X" and the content will no longer be shown on your screen. To restore the asset, you need to remove the validity period or extend the expiration date.
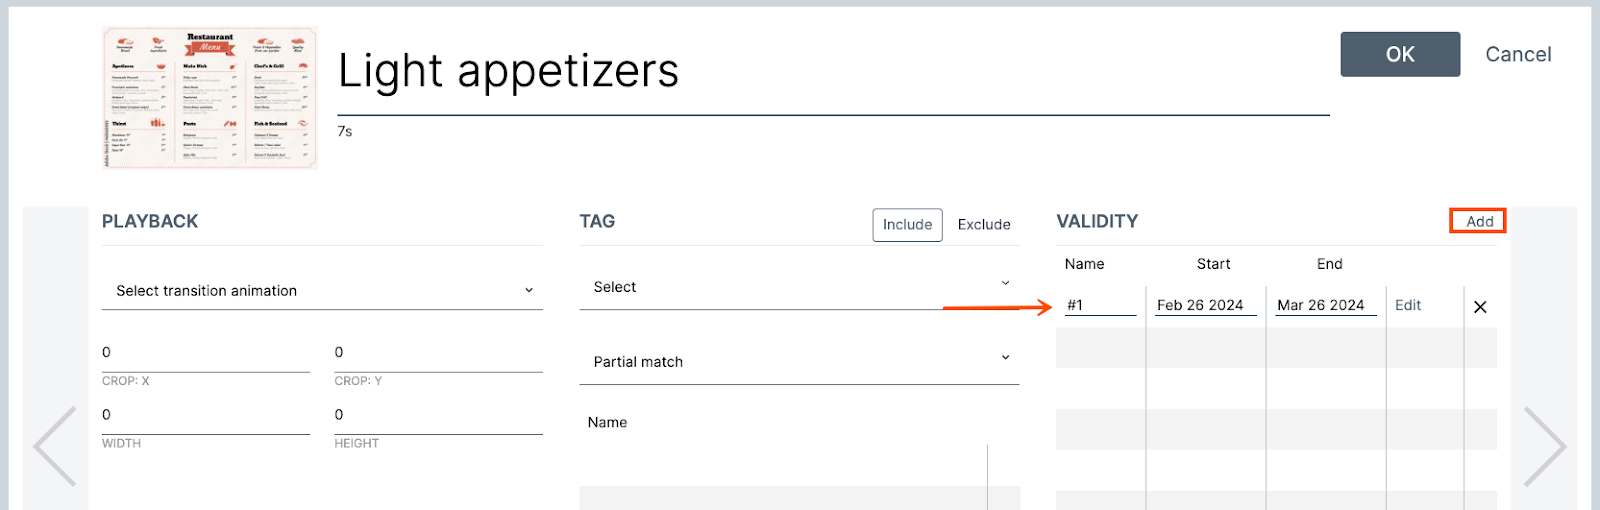
- On the Advanced settings screen, scroll to the Validity section.
- Select the Add button. This auto-populates a row that you can edit.
- Enter the name of your validity period or use the default name.
- Select the start and end dates for your validity period. You can enter your dates or use the calendar dropdown menu to select your dates.
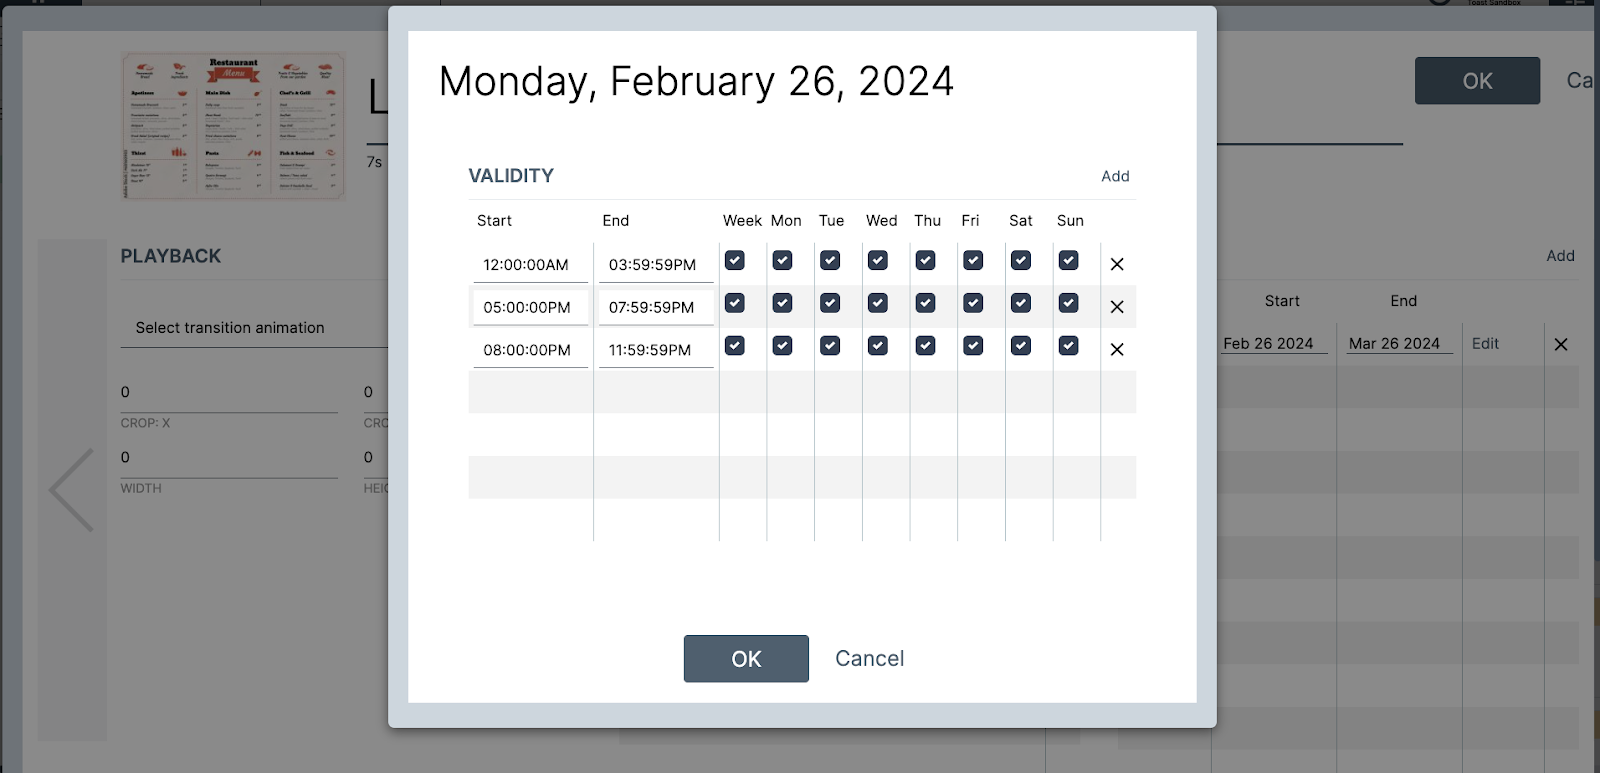
- In the row, select the Edit button. This opens the Validity dialog box. In the dialog box, you can set your validity period. You can add multiple validity periods by selecting the Add button at the top right of the dialog box.
- Select the OK button to save your changes or the Cancel button to close out of the dialog box. After you have successfully set your validity period, add the asset to a playlist. The asset displays a gray calendar icon at the bottom of the asset. This indicates that the asset has a validity period associated with it.
Media Editing (Data Feed Manager) Screen
| This screen is designed for retailers and retail use. This screen is not used to upload content to the Insight Engage Platform. |
On the Media editing (Data Feed Manager) screen, you can set playback rules for your content. For example, you can set a rule to play a summer menu if the temperature goes above 90 degrees Fahrenheit.
Keywords and Advertising Screen
| This screen is designed for retailers and retail use. This screen is not used to upload content to the Insight Engage Platform. |
On the Keywords and advertising screen, you can:
- Enter keywords.
- Set advertising metadata fields. This may help report purposes.
- Add attached files. This allows you to attach external files to your content.
To upload the attached files, select the Upload files link to open your file directory.
Best Practices
- Assets uploaded to the Insight Engage Platform should not exceed the following dimensions:
- Landscape: 1920x1080
- Portrait: 1080x1920
- Delphi Support recommends that you name your assets, groups, folders, and any other content within the Insight Engage Platform as descriptively as possible. This can reduce the possibility of mislabeling or misplacing content.
- When creating folders under your domain, Delphi Support recommends that you only create one sub-folder. This allows for easier search of assets in the Insight Engage Platform.