Optimize Toast Websites
Last updated: Oct 20, 2026, 8:49 AM
- Toast Websites Customization Overview
- Before You Begin
- Goal-to-Feature Quick Find
- Update Your Website Design
- Customize Your Navigation Bar and Footer
- Add and Manage Pages
- Customize Modules and Sections on Your Pages
- Media for Toast Websites
- Banners and Pop-Ups for Toast Websites
- Add Events to Your Website
- Reservations Widget for Toast Websites
- Add Google Business Profile Reviews to Toast Websites
- Add an Untappd Beer List to Your Toast Website
- Add a Catering Form to Your Toast Website
- Add a Gift Cards Purchase Page to Your Toast Website
- Add External Embedded Widgets
- Generative AI Content Tools for Toast Websites
- Configure Website Menus
- Customize Your Website Theme, Typography, Logo, and Favicon
- Preview and Publish Your Website
- Video Walkthrough
- Frequently Asked Questions
- Why Aren't My Edits Showing on My Live Website?
- How Do I Change the Hours of Operation That Show on My Website?
- How Do I Hide or Unhide a Page?
- How Do I Add Google Analytics or Tracking Code to My Toast Website?
- Where Do I Change My Logo and Banner Image?
- Can My Website Look Different on Mobile and Desktop?
- Does the Untappd Integration Cost Anything?
- Related Articles
Toast Websites Customization Overview
From the Site Editor (also called the editor or your website editor), you can customize the design, navigation bar, footer, pages, modules, menus, banners, and pop-ups on your website. You can also embed integrations such as Untappd beer lists, Google Business reviews, catering forms, gift card purchase pages, and external HTML widgets. Use generative AI tools and the Media Gallery to add text and visuals that match your restaurant's brand.
Note: The Site Editor now features a full-screen, inline layout. Content changes can be made visually directly on the page preview, while the sidebar is streamlined for layout and global settings.
Before You Begin
Applies to: Toast Websites
Permissions needed:
- 6.9 Websites Setup permission — required to edit your Toast Website
- 6.4 Publishing permission — required to publish changes at every location
What you will accomplish: Your live Toast Website will reflect your restaurant's brand, menus, integrations, and content.
Save and Publish model:
- Changes you make in the Site Editor save to a draft of your website.
- Your edits do not appear on your live website until you select Publish.
- If you (or an employee) cannot publish, see "Unable to Publish Changes in Toast Web" for guidance on the 6.4 Publishing permission and related troubleshooting.
Goal-to-Feature Quick Find
Use this table to find the right section for what you want to change.
| What You Want To Do | Where To Go |
|---|---|
| Change the banner image on my online ordering page | See Banners and Pop-Ups for Toast Websites. Note: If you purchased Online Ordering Pro before February 2024, banners for your online ordering page are managed in a different surface. See "Optimize Online Ordering Pro With Page Banners". |
| Add a banner to the top of my website | |
| Add or remove a popup on my website | |
| Change hours of operations on website | Customize Your Navigation Bar and Footer > Customize the Footer |
| Edits not showing on my live website | Frequently Asked Questions > Why Aren't My Edits Showing on My Live Website? |
| Integrate Untappd with my Toast account | Add an Untappd Beer List to Your Toast Website. Note: For the Untappd for Business POS integration (which syncs menu data to your Untappd account), see "Get Started With the Untappd for Business Integration". |
| Menu not showing up on the website | Configure Website Menus >View-Only Menu Manager also see Why Aren't My Edits Showing on My Live Website? |
| Hide or unhide a page | Frequently Asked Questions > How Do I Hide or Unhide a Page? |
| Add Google Analytics or tracking code | Add External Embedded Widgets; also see Frequently Asked Questions > How Do I Add Google Analytics or Tracking Code to My Toast Website? |
| Change my logo or favicon | |
| Embed a catering form | |
| Add gift cards on the website | |
| Use the AI to write website content | |
| Make my website look different on mobile | Frequently Asked Questions > Can My Website Look Different on Mobile and Desktop? |
| Connect Google reviews to my website | |
| Embed an external widget or HTML | |
| Change banner text on guest online ordering | |
| Remove a menu from the website |
Update Your Website Design
Navigate to Toast Web > Websites > Edit Site to make site-wide changes to your website logo, colors, or text. The Site Template option will be grayed out after your initial Toast Websites setup, but you can change your layout at any time by using the features within the Site Editor. See Customize Modules and Sections on Your Pages in this article for more details.
Customize Your Navigation Bar and Footer
You can now select and edit your navigation links directly on the page preview. The left-hand sidebar menu remains available for managing complex, site-wide navigation structures and drop-downs. Changes you make to your navigation bar appear on all pages of your website, so you don't need to update it on each individual page.
Update the Nav Bar
In the Site Editor, select the navigation bar to open the Update Nav Bar menu on the right side of the screen.
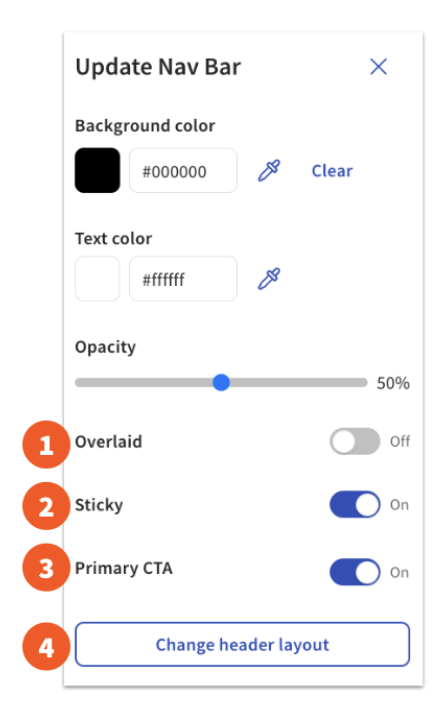
- Enabling Overlaid moves the navigation bar as a layer on top of the page content. When this is disabled, the navigation bar is a separate element, and the page content starts directly underneath it.
- Enabling Sticky keeps the navigation bar visible at the top of the page, even when someone scrolls further down. When this is disabled, the navigation bar will not be visible if someone scrolls down the page.
- Primary CTA is a stand-out button that you can add to your navigation bar. Enable it and then select the button itself to update what it links to (such as your Online Ordering menu).
- You can update your header layout to change how the logo and links are arranged.
Note: You can also choose whether to display the shopping cart on each page by enabling Show cart. Be sure to Publish your changes.
Update Navigation Links
If you have a navigation bar style with links showing, selecting those links opens the Update Nav List window, where you can rearrange, hide, edit, or delete the pages that show in your navigation bar. Dragging a page to the right underneath another page creates a drop-down menu on your navigation bar.
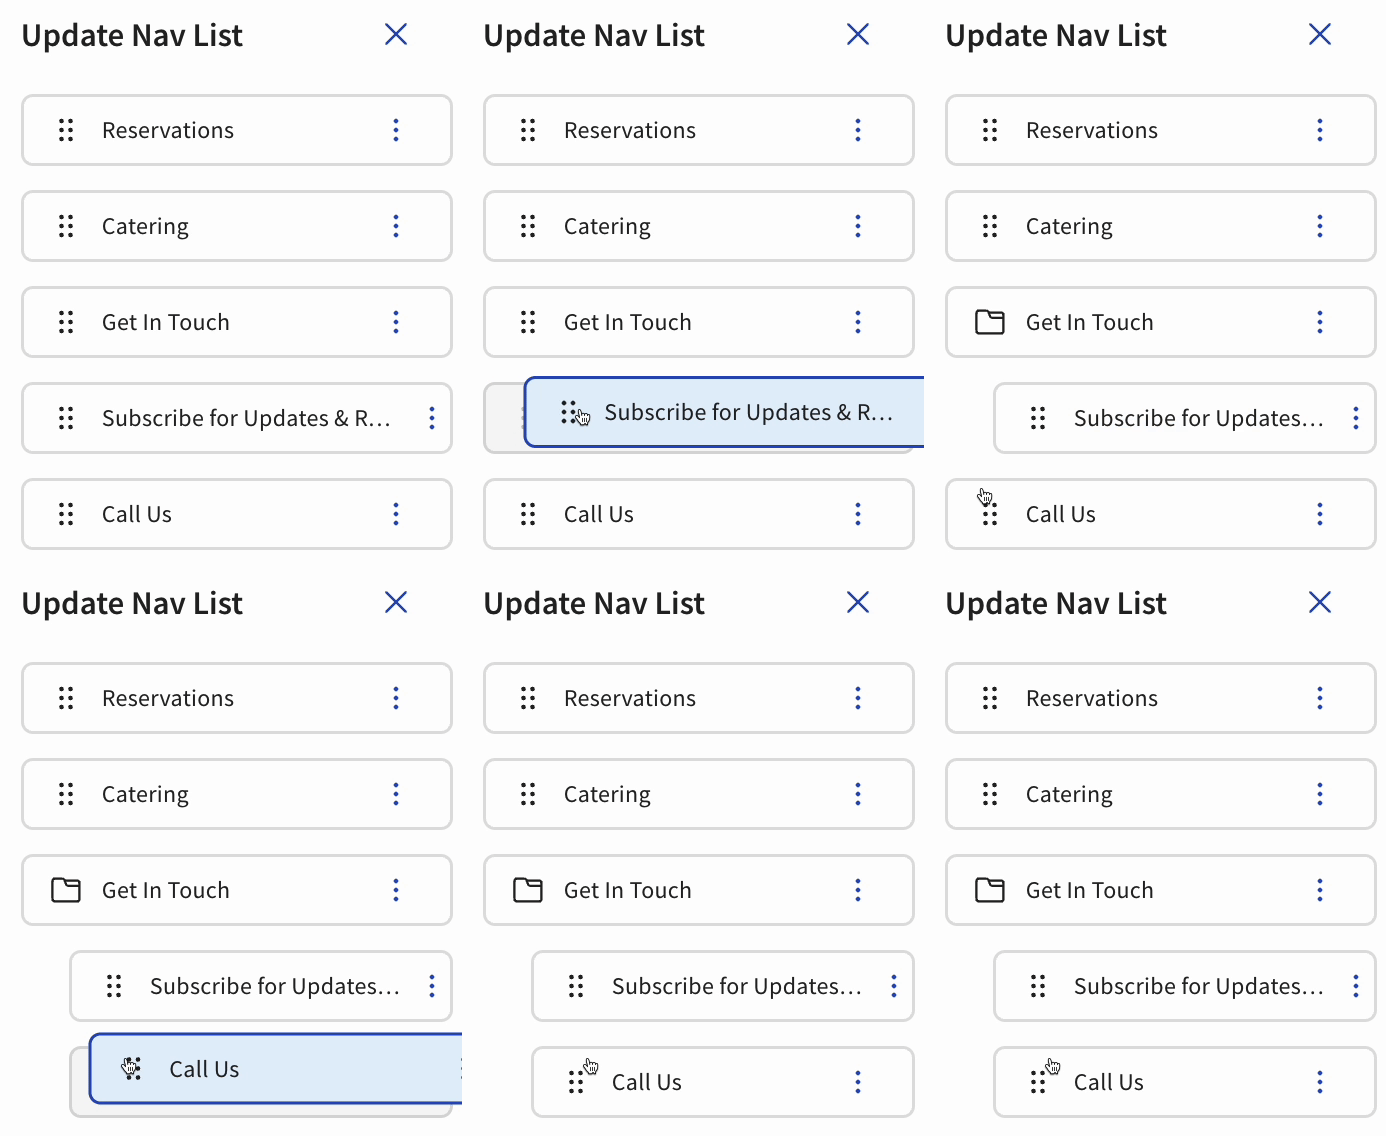
To update where a navigation link points or to create a new navigation menu link, follow these steps:
- In Toast Web, navigate to Toast Web > Websites > Edit Site.
- From the left-hand side navigation bar, select Configure site-wide modules.
- Under Global Elements, select Navigation.
- Scroll down to Nav List.
- To update where an existing menu link points, select the 3 dots next to your menu name, then select Edit. A pop-up window appears showing where your selected menu is currently linked to. Enter your new link in the Link field, then select Submit.
- To create a new navigation menu link, scroll down and select + Add link. Choose a link from your existing link list, or select Add my own link and enter your navigation menu name and link. Select Add link.
- Save and Publish your changes.
Expected outcome: The updated or newly created navigation link appears in your navigation bar on every page of your live website after publishing.
Customize the Footer
Selecting your footer lets you customize the information that shows at the bottom of all of your website pages.
Select + Add link to add a social media URL for your restaurant — the icon will automatically be added to the footer so that your guests can easily access your restaurant's social media pages.
Enable Other Settings as desired to show your hours, location, menu links, and more on your footer. Except for social media links (which you can add yourself), the information in the footer is automatically taken directly from your Toast Web setup. If you scroll down on the Update Footer window, you'll see quick links to update your location name or hours if needed.
Note:
- The toggle for Locations must be enabled for the Footer section to show on the website.
- When encountering broken links or 404 errors, verify the URL prefix to ensure it includes "https://" at the beginning. This check can resolve connectivity issues and ensure proper access to web resources.
Note: The hours editing sidebar does not appear on the Online Ordering or Menu pages. To edit hours visible on those pages, edit the footer from another page (for example, your homepage or About Us page) and select All hours from the footer. Make the necessary changes and ensure that you Save and Publish them.
Looking to customize your footer area even more? See Customize Your Website Theme, Typography, Logo, and Favicon in this article for more information.
Add and Manage Pages
Use the pages drop-down menu at the top of the Site Editor to add, delete, and rearrange your website pages.
For your Menu and Online Ordering pages, the Change Template option appears at the top of the Editor. This lets you decide whether to display images and how the images and menu items appear on these pages. You will only be adjusting the styling of your menus. If you need to change names, prices, or menu groups, do that with the usual Toast menu editing tools.
If you select +Add new page from the page drop-down, you'll see the following options for creating new pages for your website:
- Content — creates another page similar to your homepage, where you can edit all the modules within the page.
- Form — creates a page that allows you to collect submissions from your guests (such as a "Contact us" form). When creating a form, you'll enter an email address that will receive all submissions to this form. You can edit all the form fields on this page (and make them required fields if necessary) and update the submit settings (the email address that receives form submissions) at any time. If you need to update the email address these form submissions are emailed to, do so here.
- NEW! PDF Attachments - You can now add a PDF upload field to any form on your website. This is ideal for creating a hiring or job application experience where applicants can upload resumes. Note: For security and data compliance, submitted PDF files are only stored on Toast’s systems for 30 days. You must download any attachments within this timeframe.
- PDF — allows you to upload a PDF as a separate page on your website. This can be helpful for things like special holiday menus or events.
- Loyalty — if your restaurant uses Toast Loyalty, you can create a dedicated loyalty signup page with consistent branding and an appropriate URL. All configurations and legal copy are pulled directly from your Toast Loyalty setup.
- Email Marketing — if your restaurant uses Toast Marketing, you can create a mailing list signup page with consistent branding and an appropriate URL. All configurations and legal copy are pulled directly from your Email Marketing setup.
- Catering — if your restaurant uses Toast Catering & Events, you can create dedicated pages on your site to embed your catering intake forms. All content is pulled directly from your Catering & Events forms, and all edits to those forms are reflected on your site.
- Gift Cards — if your restaurant uses Toast Gift Cards, you can embed a page on your site that allows for gift card purchases. All content and configurations are managed in your Gift Card setup.
- Blank Page — creates a page without any content blocks, which you can add to and customize as desired.
Customize Modules and Sections on Your Pages
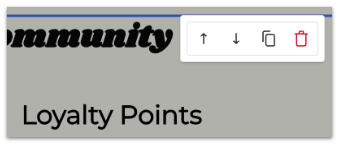
Modules (also called sections) are the blocks of content that make up your website's pages. Hovering over a module gives you the option to move it up or down on the page, delete it, or duplicate it.
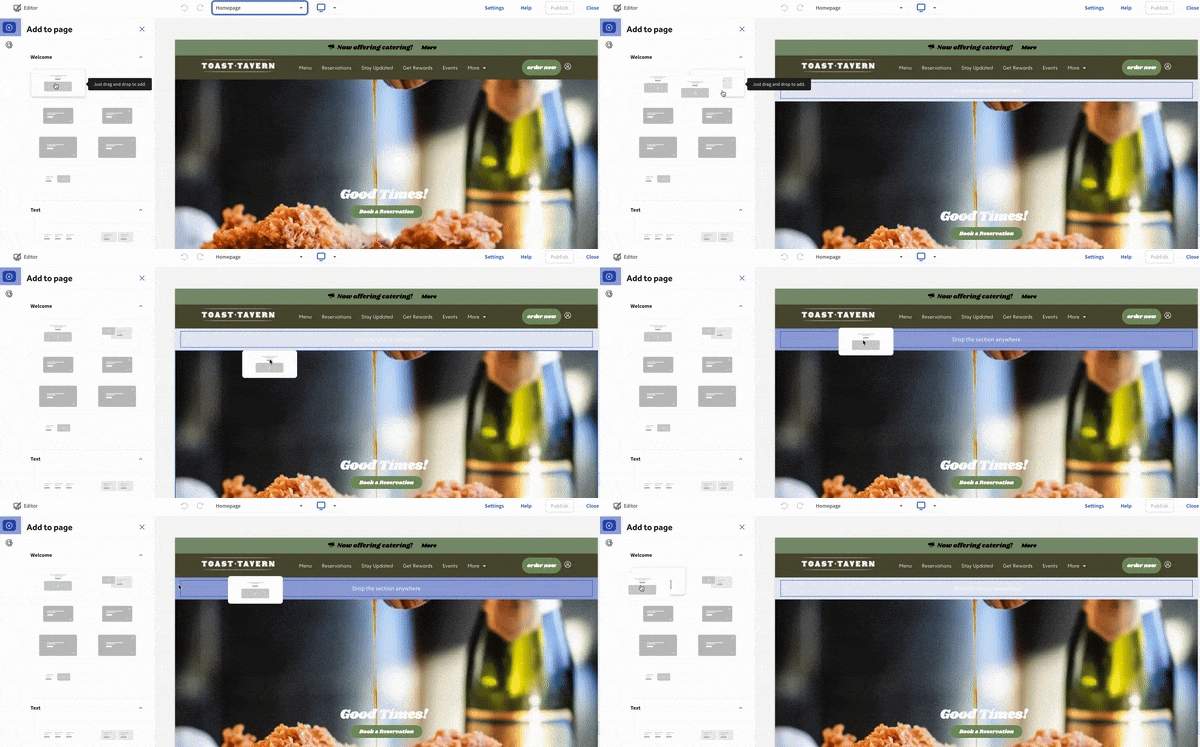
You can also drag a website module from the left-hand sidebar of the editor into the main body of the editor to add it to your website. Once the module is added, drag and drop within the editor to rearrange the sections.
You can select specific elements within a module to edit its appearance, such as the background color, spacing, style, and alignment, where applicable. Selecting a button lets you update the text, styling, and the link.
To update text within a module, select the text itself. Full-screen inline text editing allows you to change and format your text directly on the page preview without needing to use a sidebar menu.

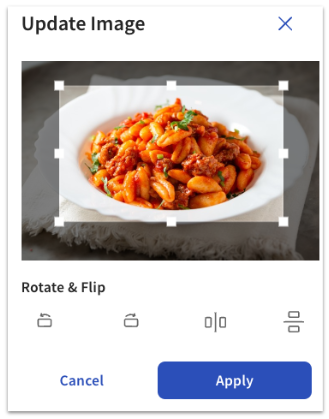
Hovering over an image gives you the option to quickly replace it, or you can select the image to open the Update Image menu on the right side of the screen for full editing options.
The image editor allows you to crop, rotate, or flip an image right within the Site Editor, so you can make sure the right content shows to your guests. When you upload an image, Toast will automatically scan the photo and generate a description that you can use for alt text to improve accessibility and aid in search engine optimization. You can edit this alt text at any time. All uploaded images are stored in the Toast Websites image gallery, so any time you want to add or replace an image on your site, you can choose from any previously uploaded image, including any images uploaded for your menu items.
To add a new module, select the arrow icon near the Websites navigation bar on the left side of the screen, and select the type of content you'd like to add: Welcome, Text, Single Image + Text, Multiple Images + Text, Image Carousel, Media, Testimonials, Events, Reservations, or banners and pop-ups.

Note: You cannot add modules to your Menu or Online Ordering pages.
To manage featured items and upsell recommendations, see the Enable Featured Menu Items and Upsell Recommendations section of Toast Online Ordering Pro: Menu Page Configuration.
Media for Toast Websites
Media Gallery
View all of your uploaded and social media (Instagram and Facebook) photos in one place from your Websites Dashboard.
- In Toast Web, navigate to Toast Web > Websites > Media Gallery.
- On the Upload tab, select +Upload from Computer or drag and drop files to add to your media gallery. You can upload or delete multiple files by selecting them from the Media Gallery or your computer and confirming your selection.
Note: The maximum size for image files is 5MB, and for videos, it is 50MB. You can add both photos and GIFs to this gallery. GIFs can be used anywhere a photo can be used on your Toast Website.
If you have not integrated Toast Websites with your Instagram account, you can do so within the Media Gallery in the Instagram tab. For more information, see Integrate with Instagram in this article. Once integrated, images from your Instagram account will populate in your media gallery.
Expected outcome: Your uploaded media is available in the Media Gallery and can be added to any page on your Toast Website.
Video Captions
When adding media to your Toast Website, you can use the video captions tool by following the steps below.
- In Toast Web, navigate to Toast Web > Websites > Edit Site.
- In the Site Editor, upload your video by dragging and dropping the video file on your site, by selecting +Upload from Computer, or by selecting your existing video on your page.
- Once the video upload is complete, navigate to Video Caption Upload.
- Upload your video caption file by dragging and dropping the SRT or VTT file on your site or by selecting +Upload from Computer.
- Publish your changes.
Note: The max size for video uploads is 50MB. The max size for video caption uploads is 50MB.
Expected outcome: Your video plays on your Toast Website with the uploaded SRT or VTT captions enabled for viewers.
Integrate with Instagram
If you have an existing Instagram account for your business, you can connect your Instagram account to your Toast Website. Once connected, you can import Instagram photos directly from your Instagram account into your Toast Website's media gallery, from which they can be added to your website.
Navigate to Websites > Settings & Integrations > Social Integrations and select Connect to Instagram. Next, you will be guided through the steps to connect your Meta account with Toast. Follow along with the prompts to upload pictures from your Instagram account into your Media Gallery.
Banners and Pop-Ups for Toast Websites
| Important: If you purchased Online Ordering Pro before February 2024, you manage banners and pop-ups from a different surface (Toast Web > Takeout & delivery > Branding & Customization) and not from the Site Editor. See "Optimize Online Ordering Pro With Page Banners" for those instructions. |
There are three types of banners you can add to your page: Promotional, Spotlight feature, and Persistent.
Promotional Banner
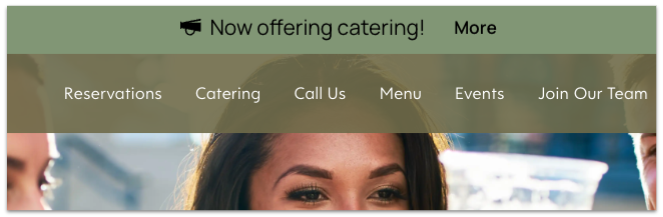
The Promotional banner (also called an announcement banner) appears below your navigation bar and can contain promotional text you'd like to highlight to your guests, or content from other parts of Toast Web (such as Toast Loyalty).
Spotlight Feature Banner
The Spotlight feature banner appears in a selected location on your page. You can add multiple spotlight features, and the banners will rotate between multiple banners every four seconds. Once you enable this mode, you can edit the background color, font, and placement, and you can select which of your Website pages this banner should be featured on. You can add a description, an optional URL link, and optional additional details.
Persistent Banner
The Persistent banner can be shown on mobile device website visits to promote a single specific action for customers.
Pop-Ups
Pop-ups are another way to highlight special announcements to your guests.
Add a pop-up:
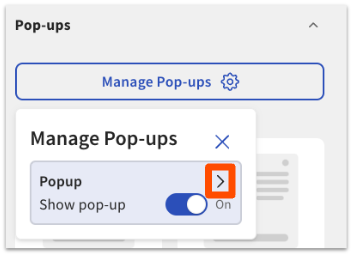
- In the Site Editor, select the arrow icon to open the Manage Pop-ups window.
- Select one of the Promos or Forms pop-up options.
- Select the arrow on the Manage Pop-ups window to show a preview of the pop-up within the Editor.
Expected outcome: A preview of your selected pop-up appears in the Site Editor.
Customize a pop-up:
- Select the pop-up on the Editor preview.
- Select the gear icon to customize your pop-up.
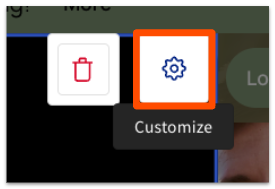
- Choose pop-up style, placement, pages to display on, and timing (immediately on page load, or after a specific number of seconds).
- If you're creating a pop-up form, enter the email address for form submissions and a success message that will appear to let your guests know that their submission was successful.
- Select Edit pop-up to change the text, images, and styling of the pop-up itself.
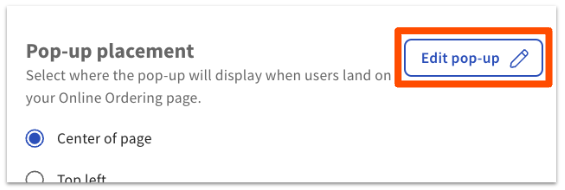
- Select Done to save your changes.
Expected outcome: Your customized pop-up displays with the selected style, placement, timing, and content on the pages you specified.
Enable or disable a pop-up:
- Open the Manage Pop-ups settings.
- Use the toggles to enable or disable a pop-up.
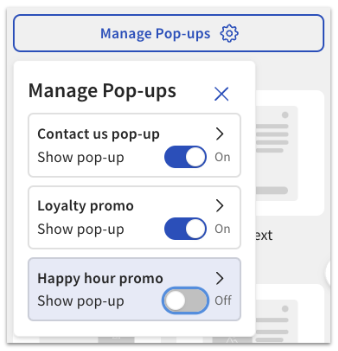
Expected outcome: The pop-up is active (or inactive) on your live website after you Publish your changes.
Remove a pop-up:
- Open the Manage Pop-ups settings.
- Disable the pop-up using its toggle, or select the pop-up and remove it from your website draft.
- Publish your changes.
Expected outcome: The removed pop-up no longer appears on your live website.
Add Events to Your Website
- In Toast Web, navigate to Toast Web > Websites > Your website.
- Select Edit Site.
- From the left-hand panel, navigate to Events.
- Drag and drop the event into the desired section of your website.
- Select the event box to adjust the following settings:
- Vertical spacing
- Background color
- Separating line
- Select +Add new event and input the following details:
- Event Name
- Event description
- Date
- Time
- Link
- After completing your edits, select Add, then select Save in the top right corner to apply your changes.
Note: A maximum of 10 events can be added in the Add Events section on the Websites page.
Expected outcome: Your event appears in the Events module on the page you added it to, with the details you entered.
Reservations Widget for Toast Websites
When using the Reservations widget, guests can submit reservations on your website based on your Toast Tables settings. This also includes the ability to require a deposit for reservations. See "Get Started With Toast Tables Deposits" for more information.
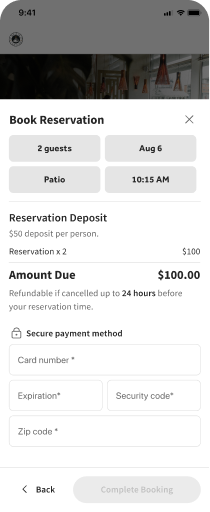
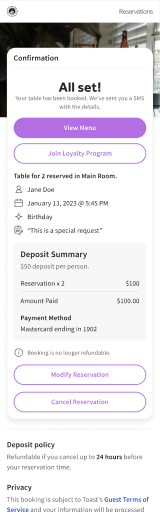
Want more information on Toast Tables? See "Get Started With Toast Tables".
Add Google Business Profile Reviews to Toast Websites
When Google Reviews are connected to your Toast Website, Toast will automatically display your recent 4- and 5-star ratings so guests can see what others have shared about your business. Every time you receive a new 4- or 5-star review, your website will automatically update. Please note: You must have a Google Business Profile already created to display your business's reviews on your website.
- In Toast Web, navigate to Toast Web > Websites > Editor & Branding.
- Select Edit Site.
- If you are adding Google Reviews for the first time, select +Add from the left navigation.
- Note: Once added, Google Business testimonials can be customized and updated inline directly within your full-screen editor preview.
- Drag and drop the Testimonials module into your desired section.
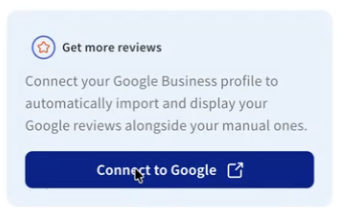
Note: If you have not connected your Google Business Profile to your Toast Website, you will be prompted to do so when you drag and drop the Testimonials module in your Site Editor. If your Google Business account is already connected in the Google Management settings, no further connection is required.
- Select I agree to the following Toast terms, then select Connect Google.
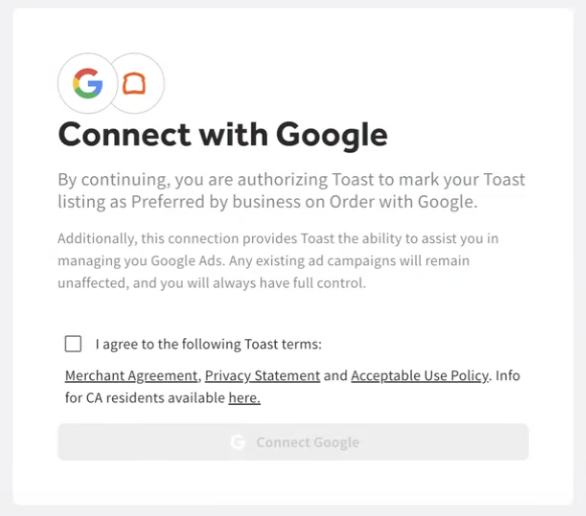
- Once connected, the 6 highest-rated reviews will be displayed on your website.
- Save and Publish your changes.
If you have added Google reviews to your website and would like to disable the feature and/or add reviews manually, disable Show Google Reviews. Save and Publish your changes.
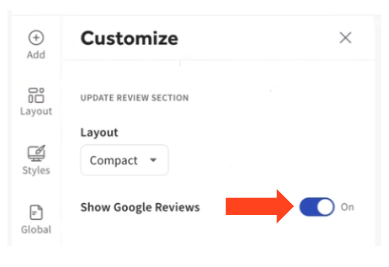
Expected outcome: Your highest-rated 4-star and 5-star Google Business Profile reviews display in the Testimonials module on your live website and refresh automatically as new qualifying reviews are received.
Add an Untappd Beer List to Your Toast Website
Note: This section covers embedding an Untappd Menu Page on your Toast Website using your Untappd Location ID and Theme ID. It is not the same as the Untappd for Business POS partner integration that syncs menu data to your Untappd account. For the partner integration, see "Get Started With the Untappd for Business Integration".
Note: This feature is only applicable to customers in the US.
Integrate your Untappd Beer List into your Toast Website so guests know what drinks you have available at your restaurant.
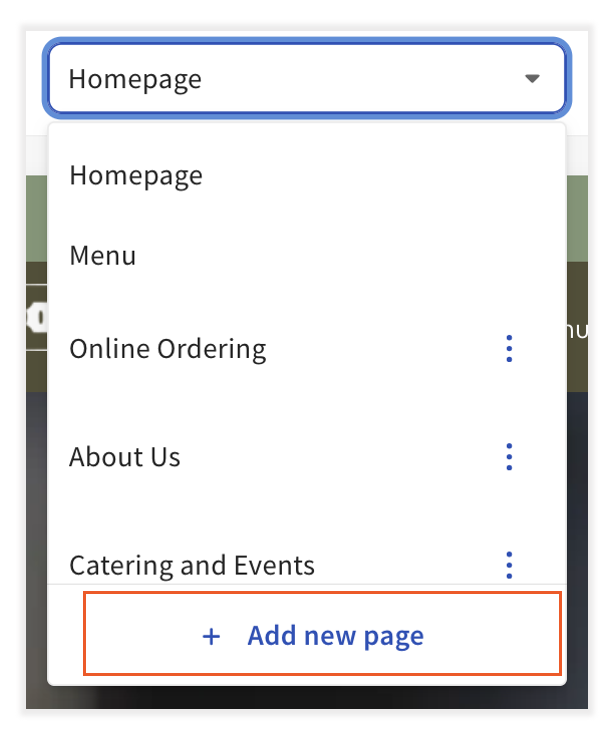
- Select Edit Site, then from the Homepage drop-down menu, select +Add new page.
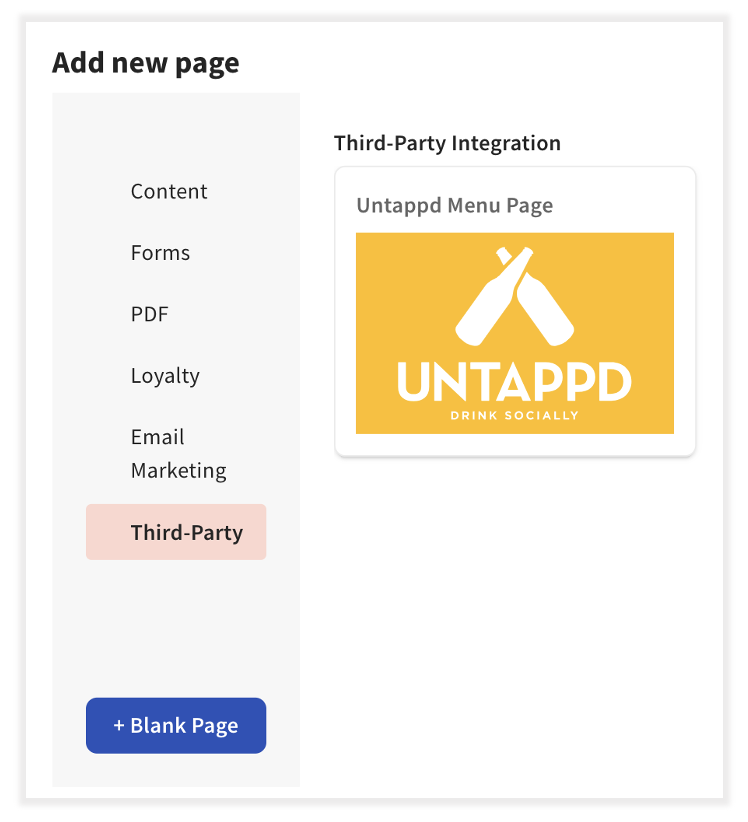
- Select Third-Party, then Untappd Menu Page, then Submit.
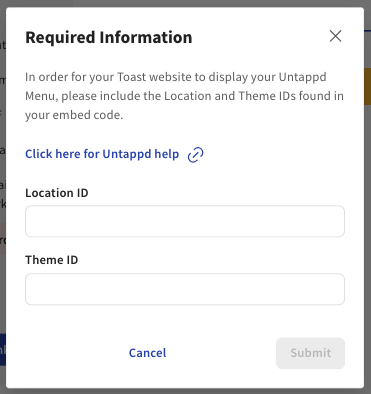
- Enter your Location ID and Theme ID, then select Submit.
Note: If you need assistance locating your Location ID or Theme ID, select the Click here for Untappd help link or visit the Untappd website at Website Embed: Adding Menus to your Website.
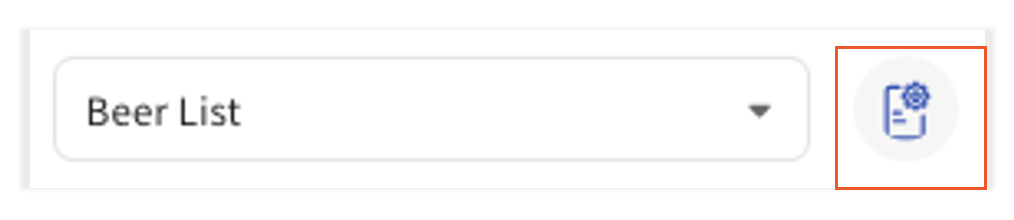
- Once submitted, you will have an Untappd Beer List added to your website. View it by navigating to the Site Editor and selecting your beer list menu from the Homepage drop-down menu. To make changes, select the edit icon next to your beer list menu page.
Note: The content and appearance of your Untappd list are managed through your Untappd account. To update them, visit Untappd and make your changes there. Those changes will automatically be reflected on your Toast Website. Untappd is not currently integrated with Toast Menu functionality; updates made to one will not be reflected in the other.
- Once complete, Publish your changes.
Expected outcome: Your Untappd Beer List page appears on your live Toast Website and reflects the content configured in your Untappd account.
Does the Untappd Menu Page Embed Cost Anything?
Does the Untappd Menu Page embed cost anything? There is no additional cost to embed your Untappd menu on your Toast Website, but it is required to have the Untappd Integration. To learn more about Untappd and how it can benefit your business, check out Get Started With the Untappd for Business Integration for more info!
Add a Catering Form to Your Toast Website
- In Toast Web, navigate to Toast Web > Websites > Your website.
- Select Edit Site.
- In the top middle section of the page, open the Homepage drop-down menu and select +Add new page.
- The Add new page pop-up appears. From the left-hand panel, select Catering.
- Select the Catering form from the available options, then select Submit.
- A Page Name pop-up appears. Enter your desired page name and URL Path, then select Submit to finalize the process.
Note: To access the Catering form, you must have an active subscription for Toast Catering & Events.
Expected outcome: Your Catering form page appears in the page drop-down on your Toast Website and embeds your selected Catering & Events intake form.
Add a Gift Cards Purchase Page to Your Toast Website
- In Toast Web, navigate to Toast Web > Websites > Your website.
- Select Edit Site.
- In the top middle section of the page, open the Homepage drop-down menu and select +Add new page.
- The Add new page pop-up appears. From the left-hand panel, select Gift Cards.
- Select the Gift Card Purchase Page from the available options, then select Submit.
- A Page Name pop-up appears. Enter your desired page name and URL Path, then select Submit to finalize the process.
Note: To access the Gift Card Purchase Page, you must have an active subscription for Toast Gift Cards.
The Gift Card Image on the Editor’s Gift Card page populates from the Editor's Online Ordering Page Banner Image settings. To change this, work through these steps in order.
- In Toast Web, navigate to Websites > Select Edit Site.
- In the top middle section of the page, open the Homepage drop-down menu and select Online Ordering.
- Select Global > Page Header > select Image under Background options.
- Under Banner Image, choose Select Banner Image.
- In the Media Gallery, select your image or + Upload Media. Then select Confirm to finalize the process. After completing your edits, select Publish in the top right corner to apply your changes.
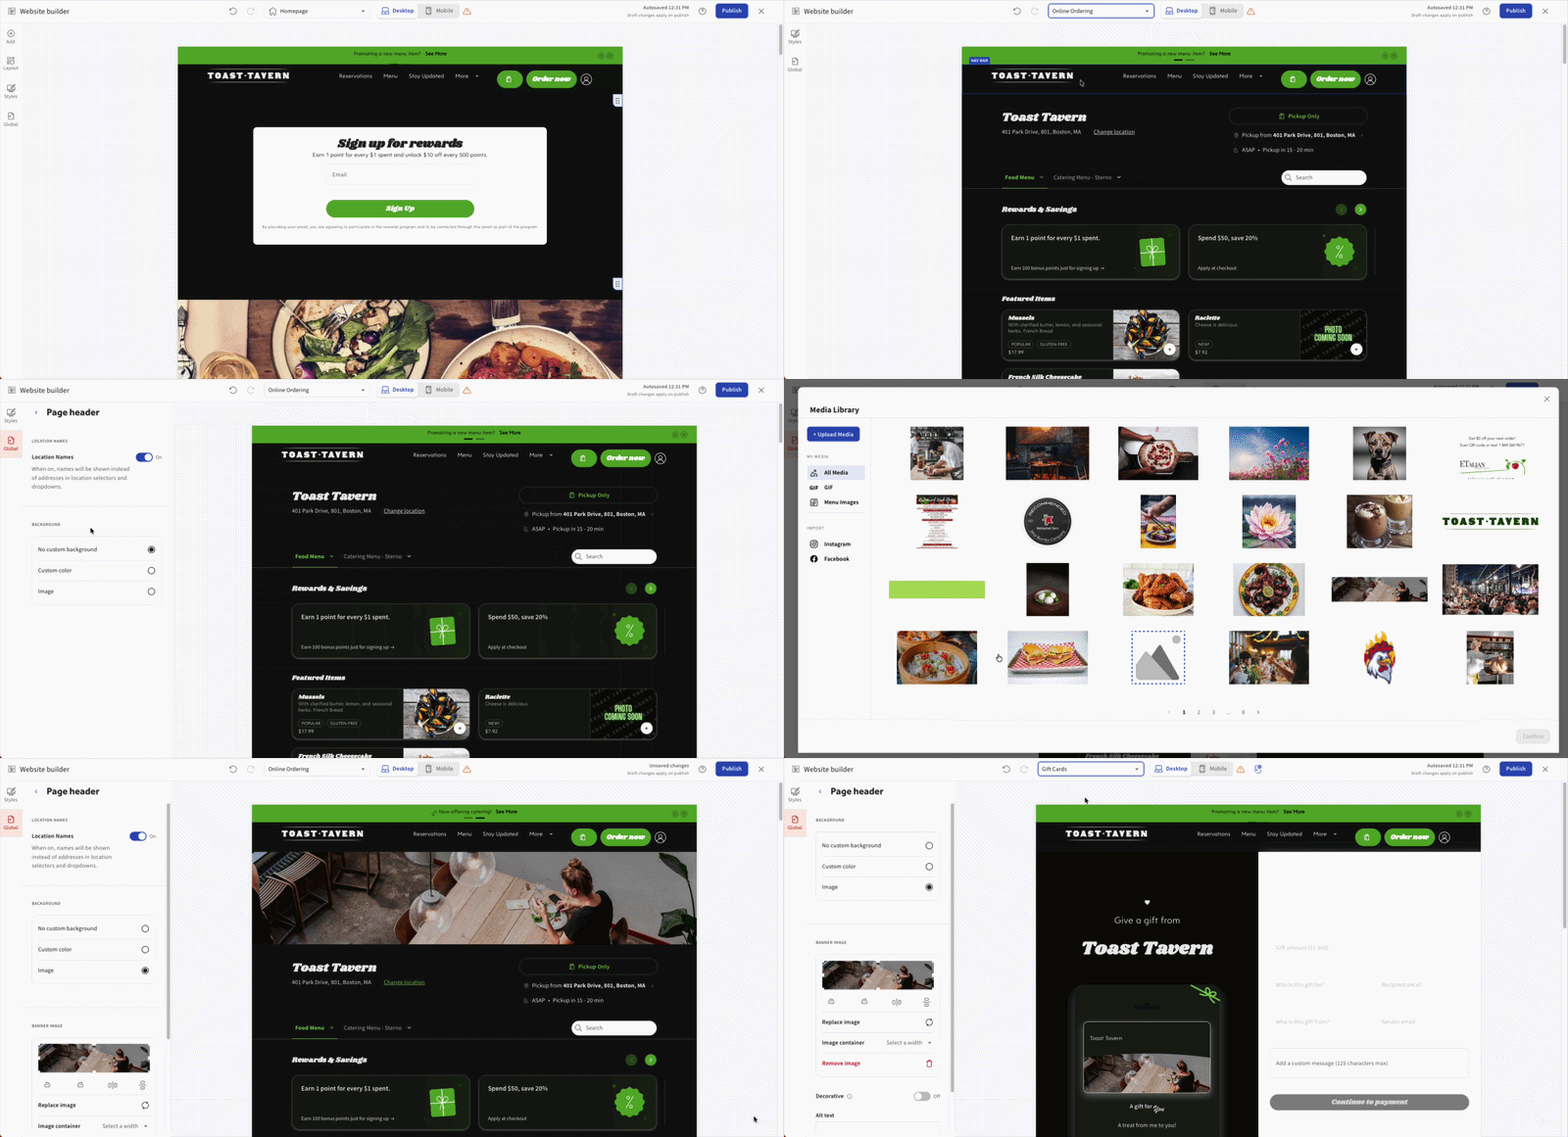
Note: The banner image found in Restaurant Info does not apply to the Website Editor’s Gift Card page or Online Ordering page. The Gift Card page image does not follow the eGift card image settings.
Expected outcome: Your Gift Cards purchase page appears in the page drop-down on your Toast Website and allows guests to purchase gift cards directly.
Add External Embedded Widgets
Note: Custom Widgets are unavailable for customers in Australia, Canada, Ireland, and the UK.
To add an external embedded widget to your site, follow these steps:
- In Toast Web, navigate to Toast Web > Websites > Your Website.
- Select Edit Site.
- Select Site Components, then scroll down to Embedded HTML.
- Drag the Code Block to the desired location on your site where you want to add the embedded widget.
- The block will display the message: Nothing here yet.
- Select the Nothing here yet box to open the Customize options.
- Enter your HTML code for the embedded widget. Examples of embeddable widgets include:
- YouTube Videos
- MailChimp Forms
- Custom Scripts (must be HTTPS and able to render inside an iframe)
- Google Forms
- Once you've completed your edits, select Save in the top right corner to apply the changes.
NEW! Toast Websites includes a built-in cookie consent banner. Analytics and tracking tools (such as GA4, GTM, Meta Pixel, and custom scripts) will only fire for guests who have consented to tracking. If you notice a reduction in analytics data after February 23, 2026, this is expected behavior reflecting consent-based tracking, not a drop in site traffic or conversions. Guests can update their preferences via Cookie Settings in the site footer at any time.
Note: Custom Scripts let you better integrate external, non-Toast features with your Toast Website without needing a specific integration. This component will not interact directly with any content on your Toast Website, and it will not be style-matched to your Toast Website. For your best experience, it is recommended to work with Toast features and products.
Expected outcome: Your embedded widget renders inside the Code Block module on your live website.
Generative AI Content Tools for Toast Websites
If you need help generating content for your website, you can use the generative artificial intelligence (AI) tool in the Site Editor. This tool helps create written content personalized to the experience you want to deliver to help you get your site closer to launch. To ensure you are using Toast generative AI tools, see "Toast Generative AI Tools: Responsible Usage for Customers".
- In Toast Web, navigate to Toast Web > Websites > Edit page.
- Review Toast's AI-powered website assistant's terms of service and select Accept or Close. If you select Close, you can revisit and accept the terms from your Websites Settings page.
- Select any text box module on your website draft and use the AI Assistant button.
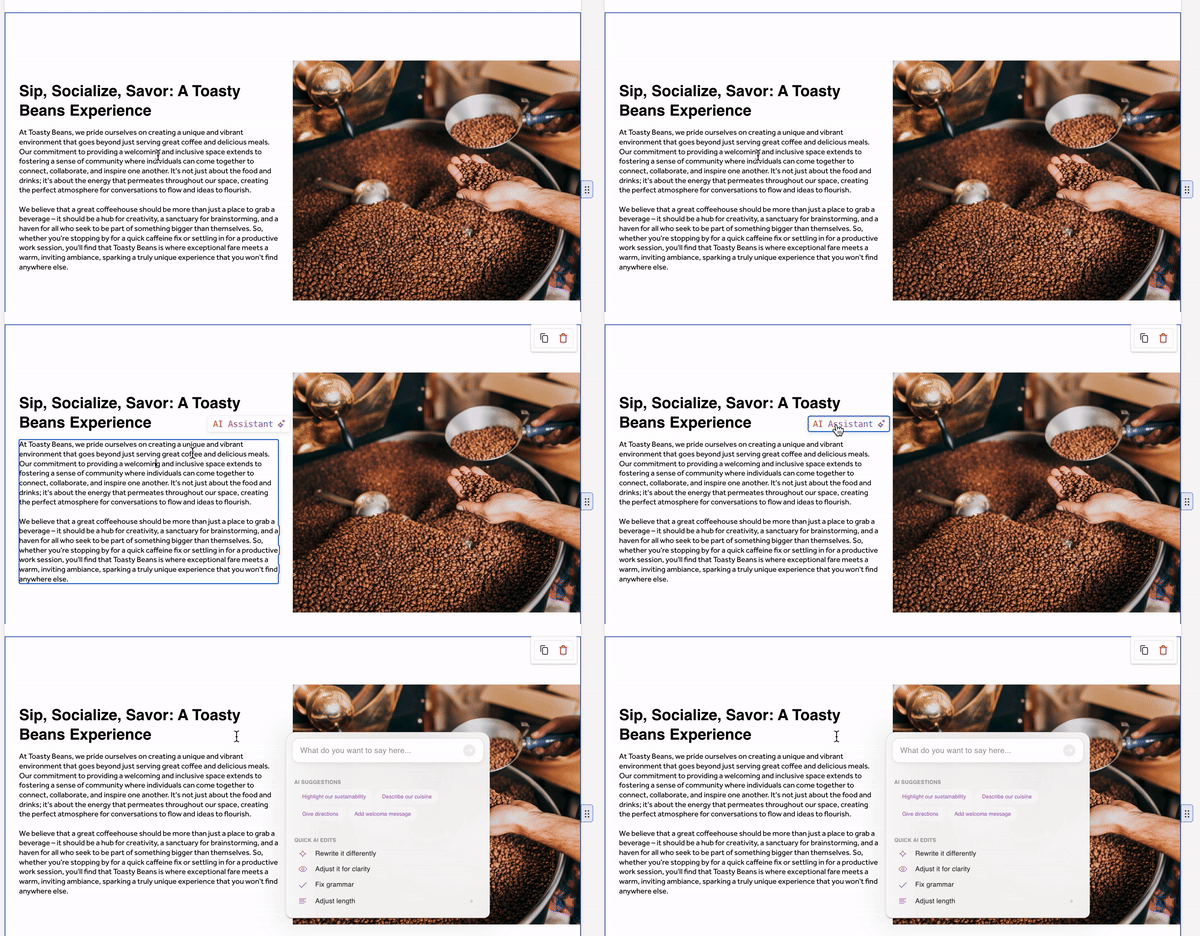
- Within the AI module, enter a prompt to inform the AI model of what you want to say. The AI assistant generates content based on your prompt or predefined AI suggestions. Once the content is generated, you can revise it with Quick AI Edits:
- Rewrite it differently
- Adjust for clarity
- Fix grammar
- Adjust length
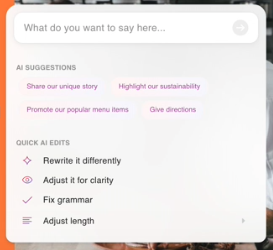
- Once you are satisfied with your updates, Publish your changes.
Expected outcome: Your selected text module is updated with AI-generated content that reflects your prompt and any Quick AI Edits you applied.
Configure Website Menus
When configuring your menus in the Site Editor, you can select the menu module to make edits that sync with your Toast Web menu data. This lets you promote specific menu items or menu groups in places other than on your menu and create a unique menu layout.
Add a Menu Items Component
- In Toast Web, navigate to Toast Web > Websites > Edit Site.
- Navigate to Site Components > Restaurant Components > Menu.
- Drag and drop the Menu component to the desired area of your menu. You can resize the component directly in the module.
- Select the Menu item component, the menu item you would like to be featured, and the information you would like visible.
- Once complete, Publish your changes.
Expected outcome: Your selected menu item displays in the Menu Items component on the page you added it to.
Add a Menu Group Component
- In Toast Web, navigate to Toast Web > Websites > Edit Site.
- Navigate to Restaurant Components > Menu.
- Drag and drop the Menu module in your editor.
- Select the module and select Menu Group from the dropdown menu. Then select the desired menu group you would like to display. Note: The module can be resized or moved once added.
- Once complete, select Publish.
Expected outcome: Your selected menu group displays in the Menu Group module on the page you added it to.
Custom Menus
The Custom Menus feature lets you adjust the layout and appearance of your view-only menus with much greater flexibility.
- In Toast Web, navigate to Toast Web > Websites > Your website.
- Select Edit Site.
- Locate the dropdown menu listing your website pages in the Site Editor.
- Within the drop-down menu, select +Add new page.
- In the new window, select Menu from the left-hand panel.
- Select one of the three available options: Standard Template Menu Page, Text Template Menu Page, or Blank Menu Page.
- Select Submit.
- Add a page name, then select Submit again.
You now have a pre-configured, customizable menu page built using Toast's site components technology. These site components are connected to your existing menu data through your menu groups. To learn more about menu groups, see "Create and Manage Menus, Menu Groups, and Subgroups".
With the Custom Menus feature, your site components can be rearranged or restructured at any point by dragging within your Site Editor. You can generate text for this page using your AI Assistant, add a component highlighting a specific menu item, or change the layout of the individual items within your menu group components by adding or removing pictures and pricing as you prefer.
This page is built just like any other page on your Toast Website, so you can also add additional content, such as a site component for reservations, testimonials, and more.
Expected outcome: A new Custom Menu page appears in your page drop-down with the template you selected and your existing menu data wired in.
View-Only Menu Manager
Channel visibility for your Toast Website is managed in Toast Web > Menus > Menu management > Menu Manager under Channel Visibility. To toggle the Websites View-Only channel for a menu, see the "Channel Visibility" section in "Manage Your Menu Visibility Settings".
Customize Your Website Theme, Typography, Logo, and Favicon
- In Toast Web, navigate to Toast Web > Websites > Your website.
- Select Edit Site.
- From the left-hand panel, select Site styles.
Color Theme
- Auto-generated themes — recommended for optimal color pairings and accessibility with default settings. You can enable or disable this feature and manually edit default colors.
- Color theme — select a theme and choose your brand color. Changing your theme color will automatically change your four automated theme options.
- Edit Defaults — modifying colors that are part of a theme may lead to incompatible pairings and reduced accessibility. You can modify the following color elements:
- Surface
- Text
- Icon
- Background
- Border
Text Theme (Typography)
Use the font style selector with recommended pairings:
- Primary Text — select from the variety of available fonts.
- Secondary Text — select from the variety of available fonts.
- Upload custom fonts — allowed file types: .otf, .ttf, .woff.
Animations
Animate sections of your website pages to appear as guests scroll.
Logo
Upload your logo to your website:
- Supported file types: jpg, jpeg, png, webp, svg
- Max file size: 5MB
- Logo size: Standard or Overflow
Favicon
Upload a favicon to display in the browser's tab bar:
- Supported file types: jpg, jpeg, png, webp, svg
- Max file size: 5MB
Expected outcome: After completing your edits, select Save in the top right corner of the page to apply your changes. Your website now reflects the chosen color theme, typography, logo, and favicon.
Preview and Publish Your Website
When making changes to your website in the Site Editor, select Publish to push those changes to your live site. On the Websites Dashboard, you can access your Preview link to test the functionality of all the pages and content you've created, just like your guests would see it. Your menu will now appear on your View-Only Menu for your website.
Video Walkthrough
Want to watch a video of Toast Websites features in action? This collection includes:
- Full-Size Welcome Section and New Images Fit Options (2:42)
- New Options for Renaming Navigation and Header (1:22)
- Section Padding & Map Control (1:14)
- Fonts and Hyperlinks in Text Editing (1:24)
- Events Module Demonstration (2:04)
- Add Links to Images (1:16)
Select the chapters icon in the top-left corner of the video to navigate to a specific section.
Toast Websites full-size welcome section and new image fit options:
- Add a full-sized welcome image module to make a strong visual impression on your guests.
- Adjust the position of the text box and add text.
- Customize the box color to blend with the background.
- Disable unnecessary buttons.
- Use the toggle to fit the photo space and display the entire image. Review the complete image.
- Observe the image's aspect ratio, adapting to screen size changes.
- Save and Publish the changes.
Frequently Asked Questions
Why Aren't My Edits Showing on My Live Website?
Your edits aren't showing on your live website because changes you make in the Site Editor save to a draft, and your edits do not appear on your live website until you select Publish in the top right corner. If you have already selected Publish and your edits still aren't reflecting, see "Unable to Publish Changes in Toast Web" for guidance — that article covers the 6.4 Publishing permission and related troubleshooting.
How Do I Change the Hours of Operation That Show on My Website?
To change the hours of operation that show on your website, the hours come from your Toast Web location's hours. To surface them on your website footer, open the Site Editor, select the footer, scroll down to the All hours section, and select Use location hours. Save and Publish your changes. The Locations toggle in the footer's Other Settings must be enabled for hours to appear.
Note: The hours editing sidebar does not appear on the Online Ordering or Menu pages. To update your hours, navigate to a different page (for example, your homepage or About Us page) and edit the footer from there.
How Do I Hide or Unhide a Page?
To hide or unhide a page on your Toast Website, click on the Navigation Bar on the Sites Editor. Next, click the three dots next to the page you would like to hide, and select Hide. Save and publish your changes.
How Do I Add Google Analytics or Tracking Code to My Toast Website?
To add Google Analytics or tracking code to your Toast Website, use the Embedded HTML site component. In the Site Editor, navigate to Site Components, scroll to Embedded HTML, drag a Code Block to your desired location, and enter your tracking HTML. See Add External Embedded Widgets in this article for the full procedure.
Note: Because Toast Websites uses a built-in cookie consent banner, tracking scripts will only fire for guests who choose to opt in. If you notice a drop in your reported analytics data after February 23, 2026, this represents consent-based tracking adjustments and is not an actual drop in website traffic or customer conversions.
Where Do I Change My Logo and Banner Image?
Where do you change your logo and banner image? Your logo is set in Site styles > Logos in the Site Editor — see Customize Your Website Theme, Typography, Logo, and Favicon for the procedure. The banner image on your online ordering page is managed separately:
-
- If you purchased Online Ordering Pro before February 2024, the banner image for your online ordering page is managed at Toast Web > Takeout & delivery > Branding & Customization. See "Optimize Online Ordering Pro With Page Banners".
- For website-page banners (the Promotional, Spotlight feature, and Persistent banners that appear on your Toast Website pages), see Banners and Pop-Ups for Toast Websites.
Can My Website Look Different on Mobile and Desktop?
Can your website look different on mobile and desktop? The Persistent banner option (described in Persistent Banner) is mobile-only and can be used to promote a specific action on mobile visits.
To preview how the mobile version of your website looks, click on the Mobile toggle at the top of the editor. This will display how your website is formatted when guests access it on their mobile devices.
Does the Untappd Integration Cost Anything?
Does the Untappd integration cost anything? The answer depends on which Untappd offering:
-
- The Untappd Menu Page embed on a Toast Website (using your Location ID and Theme ID — see Add an Untappd Beer List to Your Toast Website) may require an active Untappd subscription managed through your Untappd account.
- The Untappd for Business POS partner integration is a separate paid product. See "Get Started With the Untappd for Business Integration".
Related Articles
- Get Started With Toast Websites
- Manage Your Menu Visibility Settings
- Optimize Online Ordering Pro With Page Banners
- Domains for Toast Websites and Online Ordering Pro
- Get Help With Toast Websites