Set up Your Epson L100 or L90 Label Printer With Toast
Last updated: Jul 22, 2026, 10:26 AM
Follow the steps in this article to set up your Epson L100 label printer with Toast.
Note: This guide also applies to setting up Epson L90 printers.
- Epson L100 Label Printer Overview
- Set Up an L100 Purchased Through Toast
- Set Up an L100 Purchased Outside of Toast
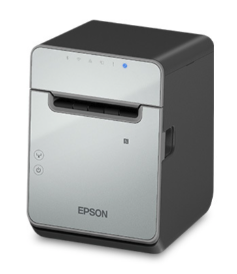
Epson L100 Label Printer Overview
The Epson L100 label printer is integrated with Toast Mobile and discoverable in-app.
Note: This model of the Epson L100 requires an Ethernet connection.
Set Up an L100 Purchased Through Toast
If you purchased your L100 through Toast, follow these steps to set it up:
- Perform the initial setup by following the steps outlined in Printer Setup Overview.
- Connect to the Toast Network (see Set Up Your Toast Network if you haven't yet set up your network).
Set Up an L100 Purchased Outside of Toast
If you purchased your Epson L100 from a third-party source, follow these steps to set it up:
- Perform the initial setup by following the steps outlined in Printer Setup Overview.
- Connect to the Toast Network (see Set Up Your Toast Network if you haven't yet set up your network).
- Make sure your printer is properly configured using the Printer Setup workflow.
- Disable the Taken Sensor.
- Disable the printer buzzer.
Disable the Taken Sensor on the Epson L100 Label Printer
These printers, if purchased from a third-party source, will come with a sensor enabled, called the Taken Sensor. If it is enabled, it will not print another label until one is pulled. The Toast app will indicate that the printer is busy. or offline, when this happens. To disable the taken sensor:
- Power off the printer, press and hold the FEED button, and power on the printer; the self-test page is printed.
- Press and hold the FEED button again until the Mode selection page is printed.
- Press the FEED button 2 times and then hold it to select 2. Customized Value settings.
- Press the FEED button 13 times and then hold it to select 13. Other settings.
- Press the FEED button 5 times and then hold it to select 5. Paper removal standby.
- Press the FEED button 2 times and then hold it to select 2. Disable.
- Once the setting is changed, power off and on the printer, and the change will be applied.
Disable the Printer Buzzer for the Epson L100 Label Printer
Another setting that often comes standard is the buzzer. If you do not want a buzzer, follow the steps below.
- Power off the printer, press and hold the FEED button, and power on the printer; self-test page is printed
- Press and hold the FEED button again until the Mode selection page is printed.
- Press the FEED button 2 times and then hold it to select 2. Customized Value settings.
- Press the FEED button 13 times and then hold it to select 13. Other settings.
- Press the FEED button 5 times and then hold it to select 8. Select buzzer.
- Press the FEED button # times and then hold it to select Buzzer Disable.
- Once the setting is changed, power off and on the printer, and the change will be applied.