Toast Payroll: Manage Applicants in the Recruitment Module
Last updated: Apr 22, 2026, 6:35 PM
- Get Started With Recruitment (new page)
- Candidate Application
- Recruitment Dashboard
- Candidate Review Page
- Manage the Applicant Lifecycle
Candidate Application
External candidates will want to navigate to your Careers page to search and apply for open requisitions. The Toast Payroll system will ask applicants to register with an email and password, which will then provide them limited access to the Payroll website where they can manage their personal profile, other open requisitions, and notifications.
- The URL for your Careers page can be found by selecting Recruitment and pressing the Careers Page button.
- After selecting a requisition and entering login credentials to register with, a candidate should choose the Jobs tab (or Settings > Jobs from a mobile device) Then a candidate will begin the application process. The steps they will see are identical to the steps added to the requisition setup.
- Once an applicant has finished applying, they are redirected to the Jobs Dashboard where they may apply to other requisitions within your company.
- They also have access to their profile (for edits, if necessary) and the Toast Payroll dashboard where they will receive communications from the Recruitment module (such as interview notifications or offers).
Note: Are requisitions are not appearing on the Careers Page? This may be due to having multiple Careers Pages. Each requisition will be assigned to a specific page and Careers Pages will only display requisitions that are assigned specifically to it. You can see which career page a requisition is attached to by navigating to Recruitment > Job Postings > Edit Pencil (of desired Requisition) and adjusting the the selection in the Page field.
Recruitment Dashboard
The Recruitment Dashboard lets you see the status of your requisitions and candidates and allows you to run reports for this module. Locate this dashboard by navigating to Recruitment.
Back to top
Requisitions Tab
- On the top of the dashboard, use the filter drop-down menus to quickly find information. Select the blue funnel icon on the right to refresh the table with your filters applied.
- Of important note is the Candidates column which displays the number of individuals who have applied for each requisition.
- Choose the blue eyeball icon to review candidates who applied to this requisition.
- Selecting the yellow edit pencil allows you to view the requisition step's setup.
- Use the trash icon to remove the requisition entirely.
- When you select the red no symbol, the requisition will go into a state of deactivation. This temporarily hides it on the Recruitment Dashboard, but by using the Status filter drop-down menu to include Deactivated requisitions and then selecting the blue funnel icon, you may view and activate it again by selecting the green checkmark.
- Read more about using this tab here.
All Candidates Tab
- You may use the filter drop-down menus at the top of the table to quickly locate the candidate you're looking for.
- Select the blue person icon next to an applicant's name to view their profile. Learn more about the Candidate Review page below.
- Select a Step if you'd like to jump to that point in the hiring process.
- Review the applicant's resume and their answers to the application and make notes about the candidate by using the blue eyeball icon.
- The blue copy icon allows you to copy the candidate's information to another requisition easily.
- The green checkmark and the red no symbol will hire or reject the candidate. If the checkmark was pressed, locate the Hired tab of the requisition and press New Hire to move them to the New Hire Dashboard.
- Learn more about using the tabs in this section.
Reports Tab
- Run any of the three reports on this page to capture data regarding the candidates and their attributes.
- After selecting a report, you may filter by requisition by choosing a Requisition from the drop-down menu and selecting the Filter button at the top.
- Once the report has the information you need, press the Queue button to download it.
Candidate Review Page
Once an applicant has submitted an application, you may review the details. Navigate to Recruitment > Candidates. Select the blue eyeball icon to view their Candidate Review page.
On Every Tab
- Reject or Hire the applicant immediately by selecting either button in the top-right corner. If you choose to hire them, navigate to the Hired tab for this requisition and select New Hire to move them to the New Hire Dashboard.
- You may see a Move to Phase button just below if phases were used in the application template.
- Towards the top-left corner, you may move the candidate to a new stage of the hiring process by changing their Status.
- On the right, there is a Notes section. Based on the settings of Notes, you and others may be able to read and/or add a 1-5 stars rating and note to indicate your experience with or perception of the candidate.
- There are three blue buttons at the bottom of each tab.
- Download gives you a quick rundown of the individual's application in PDF format.
- Status will let you view the times a candidate has moved to a new stage of recruitment.
- Audit allows you to see when and who has interacted with this applicant's page or requisition in any way.
Interview Tab
This does not appear unless interviews were specifically added to the requisition.
- Add an interview step by selecting the Add+ button. Name it and you will see it populate in the Steps section.
- The step (interview) you are currently viewing will be larger than others it may have next to it. Select a step to jump to it.
- Schedule an interview by pressing the Schedule button. Add the date & time, the interviewer, and choose to send a notification to the candidate or not. If you use a notification, include the date and time of the interview.
- Suggested Questions and Notes can be added before and during the interview. This is very useful if you use a computer when performing interviews.
Contact Tab
When you quickly need an applicant's physical address, email address, or phone number(s), navigate to this tab.
Resume Tab
When a candidate uploads a resume PDF to their application, it will be displayed here.
Application Tab
This tab contains the answers to each step of the application filled out by the candidate. When an application step has been fully completed, it appears in blue. If a step was partially completed, it appears in white.
Documents Tab
If any documents were uploaded during the application process, they can be found here. You may also add your own documents. Lastly, if the Download button was selected, the Application Export is located here, too.
Manage the Applicant Lifecycle
Review Applications
Navigate to Recruitment and select the blue eyeball icon for a requisition. You will see five tabs near the top which allow you to track candidates and which step they're on during the application lifecycle.
- Pre-interview: applicants who have only completed an application appear here. Select the blue eyeball icon to move them to an interview (Move to Interview button).
- Interview: individuals here have been approved for an interview. Select the blue eyeball icon to schedule an interview and interviewer (Schedule button). Include the date and time of the interview in the Message. You may also add or edit Suggested Questions here.
- Rejected: candidates who were declined from a job opportunity.
- Offers: applicants who have been approved for a job opportunity. View the status of their offer and acceptance here.
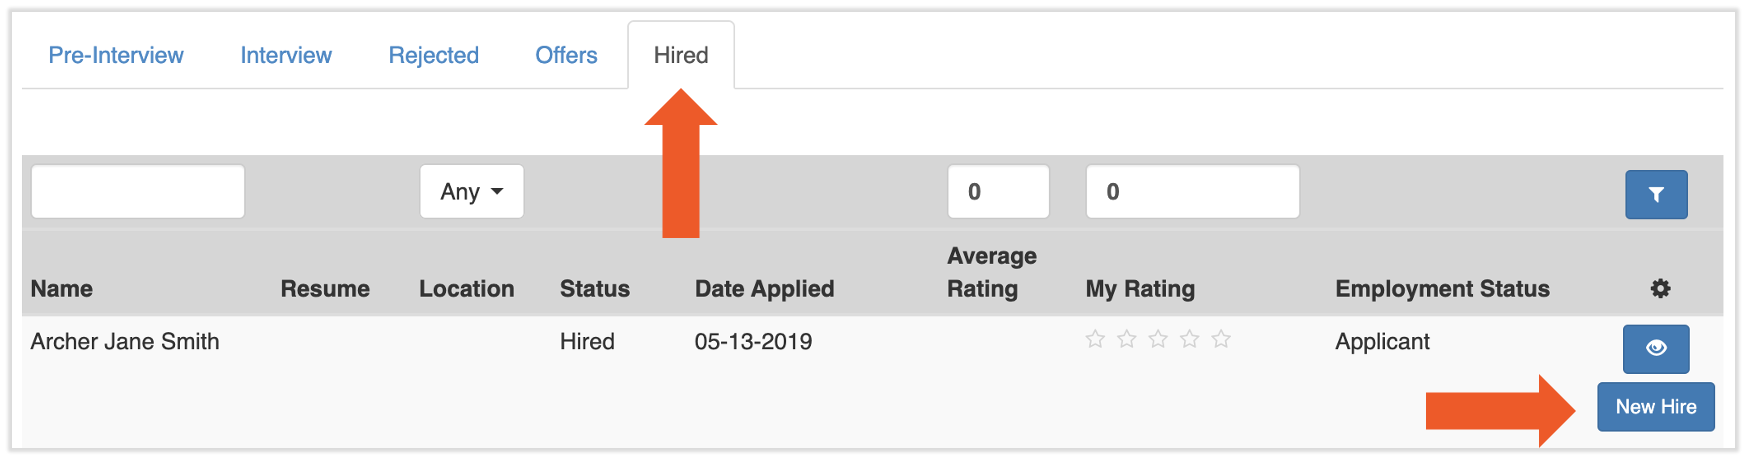
- Hired: once an individual accepts an offer, they will appear on this tab to be hired.
Find a Candidate
If you're having trouble locating a candidate which you've already hired or are planning to hire, they might be found under Recruitment > Job Posting > blue eye icon for the specific requisition. Check out the five tabs on this page (Pre-Interview, Interview, Rejected, Offers, and Hired). If applicable, check all pages of candidates on any of these tabs, but when you find them, you can move them through the recruitment workflow by using the steps in Hire a Candidate below.
If you try to add this candidate into the Recruitment module manually by using their email address, you'll receive the following error: This email is taken by an applicant record. Please hire them using the recruitment module. This is an indicator to check the page above since the individual is already in the system. Note: Until a candidate is fully hired and moved into the Toast Payroll system, you will not be able to find them in Toast Payroll reports.
Hire a Candidate
This process will move an applicant from the Recruitment module to the New Hire Dashboard.
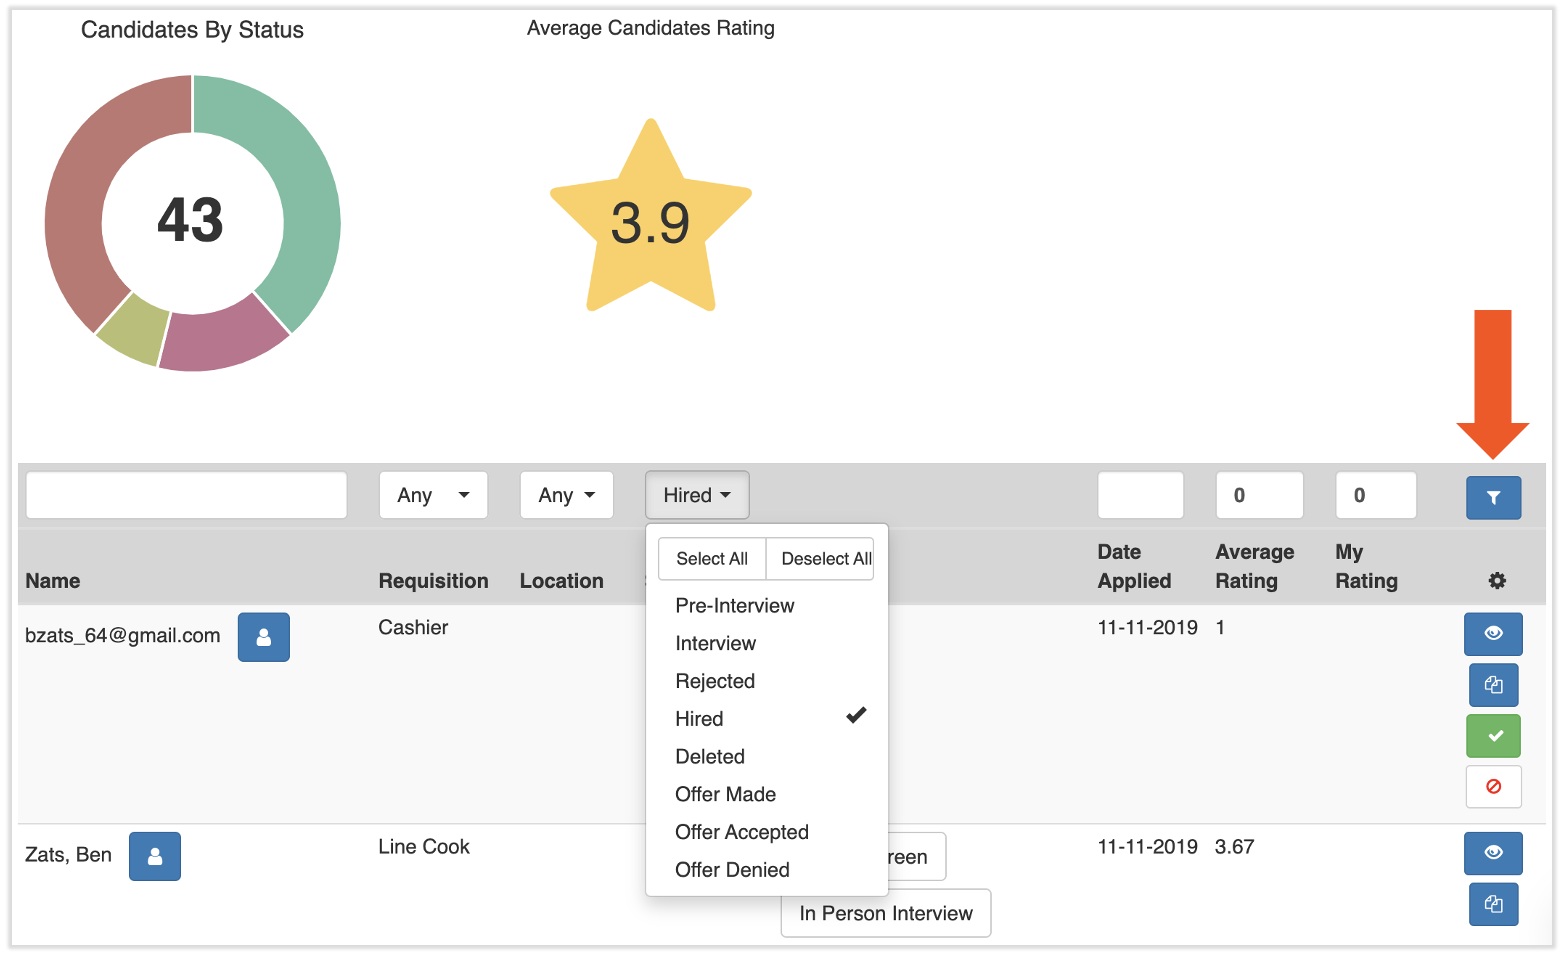
- Navigate to Recruitment > Candidates and search for the applicable employee. Note: If you select a filter from any drop-down menu on this page, the page does not update automatically, so make sure to select the blue Filter button to apply the changes (indicated by the arrow below).
- View the Status column of the applicant. If the applicant is under Pre-Interview, select the green checkmark to move the applicant from Pre-Interview to Hired.
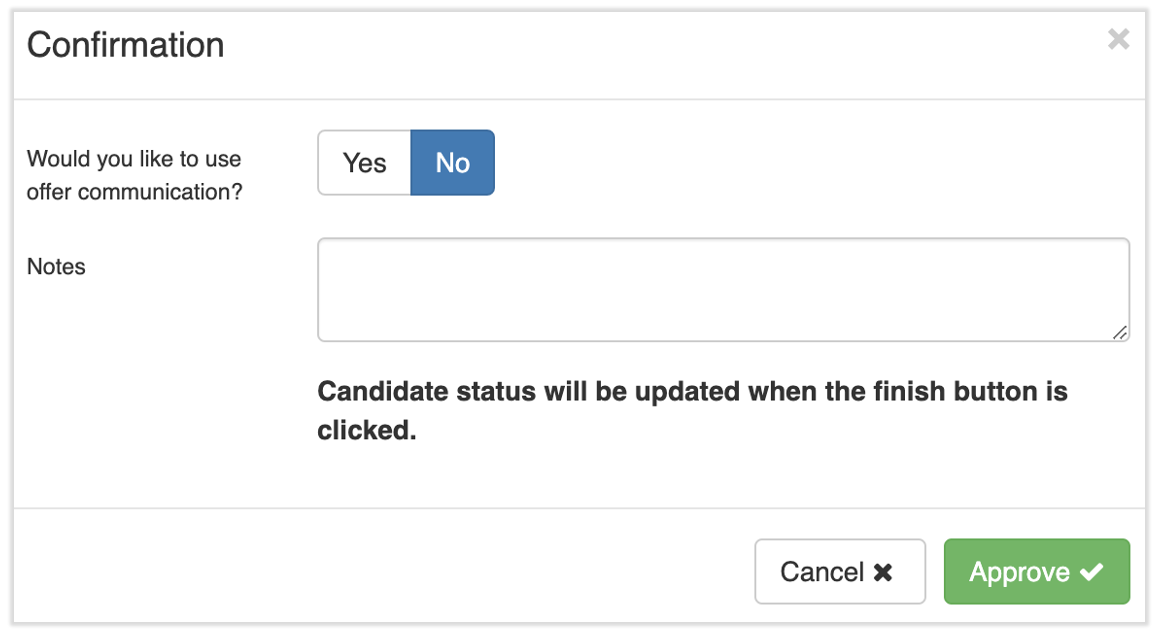
- The offer communication toggle allows you to send an offer letter/email if you've already set one up in Recruitment configuration. If the toggle is set to Yes, you'll have a chance to edit the offer letter or add documents or attachments as needed. Once the applicant has accepted or denied the offer letter, it will be available for download.
- The offer communication toggle allows you to send an offer letter/email if you've already set one up in Recruitment configuration. If the toggle is set to Yes, you'll have a chance to edit the offer letter or add documents or attachments as needed. Once the applicant has accepted or denied the offer letter, it will be available for download.
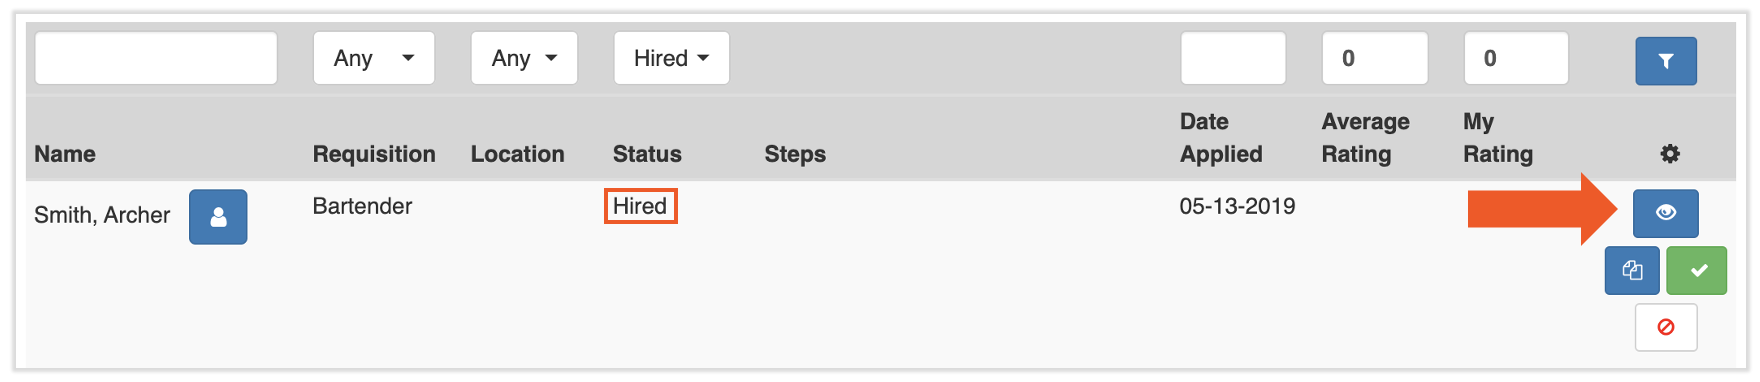
- Once the applicant is under the Hired status, select the eye icon for that candidate.
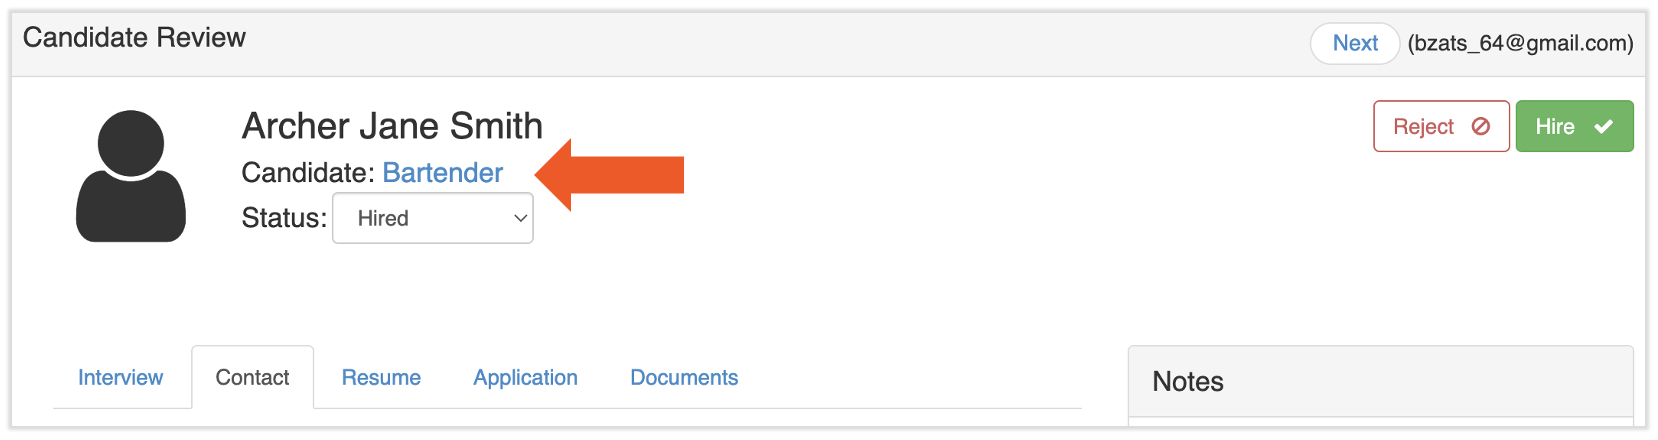
- Select the position on the top of the screen to the right of the employees name.
- On this page, select the Hired tab and then select the blue New Hire button to the right of the employee’s name. The individual will now appear on the new hire dashboard. They can begin their own onboarding once the employer new hire steps have been completed.
- At this point, you may wish to deactivate the requisition if you are no longer looking to hire for this role. You can always reactivate the requisition after deactivating it.
Reject a Candidate
On any tab, select the blue eyeball icon next to a candidate to reject (red no symbol) them. If the candidate should be denied this job opportunity, a Rejection Reason will need to be provided. If rejection communications were set up for the requisition, the option to send that email may be chosen here. The template can be edited before sending.
This content is for informational purposes and is not intended as legal, tax, HR, or any other professional advice. Please contact an attorney or other professional for advice.