Toast Payroll: Upload a File to an Employee's Document Library
Last updated: Oct 15, 2026, 12:11 PM
Question
How can I put a document, form, handbook, or file into an employee's profile?
Answer
| Are you looking to upload documents for more than one employee? Read Toast Payroll: Get Started With Employee To Do's for all existing employees on your account or check out Toast Payroll: Upload Documents for New Hires for any employees you will hire in the future. |
An employee's Document Library acts as a digital version of an employee's file. Managers and HR+ users can store important information relating to a particular employee in their document library. The types of documents can be customized depending on what a manager needs. Managers also have the ability to limit what is visible to the employee.
Examples of document types include performance reviews, wage garnishments, benefit enrollment screenshots, e-sign acknowledgements, and captures of what was completed during the new hire steps.
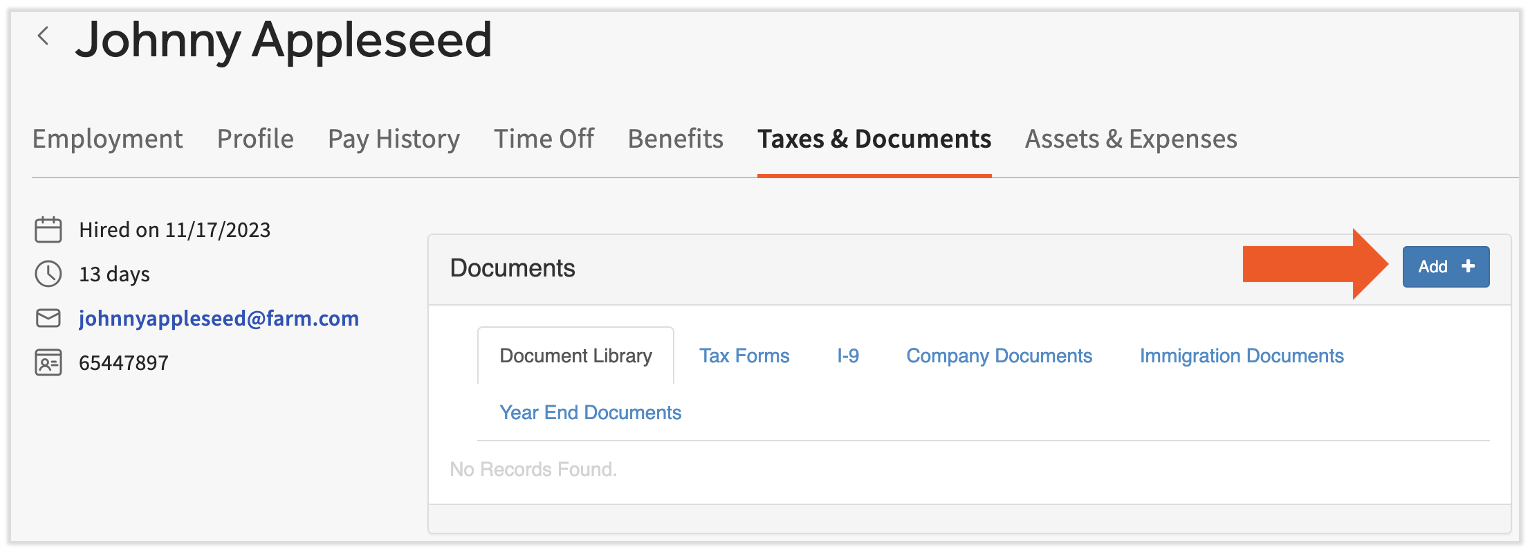
- Locate the employee's Toast Payroll profile and select Taxes & Documents.
- Learn how the new Toast Payroll navigation works by visiting Navigate Toast Payroll Within Toast Web.
- From the Document Library tab, select the Add+ button.
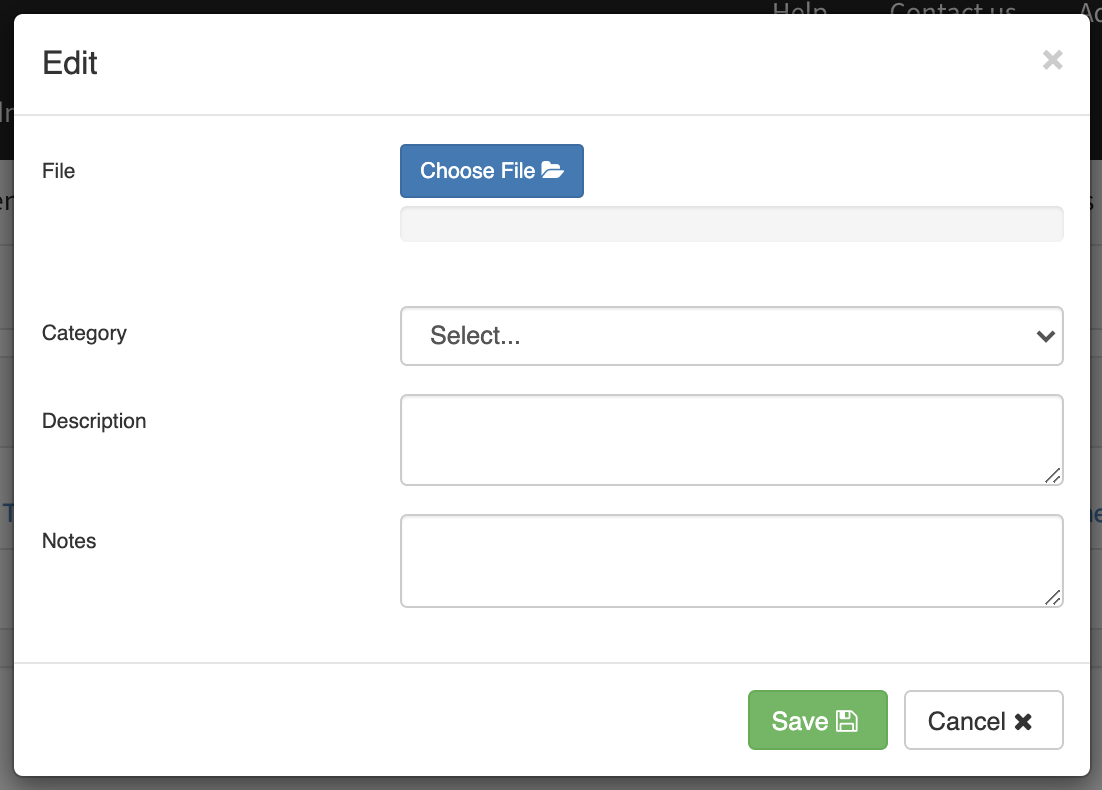
- Select the Choose File button and pick the intended file. Add a Category and select Save to finish. The Description and Notes fields are both optional.
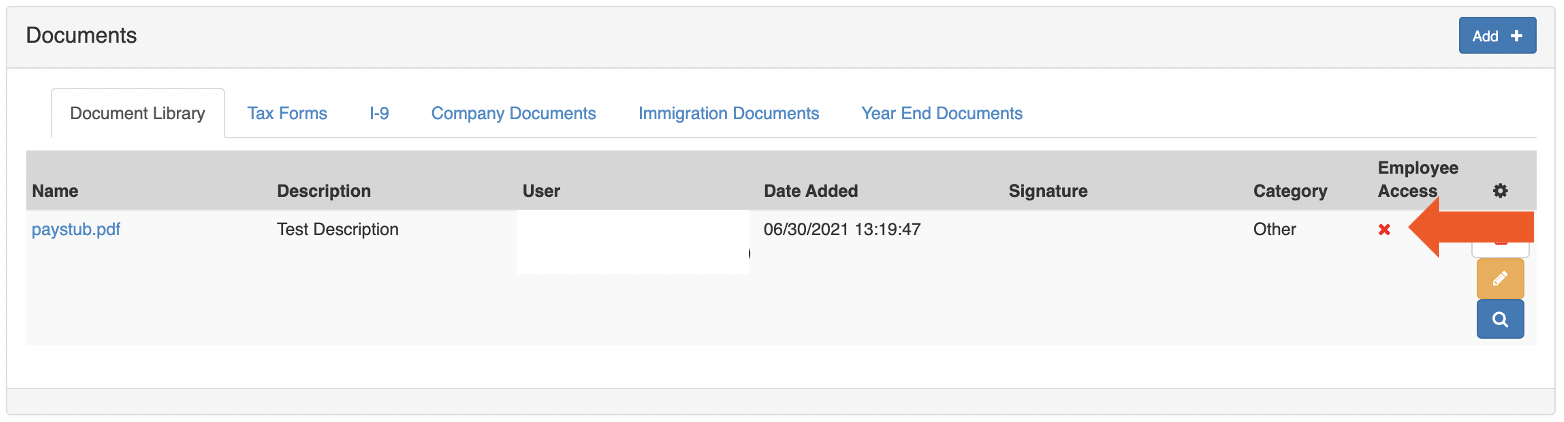
- The file will now be stored in the Document Library. You may verify if the employee will also see this file when they access their Document Library. Look for a green checkmark (they can see it) or a red X (they cannot see it).
- If you'd like to change this visibility, check out the Make These Document Visible to Employees section of Toast Payroll: Upload Document for New Hires.
Troubleshoot a Blank Category Drop-Down
If the Category drop-down menu is blank when you try to upload a file, the security role assigned to that user does not have any document types assigned to it. This can happen with custom Manager or HR+ security roles.
To make document types available to a custom security role:
- In Toast Payroll, navigate to Settings > Security > Document Types.
- If you do not see Settings on the left side of the screen, select Payroll from the Toast Web navigation rail on the left to make the Toast Payroll navigation rail appear.
- Select Add+.
- Add a name for the document type you want to appear in the Category drop-down menu.
- In the Roles drop-down menu, select the custom security role, along with any other roles that should have access to it.
- Toggle Is Active? to Yes. Toggle Is visible to Employee? only if you want employees to see documents in this category.
- Select Save, and repeat for each document type you need.
Note: The user may need to log out and log back in before the new document types appear.
If a document type already appears in the Client Document Types list but is still missing from the Category drop-down menu, select the edit pencil icon next to it, assign it to the user's custom security role, and select Save.
This content is for informational purposes and is not intended as legal, tax, HR, or any other professional advice. Please contact an attorney or other professional for advice.