Get Started With Your e285 Card Reader
Last updated: Dec 16, 2025, 2:06 PM
Learn how to set up and pair the e285 card reader with the Adyen dashboard, device information, and network settings.
- e285 Card Reader Overview
- e285 Card Reader Dashboard Boarding
- e285 Card Reader Pairing/Setup
- Device Information
- Network Settings
e285 Card Reader Overview
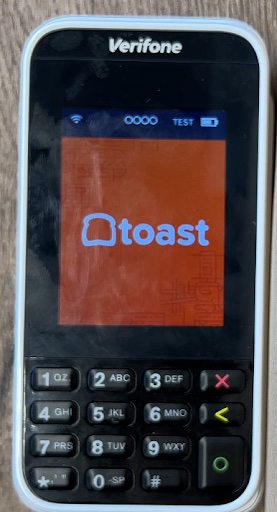
Toast uses the e285 international card reader. This card reader is small in size, making it handheld and it can be linked to the Toast Go2.
e285 Card Reader Dashboard Boarding
To ensure your e285 card reader works seamlessly with the Toast app, it must be connected to the correct store. This essential step is handled by our Customer Care team.
Please contact our support team, and we'll be happy to assist you with boarding your e285 card reader to the right location.
e285 Card Reader Pairing/Setup
- Unbox the device and remove the e285 reader as well as the USB-C charging cable.
- Power the device on by connecting the USB-C cable to a power source.
- It is recommended that the device be given at least four hours to charge while you continue the following steps.
- Once the device is powered on, connect it to the Toast network to begin the boarding process.
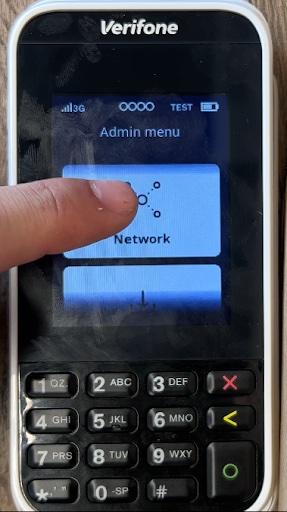
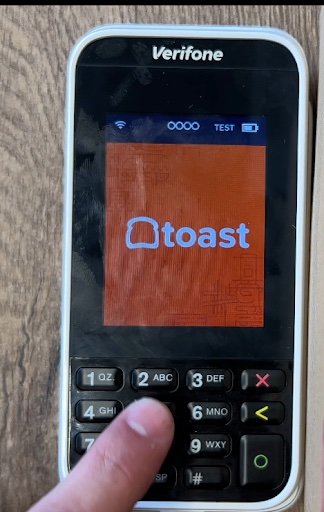
- To enter the admin settings, select the 9 button and then the green circle button.
- If prompted for a password, enter 8678 (TOST) using the T9 keyboard.
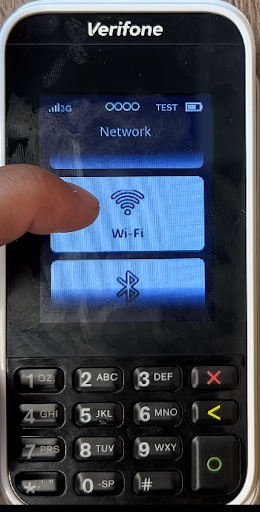
- On the terminal display, select Network.
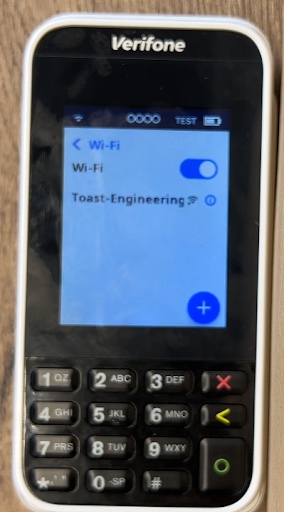
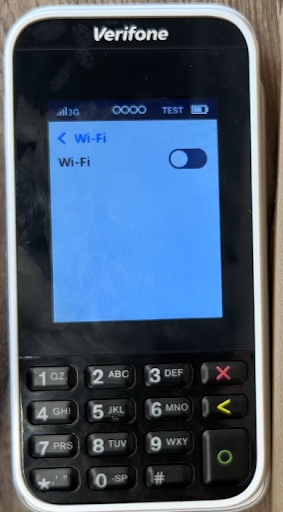
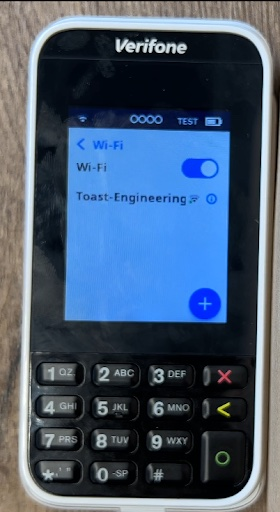
- Select Wi-Fi.
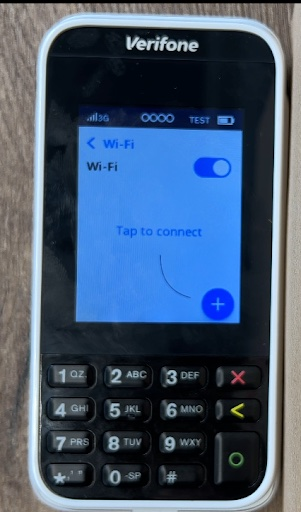
- Toggle the Wi-Fi switch (this can take about 30 seconds).
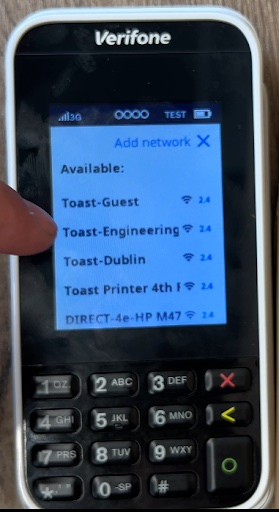
- Select the + icon to add a network. The terminal will scan for Wi-Fi networks.
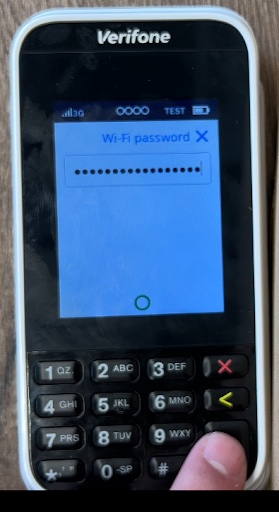
- Choose the desired network from the list and enter the Wi-Fi password, or select Add manually and enter the name (SSID) of the Wi-Fi network and the Wi-Fi password (using the T9 keyboard).
- Select the green circle button to confirm (this process can take a few moments).
- The terminal sets the network as the default automatically and connects to it. You'll now see a Wi-Fi icon at the top of the display.
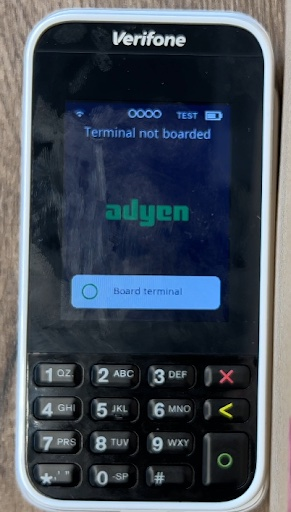
- Press the red X button on the keyboard to go back to the main screen. You will now see an option to Board terminal.
- Select Board terminal and you’ll see the device go through the boarding process.
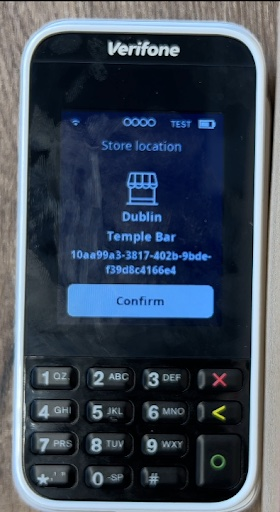
- The device will prompt a store location to confirm; double-check that it is the correct location, and then select Confirm.
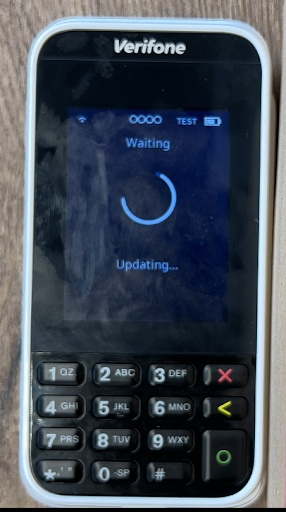
- The process will now start and could take up to 30 or 45 minutes.
- You may see the device restart a few times.
- When the device has completed the boarding process, it will have a background with the Toast logo and be connected to the network.
- We can now begin to pair the device to the Toast Go 2.
- We need some information first, so hit the 5 button, and then the green circle button to pull up the device info page.
- Note: If scan to sync doesn't work, skip down to manually syncing.
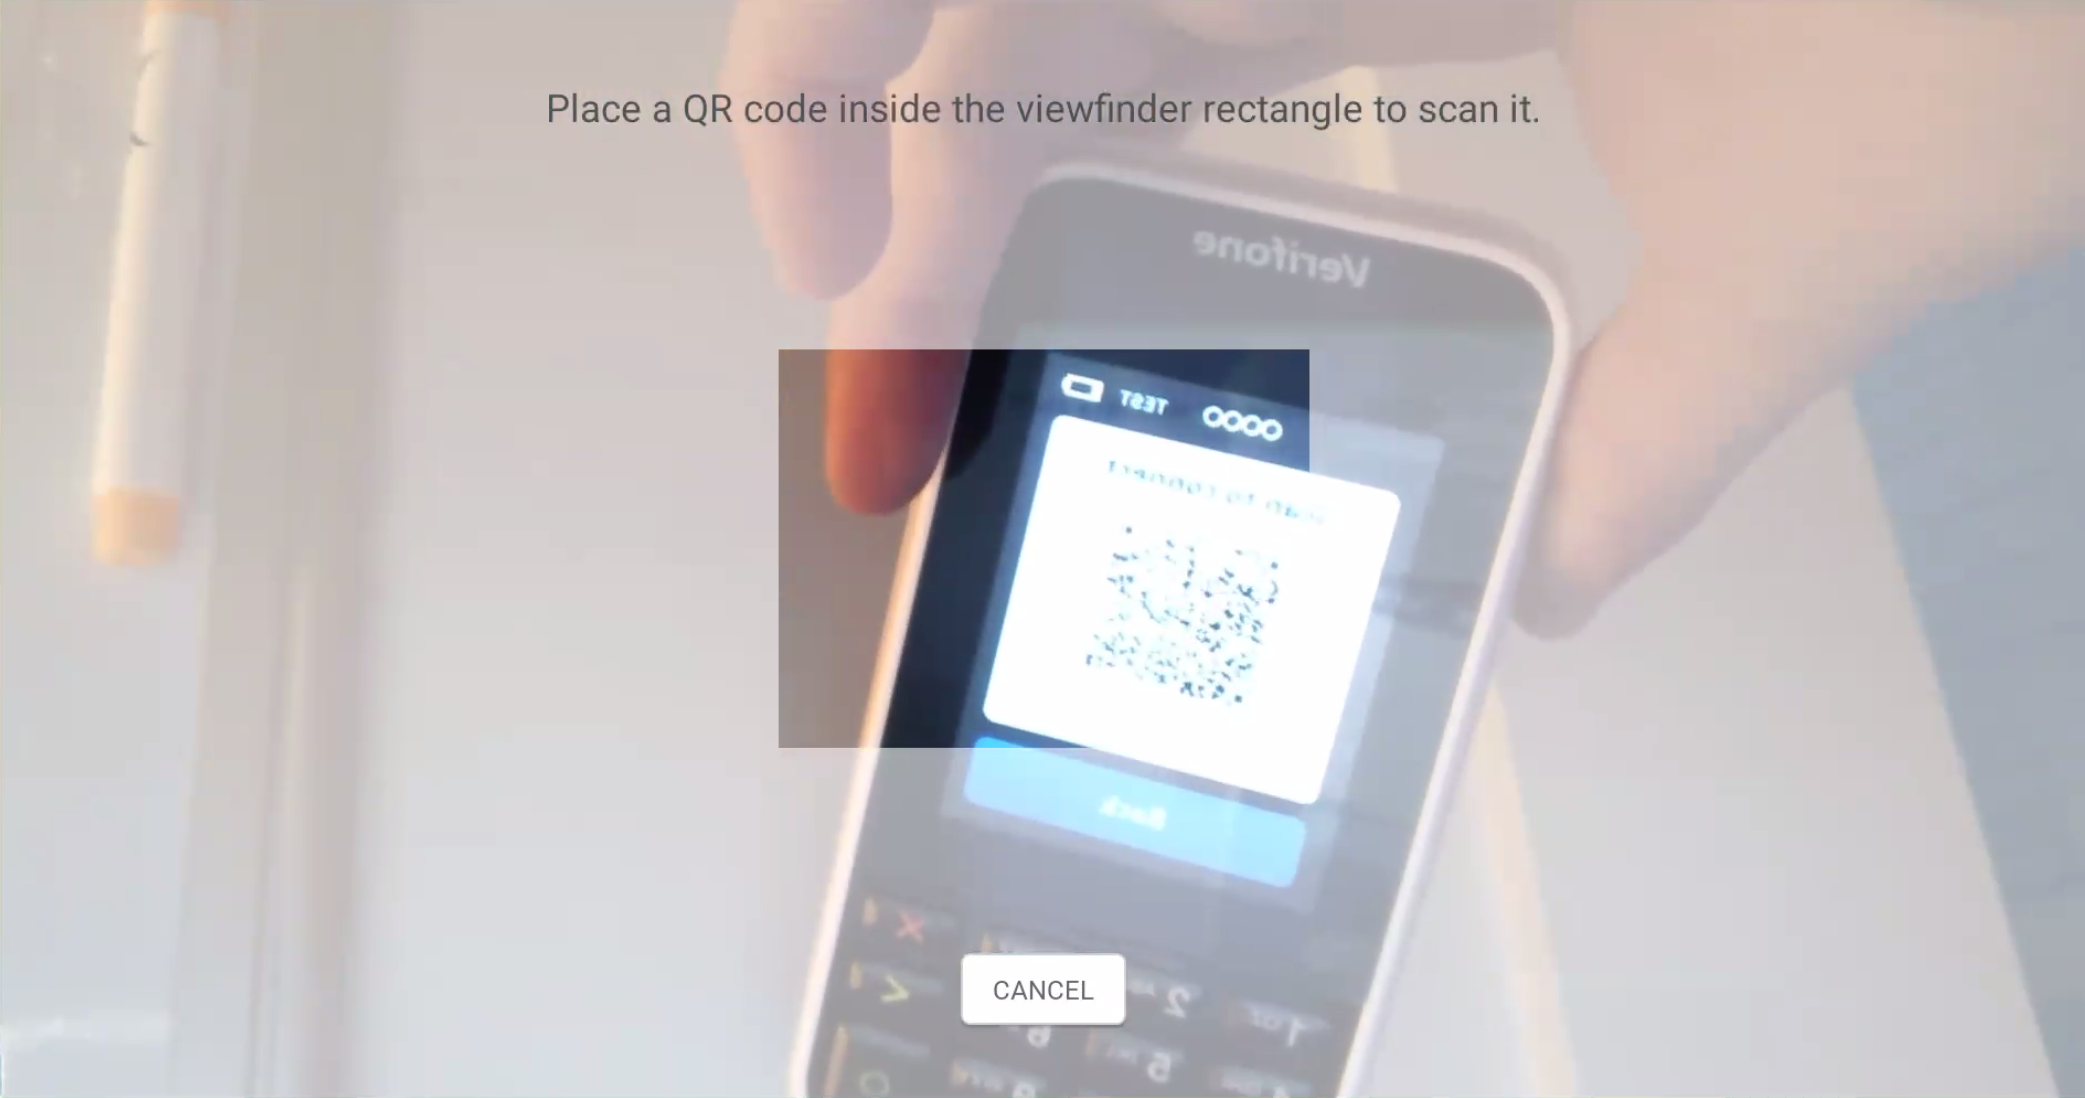
- On the E285, select the QR code logo in the bottom right
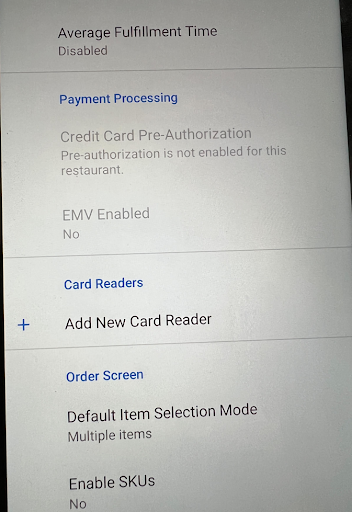
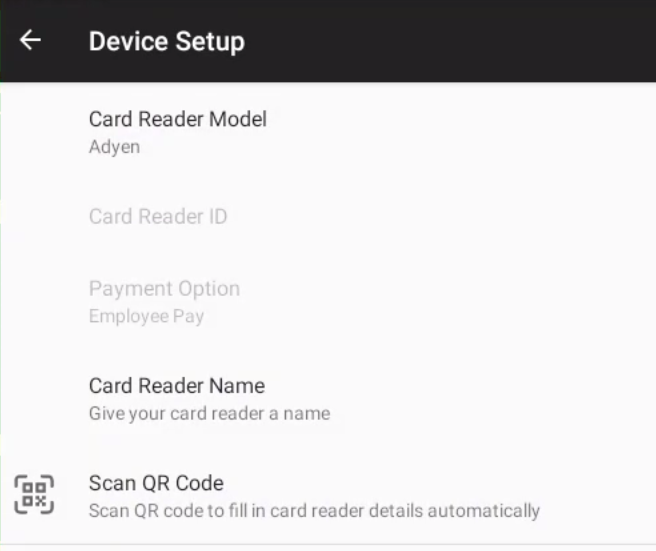
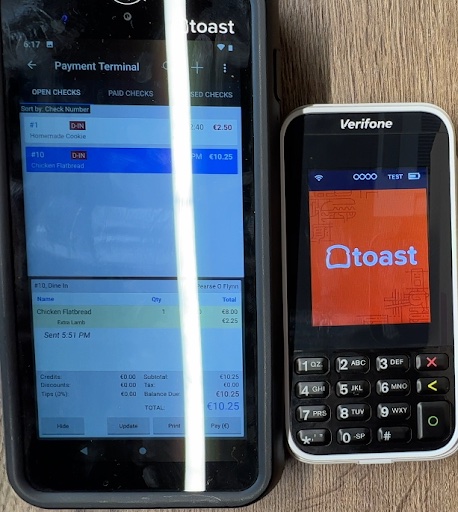
- On the Toast Go 2, within the Toast app, navigate to Device Setup> Card Readers.
- Select Add New Card Reader.
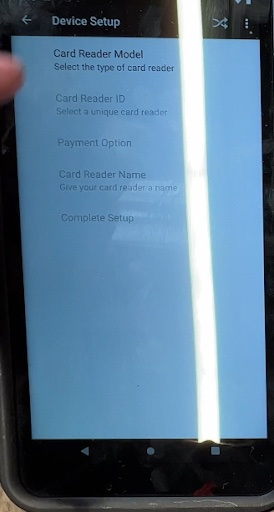
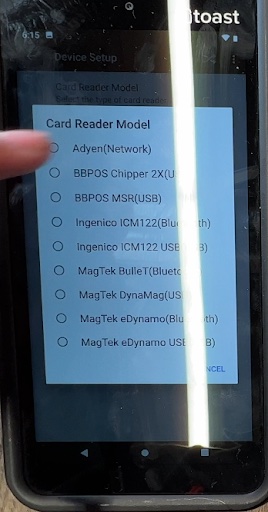
- Select a Card Reader Model from the list.
- Now, select Scan QR Code and place the device in front of the QR code box on the screen.
- The device has been successfully paired!
- If the scan doesn't work, use this step:
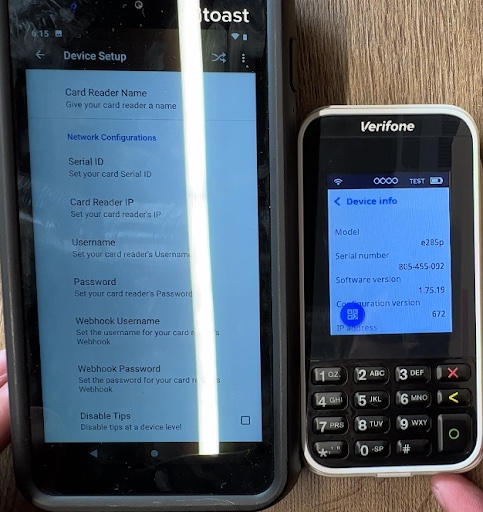
- We’ll now use the information from the device status page on the card reader.
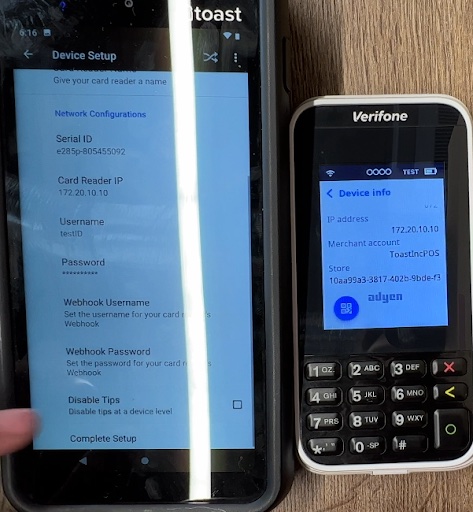
- Fill in the following information found on the card reader's device information page:
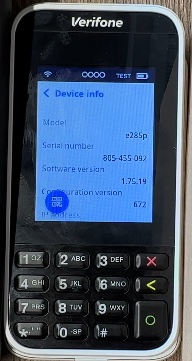
- Serial ID: (Model-SN) e285p-805455092
- Card Reader IP: xxx.xxx.xxx.xxx
- Username: toastID
- Password: The first 8 characters of your Toast GUID
- Disable Tips: Decide if you want the device to prompt for tipping or not
- Once you’ve added the information, select Complete Setup.
- Your device is now successfully added. Note: Make sure digital receipts are enabled, as well as EMV enabled on the Toast Go 2, or the device will not communicate.
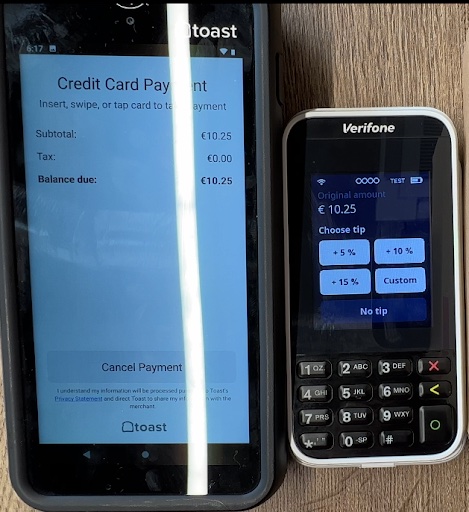
- To test that everything works, navigate back to the home page on the card reader by hitting the red X, and navigate to the payment screen to test the device.
- After selecting the payment screen, the workflow will then move over to the card reader.
- Select the tip amount and provide payment via tap, dip, or swiping the card.
- Select the tip amount and provide payment via tap, dip, or swiping the card.


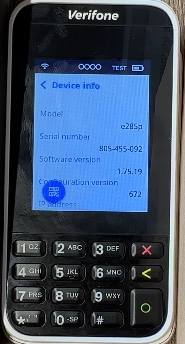
Device Information
- On the home screen of the card reader, hit the 5 button and the green circle button.
- On the next page, you’ll see device information such as
- Model
- Serial Number
- Software Version
- Config Version
- IP Address
- Merchant Account
- Store ID (card reader Related)
Network Settings
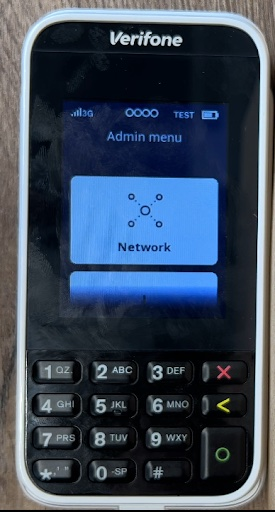
- On the home screen of the card reader, hit the 9 button and then the green circle button.
- You may be prompted for a password; if so, enter 8678 (TOST).
- The next page will prompt you with a list of options; for network settings, select Network.
- Network: See Overview, wifi details, and the ability to assign DHCP or Static
- Software: Update device software settings
- Config: Re-download the config from card reader
- Transactions: Recent Transactions page
- Power Options: Reboot and power off options
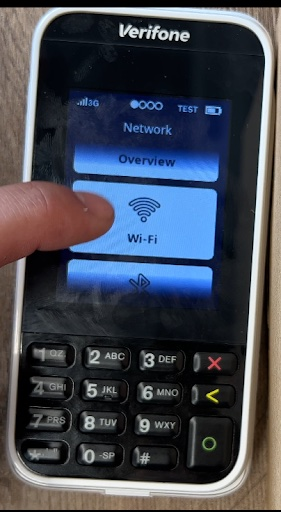
- Within Network, you’ll see options listed out. In order to select, remove, or adjust network settings for the wifi, go to Wi-Fi.
- Overview: Network Connection Details
- Wi-Fi: Wifi connection interface
- Bluetooth: NOT USED
- Cellular: NOT USED
- Within the Wi-Fi settings, you’ll have the options below. Select the little circled i next to the connected network to see further details.
- Toggle wifi on or off
- Search for SSID
- Manually add an SSID (keyboard is T9 layout)
- See connected network details (if connected)
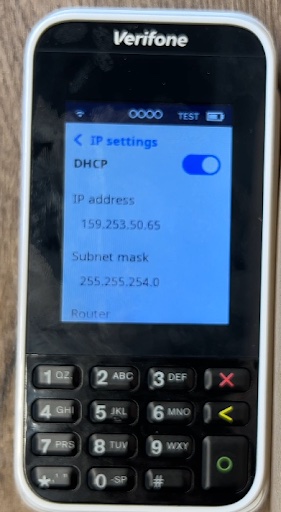
- Adjust IP settings, such as DHCP or Static
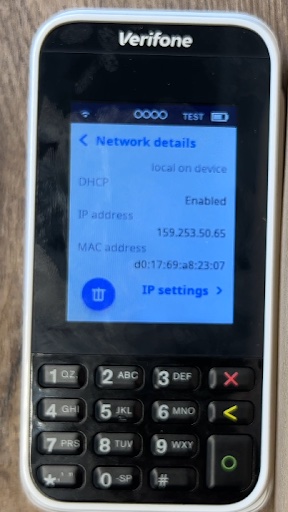
- After selecting the little circle i you’ll see a list of information about the connected network, including the below. To adjust the IP settings, scroll to the bottom of the list and select IP settings.
- SSID
- IP address
- MAC address
- Signal Strength
- Wifi Bandwidth Type
- Frequency
- Security Protocol
- Security Encryption
- After selecting IP Settings, you will see connection details for the DHCP protocol (if connected that way). If the device is static, you’ll see DHCP turned off and the ability to adjust the static IP information. If using Static IPs, the following information is required:
- IP Address
- Subnet Mask
- Router IP
- DNS - preferred