xtraCHEF: Cost Center
Last updated: Apr 8, 2026, 10:06 AM
Cost Centers Overview
Expenses incurred by your marketing teams, maintenance crews, or accounting firm all need to be recorded but don't fit neatly into a General Ledger (GL) Code or Custom Category description. In the accounting world, these are referred to as Cost Centers. A cost center is any part of your business that costs money to run but doesn't directly bring in revenue.
xtraCHEF makes it easy to include your cost center expense reporting alongside your invoice automation to minimize the time you spend switching between programs.
Note: Cost centers are not available if a QuickBooks Online or QuickBooks Desktop extract is enabled.
Cost Centers Set Up
To add a new cost center to xtraCHEF, select the gear icon in the top-right corner and select Cost centers. You'll see any existing cost centers displayed. To add a new cost center, select your Cost Center Chart. Then, select Create Cost Center.

Next, you'll be asked to create a Cost Center Code (think of this as a GL code for non-GL items). Enter a description that indicates the type of expenses this cost center code covers. These can be teams, locations, or other expense types.
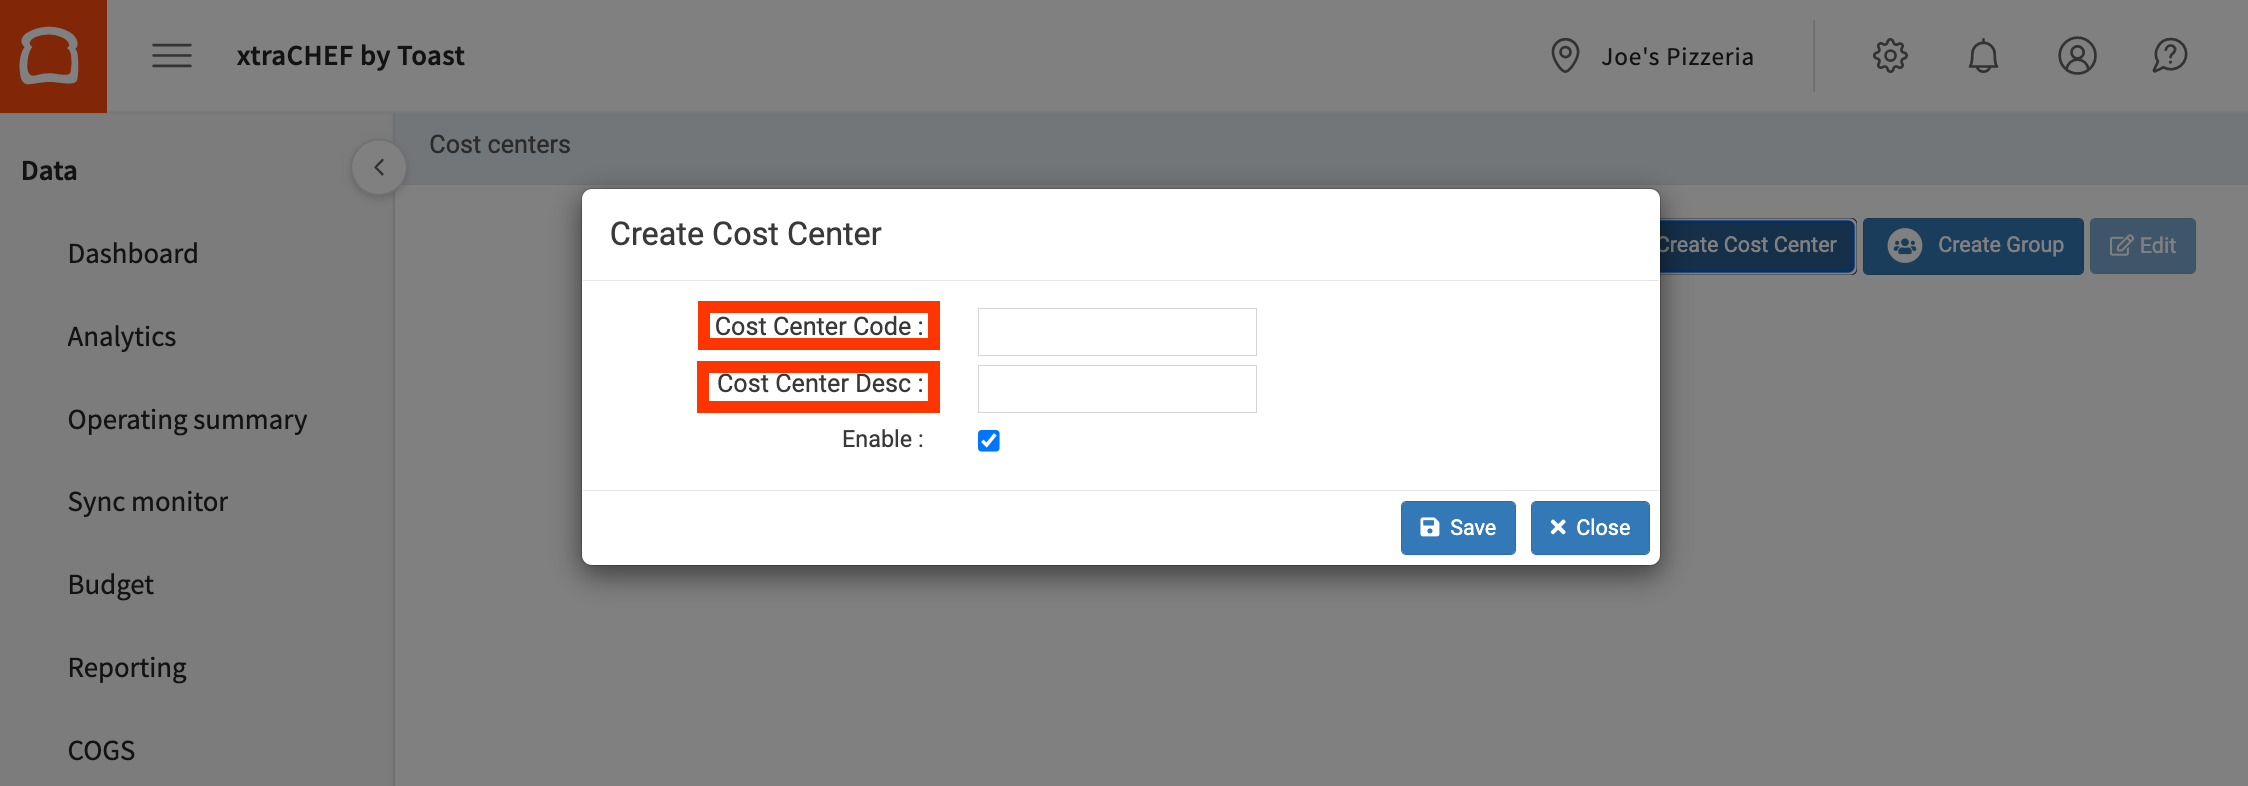
When you're ready to add your new cost center code, select Save. You can now use your new Cost Center the way you would use a GL Code. You can even assign Cost Center-specific Approval Rules to your invoice approvals flow.
Note: When setting up approvals by Cost Center, you must include all vendors in the rule conditions.
Back to top
Update Cost Centers
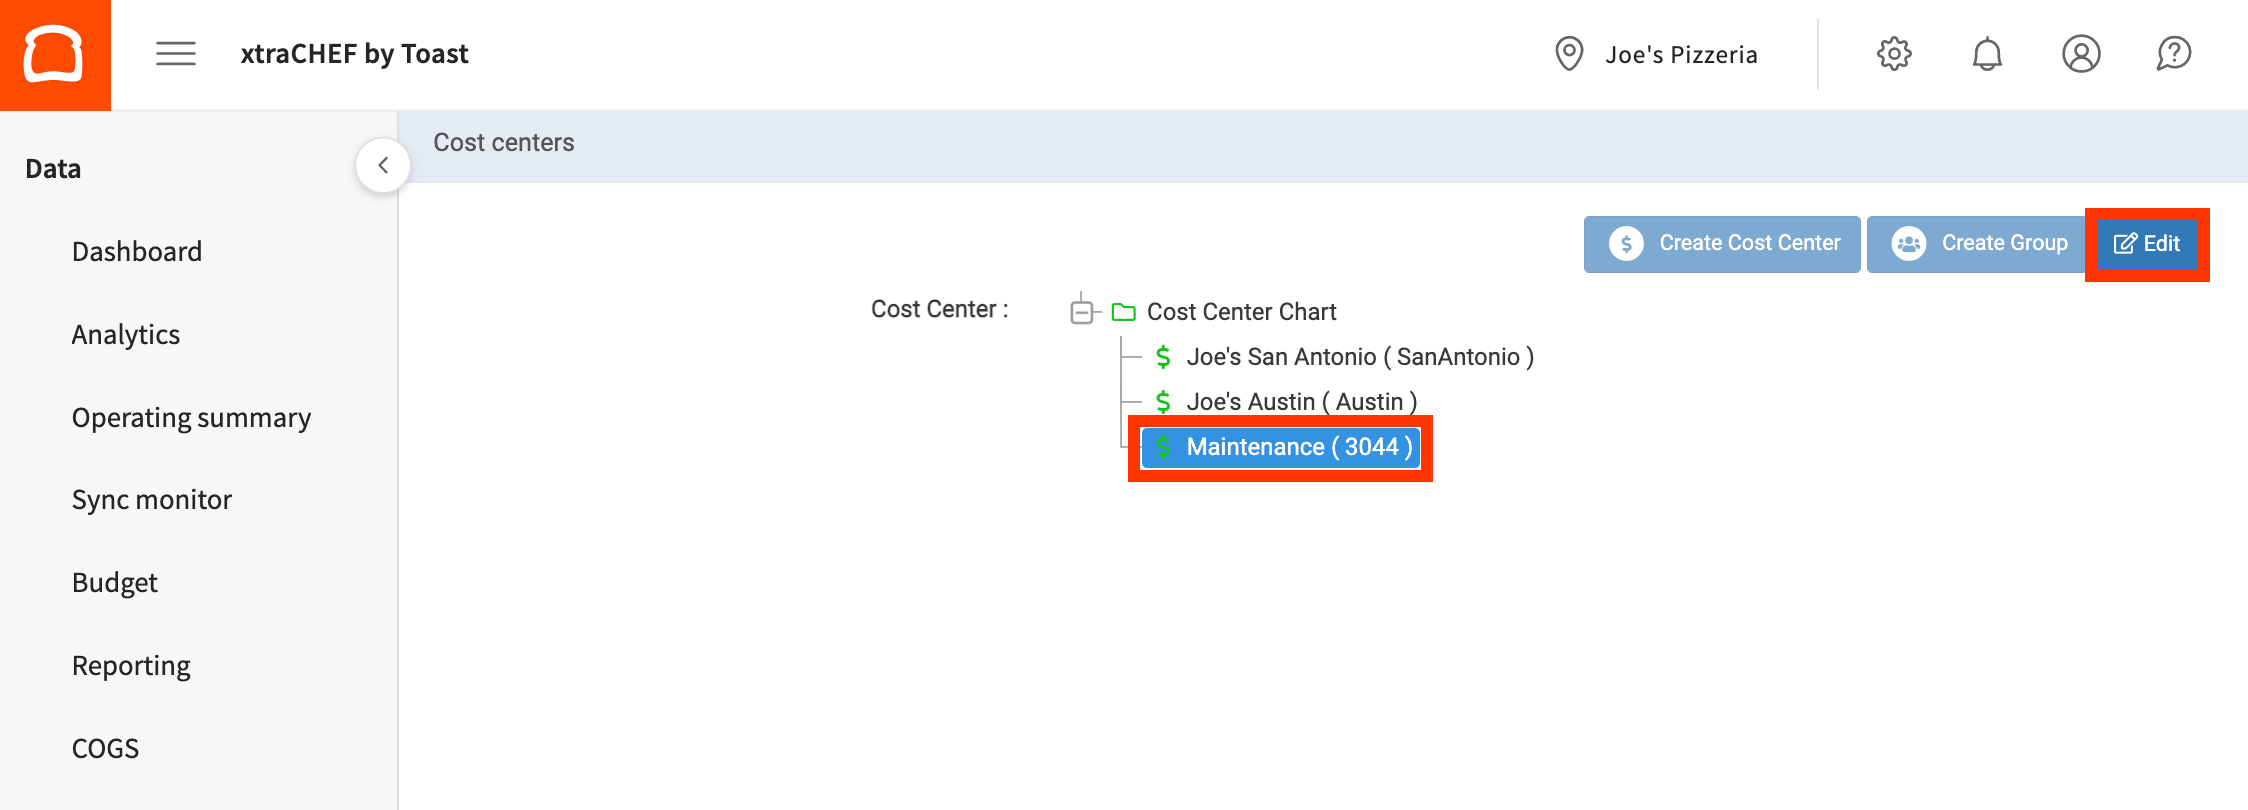
You can always edit your cost center code and description or disable/enable existing cost centers. To do this, select the gear icon in the top-right corner and select Cost centers. Then select your cost center. Next, select Update.
Finally, make changes to your cost center code, description, or enable. Then select Update.
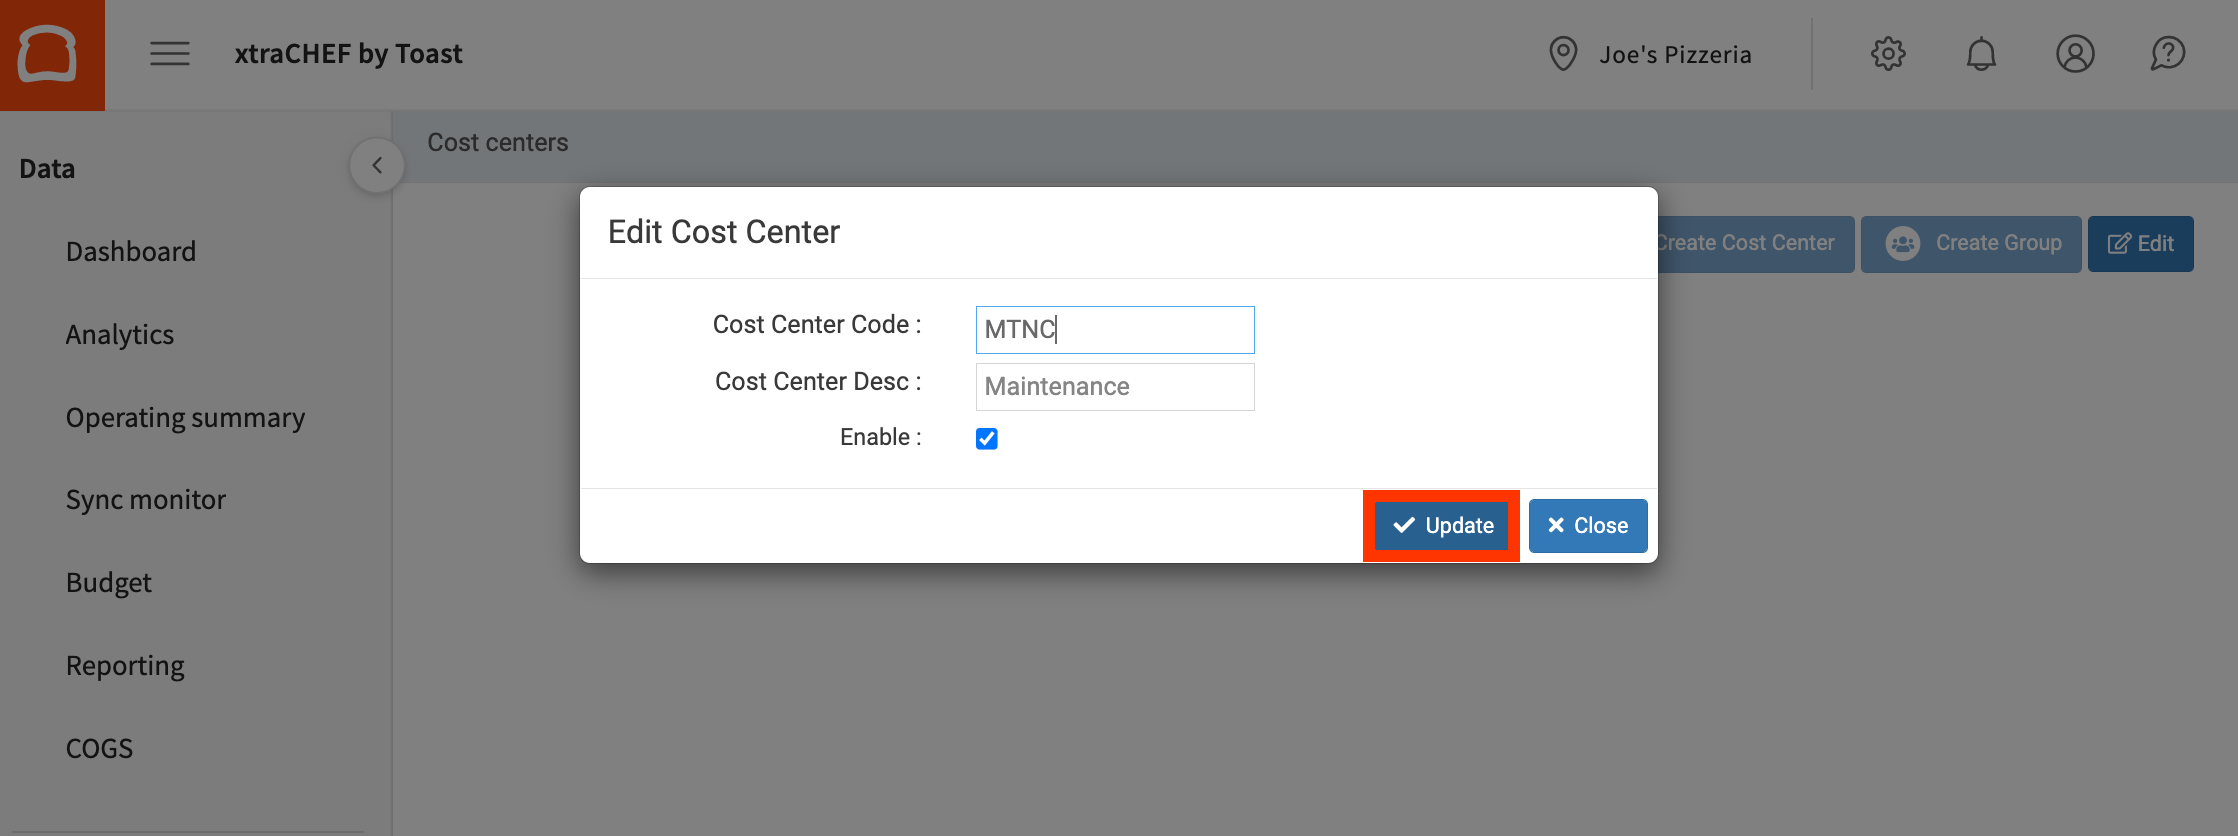
Your changes will take effect immediately upon selecting Update.
Back to top