xtraCHEF: Aprobaciones
Última actualización: 28 abr 2026, 4:20 p.m.
Descripción general de las reglas de aprobación
Lo grandioso de los restaurantes es que no hay dos iguales; incluso las ubicaciones de un mismo concepto o cadena tendrán diferentes necesidades, clientes y prioridades. Lo complicado de los restaurantes es que no hay una solución única que funcione para todo.
Probablemente ya has configurado todo lo que necesitas para escanear y procesar facturas automáticamente a través de xtraCHEF. ¿Pero qué pasa con los proveedores, suministros y casos especiales que requieren un par de ojos extra? En este artículo, cubriremos cómo establecer reglas de aprobación para tus facturas, así como cómo gestionar tu cola de aprobaciones.
Crear reglas de aprobación
Si tienes privilegios de Administrador de inquilinos en tu cuenta de xtraCHEF, puedes crear reglas de aprobación navegando al ícono de engranaje en la esquina superior derecha y seleccionando reglas de aprobación. En esta página, puedes elegir entre varios escenarios de aprobación.
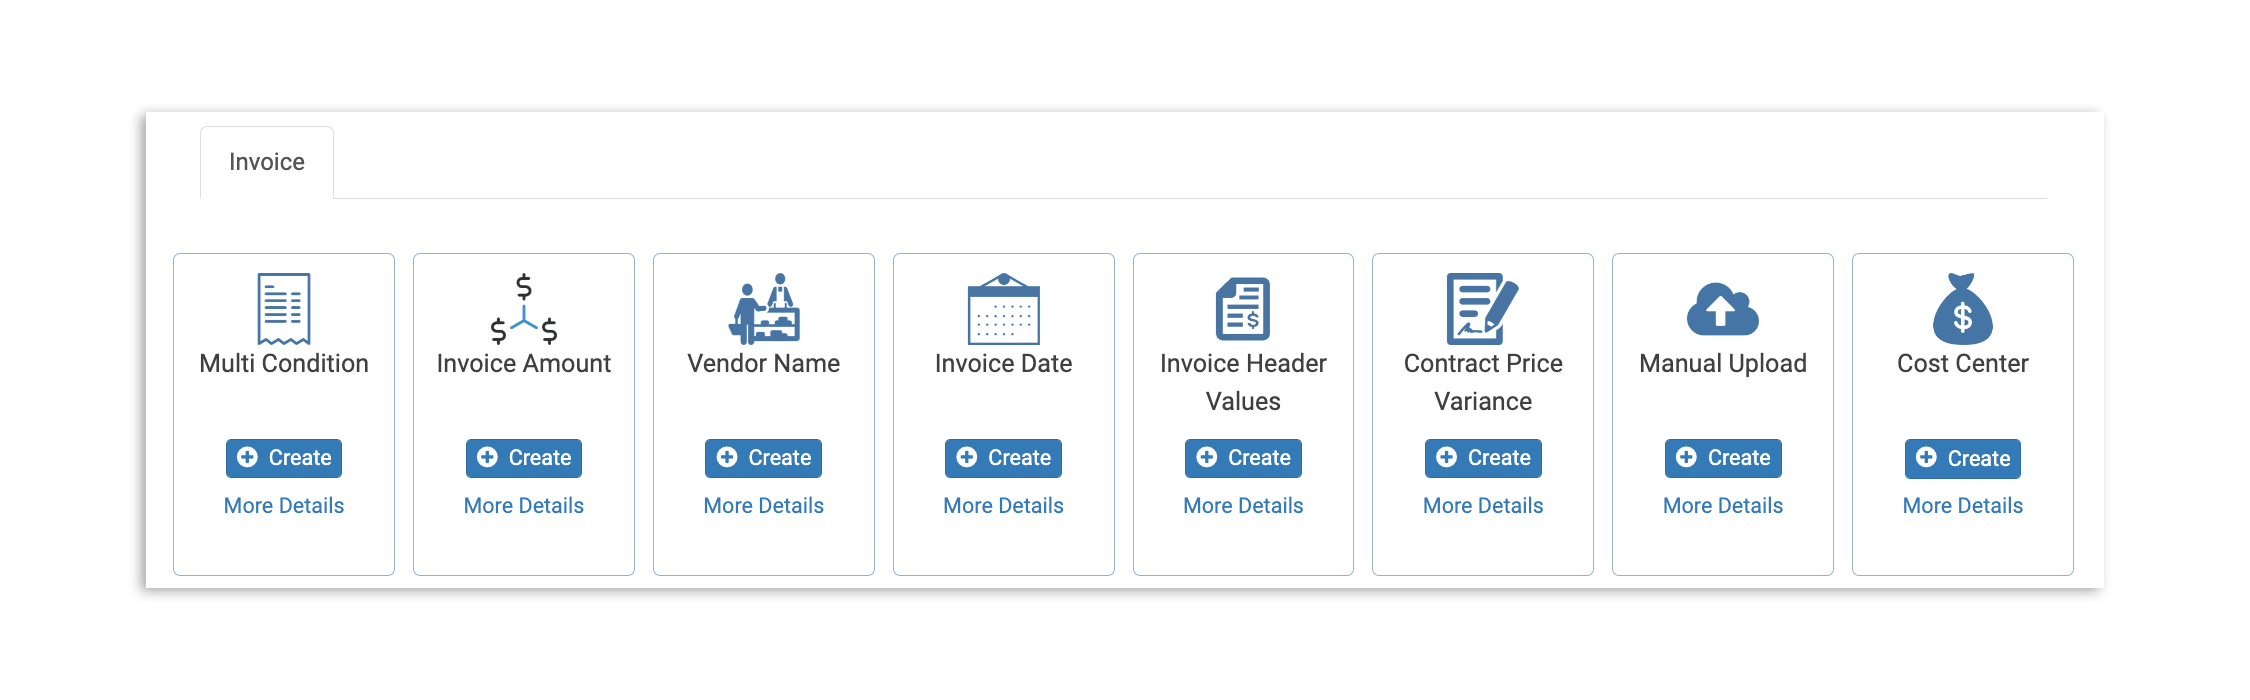
- Condición múltiple: Configura el enrutamiento de facturas para aprobación basado en la combinación de proveedor, ubicación, artículos de la factura y campos de la factura como monto, flete, etc.
- Monto de la factura: Esta regla te permite configurar el enrutamiento de facturas para aprobación basado en el monto de la factura
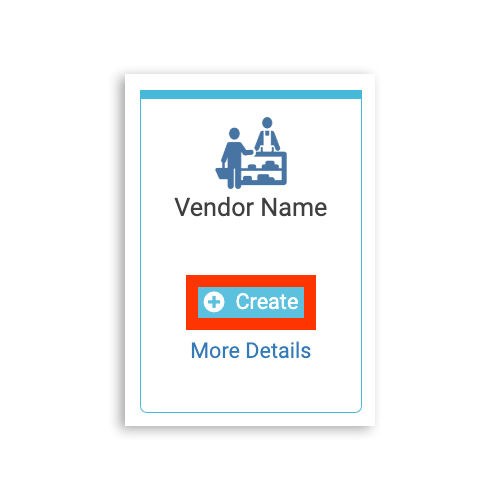
- Nombre del proveedor: Esta regla te permite configurar el enrutamiento de facturas para aprobación basado en el nombre del proveedor
- Fecha de la factura: ¿Esperando un pedido especial para las vacaciones o organizando un gran evento? Esta regla te permite configurar la ruta de las facturas para aprobación basada en la Fecha de la Factura
- Valores del Encabezado de la Factura: Esta regla te permite configurar la ruta de las facturas para aprobación basada en los Valores del Encabezado de la Factura (costos de envío, códigos de descuento, etc.).
- Variación del Precio del Contrato: Especifica si deseas marcar las facturas cuando el costo de los bienes supere el precio acordado en tu contrato, o elige ser notificado de todas las fluctuaciones de precios.
- Carga manual: Requiere revisión/aprobación manual cuando un empleado ingresa los detalles de la factura en lugar de escanear un documento.
- Centro de Costo: Marca los gastos traídos por los diversos Centros de Costo de tu organización. Al seleccionar Centro de Costo como tu regla de aprobación, estos se listarán por separado bajo la pestaña Regla de Centro de Costo.
Para crear una regla, selecciona el botón crear en el tipo de regla de aprobación de tu elección.
Esto lanzará un flujo de trabajo de regla de aprobación. Si bien los detalles de cada flujo de trabajo se verán un poco diferentes dependiendo del escenario que elijas, todas las aprobaciones seguirán los mismos pasos básicos:
- Establecer criterios específicos.
- Seleccionar y confirmar la ubicación.
- Asignar usuarios como aprobadores para las facturas que cumplan con tus criterios.
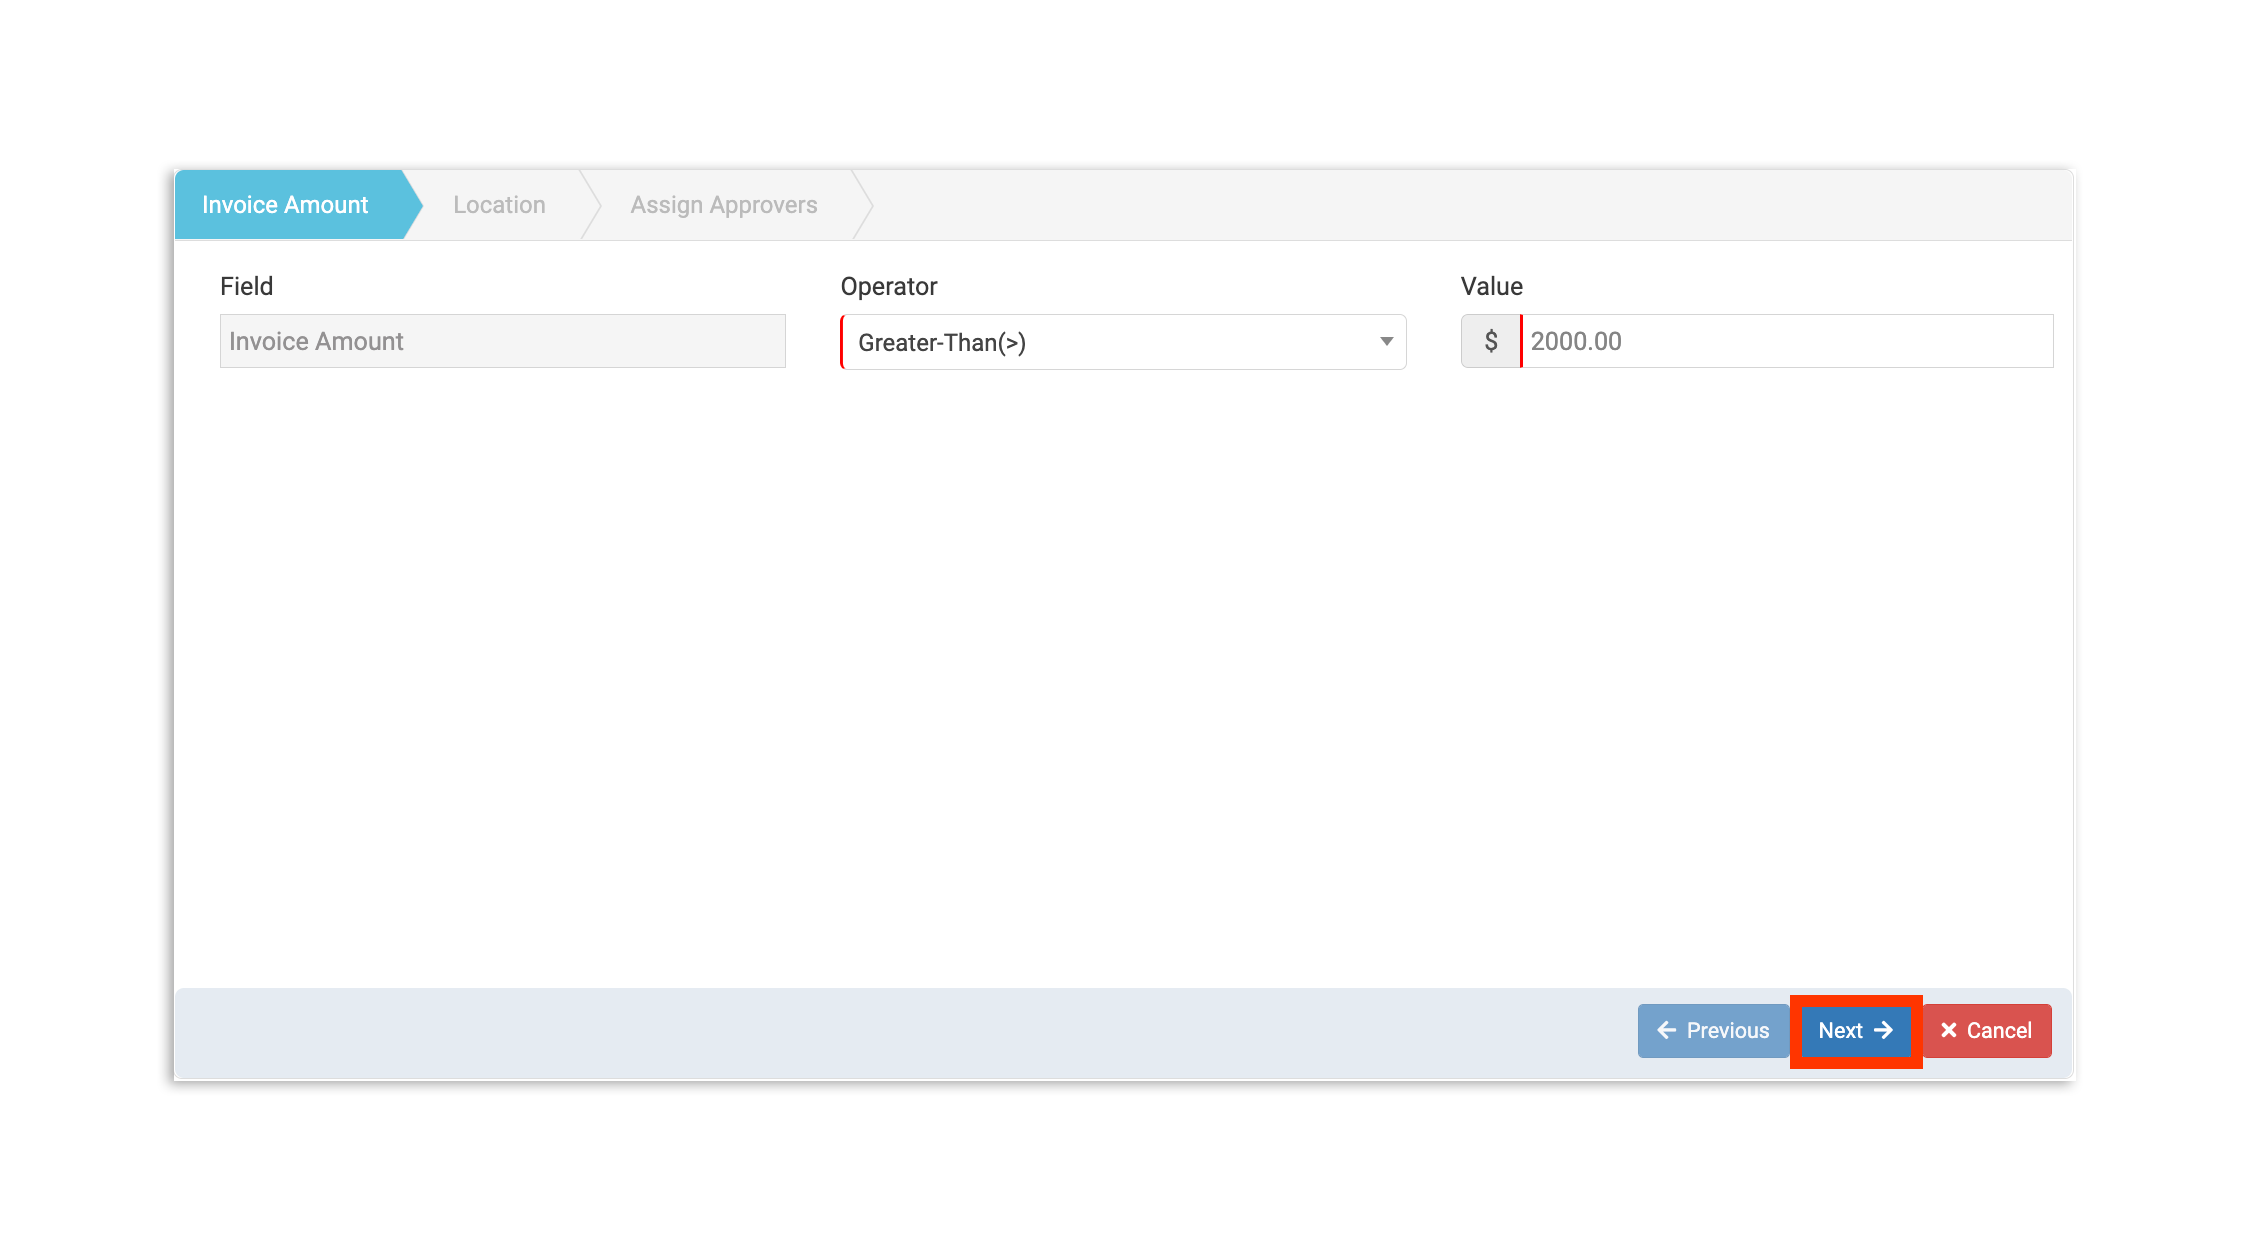
En este ejemplo, estamos creando una Regla de Monto de la Factura que marcará automáticamente las facturas para revisión manual si el total supera los $2000. Primero, especifica las condiciones de tu regla de aprobación y selecciona Siguiente.
En este caso, estableceríamos la condición Operador a Mayor que(>), y el Valor a $2000.00
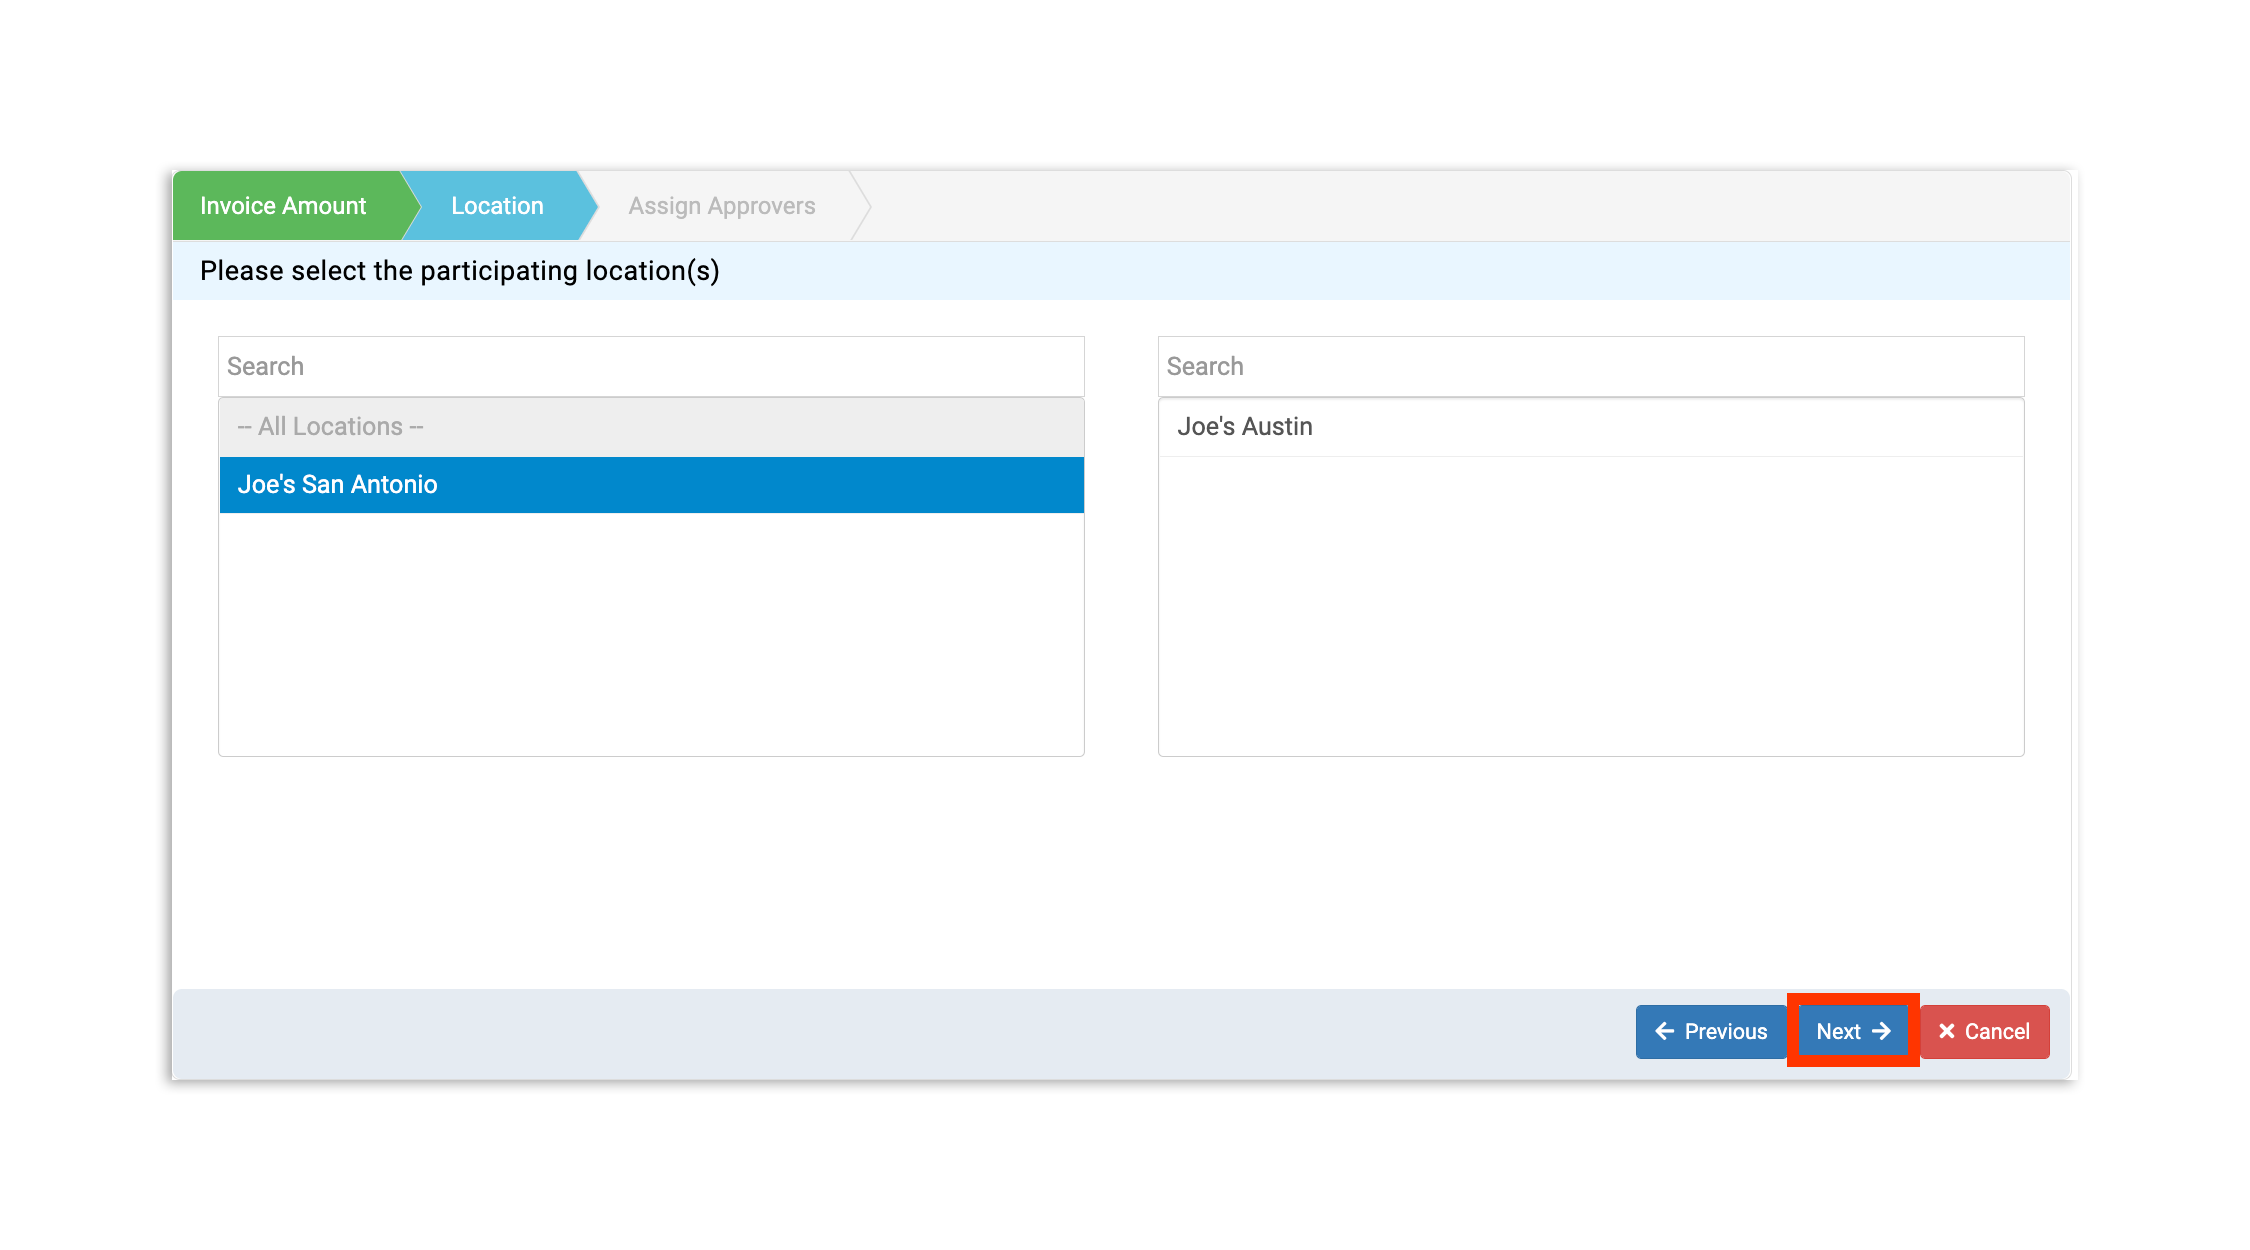
A continuación, agrega la(s) ubicación(es) que estarán sujetas a esta regla. Selecciona una ubicación de la sección de la izquierda para moverla a la sección de ubicaciones participantes a la derecha. Debes elegir al menos una ubicación. Una vez que se haya elegido una ubicación, selecciona Siguiente.
El último paso antes de que puedas usar tu nueva regla de aprobación es determinar de quién se necesita la aprobación.
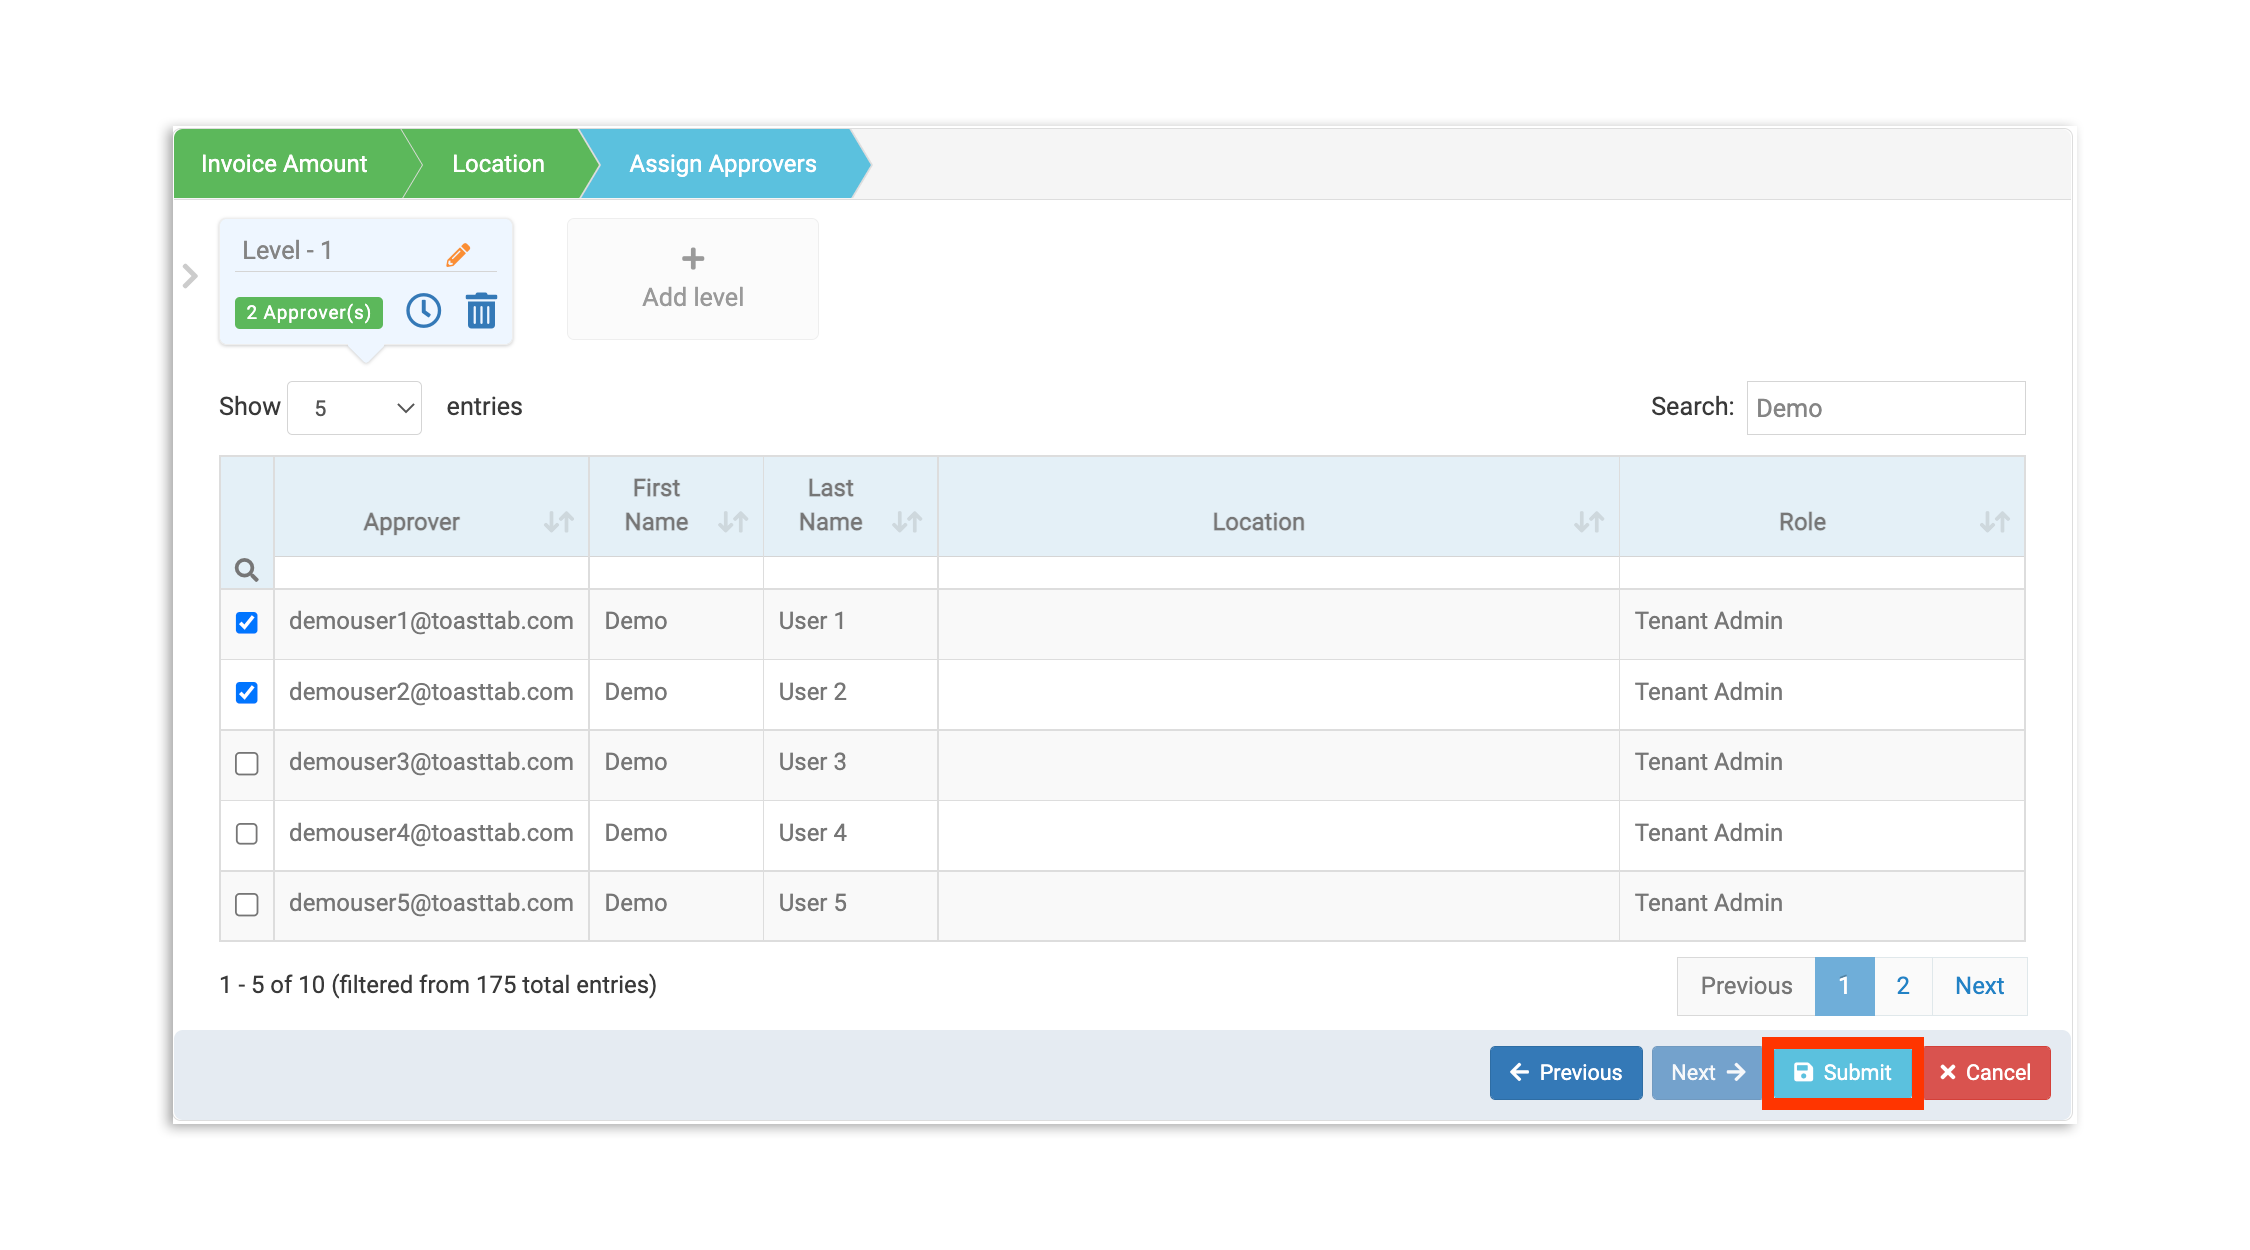
Nota:Cada regla necesita al menos un nivel de aprobación y al menos un aprobador, así que agrega primero al aprobador inicial.
Si deseas una capa adicional de aprobación dentro de la misma regla de aprobación, puedes seleccionar+ Agregar nivel. Esto hará que las facturas que cumplan con tus criterios suban "una cadena de mando". Los aprobadores de nivel 1 recibirán el documento antes que los aprobadores de nivel 2 y así sucesivamente.
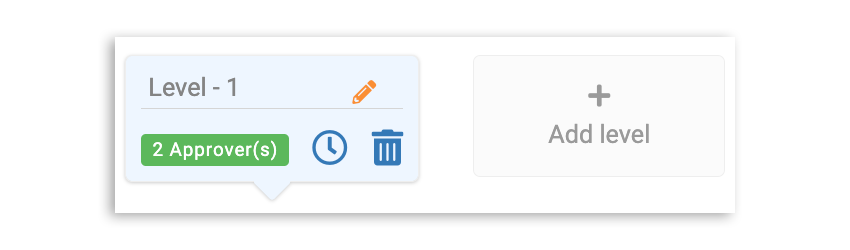
Seleccionar el ícono de reloj para un nivel te permite habilitar la auto-aprobación, si es necesario. Además, los íconos lápiz y basura te permiten editar y eliminar un nivel, respectivamente.
Finalmente, cuando hayas designado al menos un aprobador, selecciona Enviar. Luego se te pedirá que nombres tu regla. Una vez que tu regla esté nombrada y enviada, aparecerá inmediatamente en tu lista de reglas de aprobación.
Aprobar Facturas
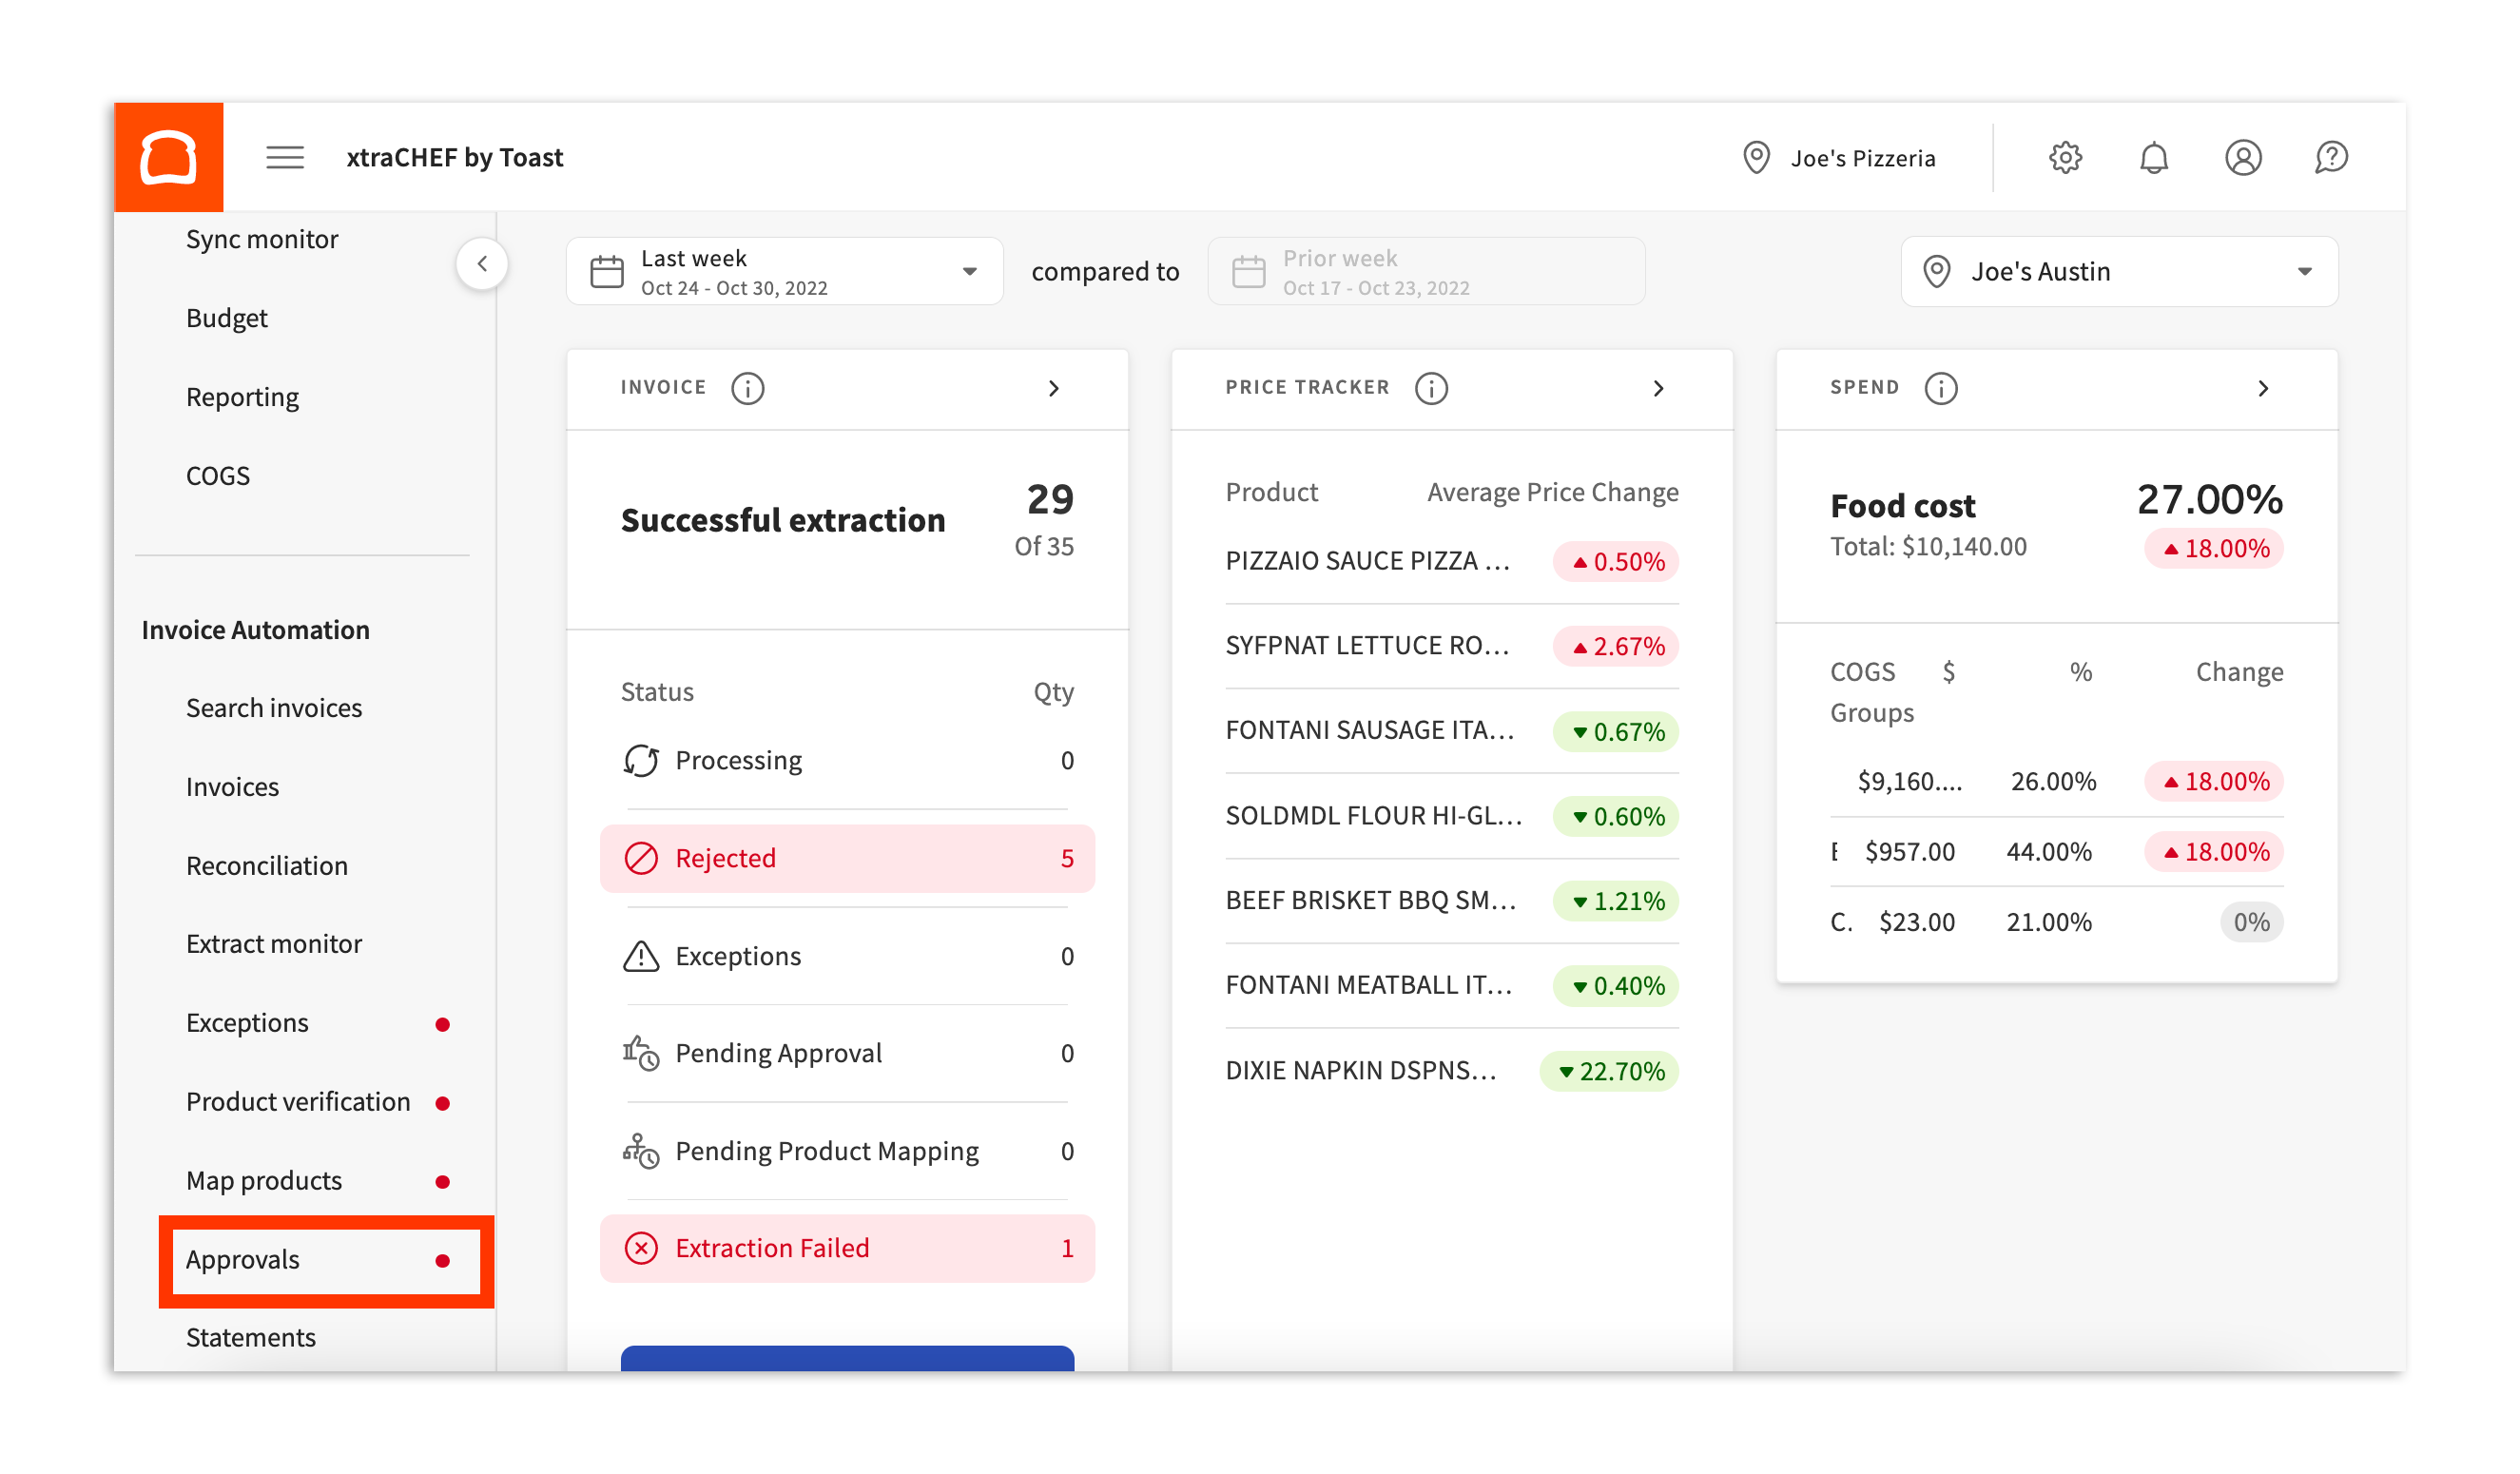
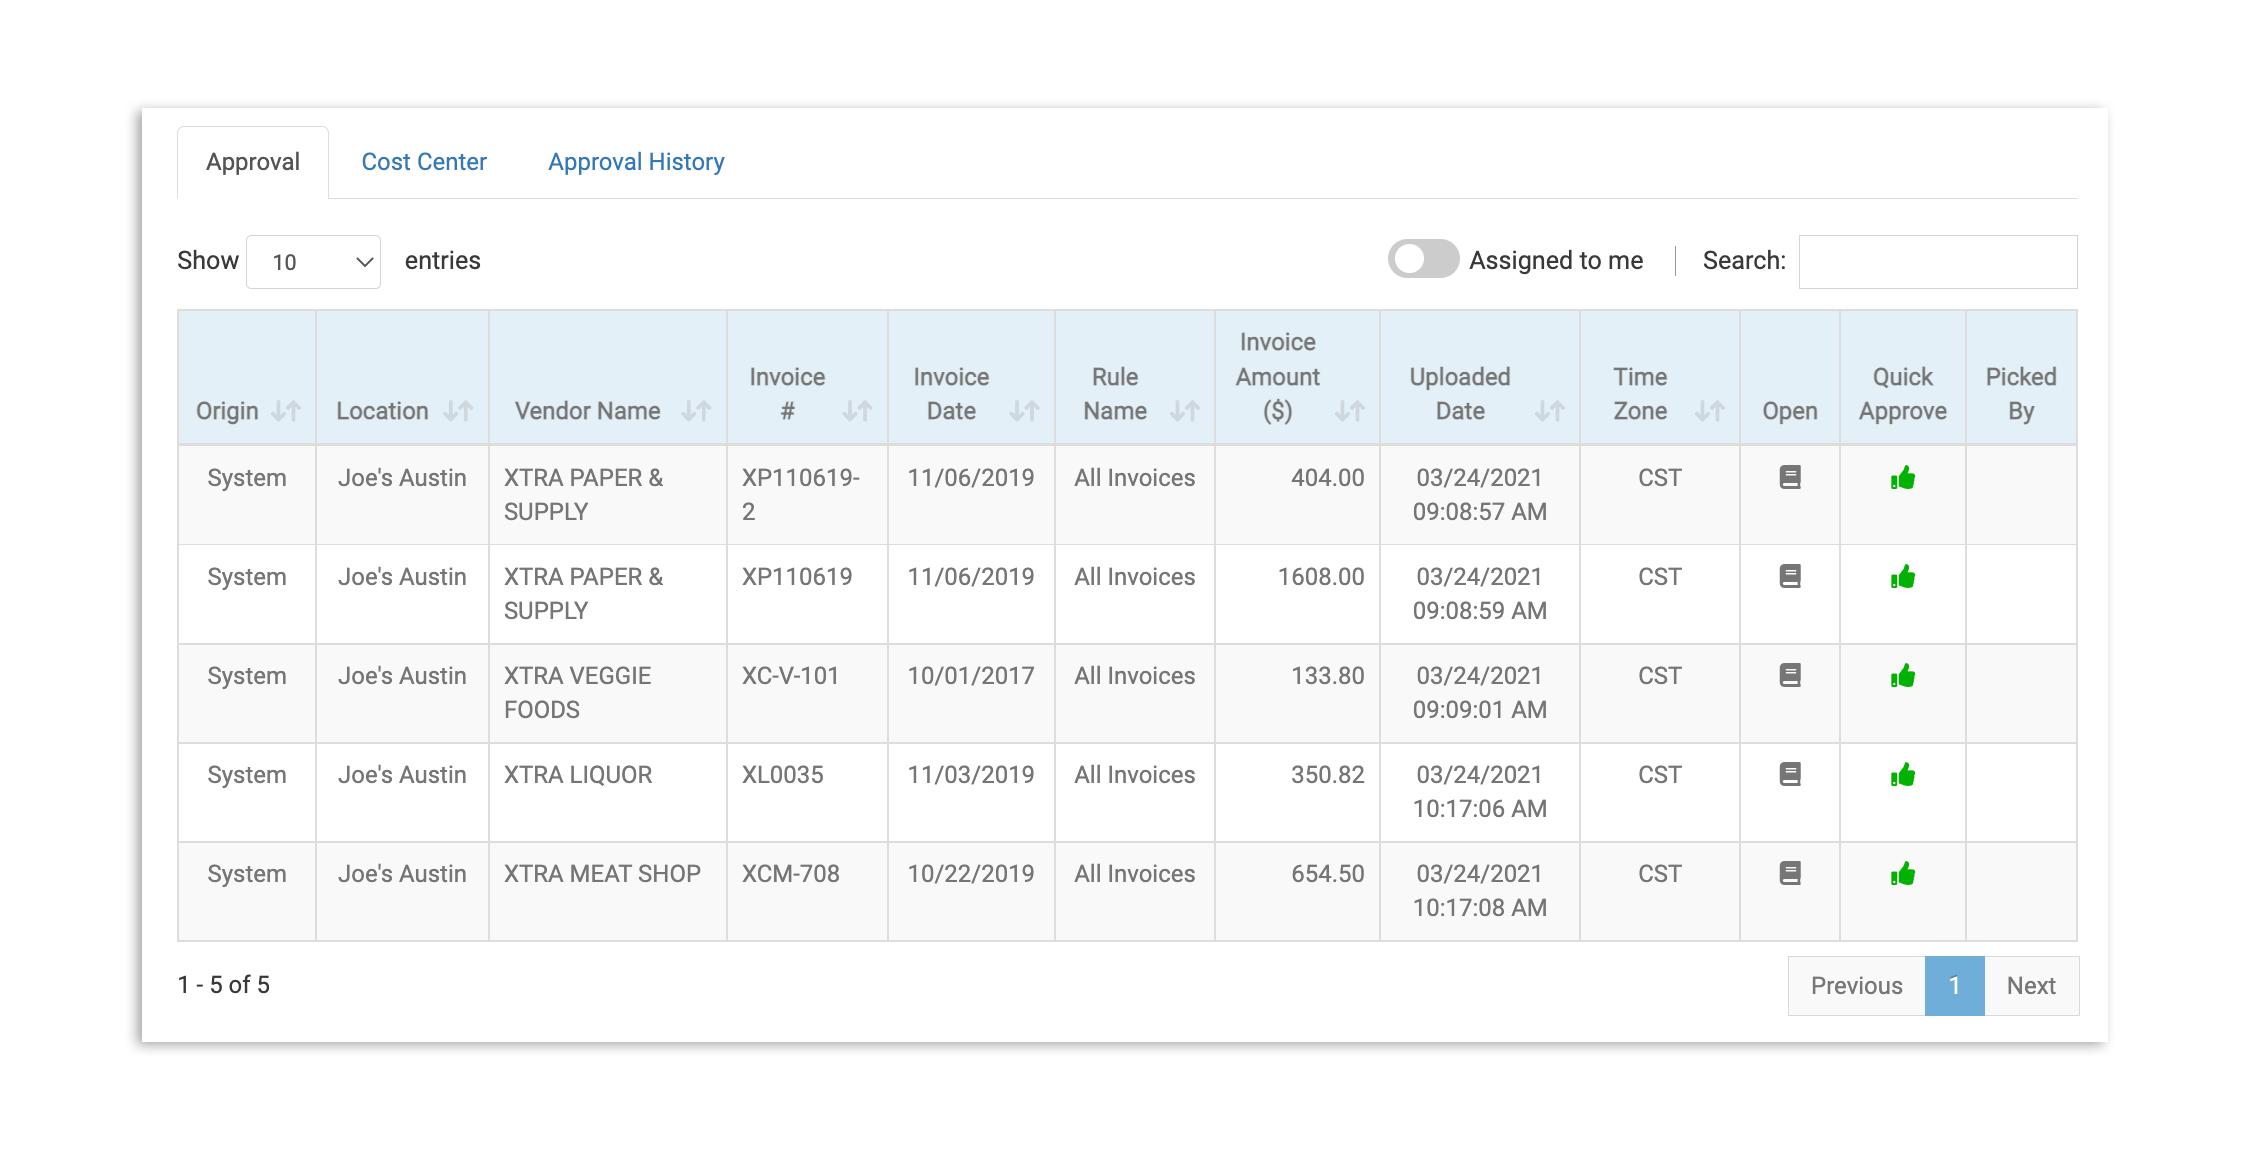
- Si estás listado como aprobador, verás un ícono de notificación roja en la pestaña deAprobaciones en la barra lateral de xtraCHEF a la izquierda cuando tengas nuevas facturas para revisar. SeleccionaAprobación para ser llevado a la cola de todas las aprobaciones de facturas pendientes.
- Si ves una factura en la lista que se espera, puedes seleccionar elícono de pulgar hacia arriba debajo deAprobar Rápido para enviarla inmediatamente a tu lista de facturas aprobadas. De lo contrario, selecciona elícono de libro debajo deAbierto para profundizar en la factura.
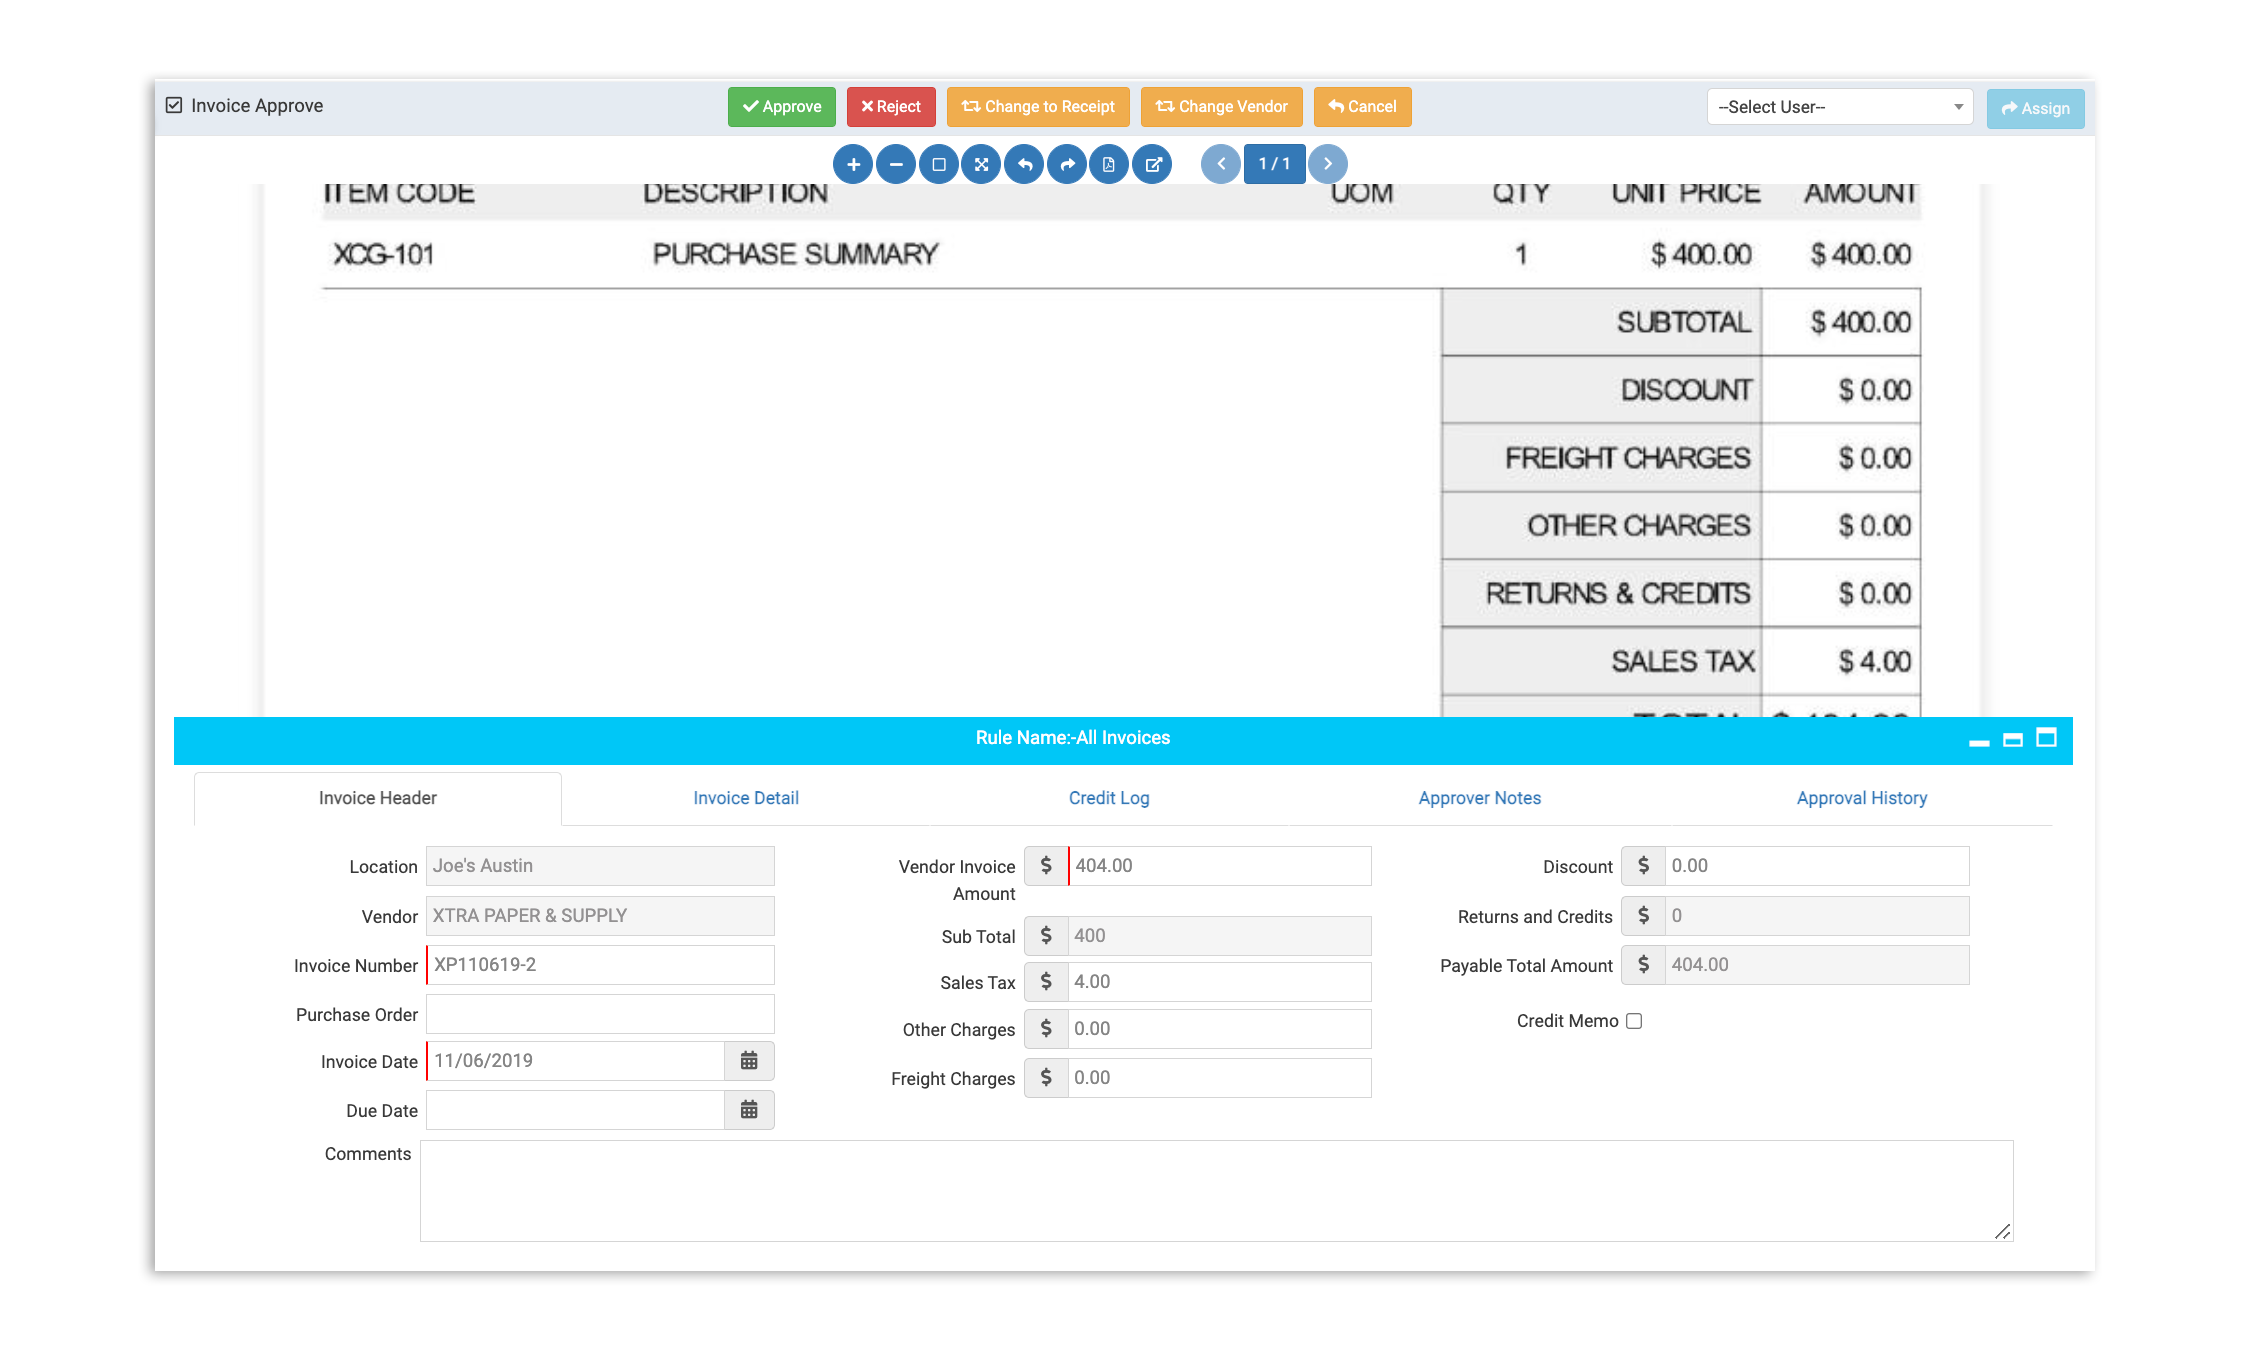
- SeleccionarAbierto abrirá una nueva página con la factura escaneada, así como los datos que xtraCHEF ya ha extraído de la factura.
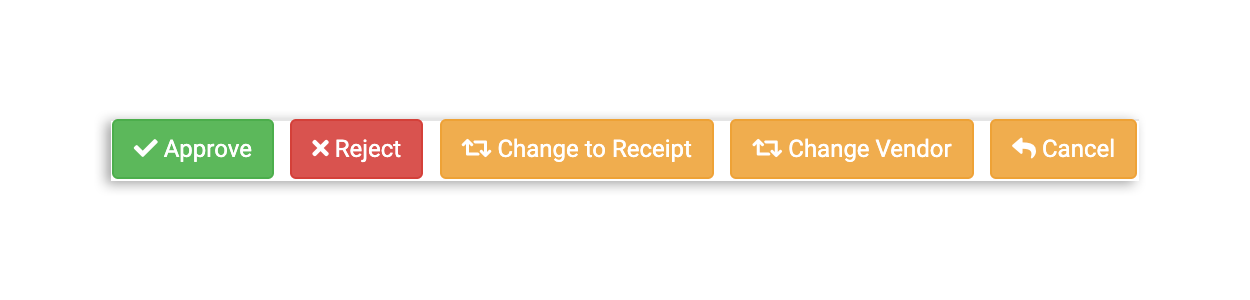
- Si todo se ve bien tras una inspección más detallada, selecciona el botón verdeAprobar en la parte superior.
- Si hay cambios que deben hacerse (un recibo escaneado como factura o detalles incorrectos del proveedor), selecciona el botón amarillo correspondiente para llevar la factura a los estándares.
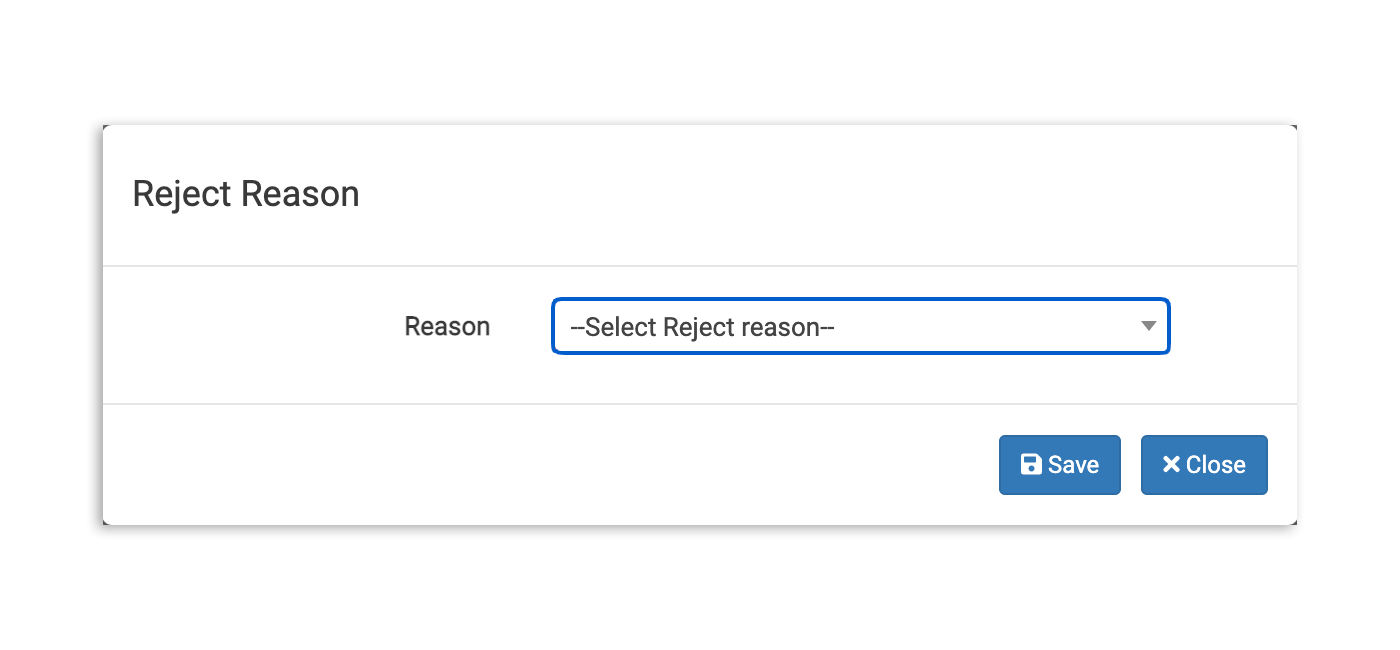
- De manera similar, si la factura no puede ser aceptada, selecciona el botón rojoRechazar y elige una razón para el rechazo. Esto moverá la factura a la columna deRechazadas en tu página de Facturas y los datos de la factura rechazada no se utilizarán en xtraCHEF.
Volver al inicio