xtraCHEF: Crear y Editar Categorías de Compra
Última actualización: 8 abr 2026, 10:05 a.m.
Las categorías ayudan a rastrear dónde está gastando su dinero a un nivel más granular que los códigos GL. Aprenda cómo crear y editar categorías de compra.
En xtraCHEF, las Categorías de Compra te permiten desglosar aún más los códigos del Libro Mayor (GL) en grupos más específicos. Las categorías de compra no afectan tus extractos contables, pero permiten capas adicionales de información en muchas de nuestras funciones de análisis e informes.
Este video de 4 minutos te guía a través de la creación y edición de categorías de compra en xtraCHEF. También destaca la información que se vuelve disponible para ti como resultado de crear un sistema de categorías de compra dentro de tus Códigos GL.
Crear Categorías de Compra
Selecciona el botón a continuación para una guía dentro del producto sobre cómo crear categorías de compra en xtraCHEF. Debes estar conectado a xtraCHEF para ver esta guía.
Aprender a Crear Categorías de Compra
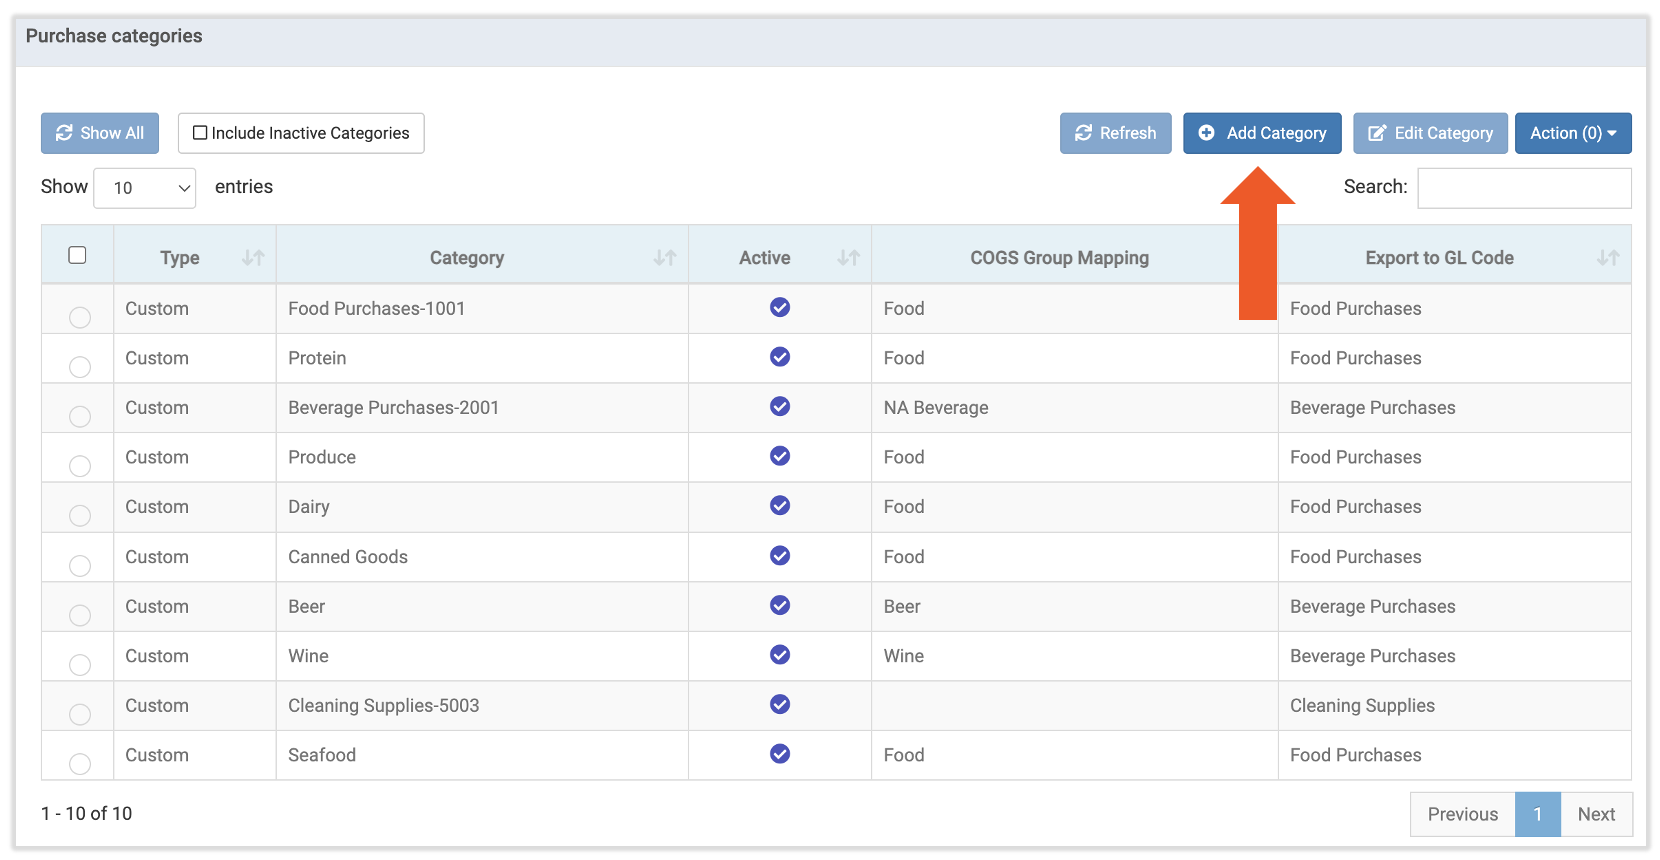
Para crear una nueva categoría de compra, selecciona el engranajeícono en la esquina superior derecha y elige Categorías de Compra. Es posible que ya veas varias categorías de compra aquí, ya que xtraCHEF proporciona a los nuevos usuarios un conjunto de categorías predeterminadas. En esta página, selecciona el botón + Agregar Categoría en la parte superior.
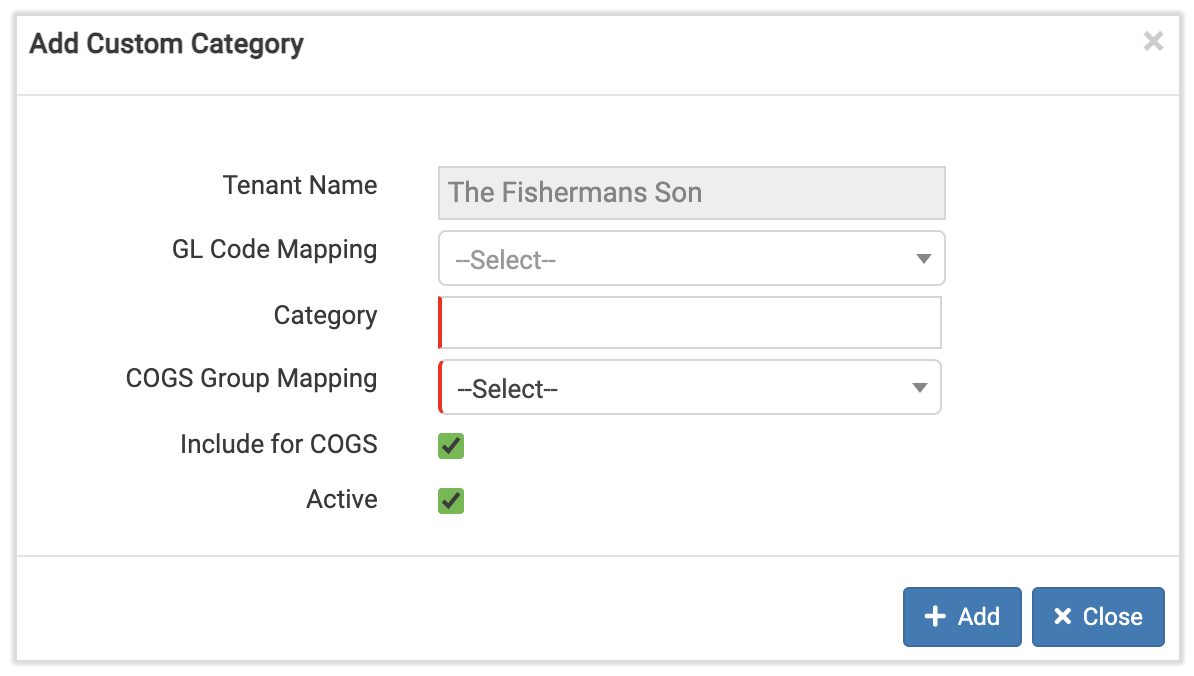
Nombra esta nueva categoría de compra y selecciona el Asignación de Código GLy Asignación de Grupo COGS que deseas que la categoría de compra desglosar. Selecciona Incluir para COGS si deseas mapear tus Grupos de COGS a compras. Visita xtraCHEF: Mapeo de COGS para aprender más sobre el mapeo de COGS. Finalmente, selecciona +Agregar para confirmar tu nueva categoría de compra.
Editar Categorías de Compra
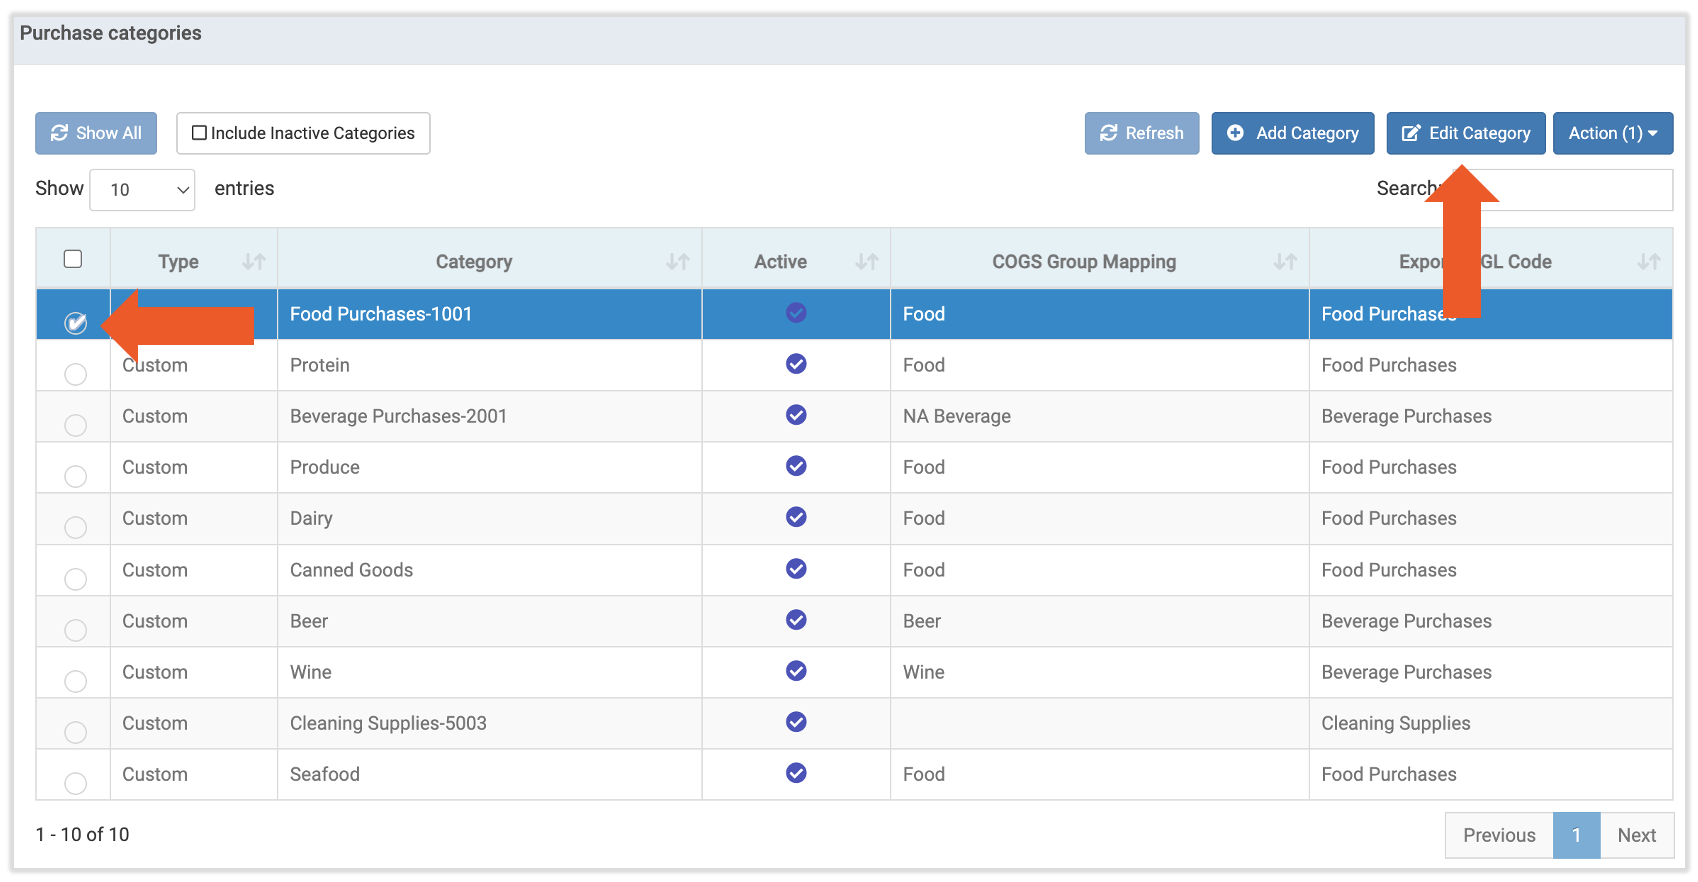
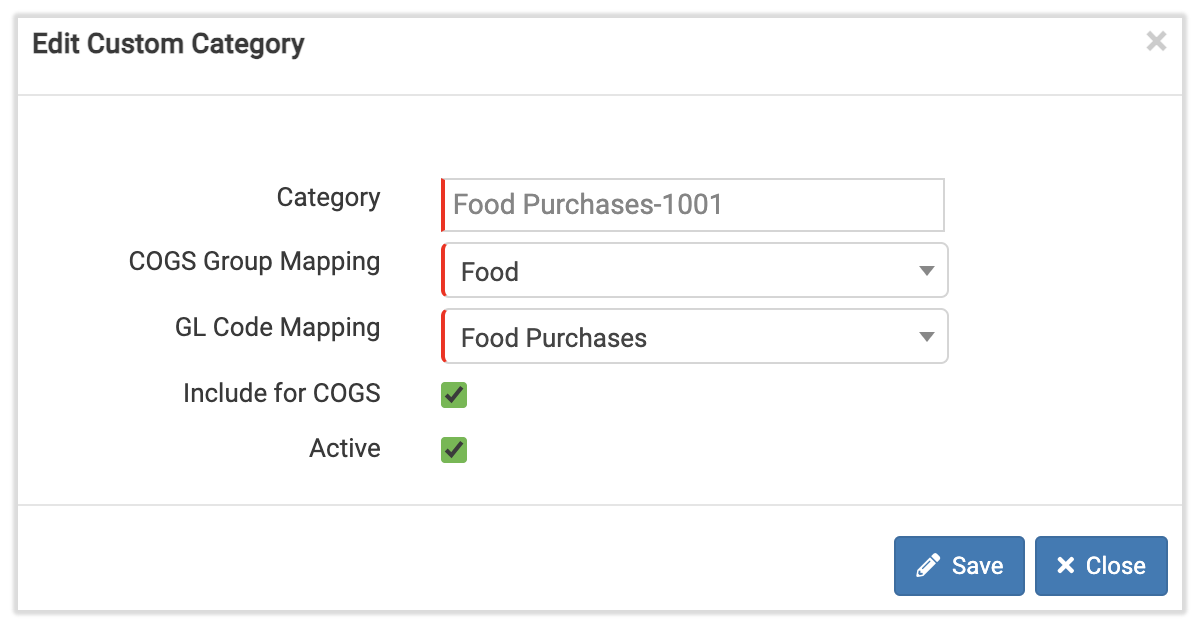
Selecciona el icono de engranajeicono en la esquina superior derecha de xtraCHEF y elige Categorías de Compra. Para editar una categoría de compra, selecciona su casilla de verificación y luego selecciona el botón Editar Categoría.
Aquí, puedes hacer cambios en el mapeo de Grupo de COGS o mapeo de Código GL asociado a la categoría de compra. Elimina el mapeo del grupo de COGS seleccionando el menú desplegable, eligiendo Seleccionar, y desmarcando la casilla para Incluir para COGS. También puedes hacer que una categoría de compra activa sea inactiva desmarcando la casilla Activa. Selecciona Guardar cuando hayas terminado y tus cambios se aplicarán de inmediato.
Desactivar/Activar Categorías de Compra
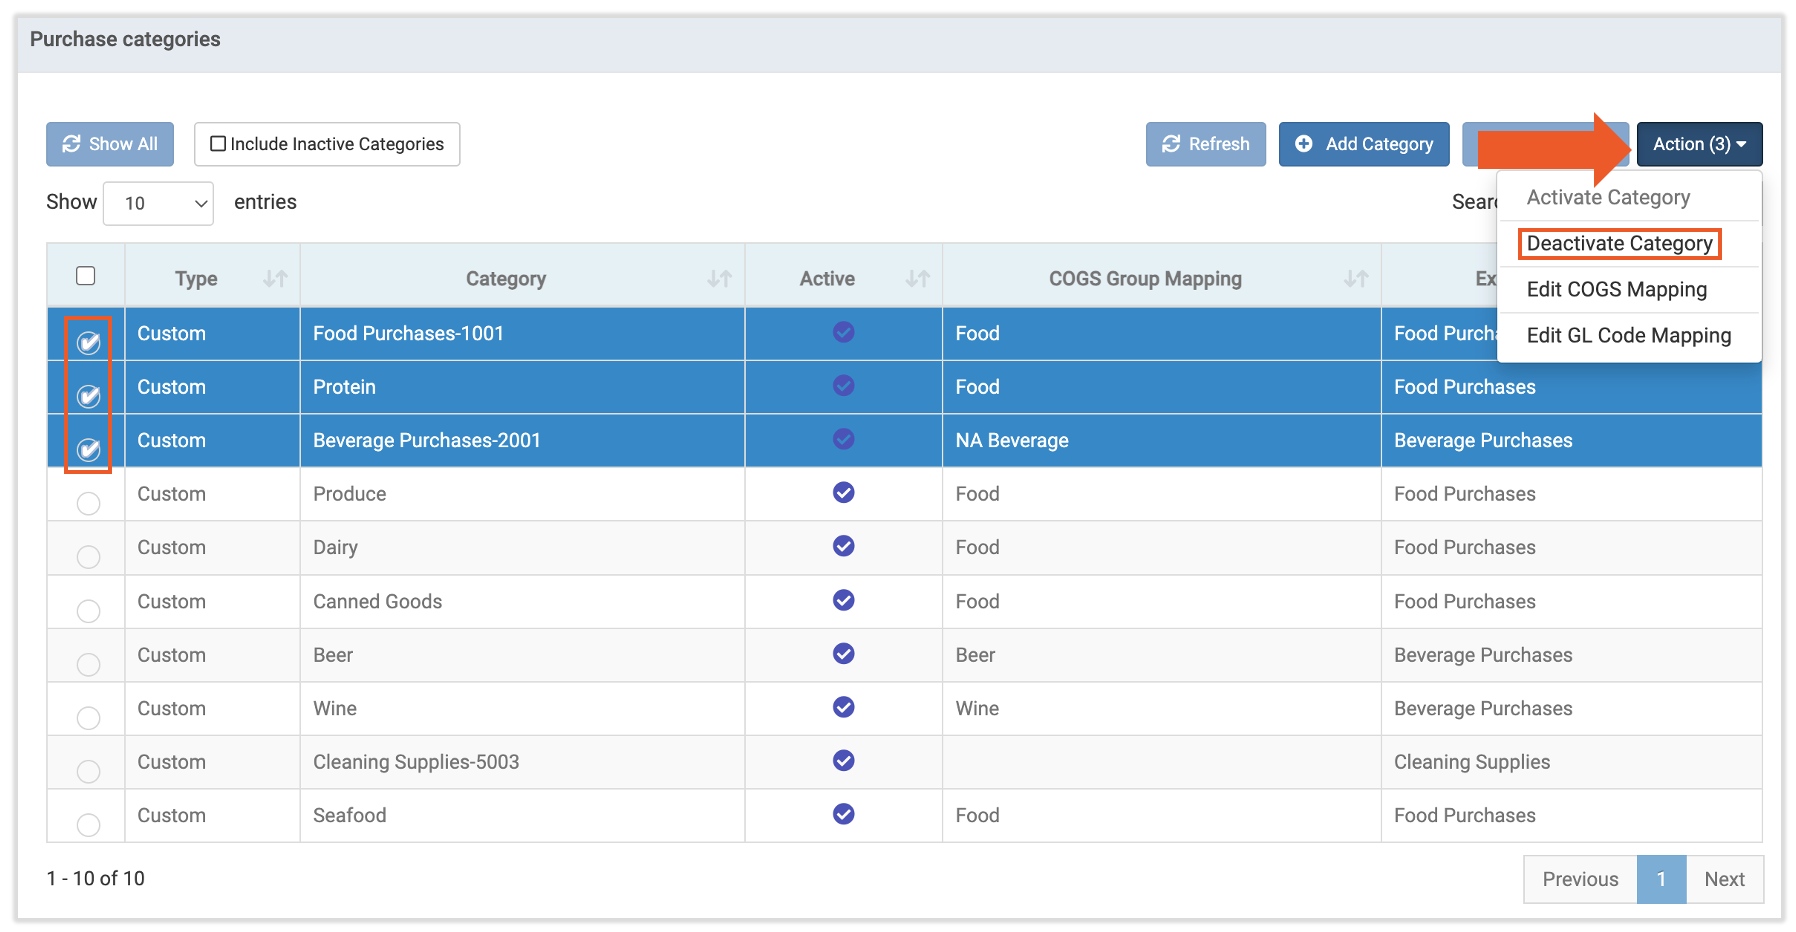
Si deseas desactivar o activar categorías de compra, puedes hacerlo individualmente o en bloque. Navega a icono de engranaje> Categorías de Compra. Ahora selecciona la casilla de verificación para cada categoría de compra que deseas gestionar. A continuación, selecciona Acción >Desactivar Categoría.
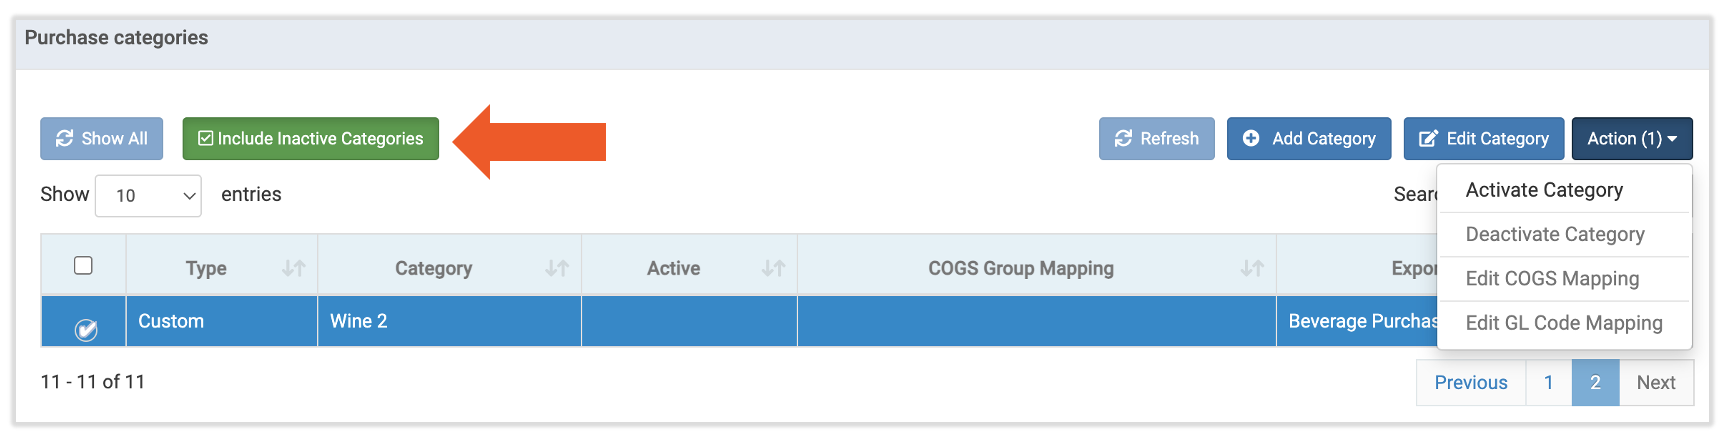
Por defecto, las categorías de compra inactivas no aparecen en esta página a menos que se seleccione Incluir categorías inactivas. Una vez que este filtro esté habilitado, siga los pasos anteriores para seleccionar la casilla de verificación de la categoría de compra y navegue a Acción > Activar categoría. Nota: Las categorías de compra inactivas aún se pueden ver, pero los artículos ya no se pueden asignar.
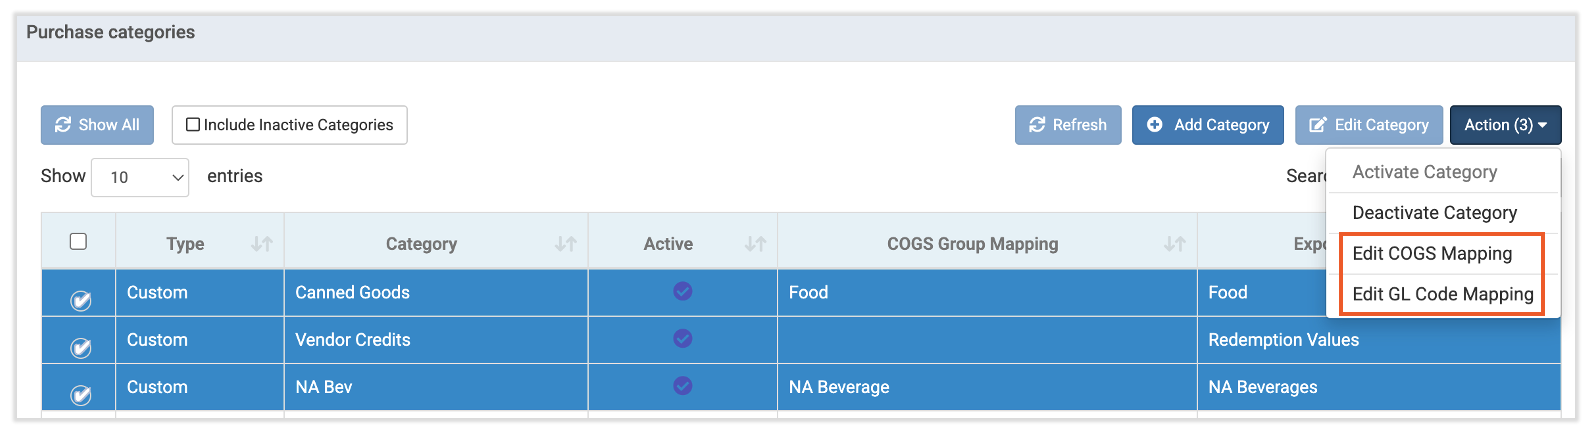
Editar categorías de compra
Puede actualizar fácilmente múltiples categorías de compra a la vez. Primero, seleccione la casilla de verificación para cada categoría de compra que desea incluir. Luego seleccione Acción y elija Editar mapeo de COGS o Editar mapeo de código GL. Una vez que haya seleccionado su grupo de COGS o código GL deseado, seleccione Guardar.