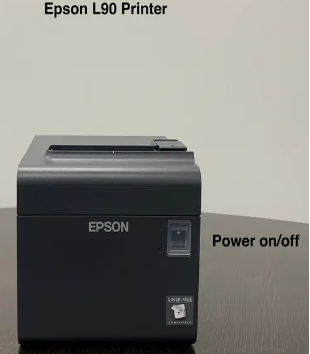
Get Help With Epson TM-M30
上次更新时间:2026年4月8日 10:00
This troubleshooting guide provides quick solutions for common Epson TM-M30 issues, ensuring smooth receipt printing.
- Before Troubleshooting
- Printer Not Printing
- Auto Cutter Jam
- Incorrect Paper
- Print a Test Slip
- Setup in Toast App
Before Troubleshooting
Checking the Printer Indicator Lights can help narrow down your issue for each of the following troubleshooting steps. Keep in mind that after your Toast Printer is configured, the light will be amber if the printer is in Sleep mode. This happens if the printer is turned off or unplugged. To power it back on, hold the Power button until the light turns green.
The Amber Light is also an indicator of error. You may notice that after troubleshooting, when the Printer cables are reseated, the internet connection is tested, and connectivity is restored, the Amber light may appear. This could help you identify a Paper Feed issue.
Printer Not Printing
If your printer isn't working, you can troubleshoot potential causes related to the printer itself or even a setup problem on Toasttab.com. To help you narrow down the issue, please work through the following questions.
- When did this start happening?
- This question will help determine if there was a possible change to a setting on Toasttab.com or the Network
- If this just recently happened, it is best to start with Toasttab.com and look for any settings changes under Publish Config Internal
- If this has been going on for a while, it is best to start troubleshooting with the Epson TM-M30 Printer
- What doesn’t the printer print?
- Finding out if the printer doesn’t print certain items or just certain tickets from certain terminals will help narrow down the focus on troubleshooting
- If the printer is only printing certain items on the check, it is most likely a setting within Advanced Properties on Toasttab.com
- If the printer is only printing at certain stations or terminals, it could be a setting on Toasttab.com under Printers, or it could be a setting on the terminal. Please be sure to check both
Note: A paper roll divider or spacer is not supported for the Epson TM-L90 (unless it is used for the Narrow (57.5 - 58 mm) receipt or kitchen tickets) since labels require a 3" width receipt paper roll, but the printer does support label lengths of 1.5", 2", and 3".
Follow the steps below:
- Try restarting the printer by locating the power switch, turning it off & on.
- Check whether the AC adapter is correctly connected. It is VERY common for the power cord to become disconnected from the power brick. Make sure the cord is not only fully plugged into the outlet, but that it is also tightly connected to the brick in the middle of the cord.
- Verify the paper is installed properly by holding down the feed button for several seconds
- If the Error LED is on:
- Check whether the roll paper cover is correctly closed.
- If the Paper LED is on, check whether the roll of paper is correctly installed.
- If the Error LED is flashing:
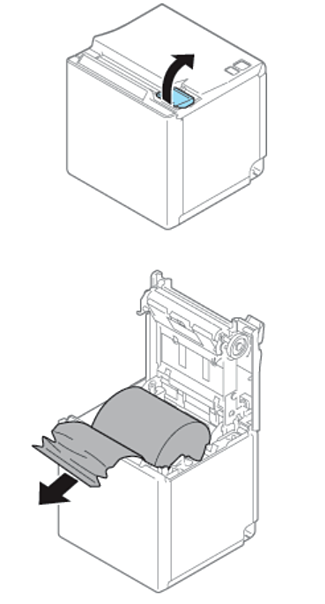
- Check whether the paper is jammed. If it is jammed, remove it (Printing stops if the thermal head overheats and resumes automatically when it cools).
- For other cases, turn the printer off, and after 10 seconds, turn it back on.
- If the Error LED is on:
- Check and make sure the paper was installed correctly.
- This printer requires thermal paper to print.
- This printer does not require ink.
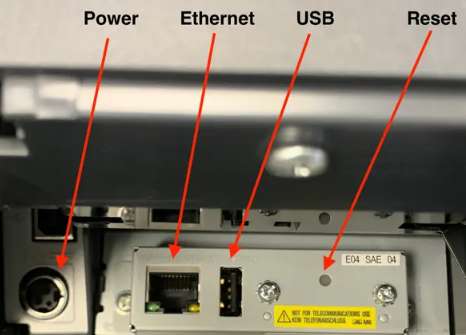
- Verify the Ethernet cable is connected to the printer by opening the printer and verifying that the Ethernet cable is connected to the printer and that there is a status light next to it indicating power. This cable needs to be tightly connected.
- You can also try restarting the router. For more information, see the article Verifying your Internet Connection
- You can also try restarting the router. For more information, see the article Verifying your Internet Connection


Auto Cutter Jam
Be sure to clean the cutting mechanism of any debris. This will prevent it from cutting the receipt paper.
- Open the printer cover to check to make sure there is enough paper on the receipt roll and that it has not bunched up inside the hardware.
- Make sure there is no debris on the paper, the cutter, or the print head.
- Re-adjust the receipt paper roll and close the cover.
After completing the troubleshooting steps, please run a test print. If the test print fails and the error light returns, we'll need to discuss your printer's warranty status and explore options for repair or replacement.
Back to top
Incorrect Paper
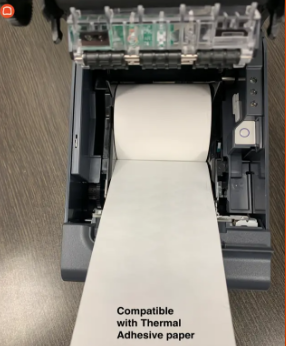
From time to time, you may run into an issue where the printer may print, but nothing displays on the receipt, or the printer will continue to jam. This may be caused due to using the Incorrect Paper within the printer. The Epson TM-M30 printer uses only Single Ply Thermal Based Paper. To ensure the customer is using the correct paper and it is loaded correctly, please follow the steps below.
Loading the Paper
The Printer Paper will have a natural curve to it. The paper will also be glossy on one side. Ensure that you have loaded the Printer Paper glossy side down so the natural curve of the paper fits within the Holding Position Cradle of the paper with ease. If the Printer Paper is not fitting within the Holding Position Cradle, it is most likely the wrong type of Printer Paper, or the Printer Paper is being placed upside down.
Incorrect Paper
The quickest way to see if the customer is using the correct paper in the Epson TM-M30 Printer is to take a piece of it and scratch the glossy side with the back of your thumbnail. If there is a black mark on the paper, it is thermal-based paper and should work within the Epson TM-M30 Printer. If there is no mark left on the paper, the customer is most likely using the incorrect printer paper and will need to purchase the correct thermal printer paper.
Print a Test Slip
- Locate the back side of the printer. This is where the Ethernet cord is.
- There is a pin-sized hole next to the Ethernet port.
- Hold this Reset button for several seconds while the printer is POWERED ON, using a small and narrow object (such as a paperclip or pen tip) until the printer produces a test slip.
For Setup instructions, please reference this article: How to Set Up & Print Item Labels.