Access Your Guest Data With Guestbook
Last updated: May 28, 2026, 9:37 AM
Learn how to use this report and leverage the data it provides for your restaurant.
- About Guestbook
- Who Can Access Guestbook
- Access Guestbook in Toast Web
- What's in a Guest Profile
- Filter and Segment Your Guests
- Tag Guests: VIP, Smart Segments, and Custom Tags
- Search, Sort, and Organize the Guestbook
- Export or Download Your Guest List
- Merge Duplicate Guest Profiles
- Email Targeted Guest Lists From Guestbook
- Known Limitations of Guestbook
- Frequently Asked Questions
- Related Articles
About Guestbook
Guestbook is the master list of guests for your restaurant management group in Toast Web. It collects contact info, order history, bookings, feedback, loyalty activity, and marketing engagement into one searchable, filterable table — and into a per-guest profile you can open with a single select.
Use Guestbook to understand who your guests are, segment them by spending or order behavior, tag them for targeted outreach, and export lists for email or SMS campaigns.
Who Can Access Guestbook
Applies to: Toast Web (Guests section)
Permissions needed:
- 4.13 Customer Credits & Reports — required to open the Guestbook
- Access to the entire restaurant management group
What you'll see: Guest data aggregated across every location in your restaurant management group, plus per-guest profiles you can view and edit.
If you select Guests in the left menu of Toast Web and see the Toast UI error message “Someone Needs to Unlock This For You”, you do not have the 4.13 Customer Credits & Reports permission. Ask the admin on your account to grant it. For more on permissions, see Permissions Reference Guide.
Access Guestbook in Toast Web
There are two ways to open Guestbook:
- Log in to Toast Web and navigate to Toast Web > Guests > Guestbook.
- Or, navigate to Toast Web > Reports > Marketing > Guestbook.
What's in a Guest Profile
Selecting any row in Guestbook opens that guest's profile. The profile is organized into modules. Use them to learn how the guest interacts with your restaurant and to take action (add notes, apply tags, view order history).
The columns in the main Guestbook table and the fields inside each profile include:
- Contact information (primary email address or phone number)
- Order date
- Number of orders
- Average spend per check
- Order source
- Dining option
- Loyalty status
- House account status
- Marketing preference
- Guest tags
- Last booking date
- Number of bookings
- Guest feedback
Guest Overview Module
The Overview module is the top section of every guest profile and gives you a snapshot of guest value and behavior:
- Last order, Lifetime spend, Average spend, Average tip
- Order channels: Dine-in, Pickup, or Delivery (by percentage)
- Most ordered items: Top menu items ordered by the guest and how many times
- Activity: A list of orders with times and dates. Selecting Orders displays the guest's full order history.
Booking Module
The Booking module shows all of the guest's reservation activity:
- Total bookings
- Cancellations
- No Show
- Upcoming (bookings)
- Booking activity
Booking data only appears for guests who have made reservations through Toast Tables.
Feedback Module
The Feedback module summarizes the guest's feedback submissions:
- Total feedback
- Average rating (Positive, Mixed, Negative)
- Feedback Activity
Loyalty Module
The Loyalty module shows the guest's Toast Loyalty activity:
- Loyalty status
- Loyalty balance
- Rewards
- Loyalty activity
- Activity: Full order history with order date and time, server, order total, and tip
Guestbook profiles are tagged when an associated loyalty account exists. To add or adjust points or rewards, use the Loyalty platform — see Manually Add and Adjust Rewards Balances.
Marketing Module
The Marketing module shows how this guest engages with your marketing channels:
- Top channel
- Open rate
- Attributed spend
- Time to purchase
- Subscription status (Email and SMS)
- Send frequency by channel (Email and SMS)
- Open rate by channel (Email and SMS)
- Campaign activity
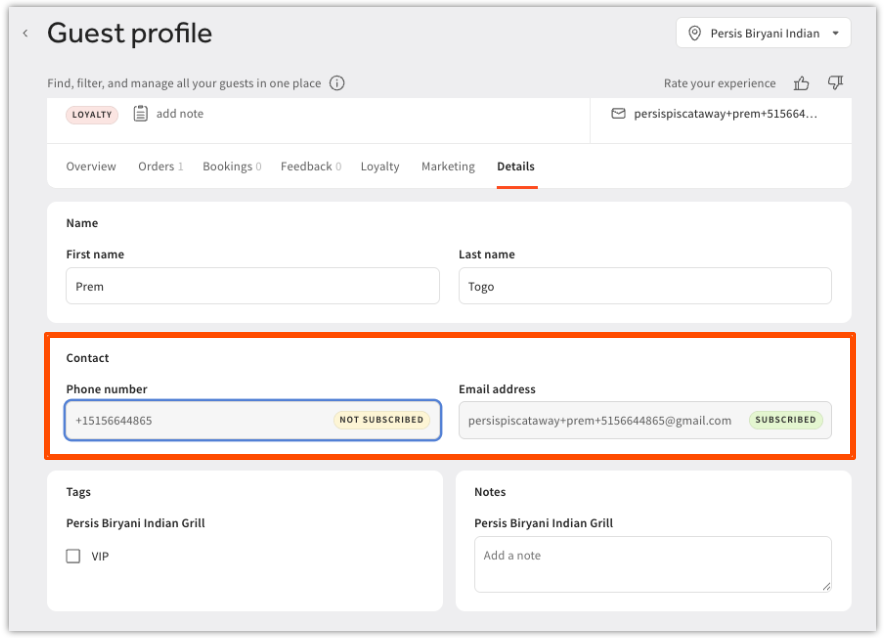
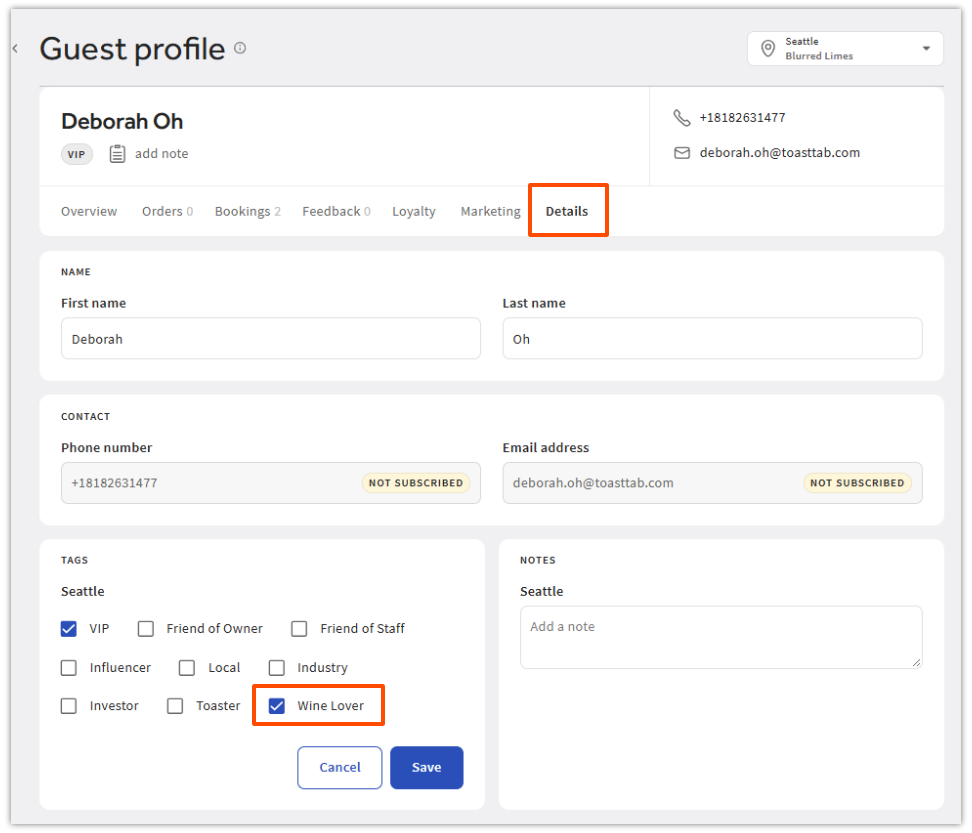
Details Module
The Details module is where you review and edit guest information. Select any editable field to update it:
- Name — editable
- Tags — editable
- Notes — editable
- Contact information (phone number and email) — NOT editable
Important: Phone numbers and email addresses cannot be edited from within Guestbook. To update a guest's phone or email, contact Customer Care.
Note: If you update or add information in the Details module, select Save before navigating away.
Filter and Segment Your Guests
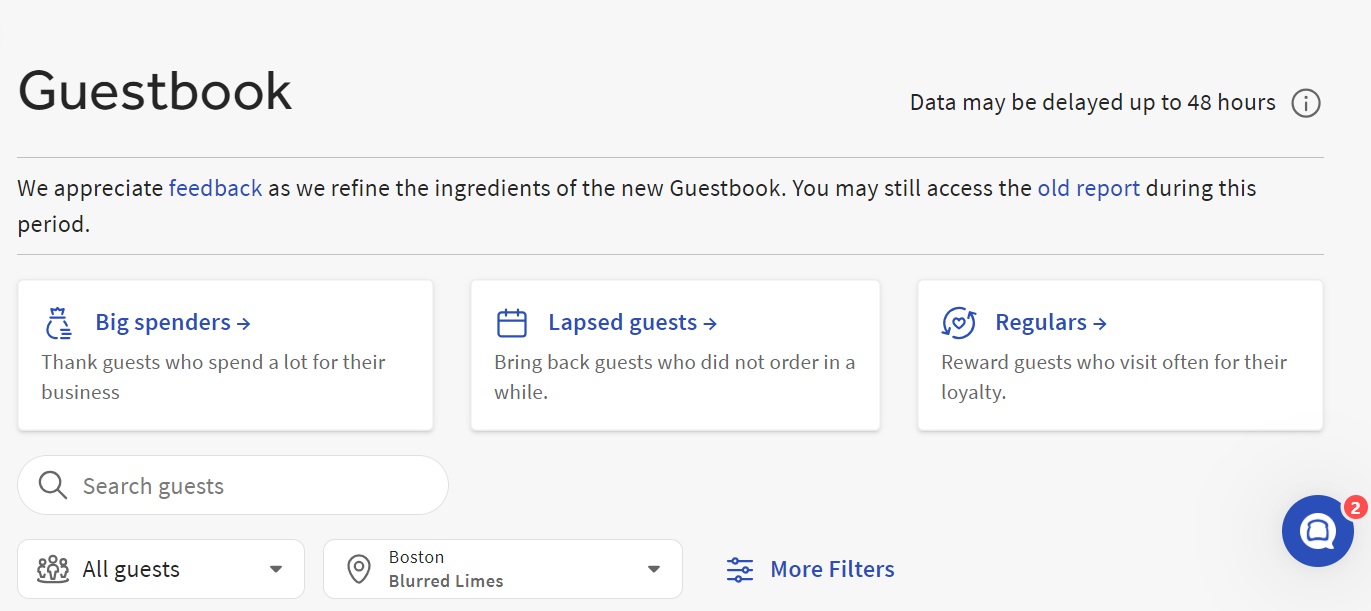
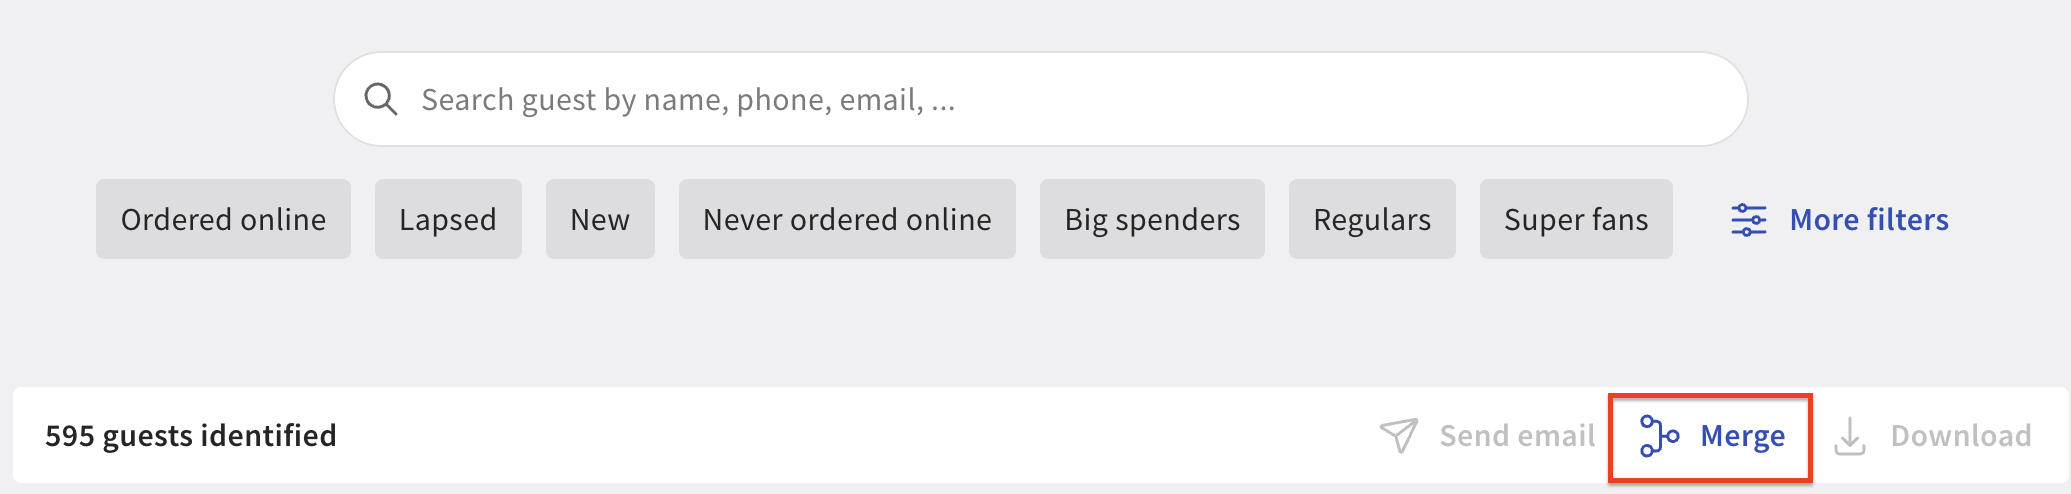
The top of the Guestbook displays predetermined segments. Each segment is a filter you can apply with a single select. Use More filters for additional criteria.
Use Predetermined Segments
- All guests — every guest in the Guestbook
- Big Spenders — guests with a check average over $30
- Lapsed Guests — guests whose last order was within 30 days
- Regulars — guests with five or more visits within 30 days


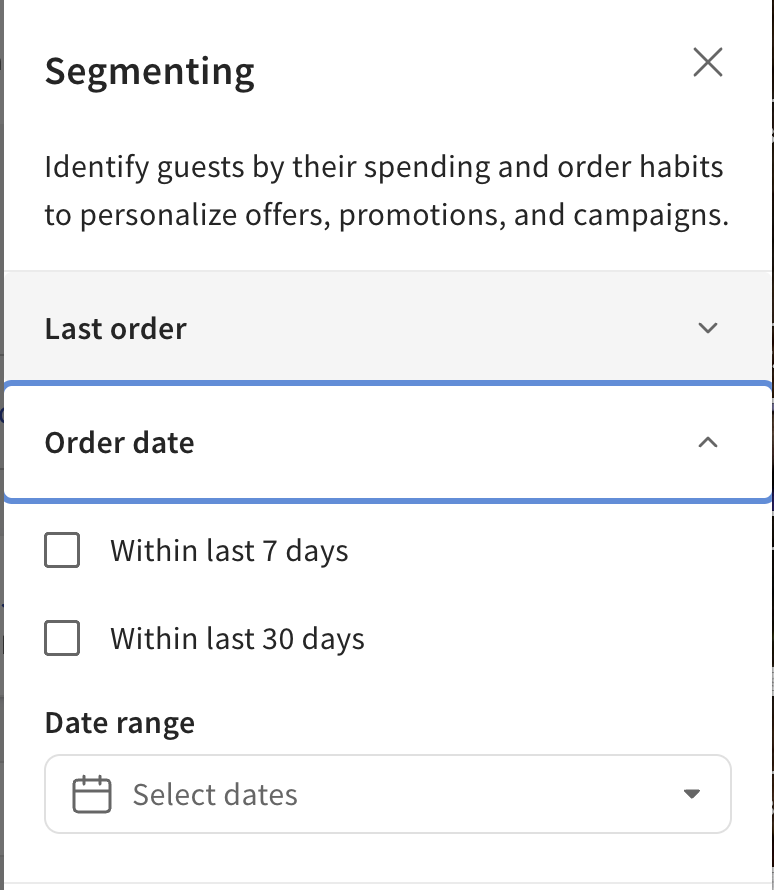
Build a Custom Segment
To filter guests on your own criteria, select Custom Segment at the top of Guestbook, then select More filters. The available filter criteria are:
- Last order date: More than 7 days ago, More than 30 days, Less than 7 days ago, Less than 30 days ago, or a specific period
- Number of Orders: Minimum and maximum
- Average spend per check: Range
- Average tip per check: Range
- Order Source: In-store, Toast Online Ordering, Toast Branded Online Ordering, Toast Local (web), Toast Local (app), Toast Mobile Order & Pay®, Toast Self-Ordering Kiosk, phone, or invoice
- Order Behavior: Includes or Excludes — then specify dine-in, takeout, or delivery
- Loyalty Status: Loyalty member or not a loyalty member
- Guest Tags: VIP (and any custom tags you have created)
Select Apply filter to see the matching list of guests.

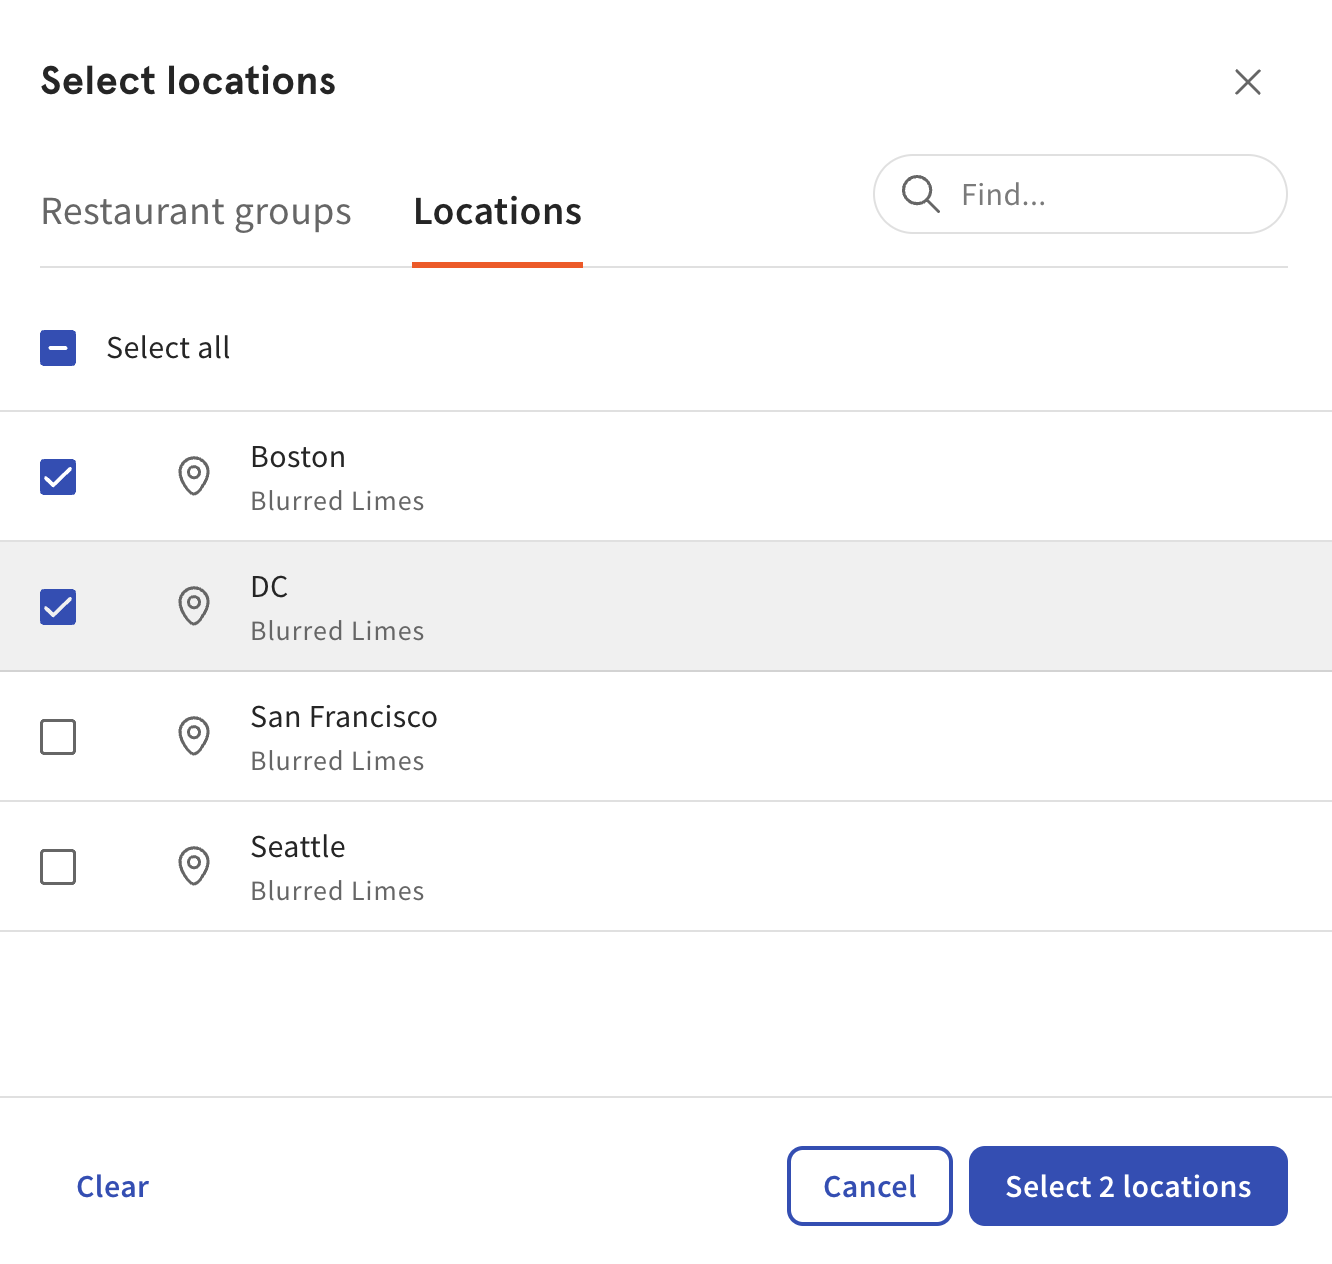
Filter by Location
By default, Guestbook displays guests aggregated across every location in your restaurant management group. To narrow to one or more specific locations, use the location selector at the top of Guestbook and select one or more locations.
Filtering by location displays all guests who have visited the selected locations at least once and shows aggregated order data for those locations only.

Tag Guests: VIP, Smart Segments, and Custom Tags
Tags help staff identify guests by special categories — VIP, big spender, lapsed, or any custom designation you define. There are three kinds of tags in Guestbook:
- VIP tag — a built-in tag for highlighting special guests (requires Toast Tables)
- Smart segment auto-tags — automatic tags applied when a guest matches a segment definition
- Custom manual tags — tags you create yourself in Guest Segments
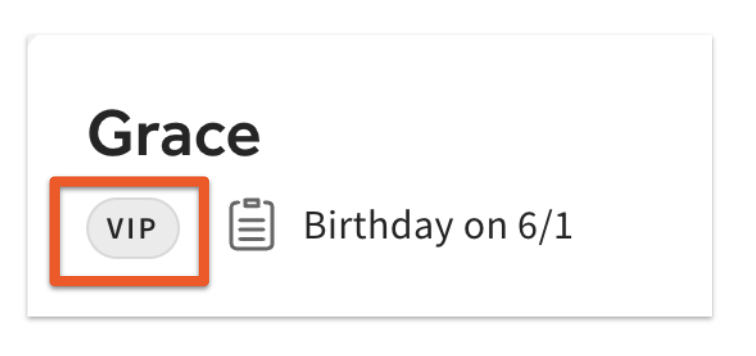
Add a VIP Tag to a Guest
Note: The VIP tag only works for customers who use Toast Tables. To learn more, see Get Started With Toast Tables.
- Log in to Toast Web and navigate to Toast Web > Guests > Guestbook.
- Select or search for your guest, then navigate to Details > Tags. If a tag already exists, you can also apply the VIP designation in the Guest Overview module.
- Select Save.
Expected outcome: The VIP tag now appears on the guest's profile and in the Guestbook table row.
Auto Tag Based on Smart Segments
Smart segments automatically assign a tag to a guest as soon as they meet the segment's criteria. These tags require no manual action.
| Segment | Code | Tag name | Description | Visibility |
| Lapsed Guest | LAP | Lapsed Guests | Last visit more than [recency] ago | YES |
| Big Spender | $$$ | Big Spender | Spends an average of [spend] or more per visit | YES |
| Regulars | REG | Regulars | Last visit within [recency] + visits at least [frequency] | YES |
| Super Fans | FAN | Super Fans | Last visit within [recency] + visits at least [frequency] + spends an average of [spend] or more per visit | YES |
| New Guests | NEW | New Guests | First visit within [recency] | YES |
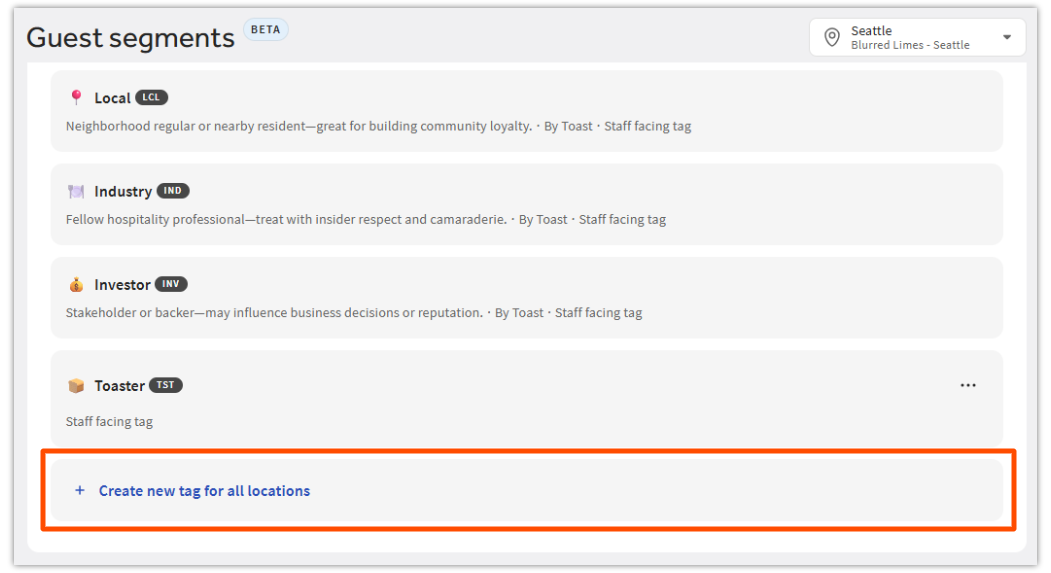
Create a Custom Manual Tag
You can create new custom tags directly in the Manual Tags area of the Guest Segments settings page. Tags created here are scoped to the location you have selected.
- Navigate to Toast Web > Guests > Guest Segments.
- Scroll down to Manual Tag, then select + Create new tag for all locations.
- Define the tag using the following fields:
- Name: The label that will appear for the tag throughout the system.
- Icon (Emoji): A visual cue to quickly identify the tag in lists.
- Short Code: A short internal code for easier reporting or searching.
- Visibility: Choose On to make the tag immediately usable, or Off to hide it until you are ready.
- Description: A brief explanation of when to use the tag.
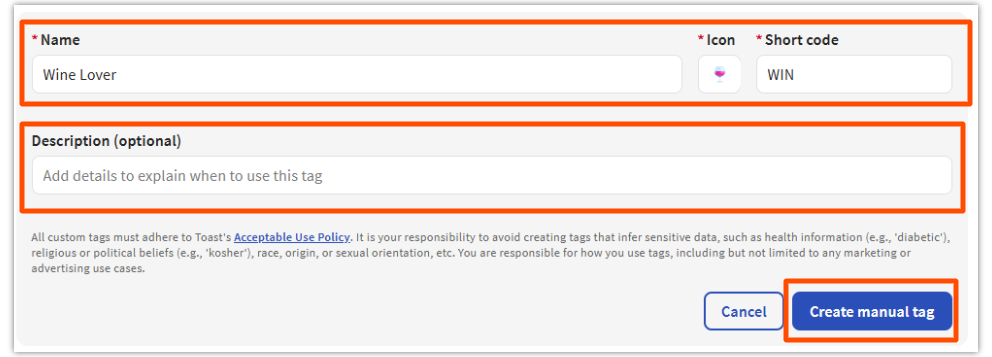
- Select Save.
Note: The system will not allow you to save a new tag if the Icon, Name, and Code fields are identical to an existing tag.
Expected outcome: Your custom tag is active immediately. You can assign it to a guest from the profile's Details page, and it appears in Guestbook filters so you can sort and find guests who have it.
Search, Sort, and Organize the Guestbook
Search bar — Located in the top right of the Guestbook. Search for guests by phone number or email address. Phone numbers can be entered without spaces or dashes.
Important: Partial matches are accepted, but the search MUST START with the text you enter. Example: if the guest's name is JANE DOE, you must type J-A-N to find them — searching for D-O-E will not match.
Results per page — Select the Results per page drop-down arrow at the bottom of the page to display 25, 50, or 100 records per page.
Sort columns — To reorder the columns in the table, select the Columns icon (five-column icon), then use the up/down arrows next to each column name to adjust the display order. Sortable columns include:
- Last order: Date of last order and dining option (takeout, delivery, or dine-in)
- Number of orders: Total order count and order types
- Avg spend: Average check amount ($), calculated by total check volume divided by number of orders
- Avg Tip: Average tip amount ($)
Export or Download Your Guest List
To export the current view of Guestbook (after any filters and segments you have applied), select Download list.
- Apply any filters or segments you want included in the export.
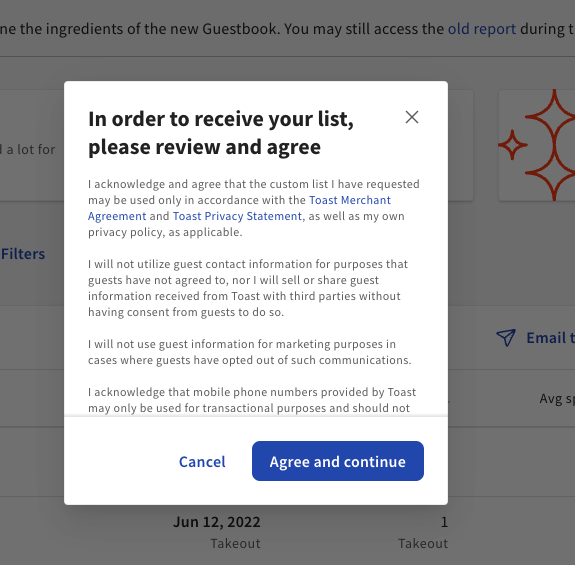
- Select Download list at the top of the Guestbook table.
- In the confirmation dialog, select Agree and continue.
- Toast emails the logged-in user a link to a unique download URL.
- Open the email and use the link to download the file as a CSV.
Important: The download link expires after 72 hours. If you do not download within 72 hours, you must request the export again.
Important: If your restaurant management group has more than 250,000 guests, the export is limited to guests who have ordered within the past six months.
Note: If you do not receive the email or the download fails, check your spam folder first. If the email still hasn't arrived after an hour, request the export again. If the export repeatedly fails or returns an error like “failed to gather email addresses,” contact Customer Care.
About the guestGuid column: The CSV export includes a column called guestGuid. This is the unique internal identifier Toast uses to track that guest record. You generally do not need to use this column — it is included so the file can be re-imported or referenced by Customer Care if needed.
Merge Duplicate Guest Profiles
If a guest has accidentally been created more than once (for example, once with a phone number and once with an email), you can merge their profiles into one.
- Navigate to Toast Web > Guests > Guestbook.
- Locate the duplicate guest profiles. Use the search bar to find them by name, email, or phone.
- Select the checkbox to the left of each duplicate guest's name. Only two profiles can be merged at a time.
- Select Merge.
Expected outcome: The two profiles combine into a single guest profile that retains the order history, tags, and contact information from both.
Note: If you have more than two duplicates of the same guest, repeat the merge with each pair until only one profile remains.
Email Targeted Guest Lists From Guestbook
If your restaurant uses Email Marketing, you can push a filtered Guestbook list directly into Email Marketing as a custom audience. You can then send a targeted message — for example, a special offer for your top guests, or a takeout promo for delivery-only customers.
- In Guestbook, apply the filters and segments that define the audience you want to email (for example, Big Spenders or a Custom Segment).
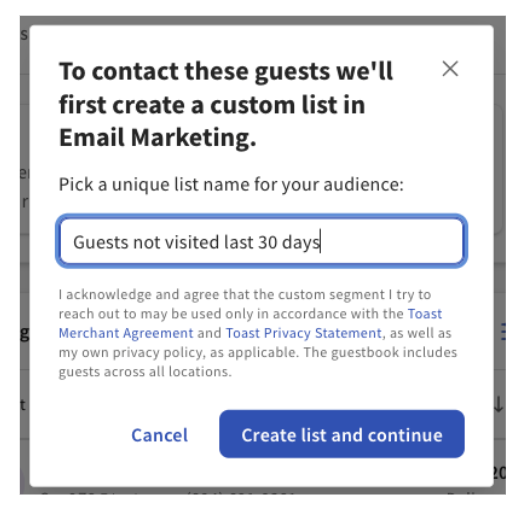
- Select Email these guests.
- Name your new custom list, then select Create a list and continue.
- Choose either:
- I'll design it later — Saves the list. You will find it under your audiences when creating an email campaign.
- Start email design — Opens Email Marketing, where you can choose a one-time campaign template.
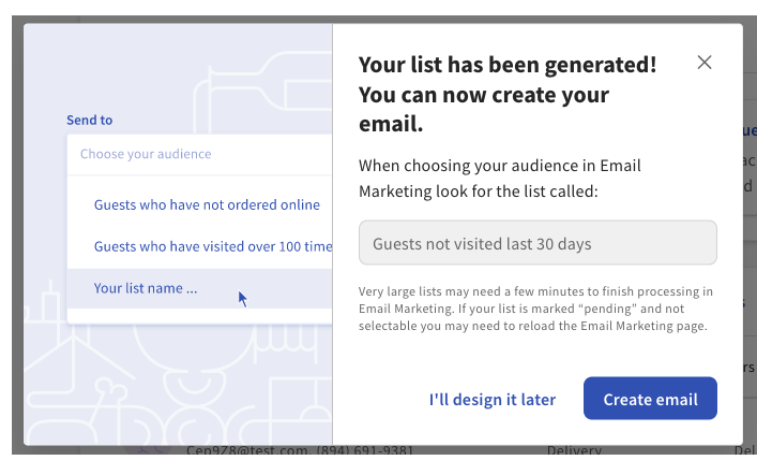
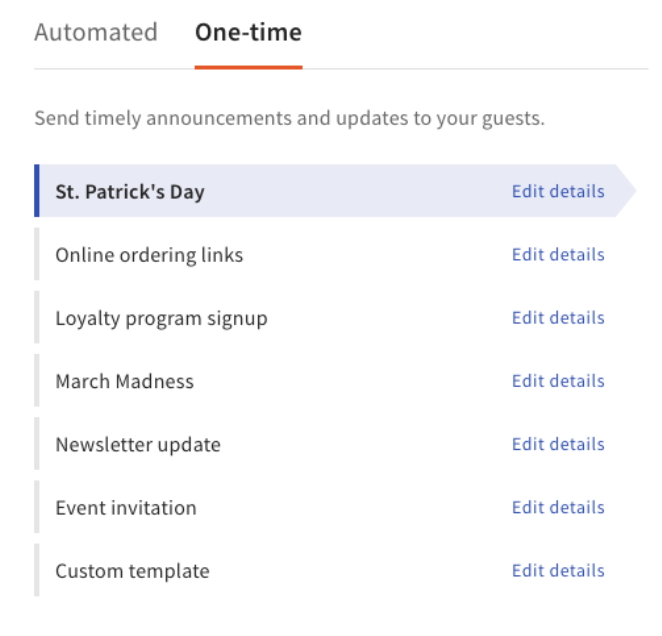
- In Email Marketing, customize your email, and make sure the list you just created is selected from the Sending to drop-down.
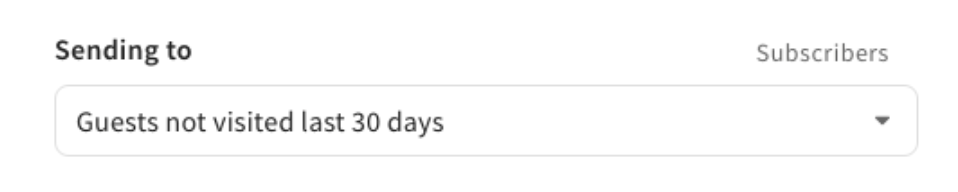
Expected outcome: Your filtered audience appears as a custom list in Email Marketing and is ready to receive your campaign.
For full email-design steps — including creating new lists, adding subscribers, viewing upload history, and unsubscribing guests — see Manage Your Email Marketing Audience.
Known Limitations of Guestbook
These are the things customers most often ask about and that Guestbook does not currently support. Read this section before contacting Customer Care — it answers the most common questions.
- You cannot manually add or import guests. Guests are created automatically when they place an order, sign up for loyalty, or provide contact info through one of the data sources in the FAQ below. There is no upload, import, or manual-add option in Guestbook.
- You cannot edit a guest's phone number or email from Guestbook. Contact Customer Care to update either field.
- You cannot delete a guest profile from Guestbook. Profiles persist as part of your order history. If a guest needs their data removed for a privacy or compliance reason, contact Customer Care.
- Data refresh can take 24–48 hours. Recent orders and updates may not appear immediately.
- You cannot send Guestbook data automatically to an SFTP site or external w1
Frequently Asked Questions
Do I need specific permissions to access Guestbook? Why do I see “Someone Needs to Unlock This For You”?
You need specific permissions to access Guestbook. Only users who have access to the entire restaurant management group AND have the 4.13 Customer Credits & Reports permission can open the Guestbook. If you see the Toast UI error message Someone Needs to Unlock This For You when you select Guests in the Toast Web left menu, you do not yet have one of those two requirements. Ask the admin on your Toast account to grant the permission. For more, see Permissions Reference Guide.
Are the guests in this report for my location or the restaurant group as a whole?
The guests in this report cover your entire restaurant management group by default. Guestbook will show every guest who has ordered at any location in your group. To narrow the view to a single location, use the location selector at the top of Guestbook and choose one or more specific locations.
Which guests get added to Guestbook?
A guest profile is created automatically when any of the following happen:
- A guest orders through Online Ordering with a unique email address
- A guest orders through the Local by Toast app with a unique email address
- A guest pays via mobile payments and enters a unique email address
- A guest pays through Toast Mobile Order & Pay™ and requests a receipt by email
- A guest orders through the Branded Mobile App with a unique email address
- A guest requests an emailed or texted receipt from an in-store order
- A guest provides their email through guest feedback on a Toast Go™
- A guest signs up for a waitlist or makes a reservation through Toast Tables with a unique email address
- A House Account is created for the guest
- A guest subscribes to Email Marketing or SMS marketing (including imports)
- A guest signs up for Loyalty (including imports)
Why am I only seeing phone numbers and not names in my Guestbook?
You are only seeing phone numbers because the guests in question never provided their name. Guestbook shows whatever contact information was collected at the moment of the order or sign-up. If a guest paid in person with no name capture step, only the receipt's phone or email appears — there is no name to display. Names appear when the guest provides them through Online Ordering, the Local by Toast app, Toast Tables, or another source that captures a name field.
How do I edit a guest's name in Guestbook?
Edit a guest's name from the Details module of the guest profile. Open the Guestbook, select the guest, navigate to the Details section, select the Name field, type the new name, and select Save. Phone number and email are NOT editable from the Details module — to update those, contact Customer Care.
How do I update a guest's phone number or email address?
You cannot update a guest's phone number or email address from Guestbook. The Details module marks these fields as read-only. To change a guest's phone or email, contact Customer Care with the guest's current and corrected contact info.
How do I delete a guest from Guestbook?
You cannot delete a guest profile from Guestbook on your own. Guest profiles are part of your order history and remain in Guestbook even if you would like to remove them. If a guest needs their data removed for a privacy or compliance reason (for example, a deletion request), contact Customer Care with the request. To stop emailing a guest, you can unsubscribe their email from Email Marketing — see Manage Your Email Marketing Audience.
Can I manually add or import a guest into Guestbook?
You cannot manually add or import guests into Guestbook. Guests are created automatically when they place an order or provide contact info through one of the data sources listed above. If you have a list of guest emails from a previous service, you can import them into Email Marketing instead — see Manage Your Email Marketing Audience for the import workflow.
How can I have the Guestbook report show up in my POS system?
Guestbook reporting can only be accessed from Toast Web. The Guestbook view itself is not available on the POS. If you need to look up a guest's rewards account from the POS, enable the Loyalty Account Lookup feature in Toast Web. See Loyalty Lookup and Redemption Workflows.
How long does it take data to refresh in Guestbook?
Data may take up to 24–48 hours to be reflected in the Guestbook. If you placed an order a few minutes ago and the guest does not yet appear, wait and check back the next day.
I see a discrepancy between Guestbook and the old report. Why?
You may see a discrepancy because Guestbook is being expanded over time. Today, Guestbook captures guests who provided their email through Online Ordering, the Local by Toast app, Toast Mobile Order & Pay™, Digital Payments, Kiosk, and Digital Receipts. Loyalty and phone-number-only profiles are still being added. Until that work is complete, the old report may show counts the new Guestbook does not yet match.
Why don't my Guestbook lifetime sales match my Sales Summary total?
Guestbook lifetime sales and the Sales Summary total are calculated against different denominators. Guestbook only includes order totals attached to a guest profile (a guest with an identifying email or phone). Sales Summary includes every transaction at the restaurant, including walk-in orders with no guest record. If your restaurant has a high share of anonymous or cash transactions, the gap can be significant.
What is the difference between Guestbook and a Rewards Account?
Guestbook and a Rewards Account serve two different functions. Guestbook is the master list of all guest information. A Rewards Account is what customers use to earn and redeem loyalty points. A guest profile in Guestbook is tagged when an associated loyalty account exists, but you manage point balances and rewards through the Loyalty platform — see Manually Add and Adjust Rewards Balances.
I have duplicate guests in my Guestbook. Can I merge them into one account?
Yes, you can merge duplicate guest profiles. From Guestbook, locate the two duplicates, select the checkbox to the left of each, then select Merge. Only two profiles can be merged at a time. For the full procedure, see the Merge Duplicate Guest Profiles section above.
Does Guestbook include catering or food-truck orders?
Guestbook includes any order, including catering and food-truck orders, when the guest provided an identifying email or phone number through one of the data sources in the Which guests get added FAQ. Orders that did not capture a guest identifier do not appear in Guestbook.
Can my guests see the notes I leave in their Guestbook profile?
No, your guests cannot see the notes you leave on their Guestbook profile. Notes in the Details module are internal-only and are visible only to users on your account with the 4.13 Customer Credits & Reports permission.
Where is the legacy Guestbook report?
The legacy Guestbook (also called the “Guest information” report) is being retired in favor of the new Guestbook. You can temporarily access the legacy report using a direct link from Marketing Reports Overview. Once the new Guestbook adds the remaining data sources (loyalty, phone-number-only profiles), the legacy report will be fully removed.
What does the guest Guid column in the Guestbook CSV mean?
The guest Guid column is the unique internal identifier Toast uses to track a guest record. You generally do not need to use the guestGuid for anything in your own reporting — it is included so the file can be re-imported (when import becomes available) or referenced by Customer Care.
Why isn't my Guestbook download arriving by email?
The download email may not be arriving for a few reasons. Check your spam folder first. Confirm the email address on your Toast user account is current. If the email still hasn't arrived after an hour, request the export again. If it repeatedly fails or returns “failed to gather email addresses,” contact Customer Care.
Related Articles
- Toast Web Navigation: Guest Hub
- Guest Insights Overview
- Manage Your Email Marketing Audience
- Permissions Reference Guide