Create and Assign Revenue Centers
Last updated: Jan 29, 2026, 2:58 PM
Revenue centers help you track your sales generated by one or more service areas, tables, and devices.
In this Article:
- Create a Revenue Center
- Assign Service Areas to Revenue Centers
- Assign Individual Tables to Revenue Centers
- Assign Toast Terminals / Handheld Devices / Kiosks to Revenue Centers
- Assign or Reassign Revenue Centers to Orders
- Revenue Centers & Third-Party Ordering Integrations
Create a Revenue Center
To create a new revenue center, you'll need the 6.6 Restaurant Operations Setup permission.
- In Toast Web, navigate to Front of house > Service areas & tables > Revenue centers.
- Select the +Add button to create and Name an entry. Add an optional Description, and if your restaurant is part of a multi-location group, select the Target and Owner.
- Save and publish your changes.
Once you've created a revenue center, it is available to be assigned to one or more of your service areas, tables, or devices.
| If you create a revenue center for a third-party delivery integration (DoorDash, Uber Eats, or Grubhub), do not archive it. Archiving a third-party delivery revenue center may prevent orders from correctly flowing in to Toast. |
When assigning service areas, tables, and individual devices to revenue centers, take note of the following:
- If an individual table is assigned to a revenue center, the sales for that table will report to the table-level revenue center.
- If an individual table is not assigned to a revenue center but is within a service area that is assigned to a revenue center, its sales will be reported to the service area-level revenue center.
- If a table is within a service area that is not assigned a revenue center but the Toast device itself has been assigned to a revenue center, the sales for that table will be reported to the device-level revenue center.
- If an individual table, service area, and Toast device has been assigned to a revenue center, the sales will report to the table-level revenue center. The table-level revenue center will always take priority in reporting.
- If a revenue center is not assigned to the table, service area, or individual device, sales will report to "No Revenue Center."
Note: Past reports do not change when a table's revenue center is reassigned.
Assign Service Areas to Revenue Centers
- In Toast Web, navigate to Front of house > Service areas & tables > Service areas.
- Select the Name of a service area that needs to be assigned to a revenue center.
- On the service area details page, use the Revenue Center drop-down to select the desired revenue center.
- Save and publish your changes.
Assign Individual Tables to Revenue Centers
Assigning individual tables to revenue centers is useful for restaurants that have a single service area that contains individual tables/sections of tables that might fall into different revenue centers. For example, if you want to print drink tickets to different service bars based on the table number, you can follow the steps below.
To assign individual tables to their own revenue center, follow these instructions:
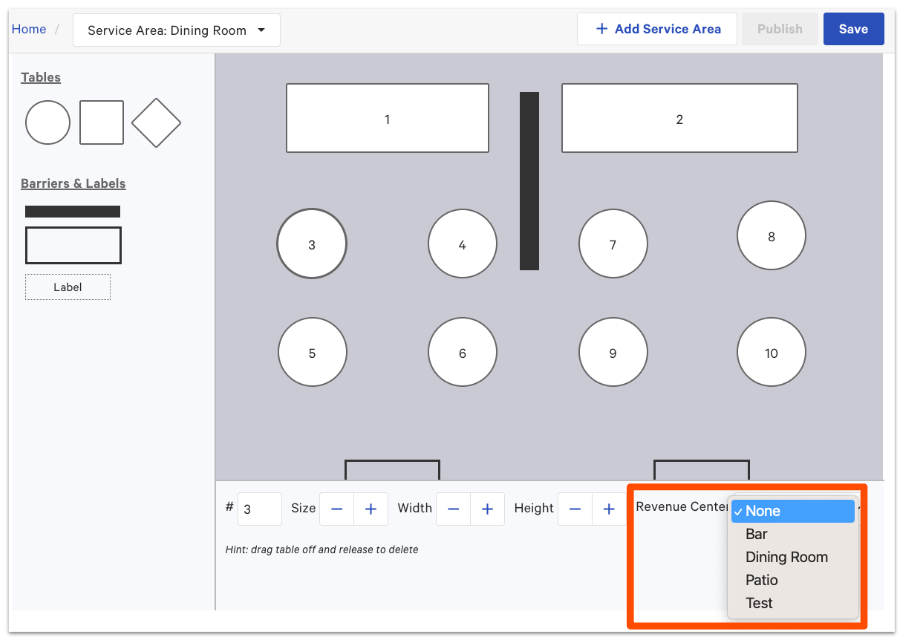
- In Toast Web, navigate to Front of house > Service areas & tables> POS table layout.
- Select a table that needs to be assigned to a revenue center.
- From the Revenue Center drop-down at the bottom of the page, choose which revenue center the table should be assigned to.
- For example, if you have both tables and bar seats in a service area labeled "Dining Room", it may make sense to assign the bar seats to a revenue center called "Bar Seating" so that you can see the revenue from Bar Seating separately from revenue that takes place at your Dining Room tables.
- For example, if you have both tables and bar seats in a service area labeled "Dining Room", it may make sense to assign the bar seats to a revenue center called "Bar Seating" so that you can see the revenue from Bar Seating separately from revenue that takes place at your Dining Room tables.
- Save and publish your changes.
Assign Toast Terminals/Handheld Devices/Kiosks to Revenue Centers
POS devices at large (terminals, handhelds, and Kiosks) can be assigned to a revenue center using the device settings.
- On your device's main menu, select Device Setup in the Setup section.
- Select the Revenue Center setting.
- Select the desired revenue center for this device, then select Save.
Assign or Reassign Revenue Centers to Orders
Toast cannot change revenue centers while an order is being placed. Instead, you'll need to use a different service area/table/terminal, depending on how you assigned to your revenue centers. Assigning service areas, tables, or terminals to revenue centers is all described above.
If one of your revenue centers is not assigned or is incorrectly assigned, the following workflow can be used to add or correct the assignment.
- In Toast Web, navigate to Reports > Sales > Orders.
- Adjust the date and time filters, and then Update your report.
- Select Show / hide columns at the top right of the report table.
- In the Show / hide columns drop-down, select the checkbox for Revenue Center. This will add revenue center information to the Orders report so you can find any missing or incorrect revenue center assignments.
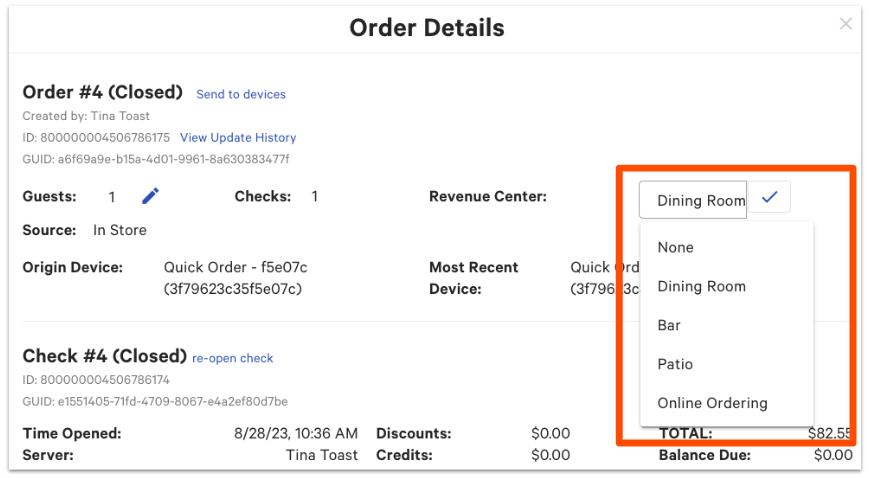
- Select the row of the order you'd like to edit in order to open up the Order Details pop-up.
- Select the pencil icon next to Revenue Center.
- Select your desired revenue center from the drop-down.
- Select the checkmark icon to save your changes.
Revenue Centers & Third-Party Ordering Integrations
To learn more about how revenue centers work for third-party ordering integrations, check out the Revenue Centers sections of the following articles:
- Get Started With the Grubhub Integration
- Get Started With the DoorDash Integration
- Get Started With the Uber Eats Integration