Get Started With Accounting Sync: Accounts Payable
Last updated: Sep 28, 2026, 11:13 AM
Learn how to set up Accounting Sync Accounts Payable with QuickBooks Online, create expense categories, and assign items for invoice sync.
| Accounting Sync - Accounts Payable is currently available only for Toast Retail customers. Check back for future updates. |
- Overview
- Connect to QuickBooks Online via Toast Web
- Configure Accounts Payable Sync
- Settings
- Related Articles
Overview
The Toast and QuickBooks Online integration allows you to connect your QuickBooks Online companies to Toast and configure how purchasing data is shared between the two systems. After setup, vendor bills processed in Toast are automatically posted to the appropriate vendor, expense account, class, and location in QuickBooks Online, helping streamline your accounting workflow.
With this integration, you can:
- Connect one or more QuickBooks Online companies to Toast.
- Assign one or more POS locations to each connected QuickBooks Online company.
- Map Toast purchase categories to QuickBooks expense (general ledger) accounts.
- Match Toast vendors with QuickBooks Online vendors.
- Assign QuickBooks classes by location.
- Automatically send vendor bills from Toast to QuickBooks Online.
Once configured, vendor bills scanned and processed in Toast are posted directly to your QuickBooks Online account under the appropriate vendor and expense category.
Before setting up the integration, confirm that the following requirements are met:
- You must use a QuickBooks Online account. This integration does not support QuickBooks Desktop.
- In Toast Web, you must have 8.1 Financial Accounts enabled. For more information on permissions, see the Permissions Reference Guide.
- In QuickBooks Online, users must have the Primary Admin role (external link). To determine which version of QuickBooks you have, navigate to accounts.intuit.com and enter your QuickBooks login information. Check out this QuickBooks link (external link) for a video on this process. See this article (external link) for more information on QuickBooks user roles.
Connect to QuickBooks Online via Toast Web
Toast recommends reviewing and cleaning up your chart of accounts in QuickBooks Online before beginning the integration.
To prepare your chart of accounts:
- Deactivate unused or duplicate GL codes.
- Confirm your naming conventions.
- Ensure your accountant has reviewed your account structure, if applicable.
Toast cannot provide accounting advice. If you are unsure how your accounts should be structured, consult your CPA or accounting professional before proceeding.
If you have not yet connected QuickBooks Online with Toast, complete the following steps. If your QuickBooks Online account is already connected, proceed to the Configure Accounts Payable Sync section.
- Select Log in to QuickBooks Online.
- In the secure pop-up window, enter your QuickBooks Online login credentials.
- If multiple locations exist in your QuickBooks Online account, select the correct location from the drop-down menu, then select Next.
- If the pop-up window does not appear, disable your pop-up blocker and try again.
- Select the checkbox for the Toast POS location(s) you want to connect to this QuickBooks Online account.
- In Toast Web, select Continue.
- For Toast Payroll customers only: Next, select your pay groups, then Continue. Note: This can be changed later in your sync settings.
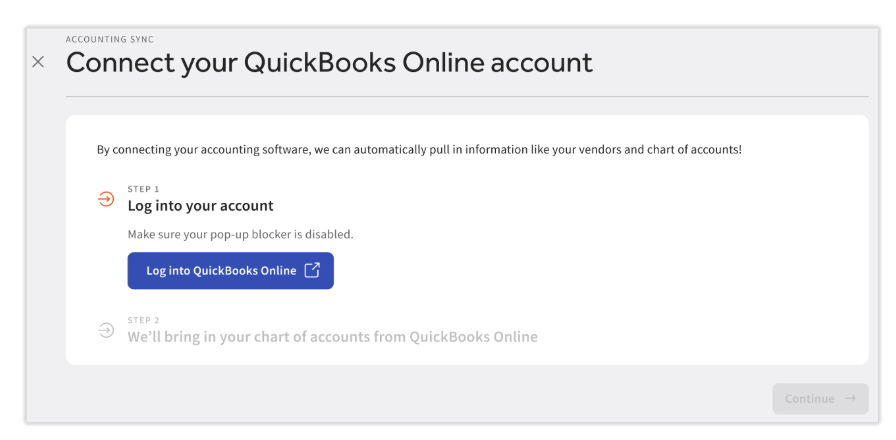
Note: If you are a Toast Payroll customer, the next step is to select your pay groups, then select Continue.
Configure Accounts Payable Sync
Step 1: Configure Accounts Payable
- In Toast Web, navigate to Retail > Settings > Accounts Payable.
- From the POS location drop-down menu in the Post to accounting system section, select the location you want to configure.
- Select your locations and click Select location to confirm
- Select Save.
Step 2: Create Expense Categories
Expense categories are used for Accounts Payable Sync. They help Toast automatically create bill entries in your accounting system when your business uploads vendor invoices.
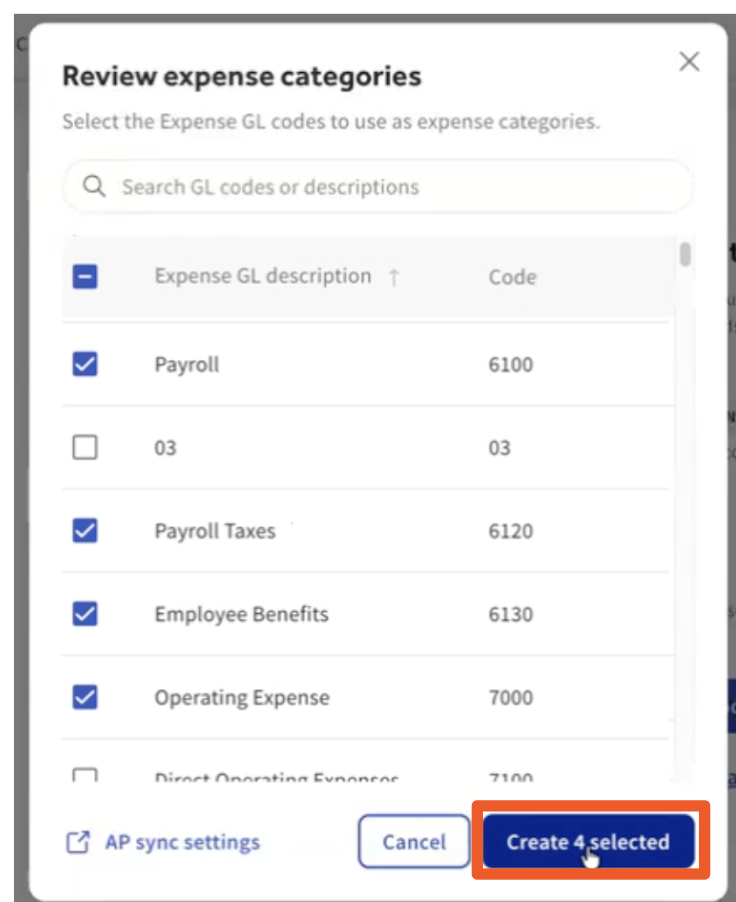
- Select GL codes to choose the codes you want to use for expense categories.
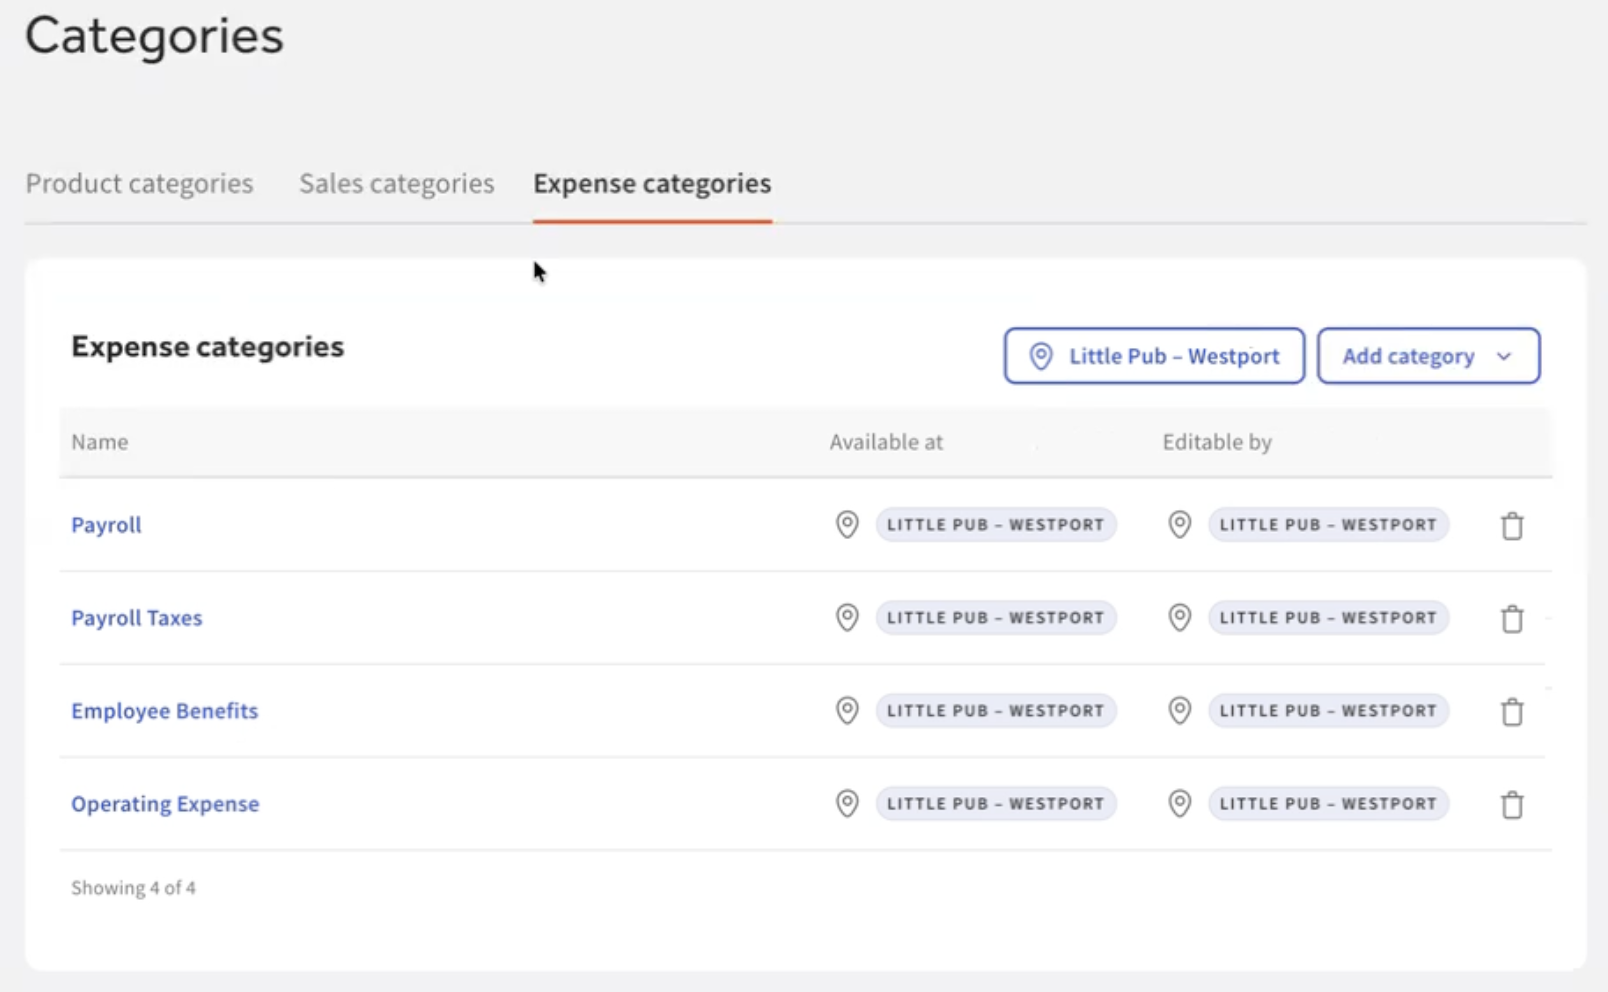
- Review and select which expense categories you would like to use. Once complete, select Create <number of expense categories selected> selected. In the example screenshot below, 4 expense categories were selected.
Note: Additional GL codes can be added by selecting from the Add category drop-down menu. You can select from your existing GL codes or create them manually.
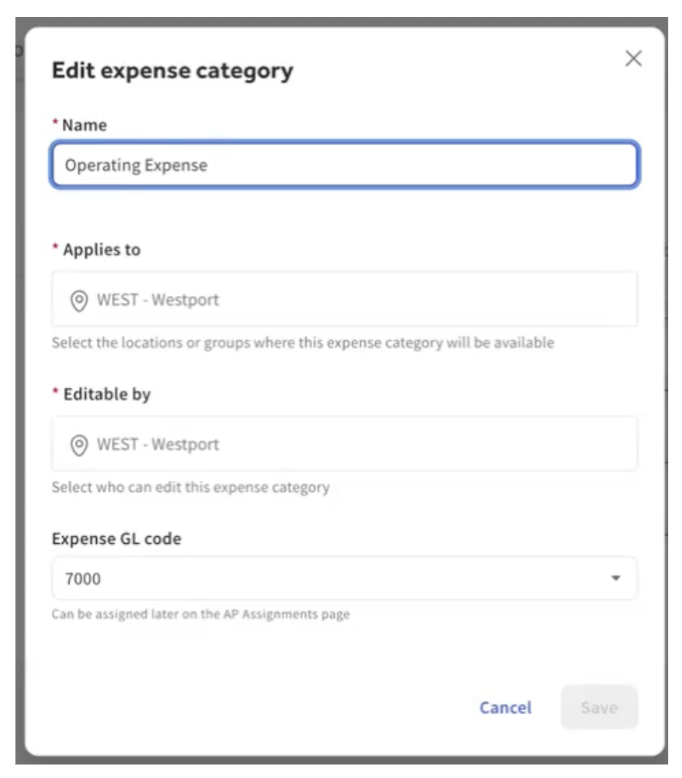
Any expense category can be edited by selecting its link. Once revisions are complete, select Save.
Step 3: Assign Expense Categories
- In Toast Web, navigate to Retail > Item catalog.
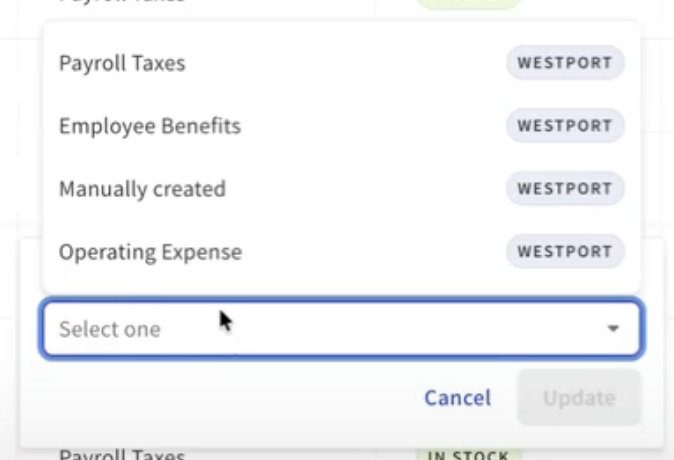
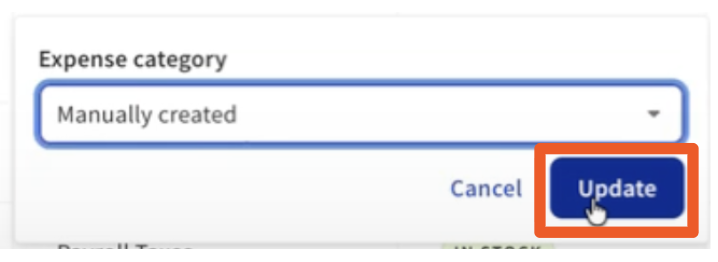
- In the Item catalog, select the desired item. Select the Expense category column to assign the appropriate expense category, then select Update to save your changes.
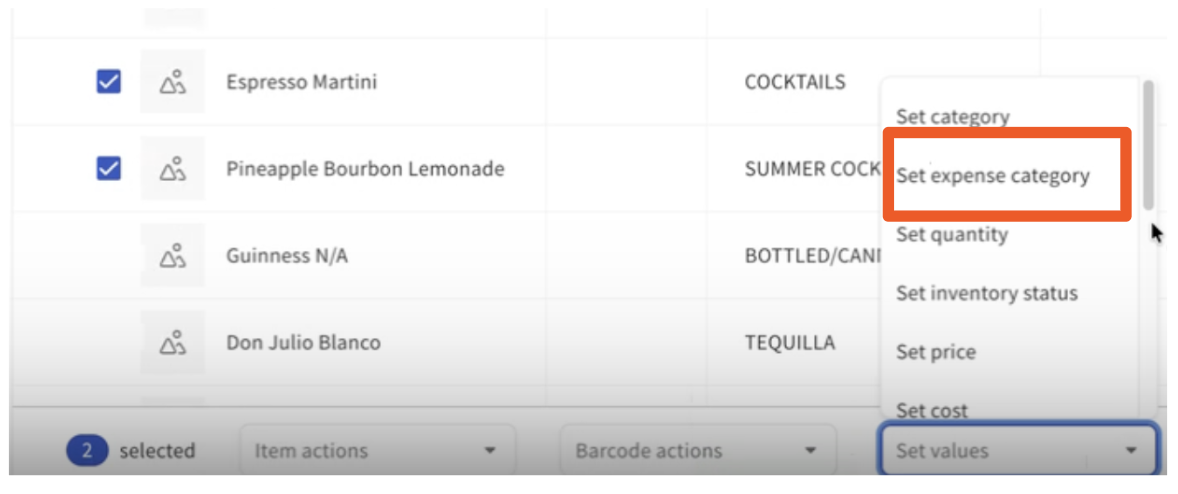
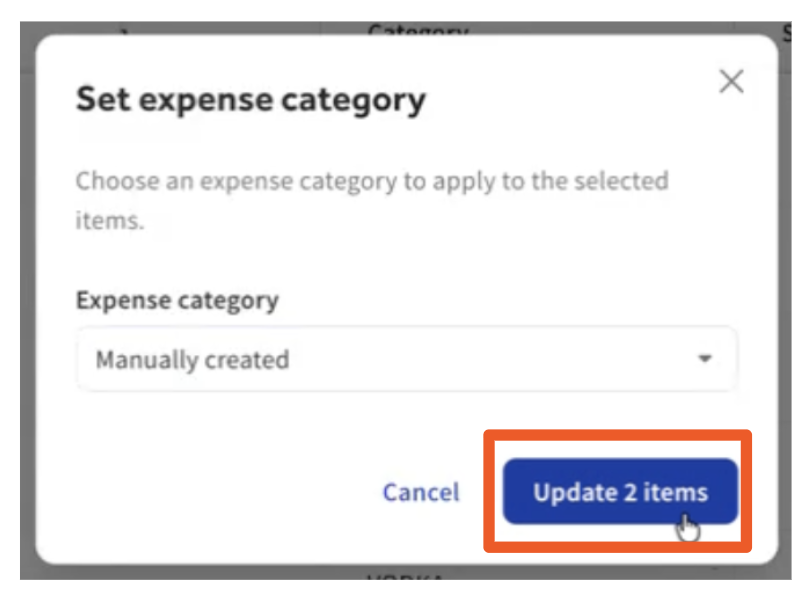
Expense categories for Items can be updated in bulk by selecting multiple line items. Once selected, leverage the drop-down menu at the bottom of the page and select Select expense category.
Once the category is chosen, select Update items.
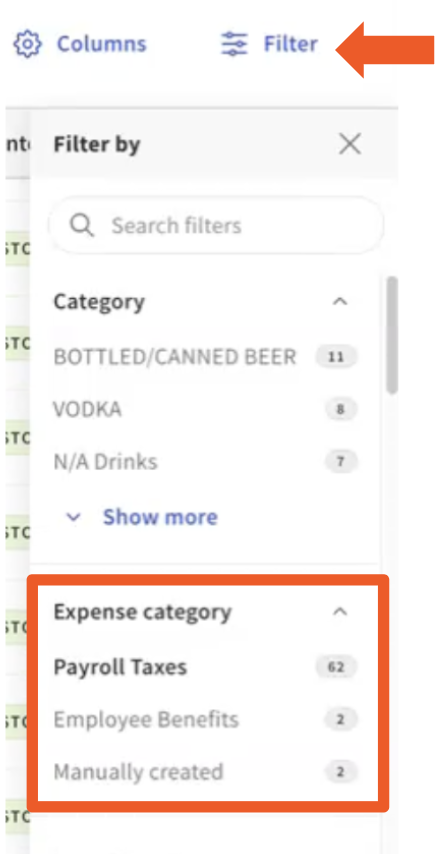
To filter by expense category, select the Filter link, then select your Expense category from the drop-down menu. Tip: If you would like to filter to items that don’t have an expense category assigned, select Blank in the Expense category section of the Filter.
- Once all selections have been made, be sure to Publish changes.
Accounts Payable Settings
There are three different ways to access the Accounting Sync feature in Toast:
- Log in to Toast Web and navigate to Finance > Accounting > Connections.
- Log in to Toast Payroll and select Accounting from the left navigation menu.
- Select the Confirmation step after submitting or posting accounting data.
Before continuing, verify that you are logged out of all QuickBooks Online accounts in every browser tab or window.
Note: Any changes made to Sales sync location connections will impact Accounts Payable Sync and vice versa.
- Post to accounting system: A daily accounts payable journey entry will be posted to the connected account for each Toast POS location.
- Sync start date: All journal entries on or after this date will be posted. Check that entries haven't already been added to QuickBooks to avoid duplicates.
- Bill posting method: Choose how much Toast includes when posting bills to your accounting system.
- Summarized by Expense Category: Combines purchased items by expense category. Each category posts as one bill line item to its GL code.
- Detailed by product: Each product posts to the GL code assigned to its expense category, and the product name displays in the description.
Related Articles
- Manage Accounting Sync: Accounts Payable
- Get Help With Accounting Sync
- Get Started With AI Invoice Scanning
- Toast Retail: Import Invoices