Get Started With Retail POS Mode
Last updated: Jul 2, 2026, 4:54 PM
Retail Mode streamlines Toast POS retail checkout to improve transaction speed, reduce manual entry, and minimize errors.
| Retail Mode on the Toast POS is in limited release with select customers. Check back for updates. |
Retail Mode Overview
Retail Mode is designed to deliver a faster, more accurate, and more intuitive checkout experience for retail transactions on the POS. By streamlining common checkout workflows, Retail Mode helps cashiers process sales efficiently while reducing manual entry and errors.
This launch introduces three core capabilities that support a modern retail checkout experience:
- Barcode scanning for quick product identification
- Scale-based weighing for items sold by weight
- PLU (Price Look-Up) code lookup for produce and other PLU-enabled products
Together, these features enable retailers to process transactions faster, more accurately, and more easily, improving both cashier productivity and the customer checkout experience.
Retail Mode Configuration
Step 1: Toast Web Configuration
- In Toast Web, navigate to Front of house > Order screen setup > UI options.
- Confirm that the following settings are toggled Off:
- Prompt to tab name (Quick order only)
- Prompt for dining options (Quick order only) Note: If any changes are made in this step, be sure to Save and publish your changes.
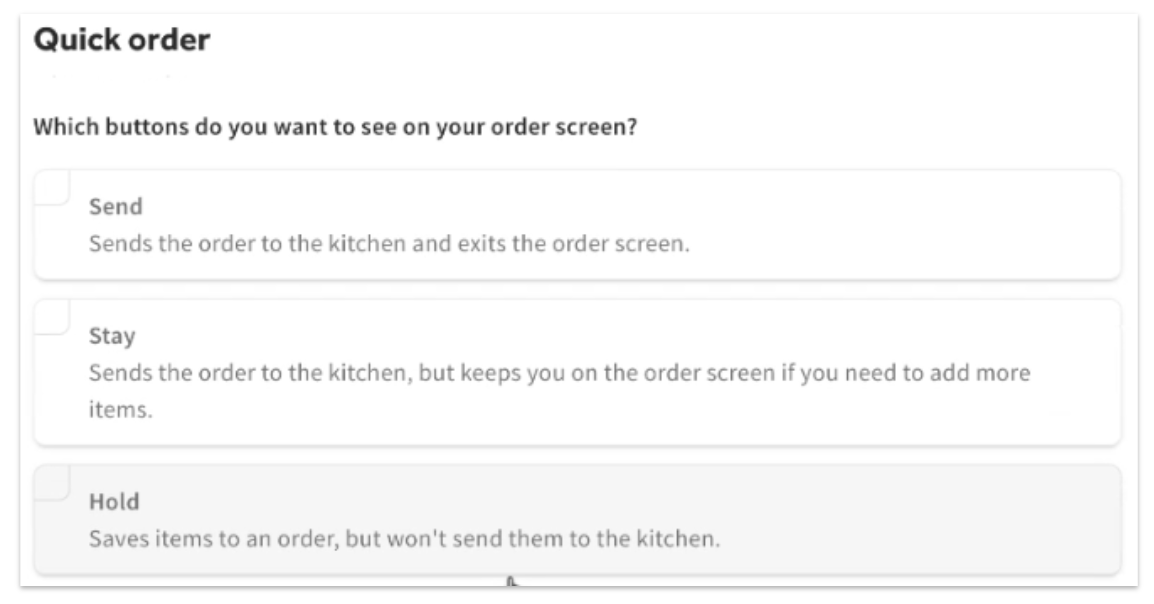
- Navigate back to Front of house > Quick order.
- Confirm that Send, Stay, and Hold are not enabled.
- Next, confirm that the following settings are set to Off:
- Require a tab name
- Prompt for dining option
- Seat numbers
- Coursing
- Save and publish any changes.
Step 2: Retail Mode POS Settings
- On the Toast POS, navigate to Device Settings and confirm and/or update the following settings:
- Primary Mode: Retail
- Enable SKUs: Yes
- Default Dining Option: Off
- Order Screen Menu View: Focus View
Use Retail Mode on the Toast POS
Follow the steps below to use Retail Mode on the Toast POS.
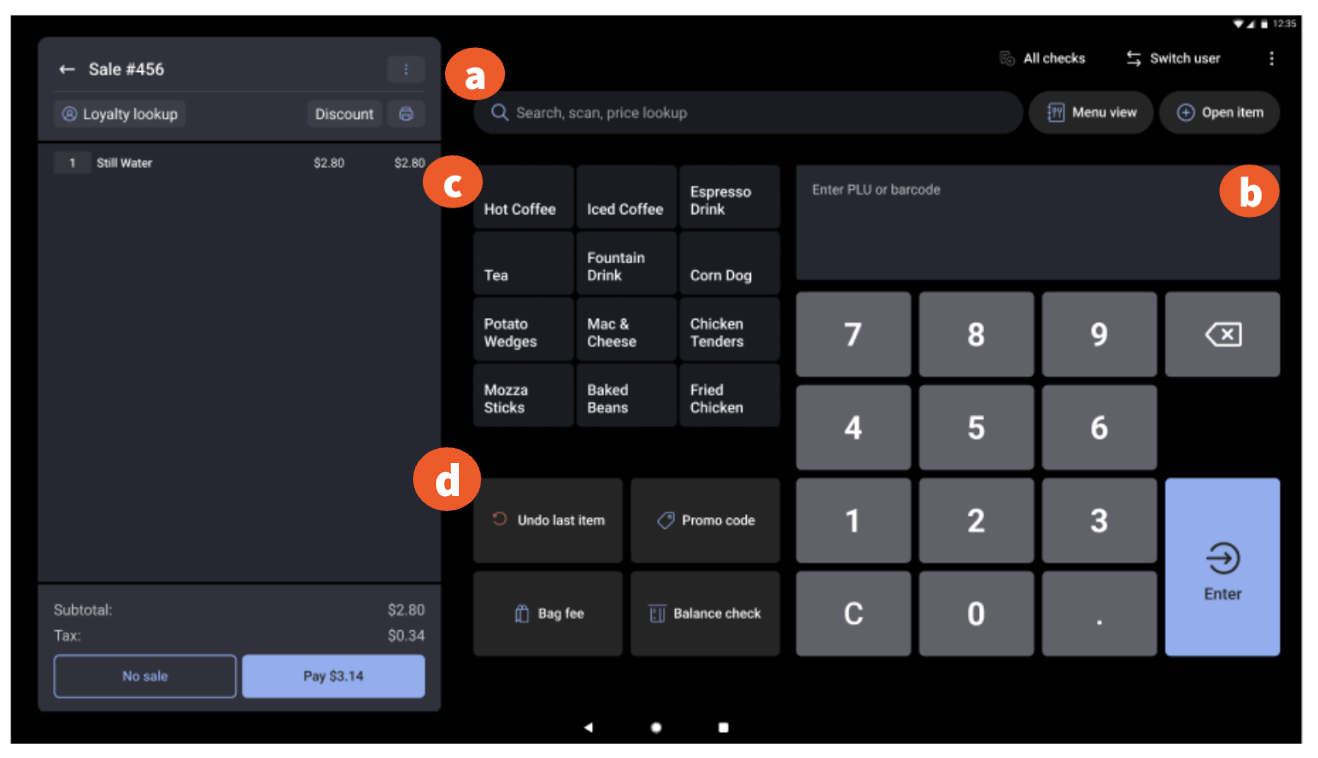
- On the Toast POS, navigate to Mode > Retail Mode.
- In Retail Mode, you can add an item by one of the following:
- Use the search bar to enter the item.
- If enabled, scan using an in-counter or handheld scanner, or enter the PLU.
- The Speed menu is a configurable list of items users can quickly add to an order without searching for the item or entering a code.
- Items from the speed menu can be added by selecting the + icon or removed by selecting the overflow menu on the item. Note: Only 12 items can be listed on the speed menu.
- Once edits have been made, select Save.
- Items from the speed menu can be added by selecting the + icon or removed by selecting the overflow menu on the item. Note: Only 12 items can be listed on the speed menu.
- Speed action settings are a configurable set of frequently used action buttons that let cashiers perform routine tasks quickly to keep lines moving.
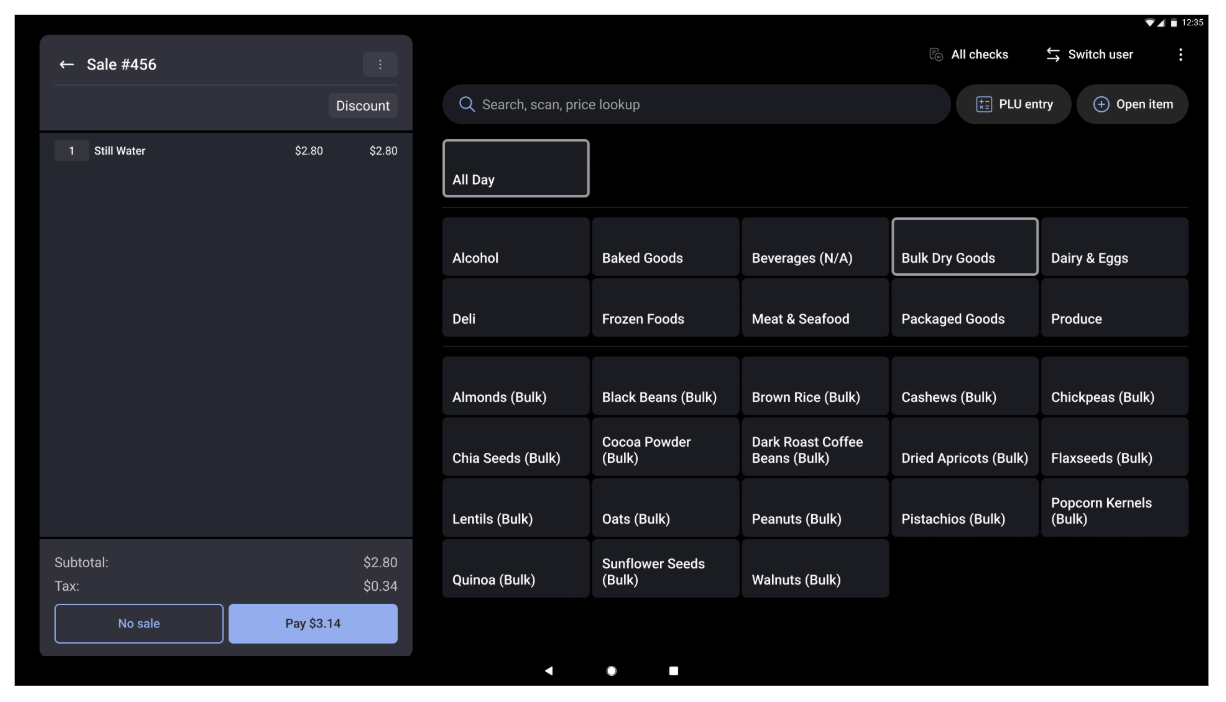
- Or, you can access the full menu view by selecting Menu view.
- Once all items have been added, select Pay to accept payment and complete the transaction.