Printer Setup in Toast Web
Last updated: Dec 17, 2025, 11:13 AM
Question
During printer setup/configuration, when should I enter a serial number and when should I enter an IP address?
Answer
| For best results, set up your printer directly from your Toast POS. |
- To begin, your printer should be powered on and connected to your Toast router via an Ethernet cable.
- Print a test slip by following your printer's specific instructions found in Print a Test Slip.
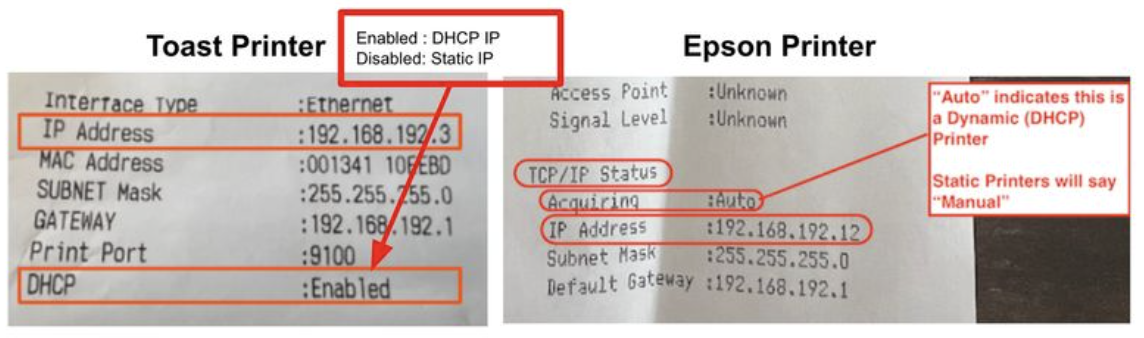
- Review the test slip for static/DHCP configuration:
- For Toast printers, look for the DHCP line. Note whether it says Enabled or Disabled.
- For Espon printers, look for the Acquiring line. Note whether it says Auto or Manual.
- In Toast Web, navigate to Payments > Checks & receipt setup > Printers and cash drawers.
- Select the appropriate printer from the list here to view its settings.
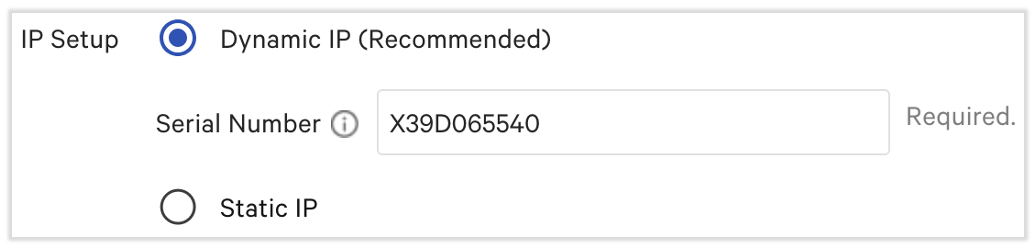
- When a printer's test slip says DHCP: Enabled or Acquiring: Auto, you only need to enter the printer's Serial Number. Serial numbers are case sensitive, so make sure to capitalize letters when necessary. DHCP printers will dynamically change their IP address, so entering an IP address can cause connection issues with the printer.
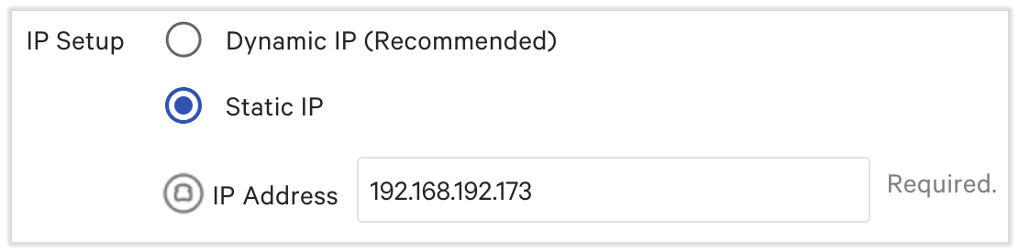
- When a printer's test slip says DHCP: Disabled or Acquiring: Manual (uncommon), locate the IP Address field on the test slip and enter that value into Toast Web. Entering a serial number can cause printing connectivity problems.
- A manual/static IP of 192.168.192.169 can result in IP conflicts, so it's best to avoid using it.
- A manual/static IP of 192.168.192.169 can result in IP conflicts, so it's best to avoid using it.
- When a printer's test slip says DHCP: Enabled or Acquiring: Auto, you only need to enter the printer's Serial Number. Serial numbers are case sensitive, so make sure to capitalize letters when necessary. DHCP printers will dynamically change their IP address, so entering an IP address can cause connection issues with the printer.
- Save and Publish your changes.
- If you ever see both fields filled in, perform these steps and remove the unnecessary information.
Additional Information
In Toast Web printer configuration, DHCP printers need a serial number only whereas static printers need an IP address only.