Toast Retail: Import Invoices
Last updated: Sep 28, 2026, 4:33 PM
Learn how to save time and ensure accurate inventory by importing your supplier invoices to Toast Retail.
- Invoice Import Overview
- Upload Your Invoice to Toast Retail
- AI Invoice Scanning
- Invoice Ingestion (Import) via Email
- Additional Resources
Toast Retail: Invoice Import Overview
The invoice import feature for Toast Retail simplifies invoice management by allowing you to upload your invoice files directly into Toast Web. This minimizes manual data entry, errors, and ensures accurate inventory and financial records.
While Toast Retail has import templates for specific suppliers (currently UNFI, Kehe, and Hackney), you can import invoices from any supplier using a generic template.
- Supported file formats include CSV and Excel (.xlsx).
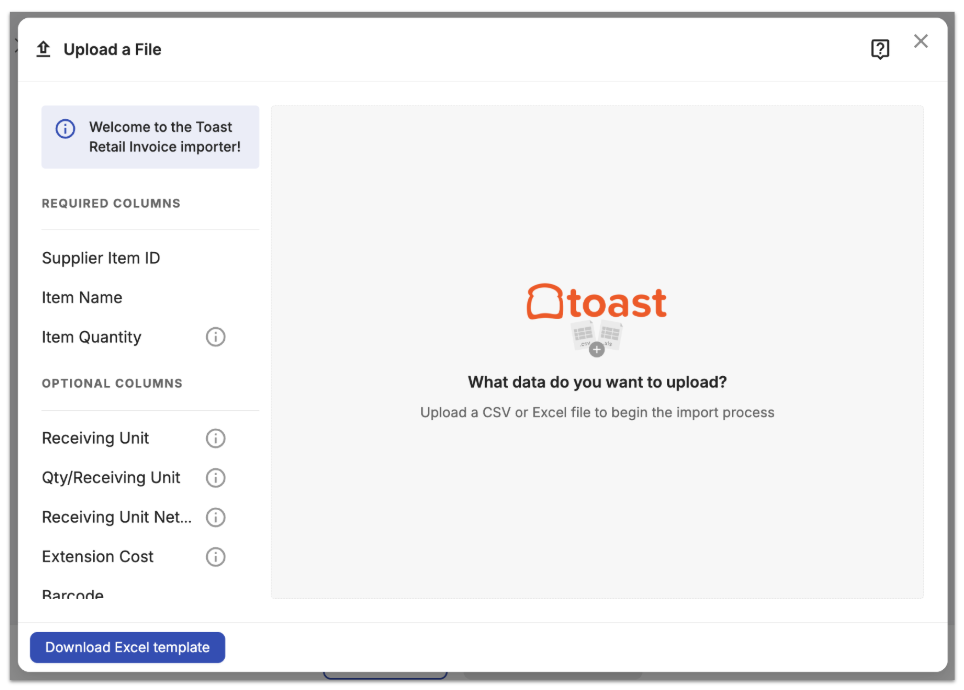
- Ensure your file includes clear column headers for these required fields:
- Supplier Item ID
- Item Name
- Item Quantity
- The invoice import tool will also recognize the following column headers:
- Receiving Unit
- Qty/Receiving Unit
- Receiving Unit Net Cost
- Extension Cost
- Barcode
- PLU
- Price (Retail)
If you’d like, you can download and use this Excel template for your invoice import: Toast Retail Invoice Template.
When you import an invoice, Toast Retail will process the file and validate it against your Item Catalog in Toast. The system will attempt to match invoice items by supplier item ID, but will also look for secondary matches using exact barcode match, or partial supplier item ID/barcode matches (without leading zeros or check digits). If there are unmatched items or other potential issues, you’ll have a chance to review and resolve those before finalizing your import.
Upload Your Invoice to Toast Retail
To upload your invoice to Toast Retail, follow these steps:
- In Toast Web, navigate to Retail > Purchasing > Purchasing & Receiving.
- Select Receive via invoice.
- Enter your Supplier.
- Select Import file, then select Next on the Import invoice pop-up window.
- If there’s a specific supplier template available for your selected supplier, you’ll see the option to use it. If you have issues using the template with your invoice, you can always disable the template and use a generic template instead.
- If there’s a specific supplier template available for your selected supplier, you’ll see the option to use it. If you have issues using the template with your invoice, you can always disable the template and use a generic template instead.
- Drag and drop the file you wish to import in the middle of the screen, or click in the middle of the screen to view your computer's file-picker.
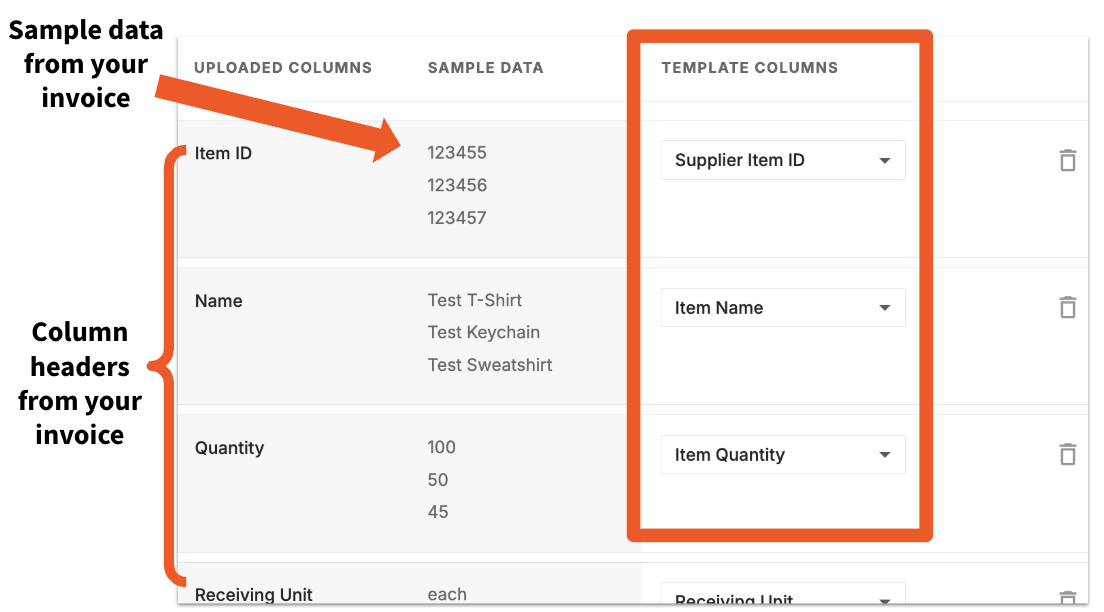
- Review your column mappings. Toast will attempt to automatically map your invoice columns to the Template columns, but if there are any columns that are unmapped you can use the drop-down to select the appropriate match. You can also use the trash can icon to exclude a column from your import. If there are any issues with your import file, a message will appear with additional details. Select Next when you’re finished.
- Toast Retail will match the incoming items to your item catalog.
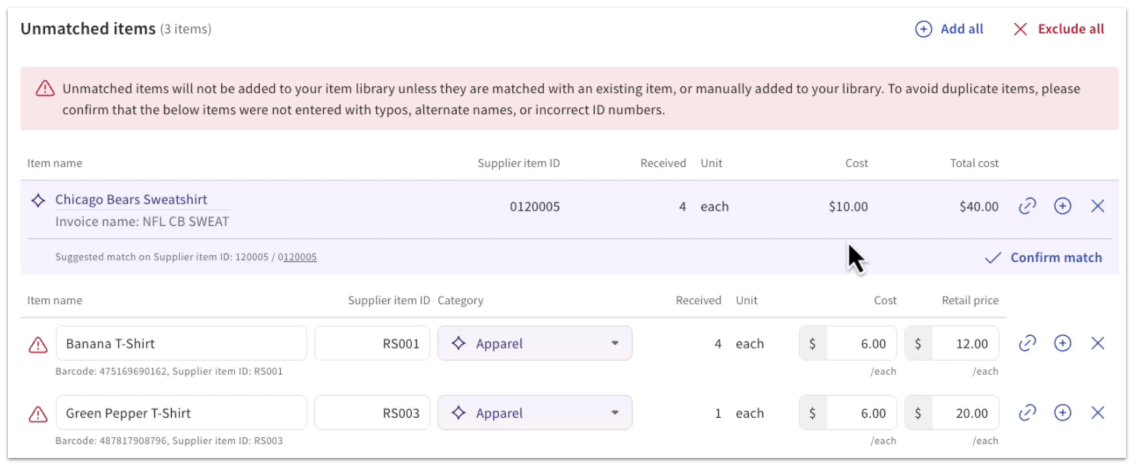
Any Unmatched items will be displayed at the top of the invoice creation page.
- If a suggested match is available (for example, for items that are already in your item catalog but have not yet been purchased from this supplier), Toast will display the item information. Select Confirm match if the suggested match is correct.
- If no suggested match is displayed but an unmatched item should be linked to an existing item in your item catalog, select the chain link icon next to the item name. A pop-up will appear where you can search for the matching item by name, PLU, or barcode to select a manual match.
- New items can also quickly be created from this workflow before receiving using the details on your invoice. Select the plus sign (+) icon next to the item name. Confirm item details on the pop-up, then select Create item.
- Review and adjust quantities or costs for matched items as needed. When you’re finished, you can select Save as draft or Mark as received.
Note:
- Items marked as unavailable or out of stock (quantity = 0) will not be imported.
- Retail prices are not updated from invoices. These values come from the existing item catalog and can be adjusted manually.
AI Invoice Scanning for Toast Retail
Permissions Required:
- 4.5 Full Edit Menu
Step 1: Upload an Invoice
Follow the steps below to upload an invoice using AI scanning. You can choose from upload by the following:
- Upload or capture your invoice
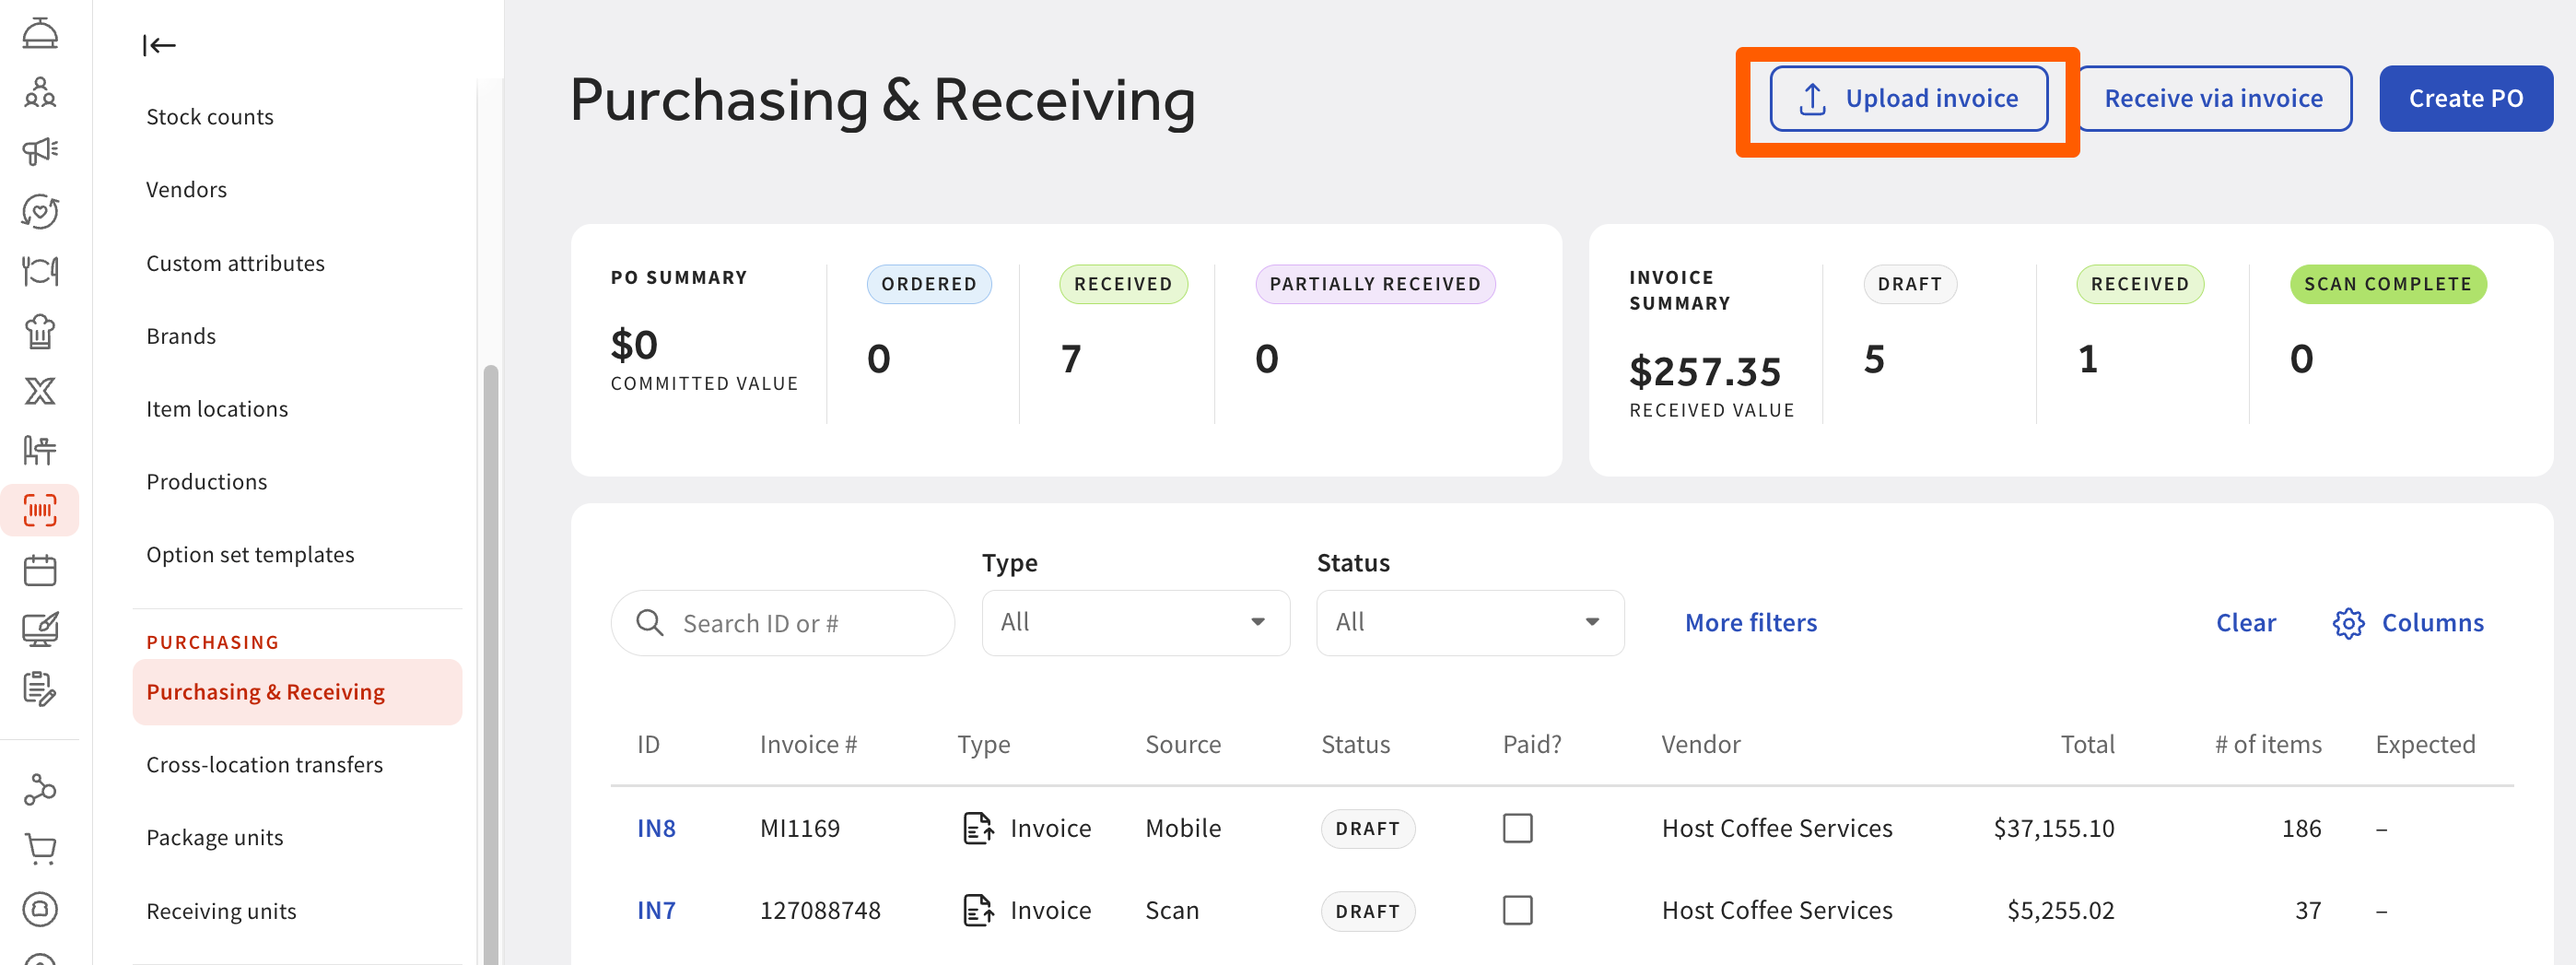
- In Toast Web, navigate to Retail > Purchasing & Receiving.
- Select Next to start the scan. Note: Scanning can take up to 2 minutes.
- In Toast Web, navigate to Retail > Purchasing & Receiving.
Option 2: Upload From Your iOS Device in the Toast Now App
Note: AI invoice scanning in Toast Now is available only on iOS devices. If you use an Android device, log in to Toast Web in a mobile browser, such as Chrome, and follow Option 1.
- Open Toast Retail in the Toast Now app on your iOS device.
- Select Add Invoice and allow camera access.
- Take a clear photo of your invoice (you can add multiple pages).
- Select Submit — your invoice will be uploaded, and scanning will begin.
Wait for the scan to complete
- Once processing is finished, the invoice will display a “Scan complete” status.
Step 2: Review extracted details
Check the information pulled from your invoice to ensure accuracy.
- A digital copy of your original invoice on the left. The extracted line items on the right.
- Make any necessary edits
- Hover over each field to highlight where it appears on the invoice. Update any incorrect or missing details. This may be needed if parts of the invoice were unclear, cut off, or obstructed.
- After confirming your scanned details:
- Select Next to move into the familiar invoice creation screen.
- Toast will automatically fill in. Note: If something doesn’t populate automatically, you can manually adjust it here:
- Supplier details
- Invoice number
- Item names, quantities, and costs
Step 3: Create and Review the Invoice in Toast
After confirming your scanned details:
- Select Next to move into the familiar invoice creation screen.
- Toast will automatically fill in:
- Supplier details
- Invoice number
- Item names, quantities, and cost
Note: If something doesn’t populate automatically, you can manually adjust it here.
Step 4: Match or Add Your Items
The system will use AI to recognize and categorize items.
- If an item already exists in your inventory, Toast will suggest a match. Select the Confirm match check mark to confirm.
- If an item is new, select the + icon next to the item name to create it.
- Fill in missing details like cost, category, or sales price.
- Use Add All to bulk-create multiple new items.
Note: The first few scans may require adding several new items. Over time, Toast “learns” your catalog, and the matching becomes faster.
- Save and link items
- The finalized details are saved as a vendor item, which can be linked to a product in Toast. This helps streamline future receiving by improving speed and accuracy when updating inventory.


Step 5: Receive Your Invoice
Once you have verified all of the upload information and/or have made the necessary changes:
- Review your matched and newly added items. Select Save at the top of the page to save your draft invoice.
- (Optional) Mark any non-sellable items (like cleaning supplies) as Exclude — Toast will remember this next time for that supplier.
- Select Mark as received to move the invoice from Draft or Received state. This will update the inventory on-hand count for items in your item catalog.
AI Invoice Scanning Limitations
- Invoice-only scanning: You can scan invoices, but not apply them to purchase orders (POs) at this time.
- Mobile experience: You can capture invoices on mobile via Toast Web in a mobile browser or the Toast Now app on iOS and continue receiving them, but the review experience is best on desktop due to detailed tables and image viewing.
Invoice Ingestion (Import) via Email
Email Invoice Ingestion enables invoices to be received directly through a dedicated location email address, eliminating manual uploads and simplifying invoice processing.
Benefits:
- Eliminates manual invoice uploads
- Supports direct vendor email delivery
- Works with scanner-to-email workflows
- Provides visibility into received emails and processed attachments
- Simplifies invoice intake for distributed business operations
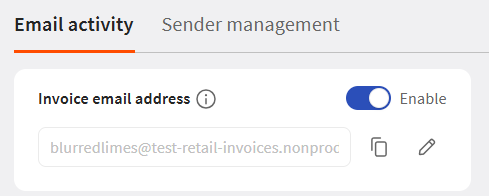
- In Toast Web, navigate to Retail > Settings > Email Import.
- Under Email activity, toggle Invoice email address to Enable.
- Enter a unique email name. That name, combined with the Toast domain, forms a unique invoice email address for that location. Note: Emails are per location and per document type.
- Share the new email address with suppliers, scanner systems, and auto-forwarding rules. Note: Only send invoice emails to this address.
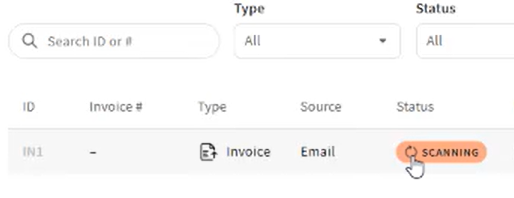
- Emails will be automatically validated once received. It will display as Scanning on the purchasing and receiving page.
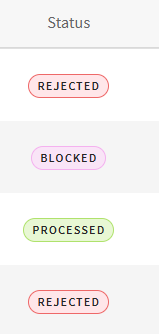
- You can track the progress of the email import page with the following statuses:
- Email Received
- Scan Complete
- Ingested
- Rejected
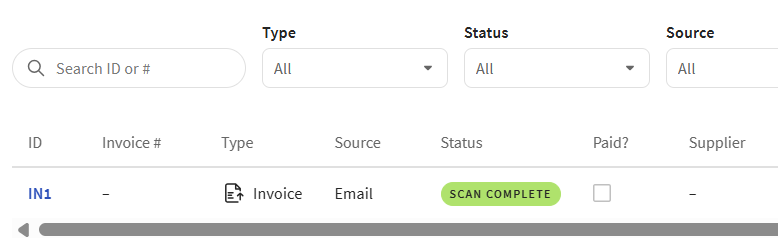
- Once scanning is complete, a Scan Complete Status will be displayed
Manage Allowed and Blocked Senders
By default, Toast accepts emails from most business domains. Emails from public domains (such as Gmail, Hotmail, iCloud, and other common public email providers) are blocked by default and must be manually allowed before they'll be accepted.
Allow a Sender
If an email from a blocked public-domain sender should be accepted, go to Sender Management and allow that sender. Allowing a sender applies only to that specific email address, not the entire domain. After allowing a sender, ask them to resend the invoice to confirm it processes successfully.
First-Time Sender Notification
When the first email arrives from a new sender, you'll receive a notification so you can choose to allow or block future emails from that sender or domain. If no action is taken, the sender remains allowed and processing continues normally.

Block a Domain or Sender
You can block a domain to stop all emails from a company, or block an individual sender when only one address should be restricted. You can also pre-block known unwanted domains or senders (for example, unwanted auto-forwarding loops) before you start receiving invoices.
Note: If a sender or domain is blocked after an invoice has already been received, the related invoice is automatically voided.

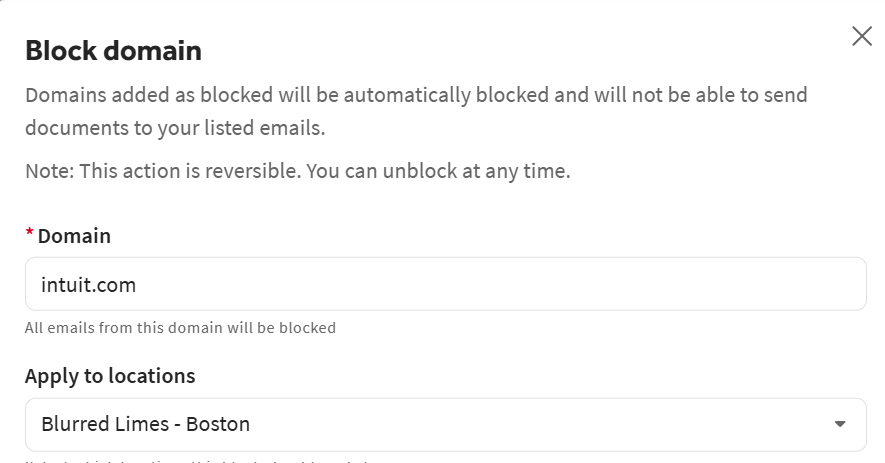
To unblock a sender, navigate to the Sender management tab, select the three-dot overflow menu, and select Allow sender.
Additional Resources for Toast Retail