Toast Tap™ (On-Counter) Installation Guide
Last updated: Oct 19, 2026, 4:03 PM
Welcome to your Toast Tap™ (On-Counter) hardware! Follow these steps to learn about this reader, the best way to install it with your hardware, as well as the ins-and-outs of configuration. This guide covers both the TOC200 and TOC300 readers.
Interested in adding a Toast Tap™ card reader to your restaurant? Navigate to Toast Shop now!
- Toast Tap™ (On-Counter) Overview
- Toast Tap™ Components
- Installation Steps for Toast Tap™ (On-Counter)
- Configuration Steps
- EMV Configuration
- Toast Tap™ Dual Card Reader Configuration
- Finishing Touches
- Toast Tap™ Placement Pad and Stickers
- Support
Note: Your Toast Tap™ (TOC200 or TOC300) can only be paired up with a swipe-only reader (also known as an MSR reader). All other card readers cannot be used with the Toast Tap™. Learn more about how to set up dual card readers below.
Toast Tap™ (On-Counter) Overview
Here's a breakdown of your hardware. The image below explains each light and both ways to insert or swipe cards.
TOC200
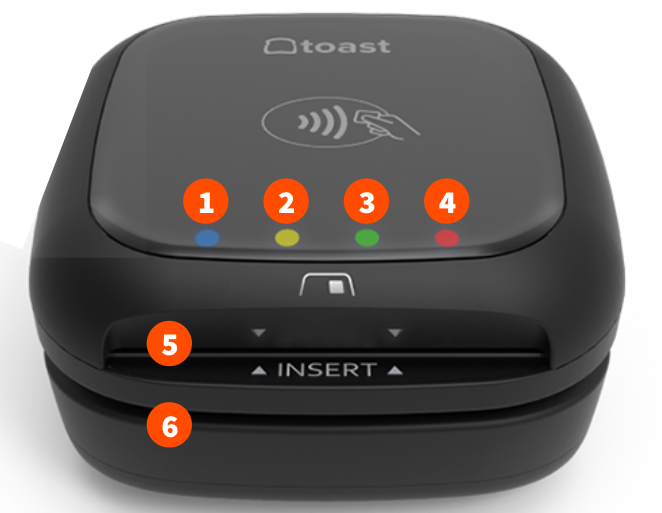
- Reader ready
- Processing
- Success
- Error
- Insert chip cards with chip facing up
- Swipe with stripe facing up (only for cards without chip or if chip fails)
TOC300
The TOC300 has separate lights, and they work differently than TOC200:
- Power indicator: a small light on the back or bottom of the reader (separate from the 4-light strip on top).
- Solid green: the reader is on and working normally
- Solid red: tamper alert—do not use, contact support
- No light: the reader isn't receiving power; check that the cable is securely connected
- Solid green: the reader is on and working normally
- Payment LED strip (the 4 lights on top, next to the tap surface):
- 4-light payment strip
- All lights off: the reader is idle
- Slow white pulse: ready to accept a tap or chip payment
- White lights progressing across the strip: payment in progress
- All four lights flash red (1 second): card read error—try again
- All four lights flash white (1 second): payment successful
- tap surface
- swipe slot
- dip slot
- 4-light payment strip
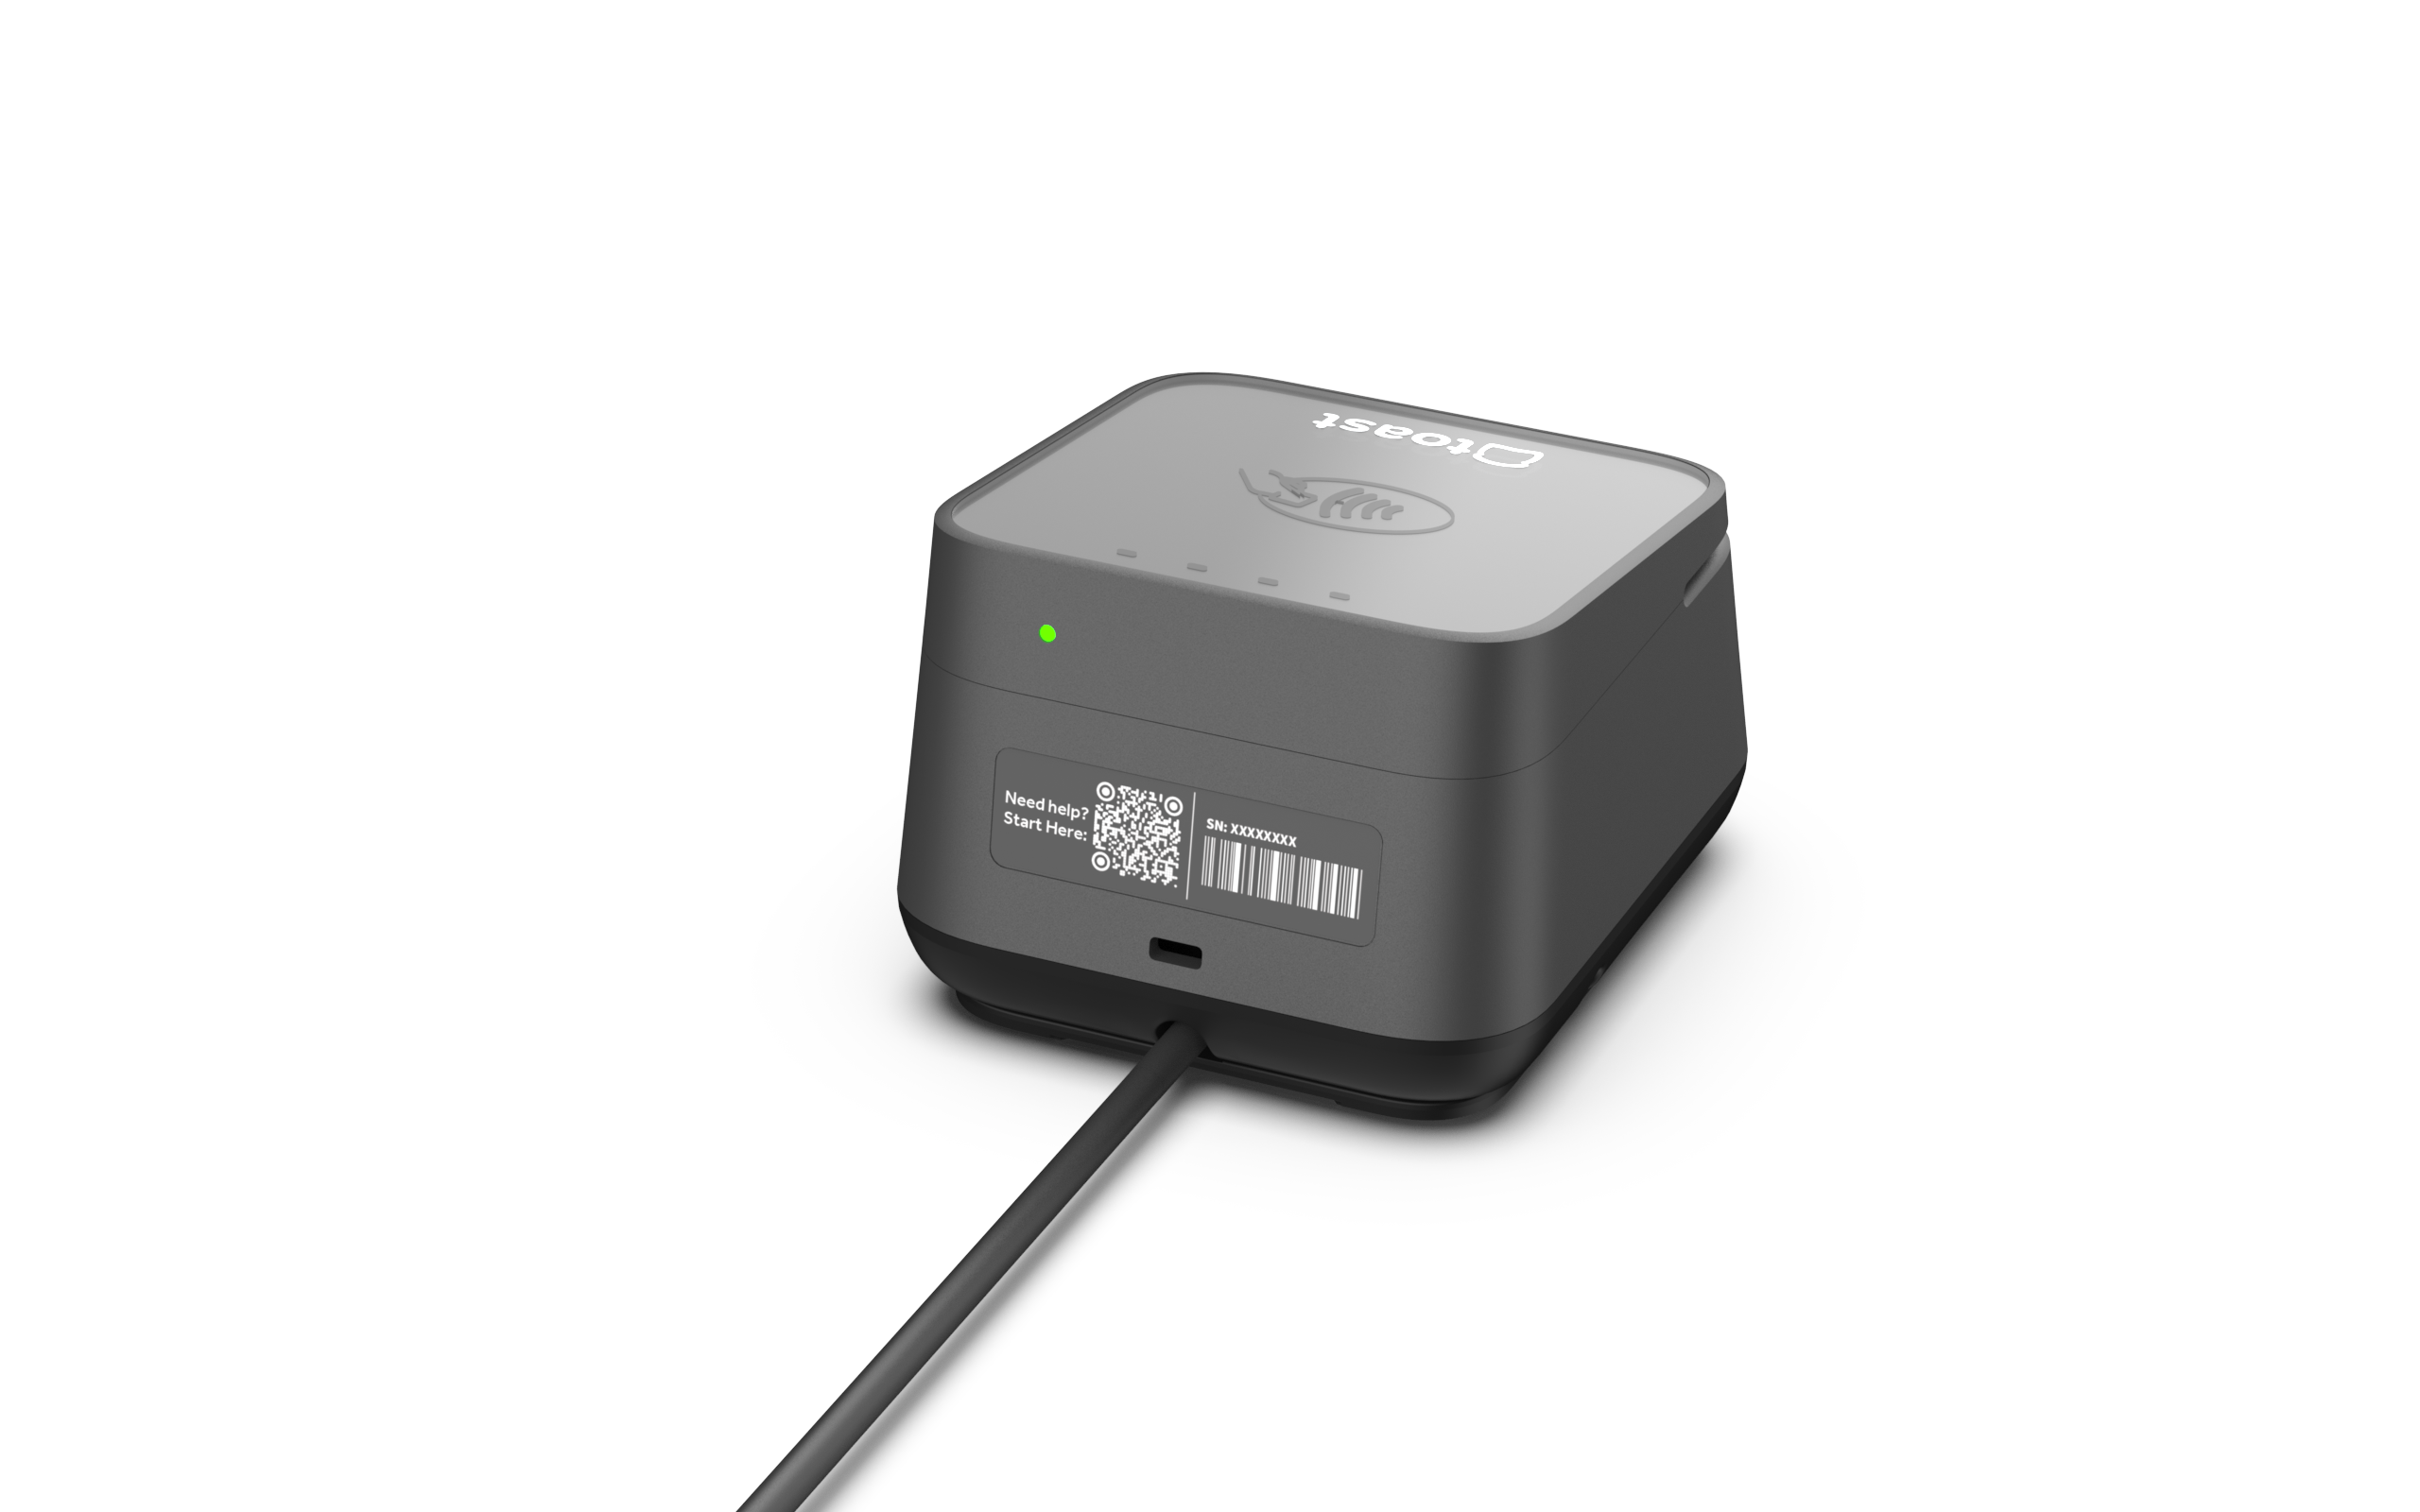
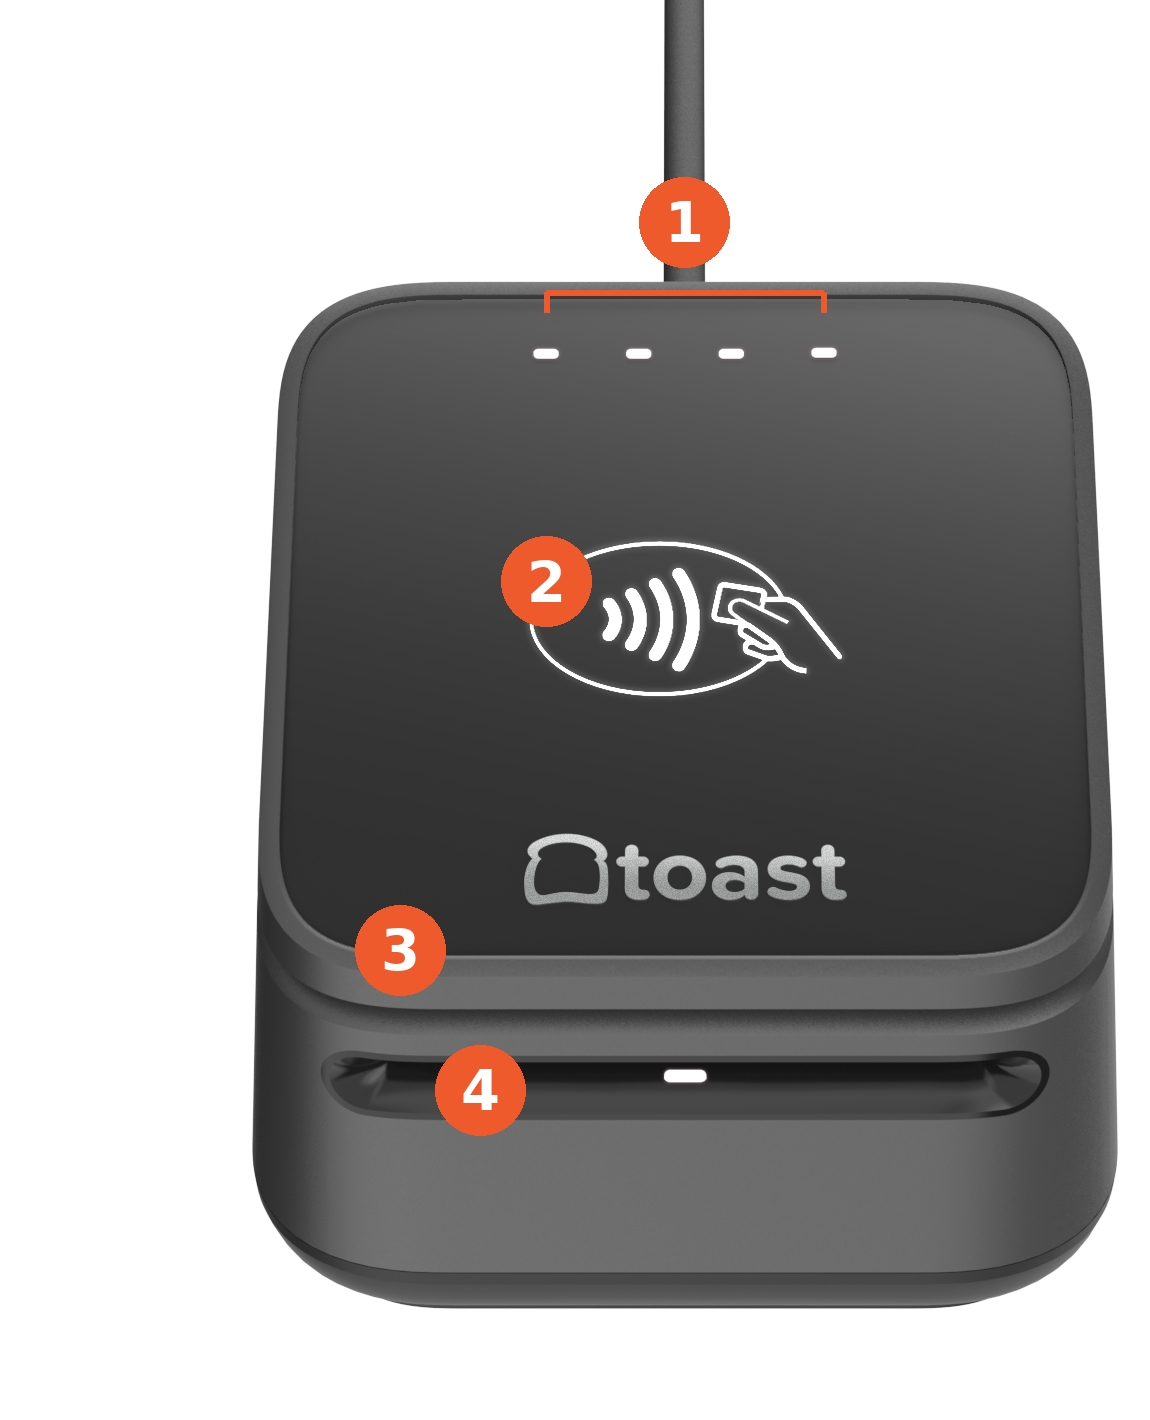
Cards can be tapped on top or dipped into the chip slot with the chip facing up. Swiping along the edge with the stripe facing up should only be used if tap or dip isn't available.
Toast Tap™ Components
TOC200
When you receive your Toast Tap™ (On-Counter), you'll get the following:
- The Toast Tap™ (On-Counter) hardware
- The Toast Tap™ (On-Counter) plate with adhesive
- Stickers for your door or windows to advertise accepted payment types
- Counter placement pad for your Toast Tap™
- Tool kit containing a screwdriver, alcohol wipes, and extra adhesives
- Micro-USB to Micro-USB cable
- USB-A to Micro-USB cable
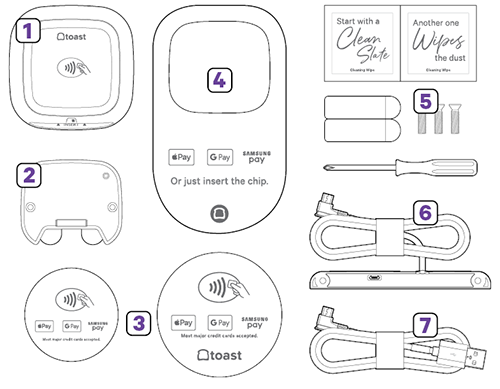
Note: You will only use one of the two cables provided to install your TOC200 hardware.
TOC300
The TOC300 ships with:
- The TOC300 hardware
- A stand, with adhesive on the bottom (under a peel-off liner) and 2 screw holes—secure it either way, whichever you prefer
- Quick start guide and product safety guide
- Three USB-C cables—each one is for a different connection, so you'll only use the one that matches your setup:
- USB-C to USB-A cable: for connecting to a Toast Printer, Printing Hub, or the back of an Elo V3/V4 terminal
- USB-C to USB-C cable (with thumbscrew): for connecting to a Toast Printing Hub or the bottom port of a Flex 3 stand
- USB-C to USB-C cable (without thumbscrew): specifically for the back of a Flex 14" or Flex 22" terminal
- USB-C to USB-A cable: for connecting to a Toast Printer, Printing Hub, or the back of an Elo V3/V4 terminal
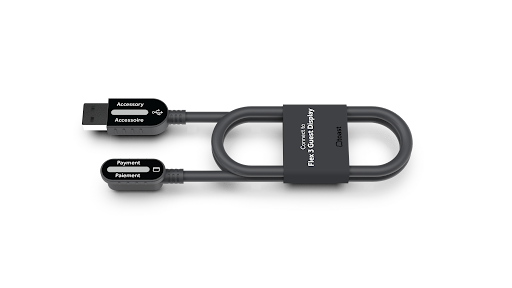
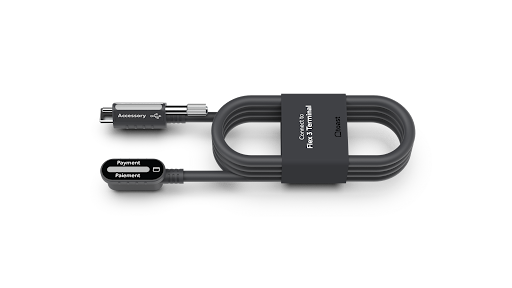
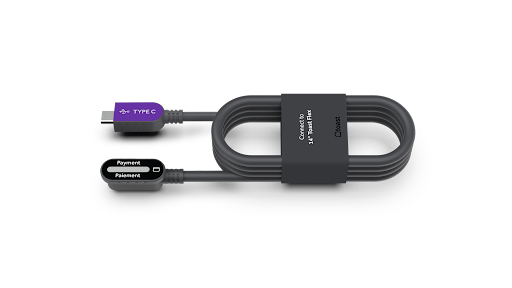
Note: Unlike TOC200, TOC300 does not include a screwdriver or alcohol wipes in the box. Third-party USB-C cables are not supported—only use the cables provided with your TOC300.
Installation Steps for the Toast Tap™ (On-Counter)
TOC200
To learn how to install your TOC200 watch the following video or read the steps below.
- Assess your counter space and card reader setup. Start by looking at your current hardware setup. Are you using a card reader that takes dip payments (aka an EMV reader)?
- If you have an existing EMV card reader, physically remove it before installation.
- Next, wipe down the countertop with the alcohol wipe provided in your tool kit. This will make it even easier for your TOC200 to adhere properly.
- Pick your cable for installation. Begin by determining the cable you'll use to plug in your TOC200 hardware. You'll only use one of these cables:
- USB-A to Micro-USB cable: Use this cable if you have an available port open on your Toast Hub, third-party USB hub, or Toast Printer. This cable plugs into the USB port on any of these devices. See installation instructions for the USB-A to Micro-USB cable further down in this article.
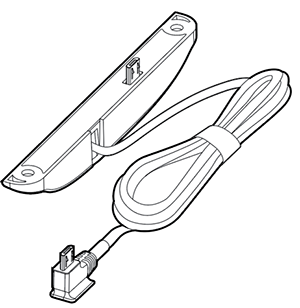
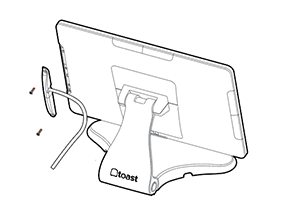
- Micro-USB to Micro-USB cable: Use this cable if you don't have an available port, have an Epson printer, or if you only have a terminal. This cable with the plate attached plugs into the side of your terminal and is adhered with screws. See installation instructions for the Micro-USB to Micro-USB cable further down in this article.
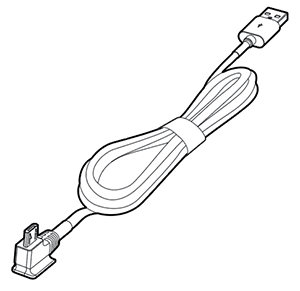
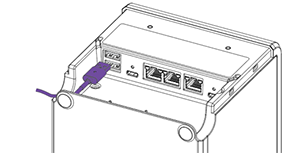
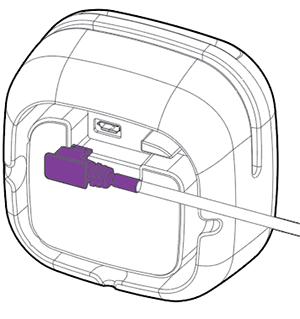
- Take the USB-A end of the cable and plug it into our Toast Hub or third-party USB hub (first image) or plug the USB-A end of the cable into your Toast Printer (second image).
OR
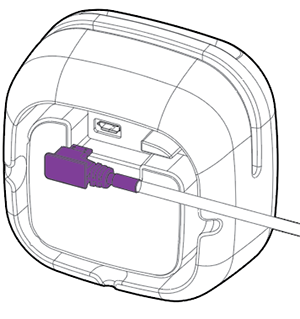
- Plug the remaining Micro-USB end into the bottom of the TOC200. The end of this cable is marked "to reader."
- You'll see a blinking blue light on your TOC200 to signify that the cable is plugged in all the way.
- Next, you'll need to configure the reader. Scroll down to the configuration section to learn more.
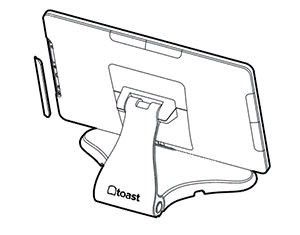
- Remove the plate covering the port on the side of your terminal. Any of the three ports (left, right, or on top) will work.
- Plug in the end of the Micro-USB cable that has the plate attached. Then screw the plate into the terminal.
- If your terminal stand has a neck to hide the cable, feed it through for a cleaner look.
- Plug the other end into the bottom of the TOC200. This end of the cable is marked "to reader."
- You'll see a blinking blue light on your TOC200 to signify that the cable is plugged in all the way.
- Next, you'll need to configure the reader. Scroll down to the configuration section to learn more.
Cable Installation (TOC300)
To learn how to install your TOC300 watch the following video or read the steps below.
Note: This same video also covers TDA300 installation, Flex 3 and Flex 14 terminal-specific setup, and software/payment configuration—use the chapter markers in the player if you'd like to jump ahead.
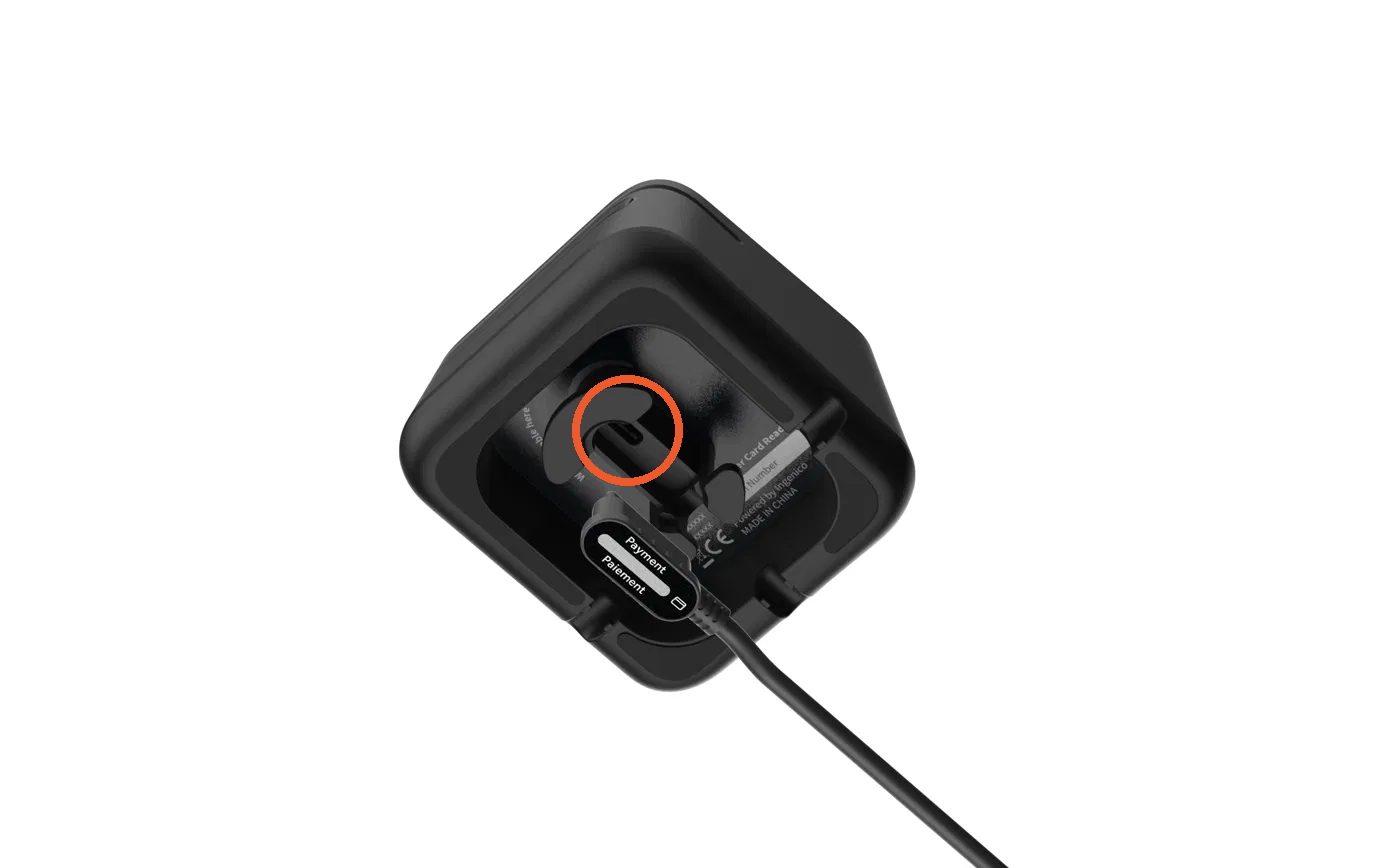
The TOC300 always uses the right-angled USB-C end to plug into the reader itself. The other end depends on what you're connecting to:
- Choose the cable that matches your setup:
- USB-C to USB-A—for a Toast Printer, Printing Hub, or an Elo V3/V4 terminal
- USB-C to USB-C (with thumbscrew)—for a Toast Printing Hub, or the bottom port of a Flex 3 stand
- USB-C to USB-C (without thumbscrew)—for the back of a Flex 14" or Flex 22" terminal
- Plug the non-reader end into the appropriate port on your Toast device.
- Plug the right-angled USB-C end into the recessed port on the underside of your TOC300.
- You'll see the power indicator turn solid green to signify the reader has power, and the tap/dip indicator will show a soft white pulse once it's ready for payment.
- Next, you'll need to configure the reader. Scroll down to the configuration section to learn more.
Card Reader Installation for Flex 3
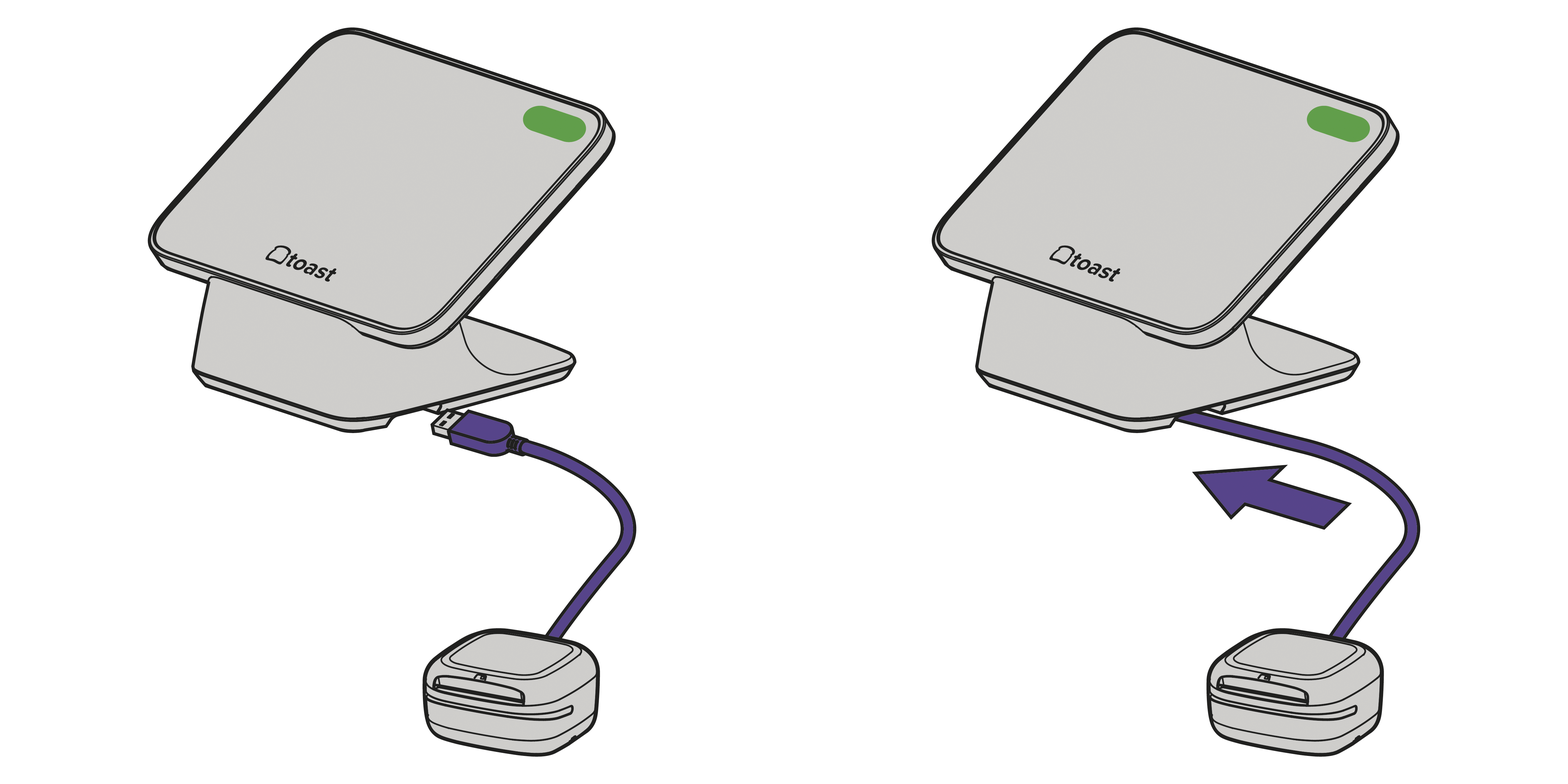
Card readers can be connected to the Flex 3 Terminal in the following ways: (see 2:15 in the installation video above for a walkthrough)
- On Counter Readers (TOC200 or TOC300)
- Readers with a USB-A cable can be plugged into the USB-A port in the Printer Hub (TP300) OR underneath the Guest Display (TGD300).
- Readers with a USB-C cable can be plugged into the USB-C port in the Printer Hub (TP300) OR in the USB-C port in the Flex 3 Terminal base or the back of the Flex 3 Display (TT300).
- Direct Attach Readers can be attached directly to the back of the Flex 3 Terminal (2 connector locations) or to 1 location on the Guest Display (TGD300) using the supplied M4 screws. Remove the connector covers first to expose these ports. More details on identifying and setting up your card readers can be found in Identify Your Card Reader Type.
Configuration Steps
EMV Configuration
Your Toast Tap™ will auto-detect once it's plugged into your Toast system. You'll need to enable EMV for the ability to take chip and contactless payments. (see 4:41 in the installation video above for a walkthrough)
- Once the Toast Tap™ has been properly plugged into your Toast hardware, restart your terminal.
- From the main menu of the Toast app, navigate to Setup > Device Setup.
- Scroll down and select the option for EMV Enabled.
- Make sure this is set to Yes.
- You'll also see an option for Card Readers below the EMV settings. Your Toast Tap™ device is listed as:
- TOC200: BBPOS Chipper 2X(USB)
- TOC300: TOC300 On-Counter Card Reader(USB)
- Confirm this is listed. You may also be prompted to update the reader's software. If so, opt into the update. Note: Switching out readers automatically turns the EMV setting off. Even if you've already enabled it, EMV will need to be turned on again.
- If you have a second screen attached to your terminal - also known as a Toast Flex for Guest or a Guest-Facing Display - you may have an additional swipe-only card reader. If you have this, make sure your Toast Tap™ reader is set to Guest Pay.
Toast Tap™ Dual Card Reader Configuration
When setting up your Toast Tap™ (On-Counter), you may have a second screen attached to your terminal - also known as a Toast Flex for Guest or Guest-Facing Display. If so, you have the ability to utilize two card readers at once. (see 5:46 in the installation video above for a walkthrough)
Setup: From the main menu on the terminal, navigate to Setup > Device Setup. Under Card Readers, you should see two different readers listed:
- Your Toast Tap™ reader—listed as BBPOS Chipper 2x(USB) (TOC200) or TOC300 On-Counter Card Reader(USB) (TOC300)—should be set to Guest Pay when used alongside another card reader.
- The MagTek DynaMag(USB) or Toast MSR is your swipe-only reader on the terminal. This reader should be set to Employee Pay.
Note: Your Toast Tap™ (TOC200 or TOC300) can only be paired up with a swipe-only reader (also known as an MSR). All other card readers cannot be used with the Toast Tap™.
Taking Payments: After taking a guest's order and selecting Pay, you'll see a button for Guest Pay, just like the option for Cash or a Gift Card. Once selected, the screen will prompt your guest with instructions to complete the payment.
For more details, check out this Support Center article: Guest Pay and Dual Reader Functionality with Toast Tap™.
Finishing Touches
TOC200
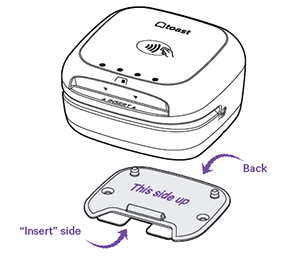
- Wrap any excess cable length around the inside of your Toast Tap™ in a clockwise motion to reduce wire clutter.
- Apply the plate to your counter surface with the adhesive to anchor your Toast Tap™. Keep in mind this adhesive is strong, so plan your anchoring spot wisely!
- Firmly press the plate down with the adhesive and hold for six seconds. The "Insert" side should face toward your guests.
- Place the reader on the plate. It can be removed if needed.
TOC300
- Carefully choose your desired location for the stand—if you're using the adhesive, this decision is permanent, so take a moment before proceeding.
- Secure the stand using whichever method you prefer:
- Adhesive (permanent): remove the plastic liner from the bottom of the stand, then press it firmly into your desired location.
- Screws: use the 2 mounting screws (#4 x 3/4" countersunk Phillips head) through the holes in the stand instead.
- Slide the card reader onto the stand.
Cards can be:
- Tapped on the top of the reader
- Dipped into the front slot with the card chip facing up
- Swiped across in any direction with the card stripe facing upwards (only used when tap or chip fails or a card is not enabled with a chip)
It's important to note that you'll need to reconfigure your manager swipe cards if you'd like to use them with your Toast Tap™. If your restaurant has a mix of TOC200 and TOC300 readers, we recommend using Toast Access Cards instead of Manager Swipe Cards, since Access Cards work across both reader generations. Check out the article Manage Employee/Manager Swipe Cards to learn how to do this.
If you'd like to check out the installation instructional booklet, you can see it here.
Toast Tap™ Placement Pad and Stickers
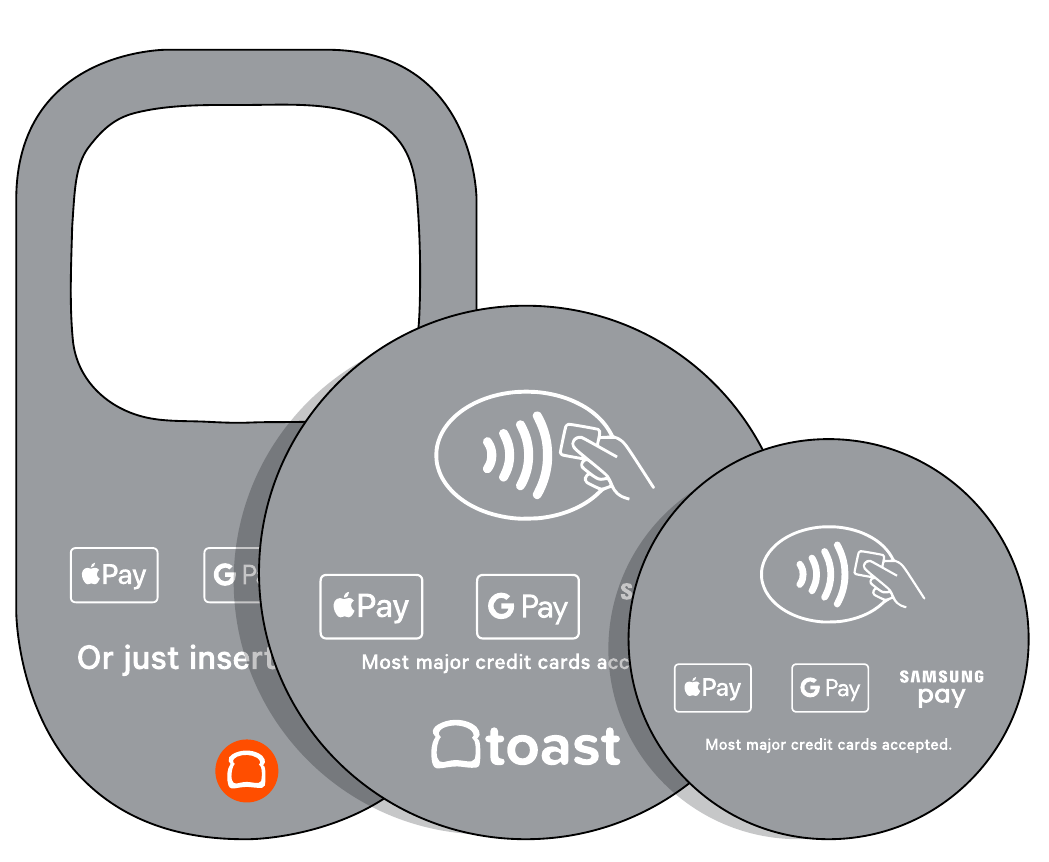
In addition to your Toast Tap™ (On-Counter) hardware, you'll receive a placement pad to anchor your hardware, and window stickers to advertise accepted payment types.
TOC200
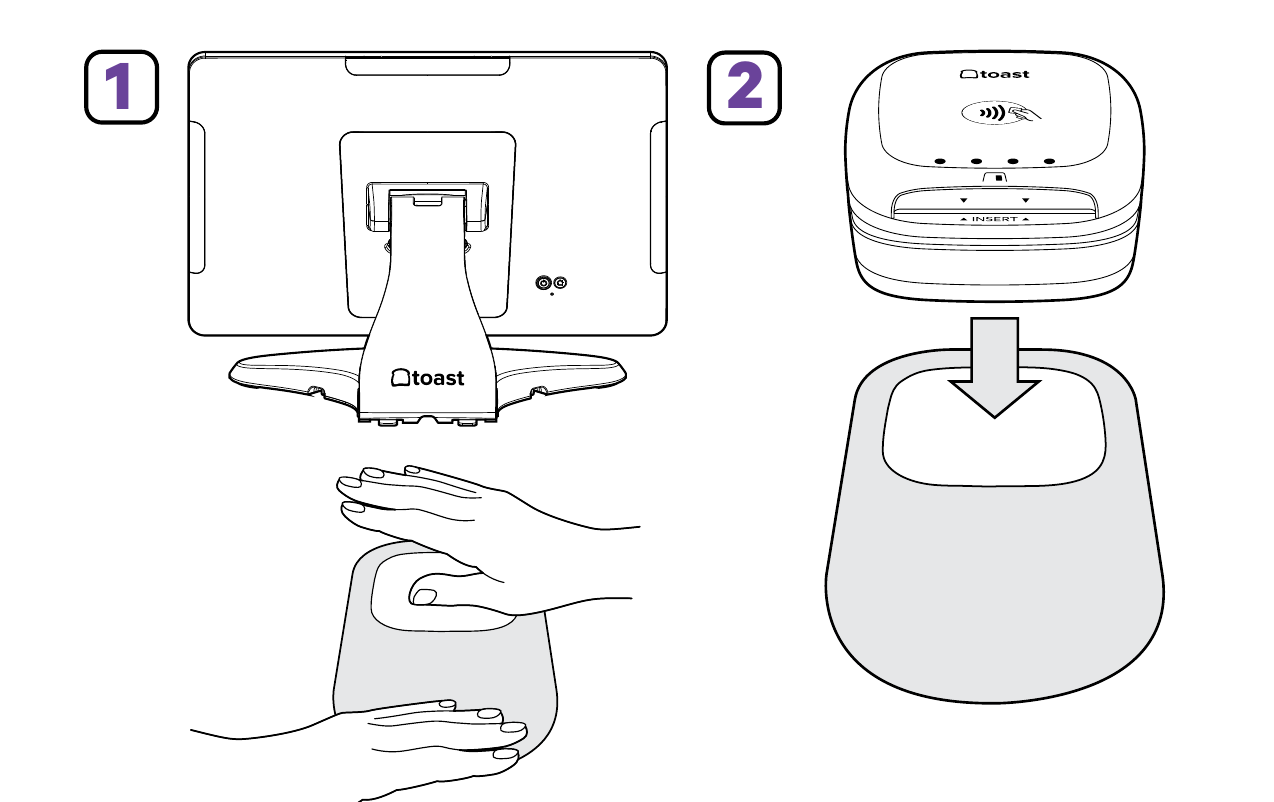
Pad Installation:
- Wipe down the counter space in front of your terminal and firmly place the adhesive side of the pad down with your hands.
- Place the Toast Tap™ within the opening of the pad. This fits with the anchor plate that comes with your Toast Tap™.
TOC300
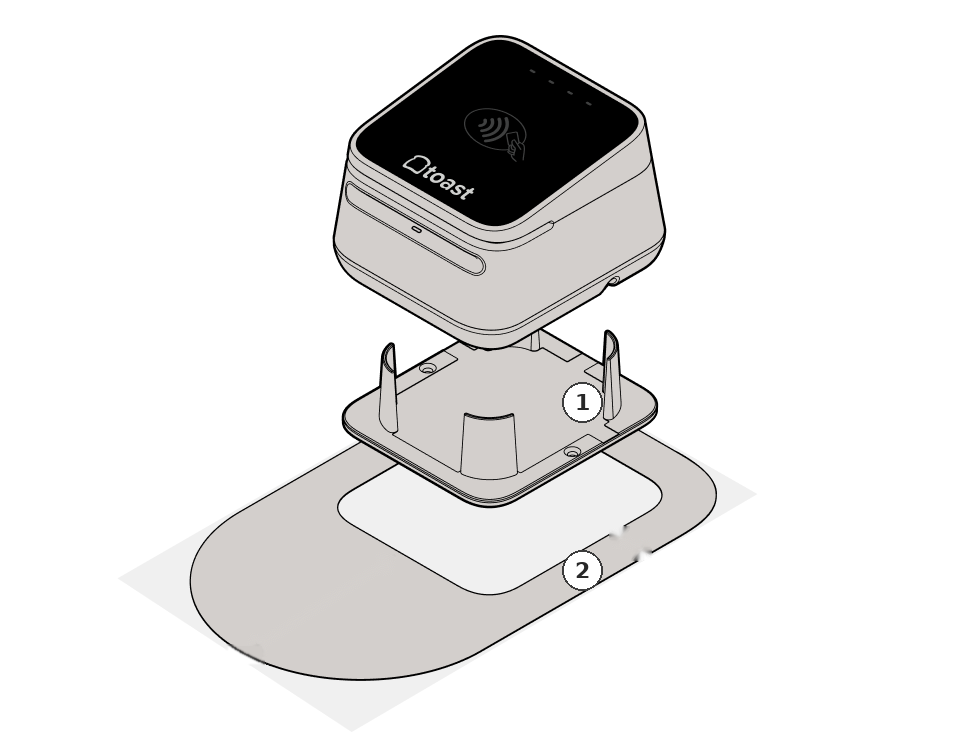
- Stand; install for the reader for stability
- Payment pad
TOC300 ships with its own stand, which has an adhesive underside. Since the adhesive is permanent, be sure of your placement before pressing it down—see the note in Finishing Touches above.
Support
Support is your first line of defense for all Toast questions. Our Support team is available 24/7/365 and is trained to either help or route your request to the correct team at Toast.
- Call (617) 682-0225
- Chat with an agent online on Toast Central
- Submit a ticket on Toast Central
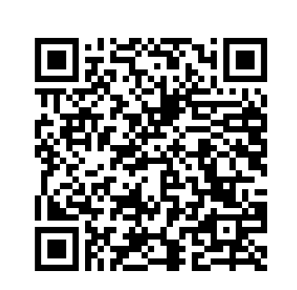
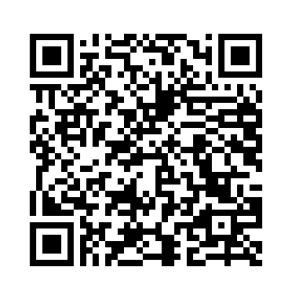
Note: Scan the QR codes below with the camera app on your phone to access the Toast Tap™ Troubleshooting Guide and the Toast Tap™ Training & Best Practices Guide for more info.
Have troubleshooting questions? Check out Get Help with Card Readers.