Use Toast Tables
Last updated: Jul 28, 2026, 2:46 PM
Use the Toast Tables app to run your host stand, manage the waitlist, take reservations, assign servers, and seat parties on your floor plan.
- Before You Begin
- Log In to the Toast Tables App
- Manage the Waitlist
- Manage Reservations
- Manage In-App Notifications
- Manage Your Server Roster
- Seat Parties and Manage the Floor Plan
- Frequently Asked Questions
- Related Articles
Before You Begin
Applies to: Toast Tables, Toast Tables Plus, Toast Web, Toast POS
Permissions needed:
- 1.18 Log Into Booking App (Waitlist & Reservations)
- 4.7 Configure Booking (Waitlist & Reservations)
What you'll accomplish: Operate your restaurant's host stand day-to-day using the Toast Tables app — including waitlist management, reservation handling, server assignments, and floor-plan seating.
If you have not finished initial setup yet — service periods, dining areas, table capacities, combo tables, online access, employee permissions — complete the configuration steps in Get Started With Toast Tables before continuing.
Note: Toast Tables is a separate app from Toast POS. You download and run Toast Tables on an iOS or Android tablet (or phone, with reduced functionality). Toast Tables is not supported on Toast hardware. For supported devices, see Toast Tables: Device Compatibility.
Log In to the Toast Tables App
To log in to the Toast Tables app:
- Open the Toast Tables app on your tablet and select Login.
- Enter your Toast Web credentials (the email and password you use to sign in to Toast Web).
- Select your restaurant location.
Expected outcome: You will see the Toast Tables home screen with five tabs at the bottom: Home, Schedule, Servers, Guests, and More.
Note: You will be prompted to log in again at least every 30 days.
If you manage more than one location, switch restaurants from the More tab by selecting More > Switch restaurant.
If you can't log in or can't see your restaurant after logging in, see Get Help With Logging in to Toast Tables App.
If you need to set up or check the right employee permissions before logging in, see the Employee Permissions section of Get Started With Toast Tables.
Manage the Waitlist
The Toast Tables waitlist lets hosts add parties, notify guests when tables are ready, and pre-assign tables before seating.
If your online waitlist is not appearing for guests, or guests can't join from your website or Google, see Get Help With Toast Tables: Online Waitlist and Reservations.
Add a Party to the Waitlist
To add a walk-in party to the waitlist:
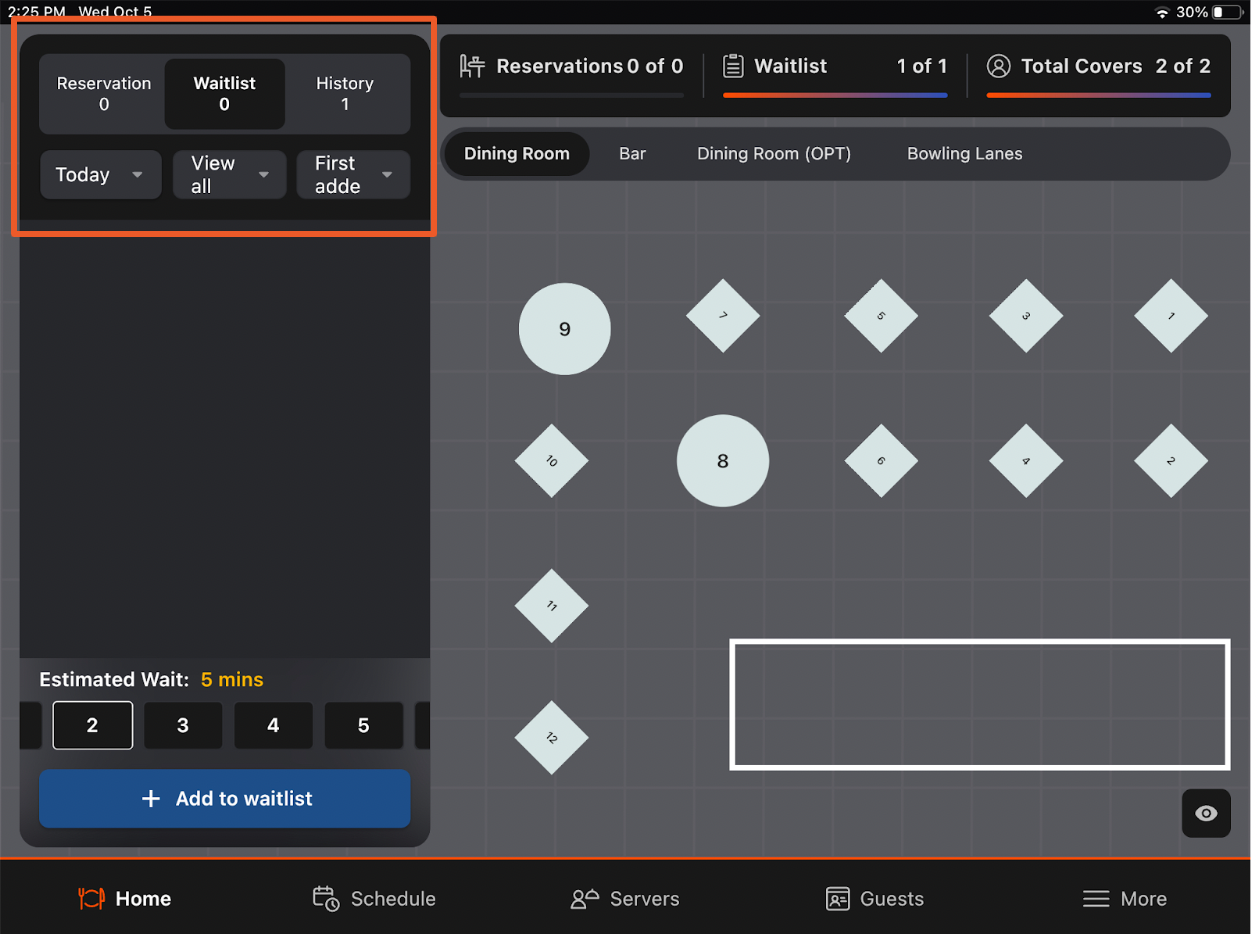
- From the Home tab, select Add to Waitlist in the bottom right.
- Select a dining area, or leave First Available selected to put the party in line for any open table.
- Enter the party size.
- Enter the guest's First and Last name. If you don't enter a name, the party is labeled Walk-in.
- Enter the guest's phone number so you can send a text when the table is ready.
- (Optional) Toggle VIP to mark VIP status on the party.
- (Optional) Add any Internal Notes by Guest or Internal Notes by Visit.
- (Optional) Add any Special Requests the guest mentioned.
- Review the quoted wait time. Toast estimates this based on your booking settings in Toast Web. To adjust the calculation, see Get Started With Toast Tables.
- Select Add.
Expected outcome: The party appears on the waitlist with a quote timer. When the timer turns yellow, the party is within five minutes of their quoted wait. When the timer turns red, the party has waited longer than quoted.
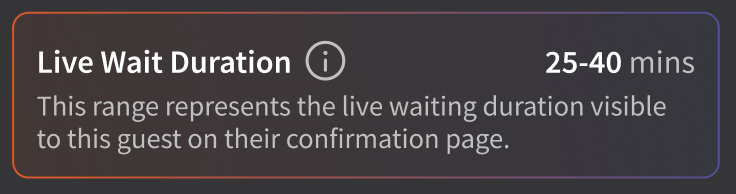
Note: Live Wait Duration. When you open the party's details, you'll see a live preview of the wait time the guest sees in their confirmation text — the same range the guest received when they joined the waitlist via your online link.
Seat a Walk-in Without the Waitlist
Sometimes you have an open table and want to seat a walk-in immediately without adding the party to the waitlist. This still keeps your POS integration and cover counts accurate.
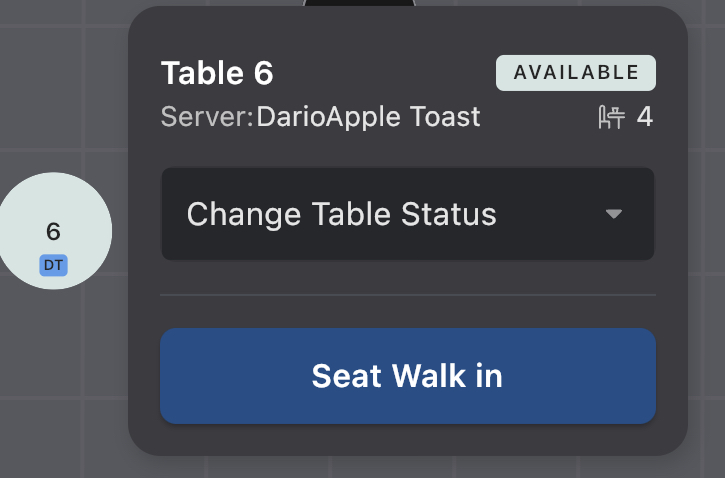
- From the Home tab, select the table where you want to seat the party.
- Select Seat Walk in.
- Enter the party size and (optional) party name. If you don't enter a name, the party is labeled Walk in.
- Select Seat Walk in at the bottom right.
Expected outcome: The table is marked Seated (in-use), and a turn-time countdown begins on the table's progress bar.
Note: To seat a walk-in party across multiple tables, select Select at the bottom right and then select each table you want to combine before seating.
Notify a Guest Their Table Is Ready
To send a text message letting a waitlist guest know their table is ready:
- Select the Waiting party on the left side of the Home tab.
- Select Send Notification.
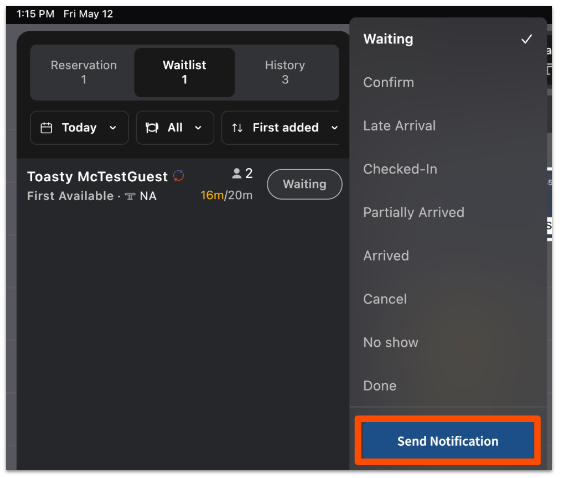
Expected outcome: The party's status changes to Notified. The guest receives the text using the Waitlist Notify SMS template set in Toast Web.
Note: If the guest did not provide a phone number, Send Notification is grayed out.
For details on configuring your SMS templates, including 2-way messaging, see Toast Tables: The Guest Experience.
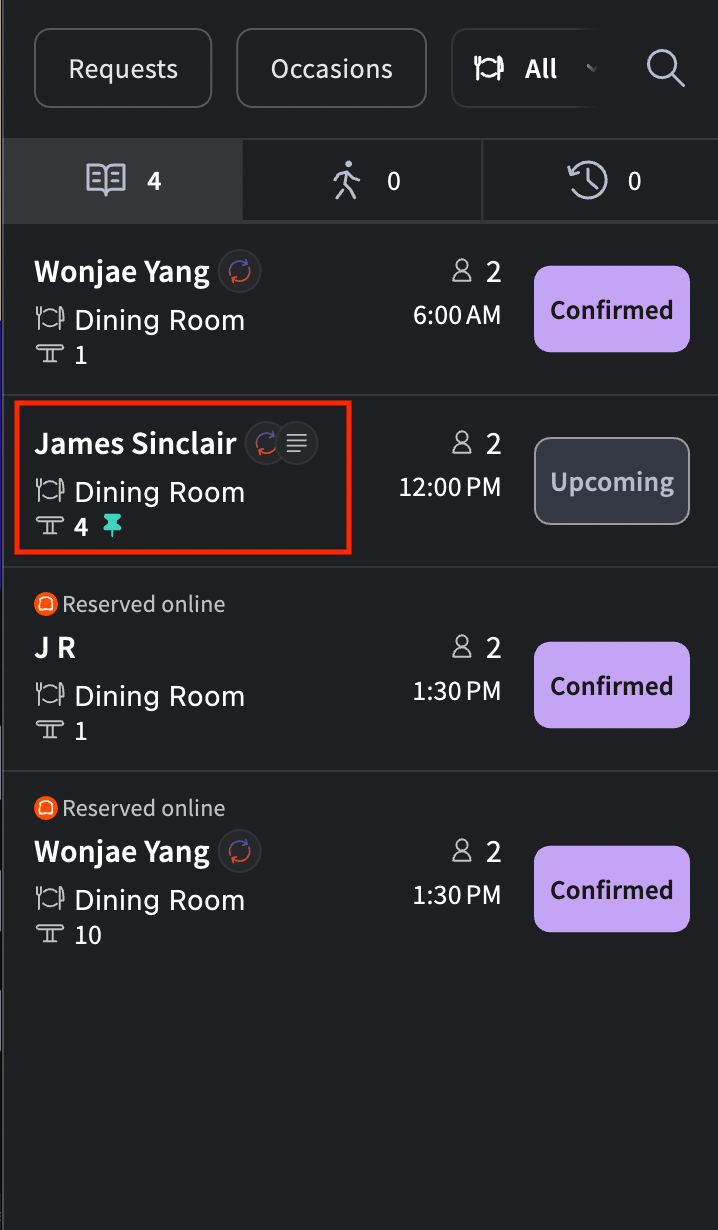
Pre-assign Tables to a Waitlist Party
You can hold one or more tables for a waitlist party before they arrive.
- Select the waitlist party.
- Select Assign Table.
- Select one table — or multiple tables to create a combination table — then select Assign.
Expected outcome: A pushpin icon appears next to the party's name to indicate the table is held for them. The pre-assigned table is highlighted in blue when you go to seat the party.
Manage Reservations
A reservation can be created four ways:
- By a host or manager in the Toast Tables app (covered below).
- By a guest through your restaurant's online reservation link — see Toast Tables: The Guest Experience.
- By a guest through Reserve with Google — to set up, see the Set Up Reserve with Google section of Get Started With Toast Tables.
- By a manager in Toast Web on the Overview tab — see View Reservations on Toast Web and the Toast Tables Overview Tab section of Get Started With Toast Tables.
Note: When a reservation is created, a Guestbook profile is created or updated with any notes you add. Tags on the profile help your team identify guest attributes and run targeted marketing. For more, see the Guestbook Tags section of Access Your Guest Data with Guestbook.
Note: Guests cannot choose their own table. Only a host or manager can assign tables.
 Add a Reservation as a Host
To create a reservation in the Toast Tables app:
- On the Home screen, select the Reservation tab.
- Select + Add new reservation.
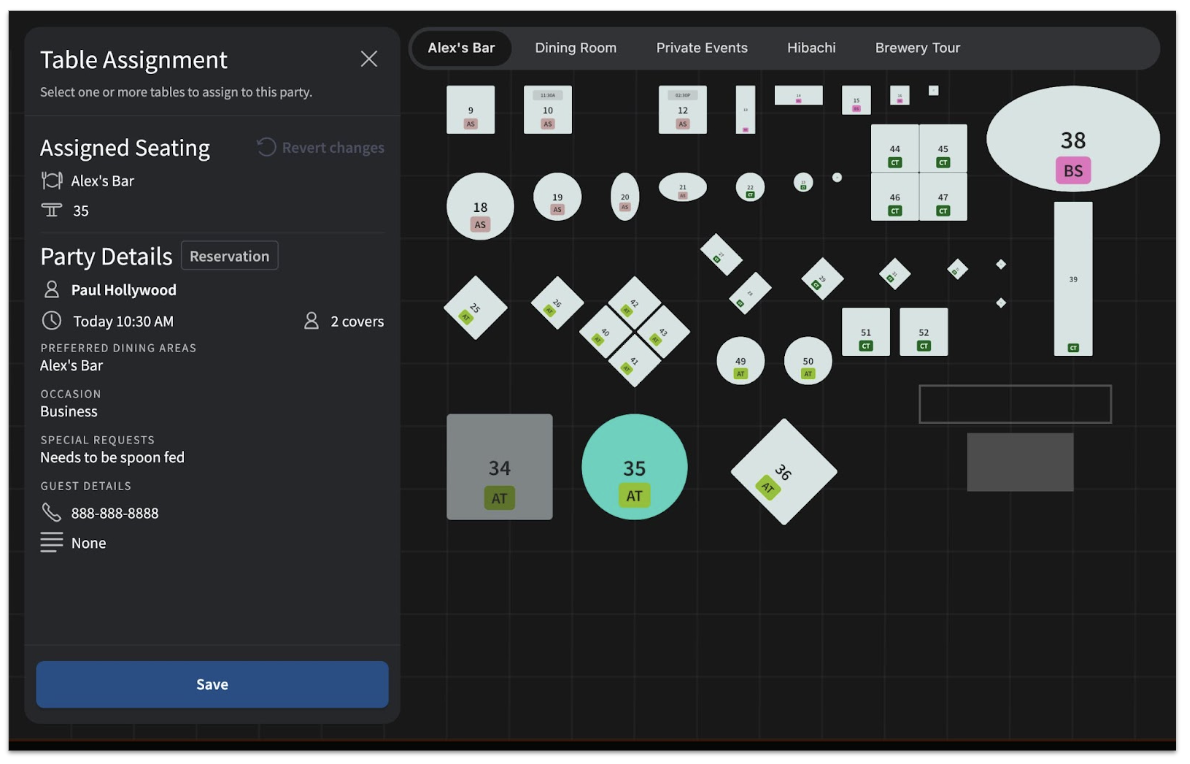
- Select a Service area to filter tables, or leave it open for any available table. To pick a specific table and override availability, select Advanced Table Selection.
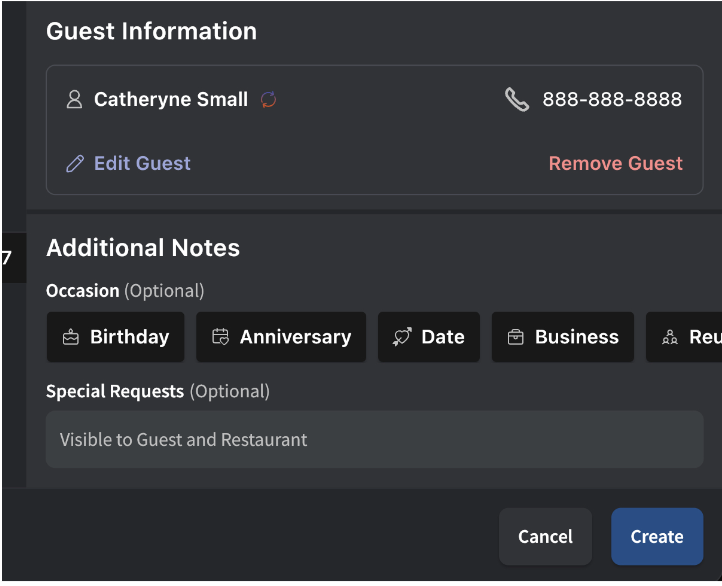
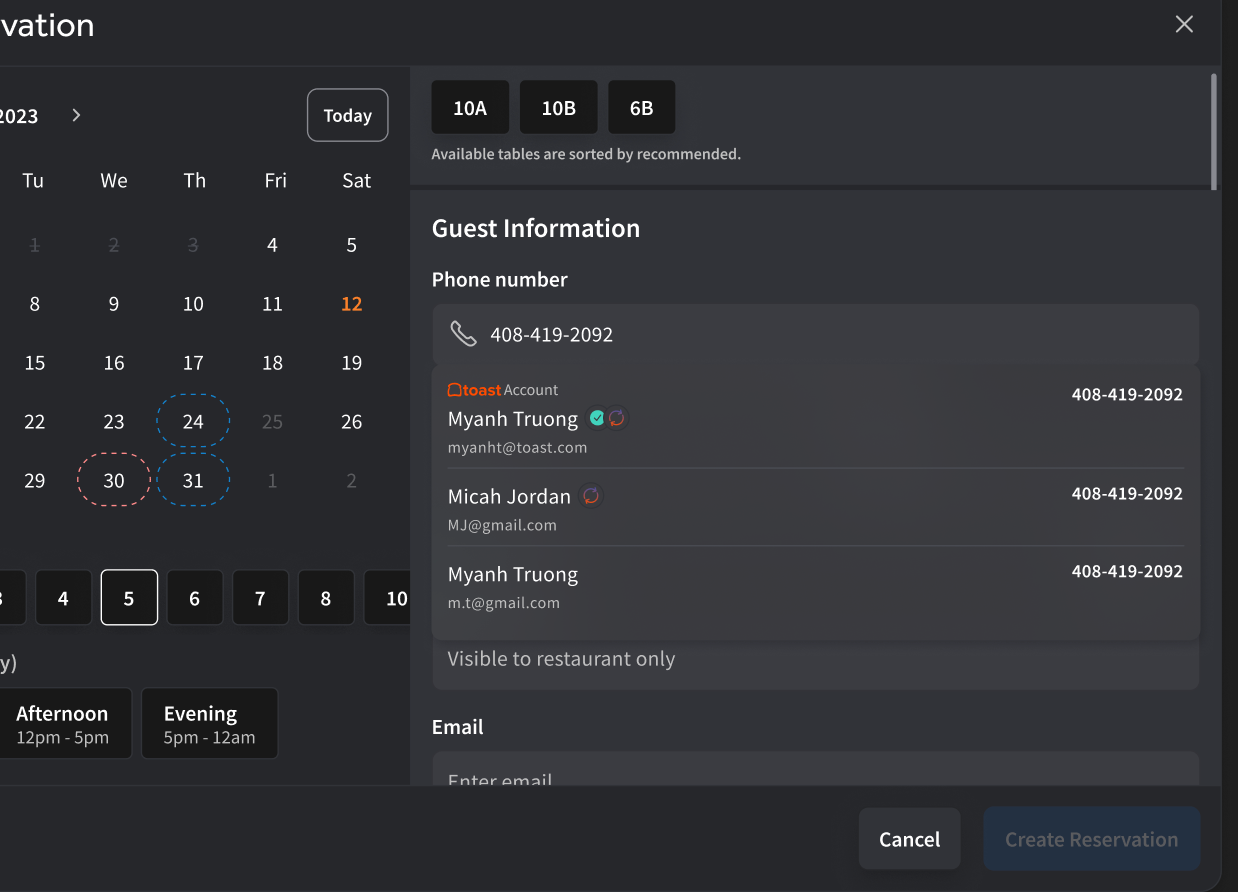
- Enter the guest's information. Under Additional Notes, add any special requests or context for your team.
- Select Create Reservation.

Expected outcome: The reservation appears on the Reservation tab and on the floor plan at the assigned table and time.
Note: If the guest already has a Toast account, you may see multiple guests associated with the same phone number — choose the right one from the list. Hosts and managers cannot edit guest information from this screen.
View Upcoming Reservations
The Reservation tab shows upcoming reservations sorted by Next Up by default. You can change sorting to time added, party size, or status.
- Search by guest name using the search bar at the top of the Reservation tab.
- Switch to the calendar view by selecting Today to see another date.
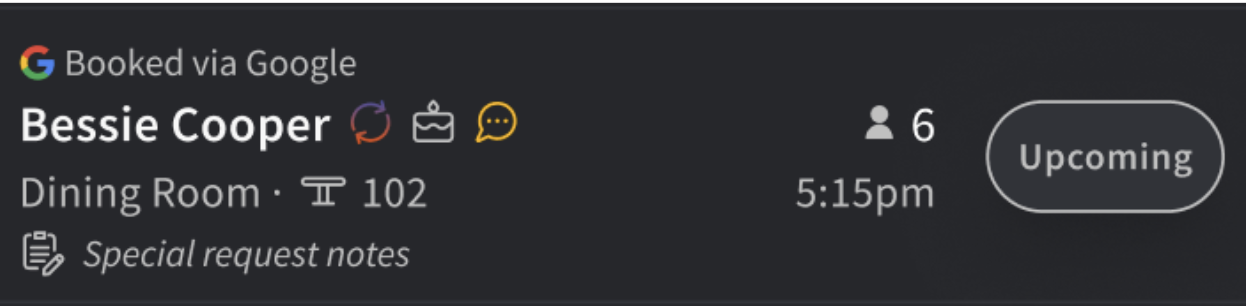
- The default floor-plan view is Table View. Each table card shows the next three reservations due on that table.
- Reservation cards display the source — Booked via Google, Online Reservations, or Online Waitlist — when applicable.
Note: Reservations created in the Toast Tables app are not visible on a Toast POS terminal or handheld. The Toast Tables app cannot be installed on Toast POS hardware.
Notify a Reservation Guest
You can text reservation guests directly from the app if your restaurant has 2-way messaging enabled. To enable or configure 2-way messaging and reservation reminder templates, see the SMS settings section of Toast Tables: The Guest Experience.
Edit a Reservation
To change a reservation's party size, time, date, table, or notes:
- Select the reservation.
- Select Edit Reservation Details.
- Make your changes.
- To pick a time that the system shows as unavailable, select View Unavailable. This may create a conflict — see Resolve Conflicting Reservations.
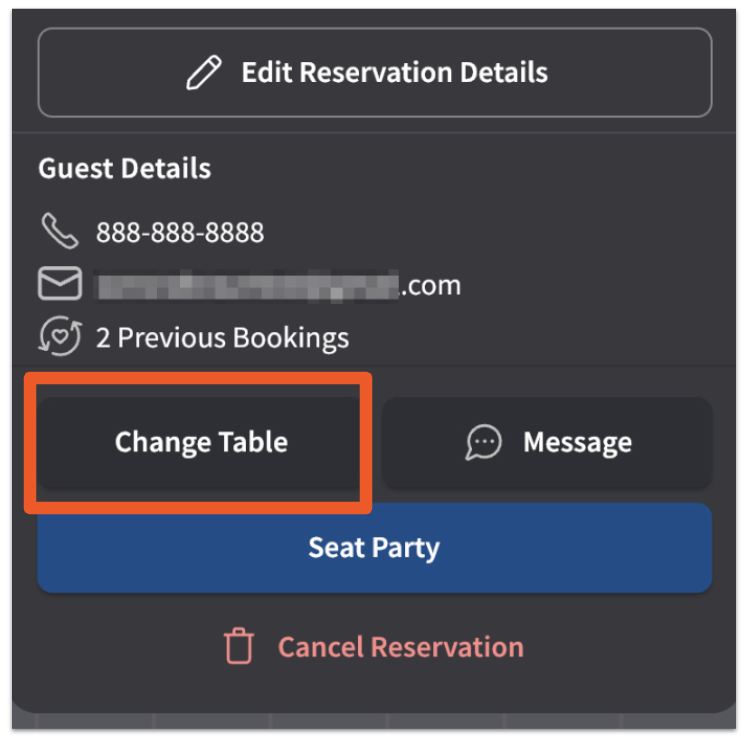
- To change the table without opening the full reservation details, select Change Table. This opens the Table Assignment view.
- To move a reservation to a different service area, long-press the reservation and select Move Service Area.
- To move a reservation to a different table within the same service area, drag the reservation card onto the target table.
Expected outcome: Changes save automatically when you confirm. The reservation card updates on the floor plan and the Reservation tab.
Note: When you're moving a booking between tables, the original time slot stays visible but dimmed to reduce errors.
Note: Guests cannot edit their own reservations after booking. If a guest needs to change a detail you can't accommodate, the guest must cancel and rebook.
Resolve Conflicting Reservations
When two reservations are scheduled for the same table at overlapping times, both reservations turn red on the floor plan and on the Reservation tab.
To resolve a conflict, switch to Timeline view, then either:
- Move one party to a different table or time, or
- Shorten the standard turn time so the earlier reservation ends before the later one starts.
Use Timeline View and Flow View
Toggle between Table View (floor plan) and Flow View (chronological view) at the top of the Home tab.
- Adding a reservation from Timeline View: drag the new reservation box to the appropriate turn time on the timeline.
- Adjusting a reservation from Flow View: long-press the reservation, then drag the start or end time.
- Unassigned bench: unassigned parties sit on the bench above the timeline until you assign them a table. Drag a party from the bench to any open table.
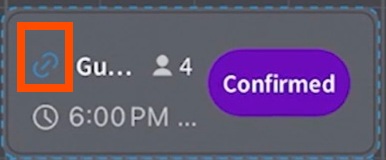
- Combo tables: if a party is assigned to a combination of tables, a blue clip icon appears next to the guest's name.
Flow Control settings determine how many guests can be booked in each 15-minute window per service period. To adjust these settings, see the Flow Control section of Get Started With Toast Tables.
Change a Party Status and Reinstate a Cancelled Party
You can change a party's status at any time. Statuses work for both waitlist parties and reservations.
Possible statuses include:
- Waiting — waitlist party still in queue
- Notified — text sent that the table is ready
- Arrived / Checked-In — guest has arrived at the host stand
- Late Arrival — guest arrived after their reservation time
- Seated — party is at their table
- Done — guest's visit is complete (or auto-applied — see below)
- No Show — guest never arrived
- Cancelled — reservation or waitlist entry cancelled
To change a party's status:
- Select the party on the Home tab or Reservation tab.
- Select the current status, then select the new status.
Expected outcome: The status updates on the party card and the party moves to the appropriate place in your view (e.g., Cancelled and No Show parties move to the History tab).
Note: Notified waitlist parties are automatically moved to History if they do not respond or arrive within 15 minutes of being notified. The system marks them as Done during this auto-removal.
SMS auto-reply. If you have enabled the Enable auto-reply option in Toast Web, guests can reply 1 to confirm and 9 to cancel or leave the waitlist. This is the fastest way to update statuses without manual host action.

Reinstate a cancelled or no-show party. If a party was marked Cancelled or No Show by mistake, or if the guest arrives late:
- Open the History tab.
- Select the party.
- Move the party back to Waiting (for a former No Show) or Created (for a former Cancelled).
Expected outcome: The party returns to the active waitlist or reservation list.
Manage In-App Notifications
The Toast Tables host app can send real-time, in-app push notifications when a reservation or waitlist party changes during the current shift, so hosts don't have to keep manually refreshing the app to catch cancellations or new bookings.
Turn On and Configure Notification Types
To turn on or adjust in-app notifications:
- Select the More tab.
- Select Settings.
- Select In-app notifications.
For each notification type, turn it on or off and choose whether it applies to All bookings, Reservations only, or Waitlist only:
- Bookings created — notifies you within a 4-hour window when a new booking is created or a guest is added to the waitlist, online or in-house.
- Booking changes — notifies you within a 4-hour window when a reservation or walk-in is updated, including changes to party size, seating, time, or notes.
- Large party alerts — notifies you within a 4-hour window when a party of 7 or more guests is booked.
- Cancellations and removals — notifies you within a 4-hour window when a guest cancels a reservation or removes themselves from the waitlist.
Expected outcome: Notifications matching your selections appear on the host app in real time.
Note: You will not receive a notification for a change you make yourself. Other devices signed in to the Toast Tables app for your restaurant will still be notified.
View the Notification Feed
Select the notification bell icon at the top of the Home tab to open the notification feed. Each entry shows the guest's name, the type of update — for example Reservation cancelled, Reservation created, Large party booked, or Reservation edited — and how long ago it happened. Edited reservations also note what changed, such as an updated party size.
Manage Your Server Roster
The Servers tab is where you add servers and hosts to today's roster, assign them sections, and track rotation and cover counts.
Add Servers to the Roster
To add servers to the roster:
- Select the Servers tab.
- Select Add Servers to Roster.
- Select the + button next to each employee you want to add.
- Select Save.
Expected outcome: The selected employees appear on the roster and become assignable on the floor plan.
To edit the roster after creating it, select Edit Server Roster.
Note: Your employee roster syncs overnight from Toast Web. A newly added employee in Toast Web will not appear in the Toast Tables app until the next day's sync.
Start a new shift for a server. If a server is working back-to-back shifts and you want their cover counts and table counts to reset:
- Select the Servers tab.
- Select Server Rotation.
- Select the server.
- Select + Shift.
Expected outcome: The server's covers and tables reset to zero for equitable distribution on their new shift.
Why a Server Is Not Visible in the Tables App
If a server is clocked in or scheduled but does not appear in the Toast Tables app, check the following:
- The employee is on the Toast Tables roster for today. Add the employee to the roster from the Servers tab (steps above). Being clocked in on the POS does not automatically add a server to the Tables roster.
- The employee was added to Toast Web today. New employees added in Toast Web sync overnight and may not appear in the Tables app until the next day.
- The employee has the right Toast Tables permissions. The employee needs at minimum the 1.18 Log Into Booking App (Waitlist & Reservations) permission to appear as a host or server. See the Employee Permissions section of Get Started With Toast Tables.
- The employee was rehired. Rehired employees may need to be re-added to the roster or have their permissions republished.
If the server still does not appear after checking the above, contact Customer Care.
Add a Host to the Toast Tables App
A host is added the same way as any other employee. The employee needs the 1.18 Log Into Booking App (Waitlist & Reservations) permission in Toast Web. Once the permission is published, the host can log in to the Toast Tables app with their Toast Web credentials and will appear on the roster if you add them via Add Servers to Roster.
For permission setup steps, see the Toast Tables Employee Permissions section of Get Started With Toast Tables.
Assign Tables to Servers
Each server on the roster is automatically assigned a color. To assign tables:
- Select the Servers tab.
- Select a server to highlight them.
- Tap each table you want to assign to that server, or select Select all tables in service area to assign every table in the current service area to the highlighted server.
- To remove all of a server's assignments, select Clear [Server]'s tables.
Expected outcome: Each assigned table's progress-bar border takes on the server's color.
View Server Rotation and Cover Counts
Server rotation and cover counts live at the top of the Home tab on the Server Rotation strip. Sort the rotation by:
- Last sat time — server who was seated longest ago at the top (typical default)
- Current covers — number of guests currently seated under the server
- Total covers — total guests served on this shift
- Current tables — number of parties currently seated under the server
- Total tables — total parties served on this shift
Note: Sort settings apply to a single device. If you have multiple Toast Tables devices in use, set the sort order on each device.
Best Practices for Managing Server Activity
- For assigned sections. Assign each server's section at the start of their shift. If you need to swap a server's tables mid-shift, you can — open checks stay with the original server until closed.
- For unassigned sections. Add every server who will work that shift to the roster, but skip table assignments. The host assigns tables at the moment of seating.
Note: If your Toast POS permissions allow servers to edit each other's checks, servers can still edit Toast Tables-created checks on the POS, even if the table was assigned to a different server.
Seat Parties and Manage the Floor Plan
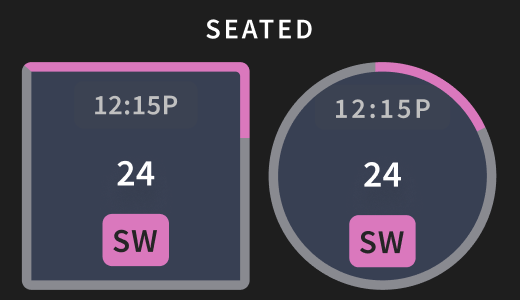
The floor plan on the Home tab is your live view of the dining room. Each table shows its current status, the assigned server's color, and a progress bar that counts down the turn time.
Seat a Party at a Table
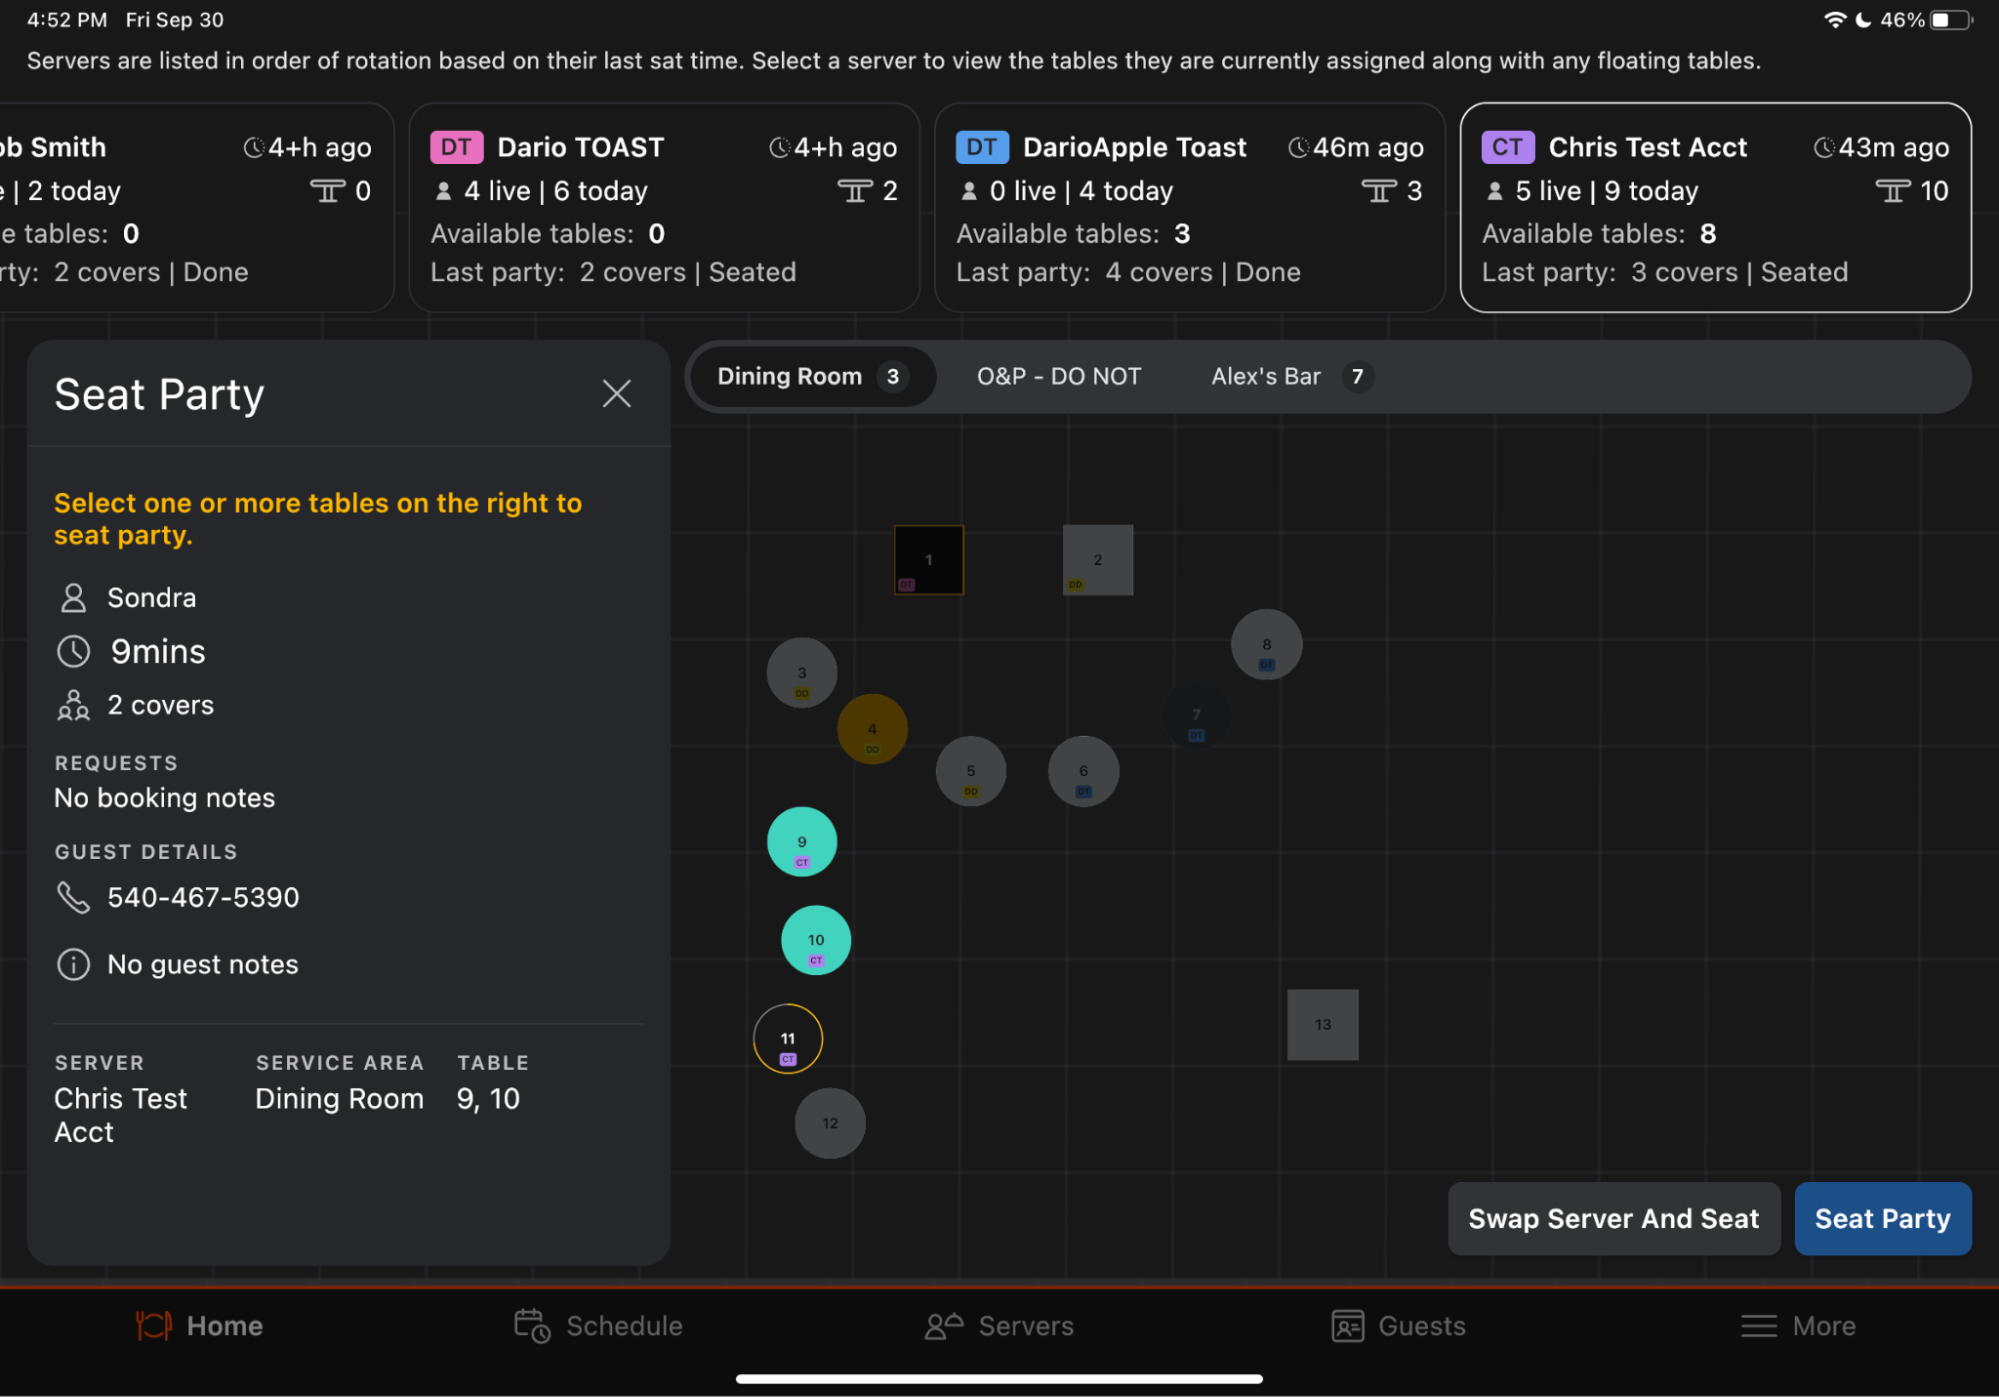
To seat a reservation or waitlist party:
- On the Home tab, long-press the party card on the left and drag it to an open table. Or, select the party's status and select Seat.
- If multiple service areas exist, navigate to the right one. Pre-assigned tables appear pre-selected in blue.
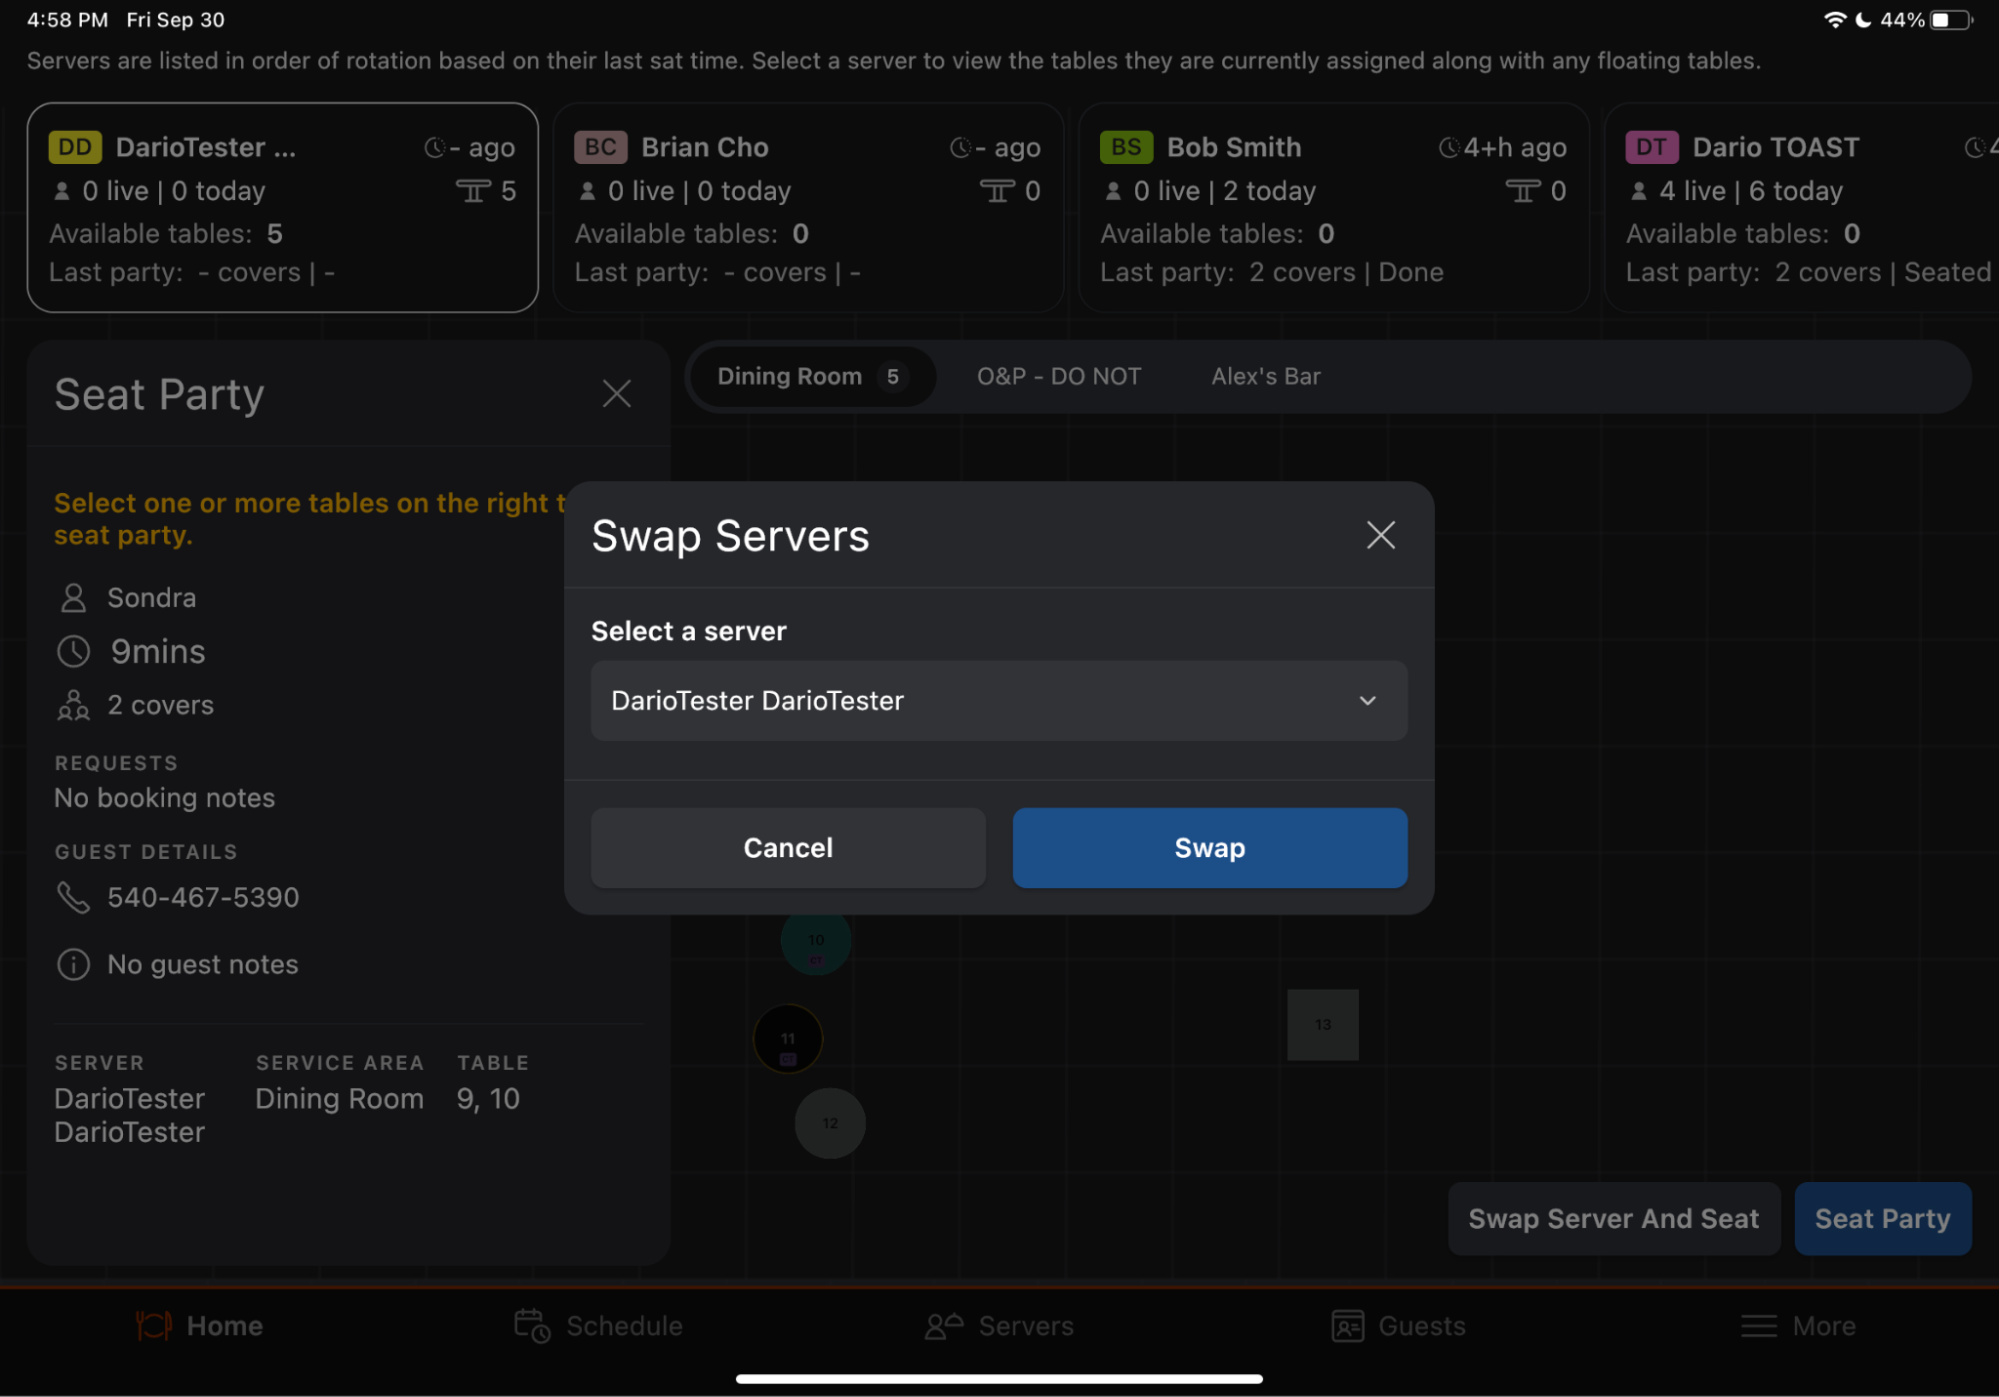
- Confirm the server. If the server is not on the roster or is unavailable, select Swap Server and Seat to assign a different server for this party only.
- (If swapping) Select the replacement server, then select Swap.
- Select Seat Party.
Expected outcome: The table is marked Seated, the assigned server's color appears on the progress bar, and you return to the Home tab.
Note: You cannot drag a party onto a table that is already Seated or Ordered, onto a combo table (unless the table was pre-assigned to the party), or seat a party using a server who is not on today's roster — unless you use Swap Server and Seat.
Note: If the Start Order on POS integration is enabled, a new order starts on the POS automatically when you seat the party.
Un-seat a party. Select the seated table and select Unseat Party, or long-press the seated table and drag the party back to the list on the left.

Expected outcome: The table returns to Dirty (or Available if no order was started). If the Start Order on POS integration is on and the party is re-seated, a new POS order starts at the table.
Table Colors and Statuses
Each table on the floor plan has a status. Statuses are either automatic (driven by the POS order data or a seating action) or manual (you set them).
| Status | When it applies |
|---|---|
| Available | Default state, or set manually by Make Available |
| Seated | Set automatically when you seat a party |
| Ordered | Set automatically from POS order data (party has placed an order) |
| Paid | Set automatically from POS order data (party has paid) |
| Dirty | Set manually by Mark as Dirty, or automatically when a party leaves |
| Blocked | Set manually by Block Table — see Block Specific Tables From Reservations |
The progress-bar border around each table represents the elapsed turn time, based on the Turn Times setting in Toast Web > Restaurant Settings. The border color matches the assigned server's color.
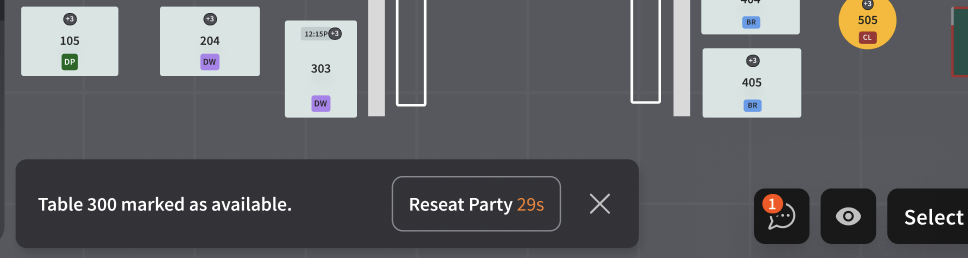
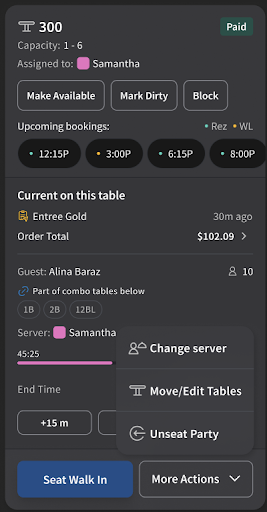
Change a Table Status
To change a table's status manually:
- Select the table.
- Select the new status — Make Available, Mark as Dirty, or Block Table.
Expected outcome: The table updates immediately on the floor plan. A small notification appears at the bottom of the screen — if you changed the status by mistake, tap the notification or tap the table within 30 seconds to undo.
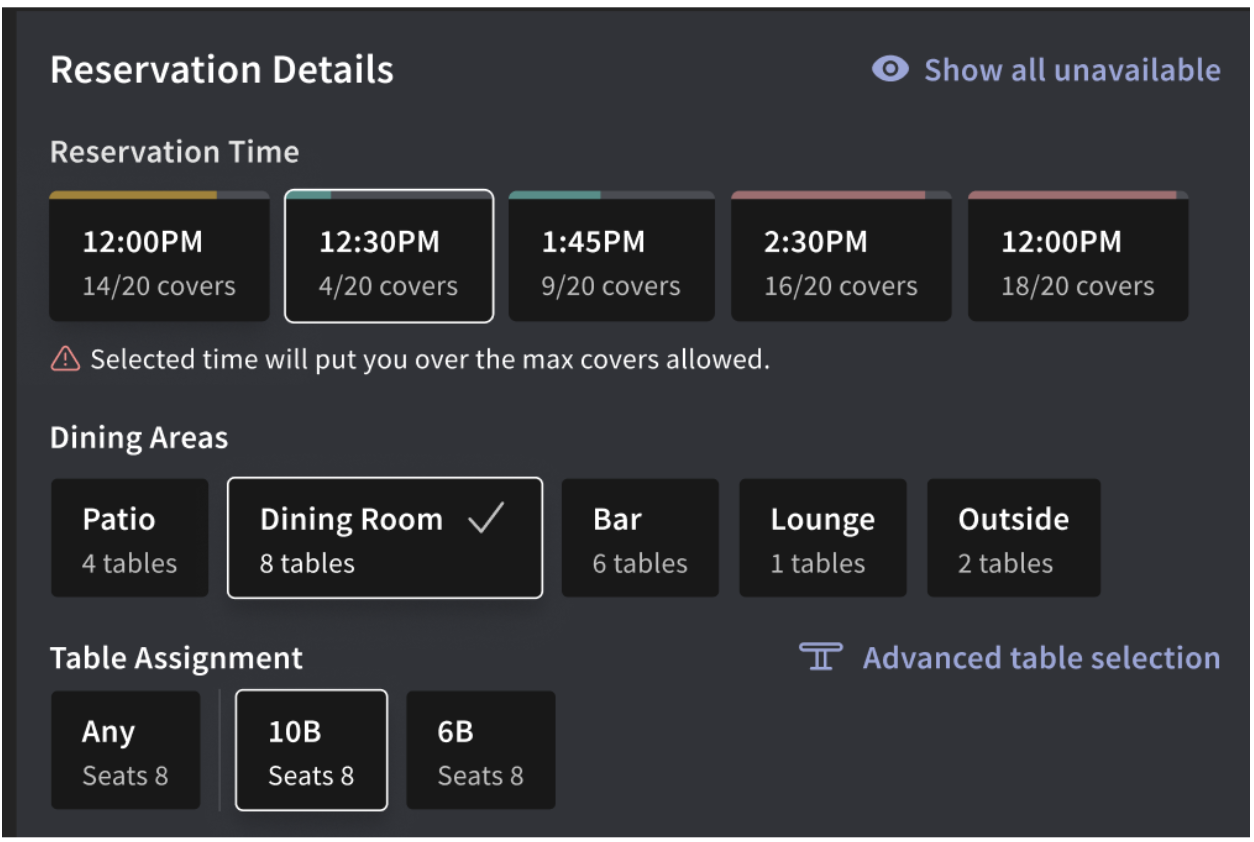
Select Unavailable Times
To override system availability — for example, to book a party at a time the system says is unavailable:
- While creating or editing a reservation, select View All Unavailable.
- Select the table and time you want.
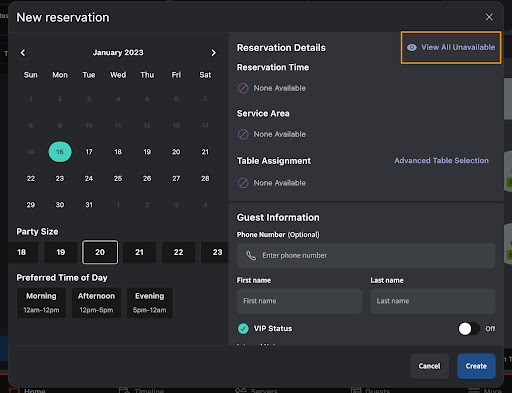
Expected outcome: The booking is created at the chosen table and time. This may create a conflict — see Resolve Conflicting Reservations.
Block Specific Tables From Reservations
To stop specific tables from being booked online or in-house for a date or a shift:
- Open the date you want to block (use Today to switch dates).
- Select a table to block one table, or select Select at the bottom right and pick multiple tables.
- Select Block tables for this date.
Expected outcome: The selected tables are blocked for the entire date and are unavailable for new reservations or walk-in seating.
To manage shift-level blocks, see the More tab and select Blocks. To pause all reservations or the online waitlist across your restaurant (not just specific tables), see Toast Tables: Set Special Dates and Block Reservations.
Track Order Status and Coursing
If your restaurant uses a kitchen display screen, item icons on each seated table show coursing status:
- A yellow item icon means the item was sent to the kitchen but has not been fulfilled.
- A blue item icon means the item was fulfilled by the kitchen.
Use Party Icons, Filters, and Sorting
Each party card on the Home tab shows up to eight icons describing the guest and party state:
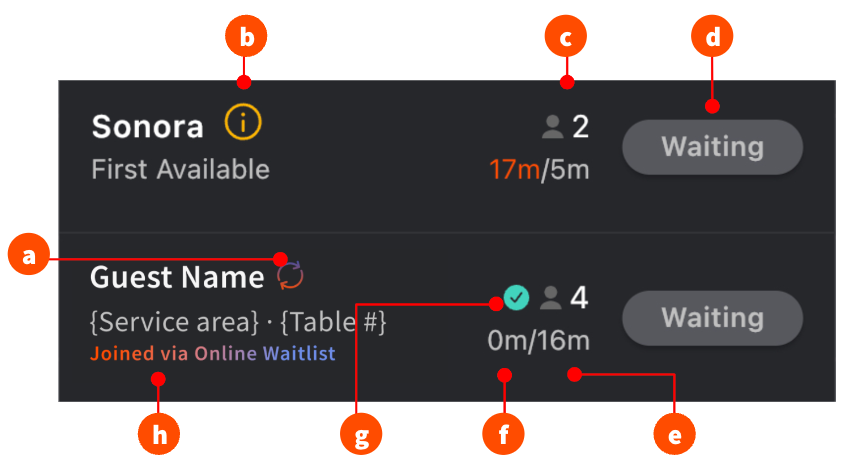
- Repeat guest
- Internal or guest note attached
- Party size
- Party status (Waiting, Notified, Seated, etc.)
- Quoted time
- Time passed since the party was added
- VIP
- Source — where the guest joined from (online waitlist, online reservation, host)
Filters sit at the top-left of the Home tab. Filter by date (default Today), service area, party size, or time added.
History tab — see seated, cancelled, no-show, and done parties. Move a party back to the active list by selecting Waiting or Created.
Pushpin icon — a pushpin next to a party's name indicates the table was manually assigned (pre-assigned) to that party.
Move, Edit, or Add Tables
To move a seated party to a different table mid-service, long-press the table and drag it to an open table.
Note: Toast will never auto-reassign a table that was explicitly chosen by a host or manager. The system only auto-reassigns when reservation conflicts arise on a table that was auto-assigned.
Note: You cannot move combo tables.
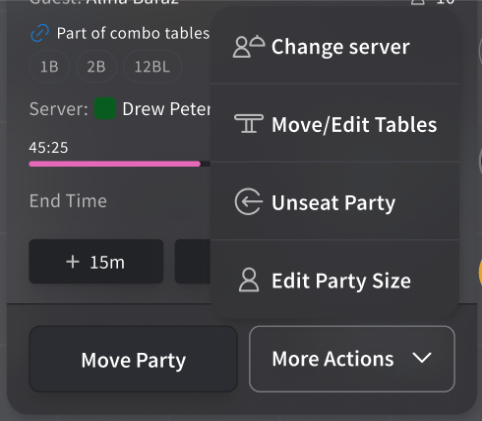
To change a party's party size:
- Select the party.
- Select More Actions.
- Update the party size and select Save Changes.
Expected outcome: The party's card and any assigned table update. If the system reassigns to a different table because of capacity, the previous table is marked Dirty.
Important: Moving a seated party to a new table does not move the order in the POS unless the Start Order on POS integration is enabled.
Review Booking History
Two History views exist in the app:
- History button (per booking) — opens the change log for a single reservation or waitlist entry. Useful when you need to see who edited a booking and when.
- History tab (per day) — shows every booking from today, including cancelled, no-show, and completed parties.
Note: The History button is different from the History tab. The button shows changes for one booking; the tab shows all bookings for the day.
To see edits and the audit trail for a single booking in Toast Web, see the Overview tab in Get Started With Toast Tables.
Frequently Asked Questions
Why is a server clocked in on the POS but not showing in Toast Tables?
A server clocked in on the POS is not automatically added to the Toast Tables roster. To make the server appear in the Tables app, open the Servers tab and select Add Servers to Roster, then add the server. If the employee was newly added in Toast Web today, the employee may not appear until the next overnight sync.
For more, see Why a Server Is Not Visible in the Tables App.
Also asked as:
-
- "I have a server who is not showing up under Toast Waitlist"
- "I added a server to Toast and she is clocked in but I don't see her on toast tables"
- "I just rehired an employee — how do I get them to show up as a server on our Roster?"
How do I add a host to Toast Tables?
To add a host to Toast Tables, give the employee the 1.18 Log Into Booking App (Waitlist & Reservations) permission in Toast Web, then add them to today's roster from the Servers tab using Add Servers to Roster. Permission setup steps are in Get Started With Toast Tables.
Also asked as:
-
- "How to add a host to toast tables"
- "Where do I add a host"
How do I indicate that a party has been seated?
To indicate a party has been seated, long-press the party card on the Home tab and drag it onto an open table, then confirm the server and select Seat Party. The table is marked Seated and the party leaves the waitlist or reservation list. See Seat a Party at a Table for the full walkthrough.
Also asked as:
-
- "How do we indicate a party has been sited"
- "Mark party as seated"
- "How do I seat a reservation"
Why is my waitlist marking guests as "done" automatically?
Notified waitlist parties are automatically moved to the History tab and marked Done if they don't arrive or respond within 15 minutes of being notified. To bring a party back, open the History tab, select the party, and move them back to Waiting.
Also asked as:
-
- "Waitlist system keeps taking people off the waitlist by marking them as done"
How do I reinstate a cancelled reservation?
To reinstate a cancelled reservation, open the History tab, select the cancelled reservation, and move the party back to Created. The reservation returns to the active reservation list. See Change a Party Status and Reinstate a Cancelled Party.
Also asked as:
-
- "Reinstate cancelled reservation"
How do I block specific tables so guests don't reserve them online?
To block specific tables from being booked, open the date you want to block, select the tables (one at a time, or use Select to pick multiple), then select Block tables for this date. To pause all online reservations or the online waitlist across your restaurant — not just specific tables — see Toast Tables: Set Special Dates and Block Reservations.
Also asked as:
-
- "How to block specific tables so people don't reserve online"
How do I text a guest directly through Toast Tables?
To text a reservation guest directly from the app, your restaurant must have 2-way messaging enabled in Toast Web under Waitlist & Reservations > Guest Communication. Once enabled, hosts can send and receive text messages with guests from the party's details screen. For setup steps, see Toast Tables: The Guest Experience.
Also asked as:
-
- "How do I text something to a guest through the toast reservation app"
- "Can we text the guest from the app"
What's the difference between Toast Tables and Toast Tables Plus?
Toast Tables (the base product) includes table management, walk-in waitlist, and a monthly limit on reservations (typically 25 per month). Toast Tables Plus removes the reservation limit and adds features for restaurants with higher reservation volume. If you exceed the base reservation limit, you'll see a Limited functionality message in the app. For details and upgrade steps, see Toast Tables FAQ.
Also asked as:
-
- "Does Toast have a basic waitlist feature that isn't toast tables plus?"
- "How do I upgrade from Toast Tables to Toast Tables Plus?"
Why does my online reservation page say "no times available" when I have open tables?
"No times available" usually means one of: service periods are not set up for that date, online reservations are not enabled globally or for that schedule, table availability is set to 0%, no tables exist that hold the requested party size, special dates are blocking that date, the request is outside your online reservation window, or Flow Control is too strict. For step-by-step troubleshooting, see Get Help With Toast Tables: Online Waitlist and Reservations.
Also asked as:
-
- "Every time someone tries to do a reservation online it says they can't make a reservation"
- "Reservation page is not showing any available times"
Can I access Toast Tables on a Toast POS device?
No. The Toast Tables app cannot be installed on Toast POS hardware. Toast Tables runs on a separate iOS or Android tablet (or phone, with reduced features). For supported devices, see Toast Tables: Device Compatibility. The reason is PCI compliance — Toast Tables is not a payment-processing application and is not allowed on Toast's PCI-in-scope network.
Also asked as:
-
- "Can I access the waitlist from my computer"
- "How do we access the Waitlist on the mobile devices"
- "How do I install toast tables on a tablet"
Related Articles
- Get Started With Toast Tables
- Get Help With Toast Tables: Online Waitlist and Reservations
- Toast Tables: The Guest Experience
- Toast Tables FAQ
- Get Help With Logging in to Toast Tables App