xtraCHEF: Get Started With Inventory Area Setup and Count Lists
Last updated: Apr 3, 2026, 12:56 PM
| Live and recorded Inventory training are available in the Toast Classroom! Register for an upcoming session here: Join an Inventory Webinar. |
In this Article:
Inventory Summary
Inventory in xtraCHEF allows you to digitize your physical inventory counts and lean on automation. Simply count what you have on hand, and xtraCHEF will do the rest, creating inventory values and analytics to better track what is coming and going, waste, and more.
Inventory Management, along with Recipe Costing, is only available in xtraCHEF's Pro suite of features.
Get Started with Inventory
This video covers creating an inventory area, establishing a count list for the area, and completing physical inventory counts.
In xtraCHEF, configuring your Inventory to begin counting and viewing reporting consists of three parts:
- Area Setup: This is where you create an Inventory Area and set your Inventory Schedule.
- Count Lists: Here, you add Products (Inventory Items) to a list and set Par Levels.
- Inventory Counts: Where you can physically count your inventory.
Your First Inventory Area
To get started, select the Inventory tab on your navigation bar. You'll need to set up your inventory process for each of your locations separately, so always double check your location at the top of the page before starting.
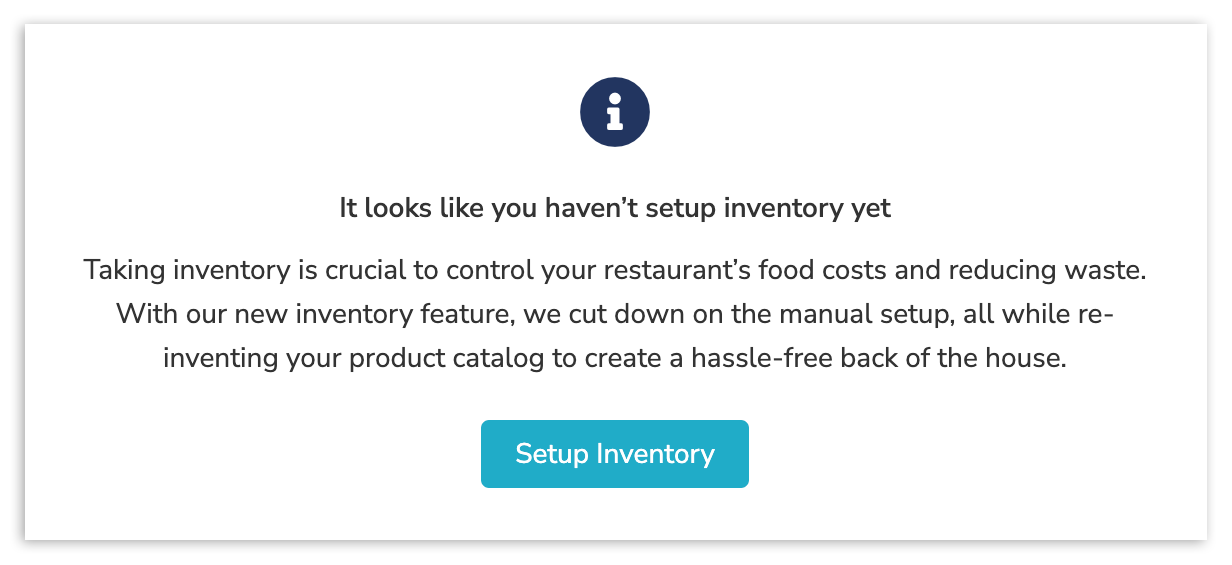
If you are setting up inventory for the first time, xtraCHEF will walk you through your first inventory area setup. To do this, select Setup Inventory.
Follow the prompts by selecting the inventory area that best describes the inventory space you will be counting for or in. Default options include Walk-In, Freezer, Prep Area, Liquor, Dry Goods, and Cooler. If those do not accurately describe your area, you can also choose + Add Custom Area.
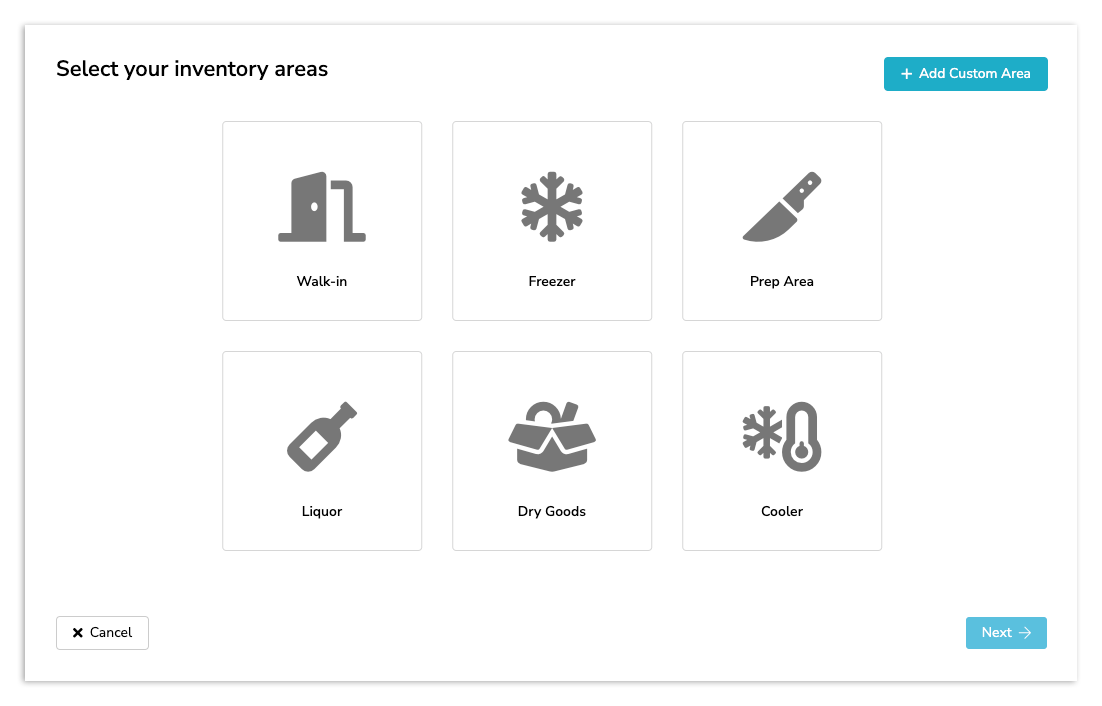
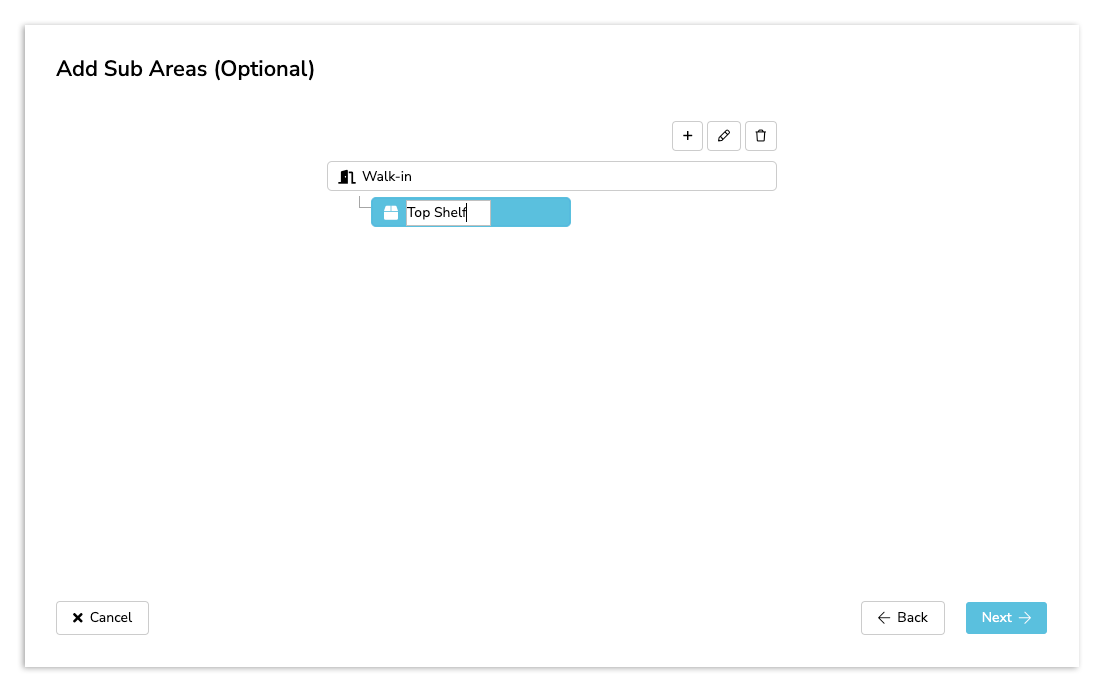
Select your inventory area(s), then select Next. You will then be prompted to Add Sub Areas to your inventory area. While this is an optional step, taking advantage of this feature can help streamline your inventory counts and help your staff spend less time searching for items on their count sheets.
To add sub areas, select the plus symbol. Next, type in the sub area name and select Next. This will prompt you to Schedule your Inventory and set your inventory takers.
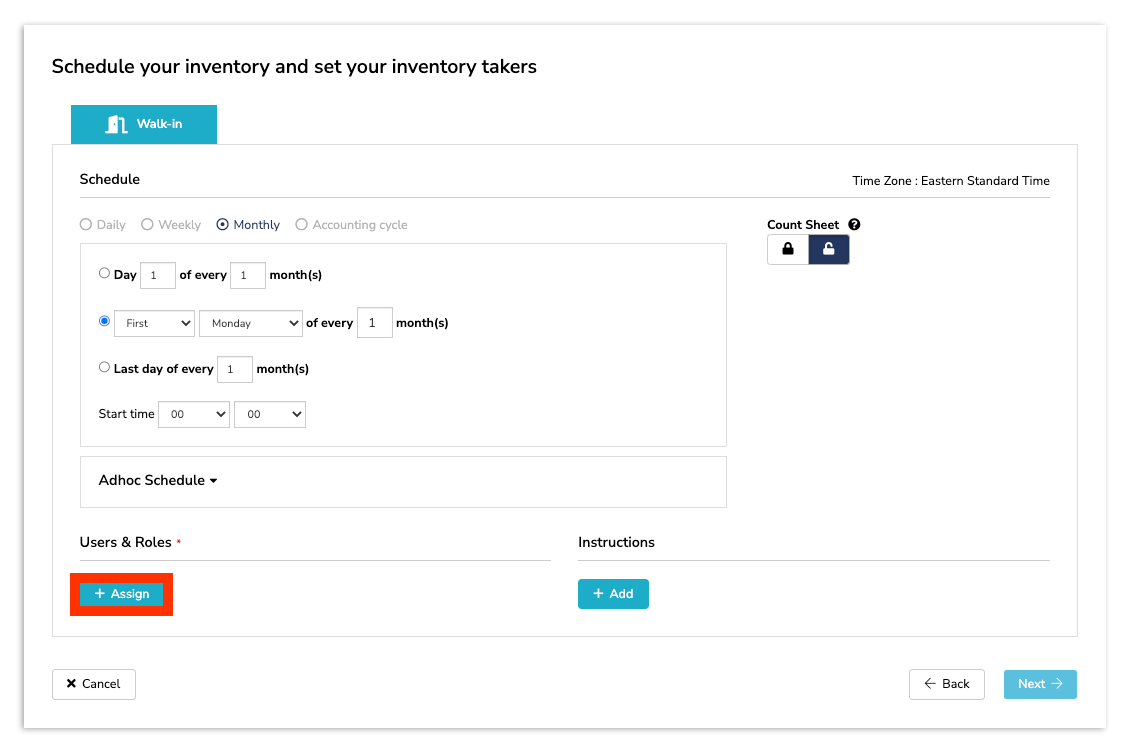
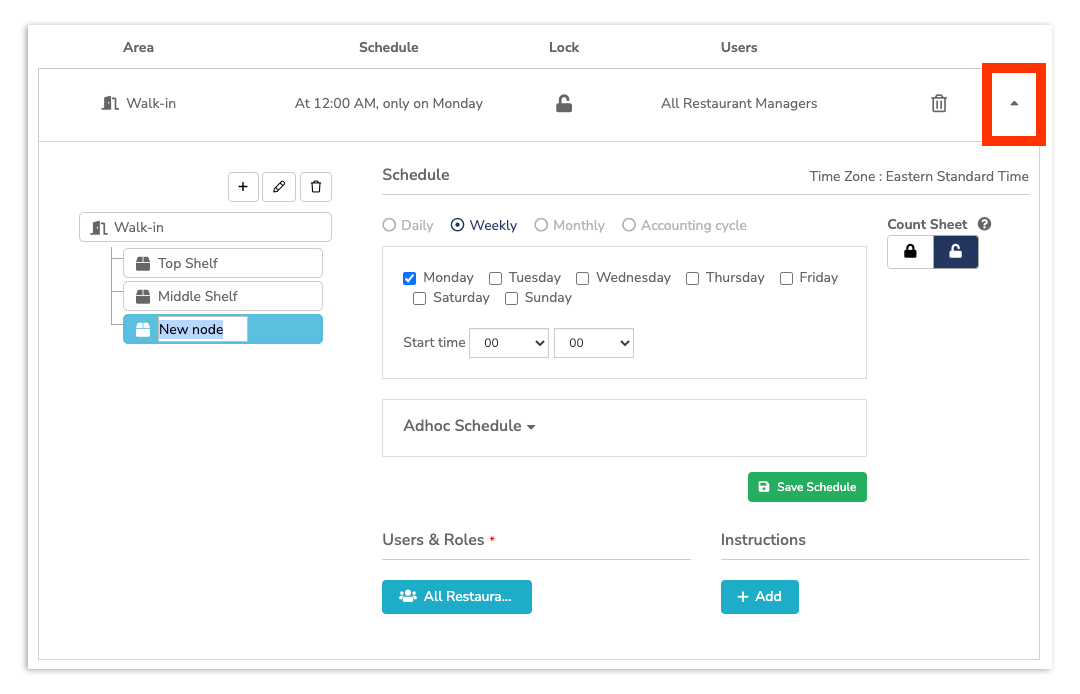
Your inventory schedule will default to 12 am daily unless customized to match your existing or new inventory schedule. This can be done by selecting either the Daily, Weekly, Monthly, or Accounting cycle options. You can further customize the timing specifics by selecting a corresponding field in the Schedule section.
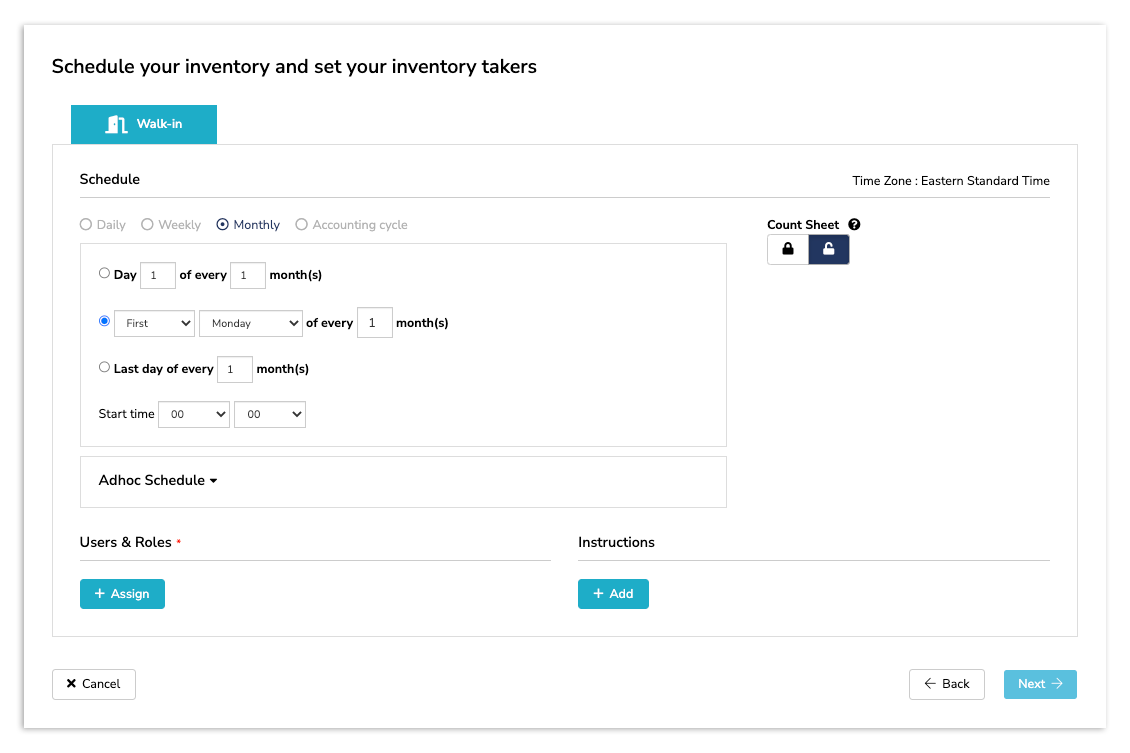
You may also decide to create an Adhoc schedule. By creating an adhoc schedule, you can choose any day of the month and whether you want that date to repeat. Select Save Schedule when you're happy with your changes.
Note: Inventory is an end-of-day entry. If you count inventory before opening, your schedule should be set to the previous business day. Doing this will ensure inventory is recorded before sales and, thus, inventory depletion is not overridden by your count.
Finally, select the users that you want to have complete inventory counts in this area. To do this, select + Assign.
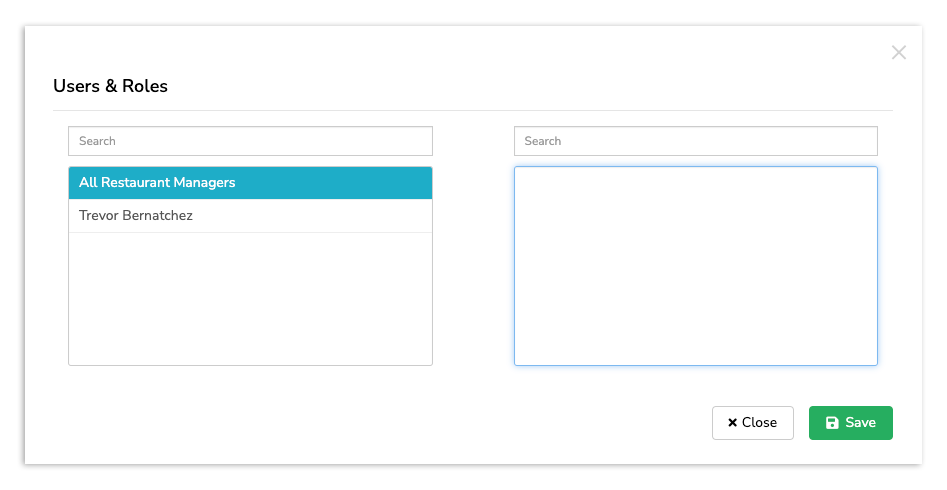
By selecting + Assign, you can choose either specific users in your account or All Restaurant Managers. To proceed, select one option and Save.
Should you choose to, you can also add instructions. By selecting +Add, you can write in any intricacies or notes you want staff to adhere to when counting this area.
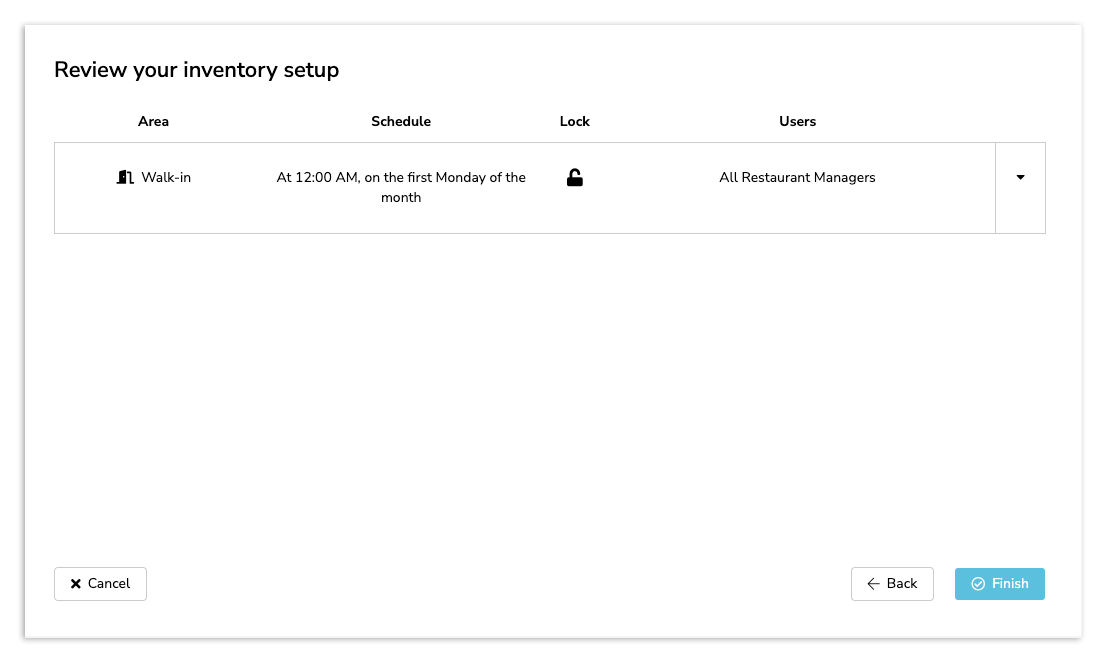
Your last step for the initial inventory setup will be to review your work. Ensure all the information you added is correct, then select Finish. If you find your work is incorrect, or you would like to start over, you can select Cancel.
Area Setup
To create additional inventory areas, navigate to Inventory and select the Area Setup tab. Then, select + Add New Area.

The following Area Setup steps will be almost identical to those outlined in Your First Inventory Area. Select the inventory area that best fits your needs or create a Custom Area. Then select Next.

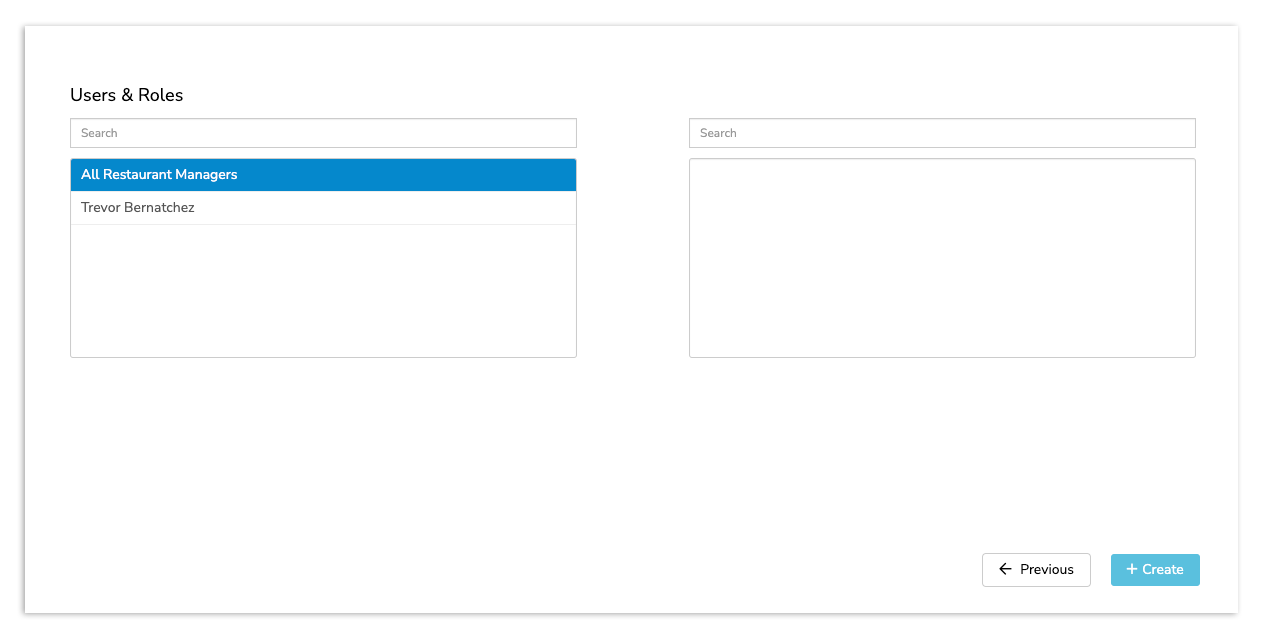
Next, select your inventory users or All Restaurant Managers and + Create.
Finally, align xtraCHEF with your current or new inventory schedule and add sub area(s) to your inventory area. To do this, select the expand icon located next to your new area.
Note: Inventory is an end-of-day entry. If you count inventory before opening, your schedule should be set to the previous business day. Doing this will ensure inventory is recorded before sales and, thus, inventory depletion is not overridden by your count.
Once you've configured your inventory, you're ready to start creating your count lists. As you might have guessed, count lists are all the items that need to be counted from your inventory.
Count Lists
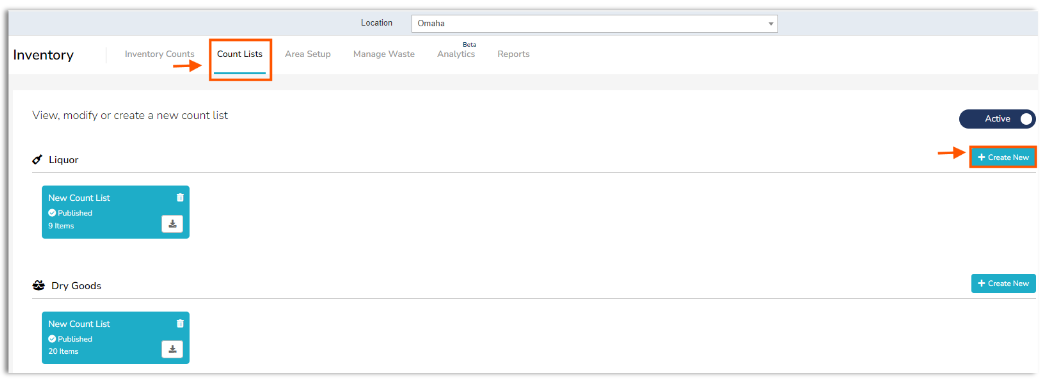
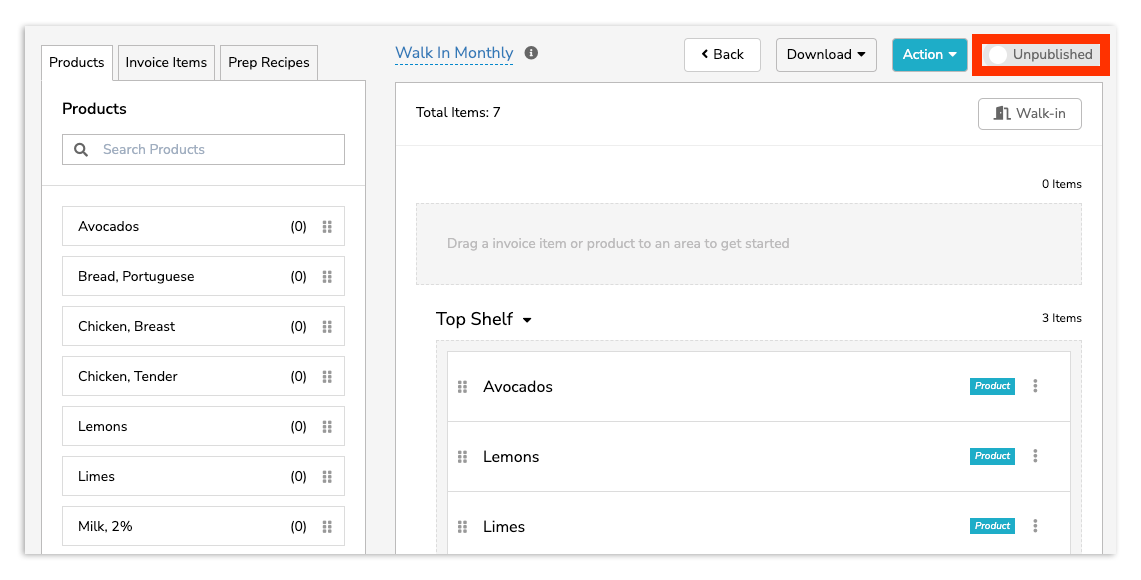
To create a new count list for an area, navigate to Inventory > Count Lists and select the + Create New button next to the area of your choice.
By default, this count list will be named New Count List. To change this, select New Count List and type in a custom name.
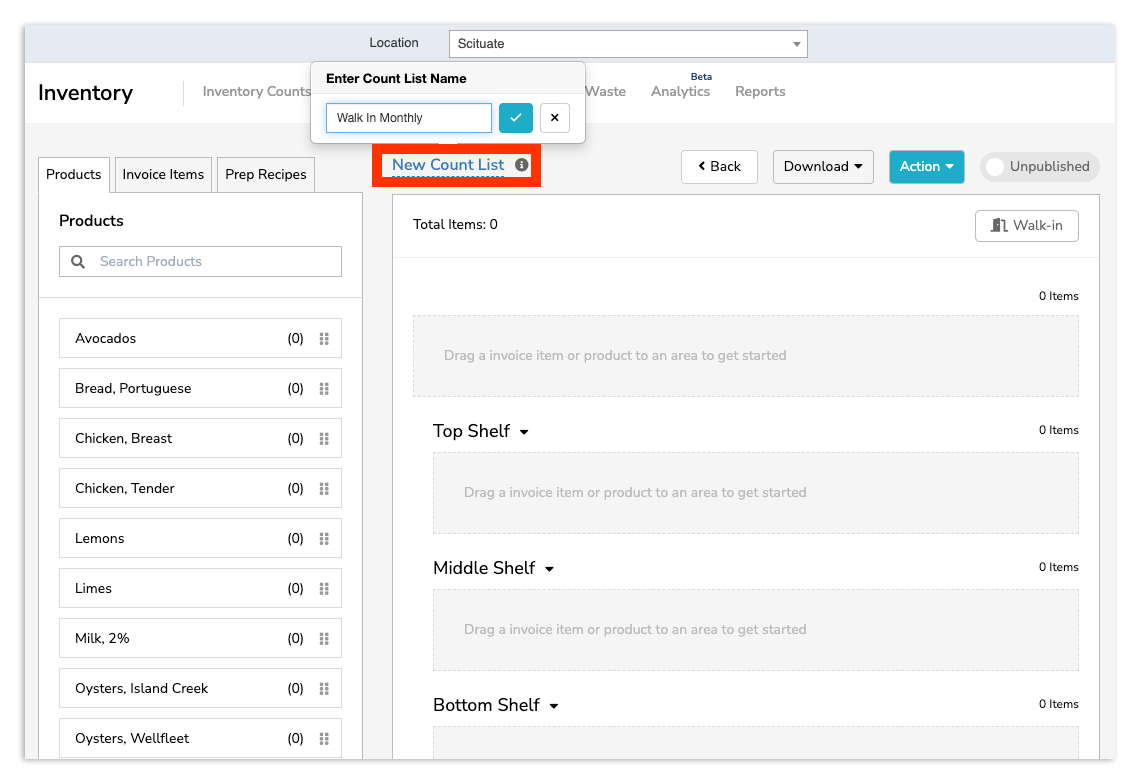
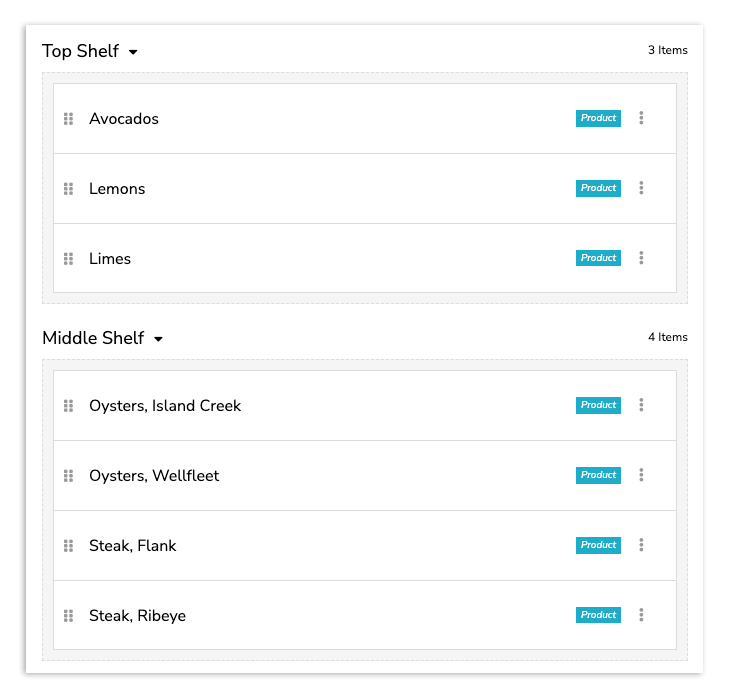
Next, start adding inventory items to your count list by dragging and dropping products into your Count List. If you created sub areas, those will populate here and can be assigned specific items.
If you don't see the item that you're looking for and you know that it's in the product catalog, you'll want to verify that it's been added to a product. Check out xtraCHEF: How to Create Products for more information.
Pro tip: You can move multiple products, invoice items, or prep recipes at once by pressing and holding your Shift key and selecting Inventory Items.
Continue to add your products until the list is complete. Then Publish your finalized Count List via the Unpublished/Published slider in your top right corner. Confirm that you want to publish this count list by selecting Publish on the pop-up. If left Unpublished, this count list will not appear or be available for counting.
Par Levels and Inventory Configuration
While creating count lists, you can also establish Par levels and further customize your products for inventory purposes. Par levels determine how much of an ingredient or inventory item you should have at all times. Setting these allows xtraCHEF to create "to-be-ordered" amounts for you, greatly simplifying ordering.
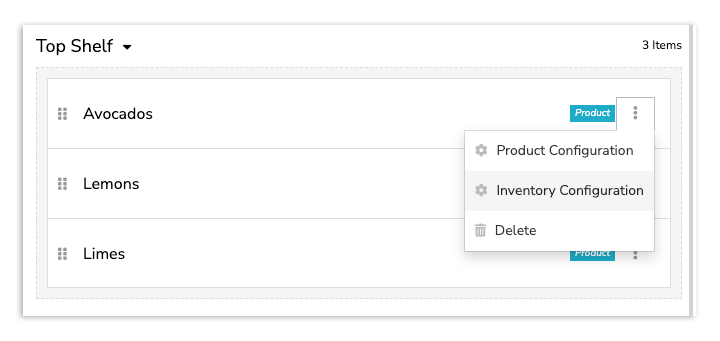
To do this, revisit your count list and select the 3 dot icon next to a product. Then, select Inventory Configuration.
Here, you can toggle par level(s) on. To do this, input a par level amount (par level UOM's are based on the item's purchase unit). This will indicate how much of your inventory item to have on hand at all times. Want to set pars for specific months where demand may be higher or lower? Select an individual month and change the par amount. Note: Par levels do not carry over from one count list to another and will apply only to the list being edited. You can set different par levels for the same product in different count lists.
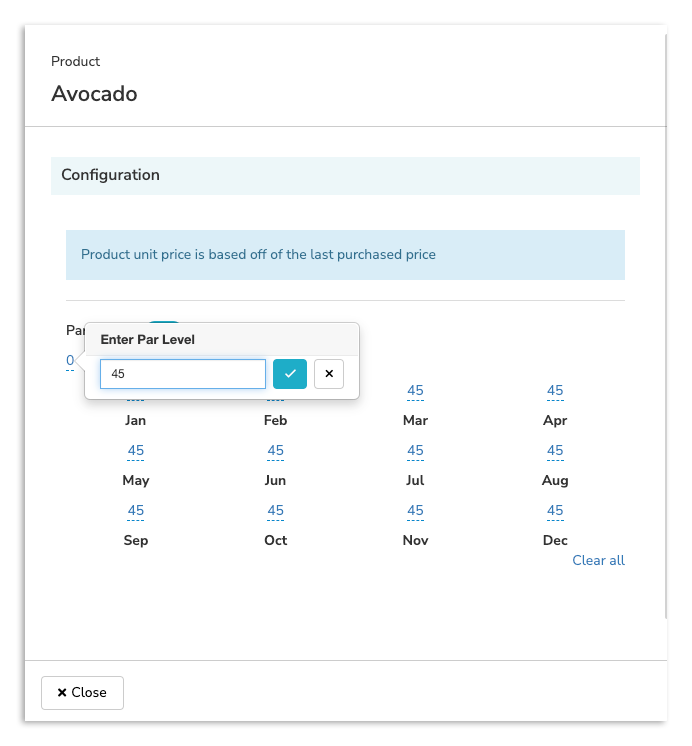
The Need to Order amount will populate on the right side of the count list.

In Inventory configuration, we display your cost as the Last Purchase Price of the most recent item in that product.
Preview Your Inventory Count Lists
With your Inventory Areas established and Count Lists created, you're all set to begin counting your Inventory in xtraCHEF! However, before you dive into completing inventory counts, you may want to preview how these lists will look.
To do this, navigate to Inventory > Count Lists and select Action and Preview List. This will present a mock count list for you to review.
Next Steps
Congratulations! Your location is now ready to dive into the full power of xtraCHEF Inventory. To access that insight, begin performing your inventory counts regularly to keep your data and inventory fresh.
- For more information on completing your new inventory counts, visit xtraCHEF: Inventory Counts.