xtraCHEF: Get Started With Recipes
Last updated: Apr 8, 2026, 10:05 AM
- Recipe Overview
- Create Prep Recipes and Recipes
- Product Details and Unit Conversions
- Cost Configuration
- Next Steps
Recipes in xtraCHEF Overview
You may already know that managing plate costs is essential to your restaurant's success. However, you may not know that xtraCHEF offers a convenient way to calculate and track plate costs to ensure your organization maximizes profit while still providing value to your guests.
Learn how to create Recipes and Prep Recipes in xtraCHEF, which helps reveal to-the-cent prime costs and lay the foundation for advanced reporting. Additionally, register for an upcoming Recipe webinar powered by Toast Classroom.
Create Prep Recipes and Recipes
Note: Recipes and prep recipes are created in xtraCHEF using your products. For that reason, you must have created products in your xtraCHEF account before beginning with recipes. If you already have products set up, let's begin.
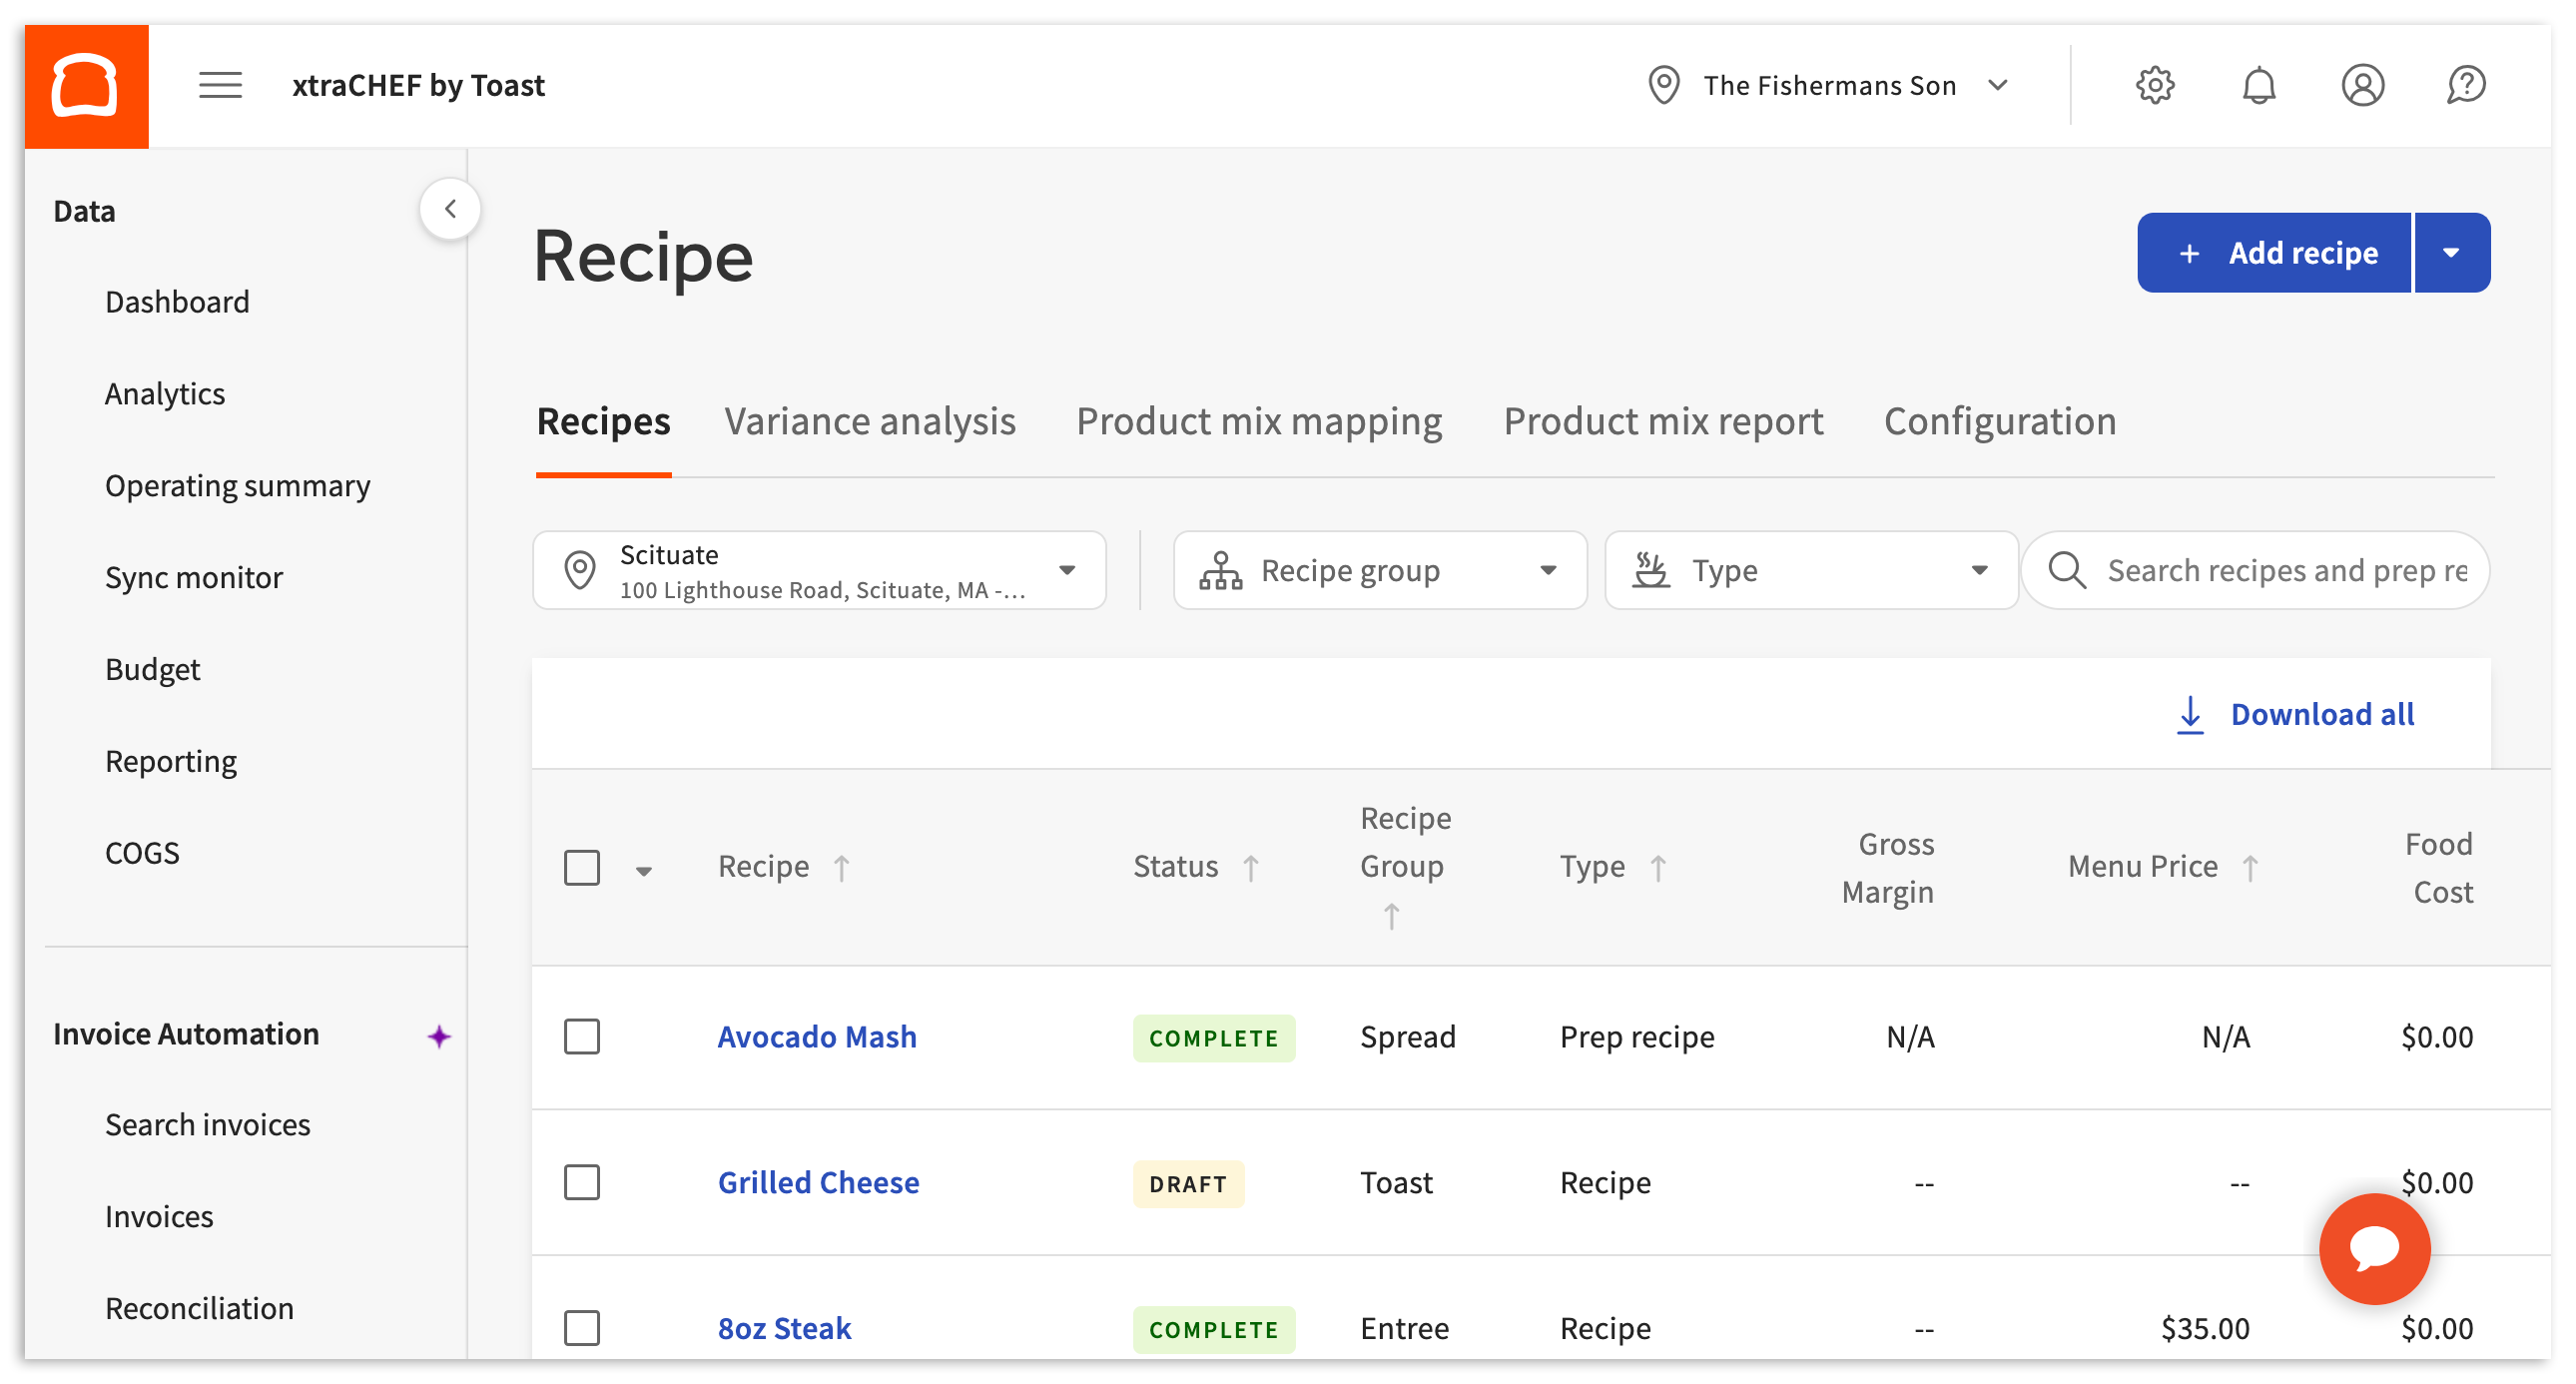
- Select Recipe near the bottom of your left-hand navigation bar to begin utilizing this tool.
- Across the top of this page, you will see tabs for Recipes, Variance analysis, Configuration, and more. With Toast POS integrated with xtraCHEF, you will also see recipe options such as Product mix mapping and Product mix report.
- To create new recipes, select the + Add recipe button.
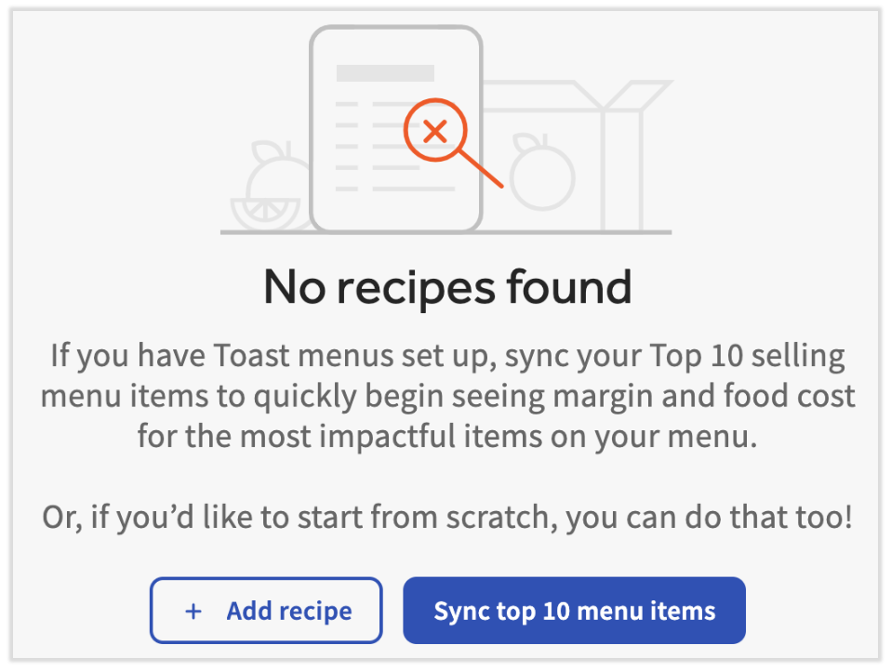
- If you are visiting this page for the first time, you'll see an option to automatically pull your 10 most popular items from Toast Web. Select Sync top 10 menu items to pull the data and create the recipe, name it (using the menu name), and link the recipe to the Toast menu item.
- If you are visiting this page for the first time, you'll see an option to automatically pull your 10 most popular items from Toast Web. Select Sync top 10 menu items to pull the data and create the recipe, name it (using the menu name), and link the recipe to the Toast menu item.
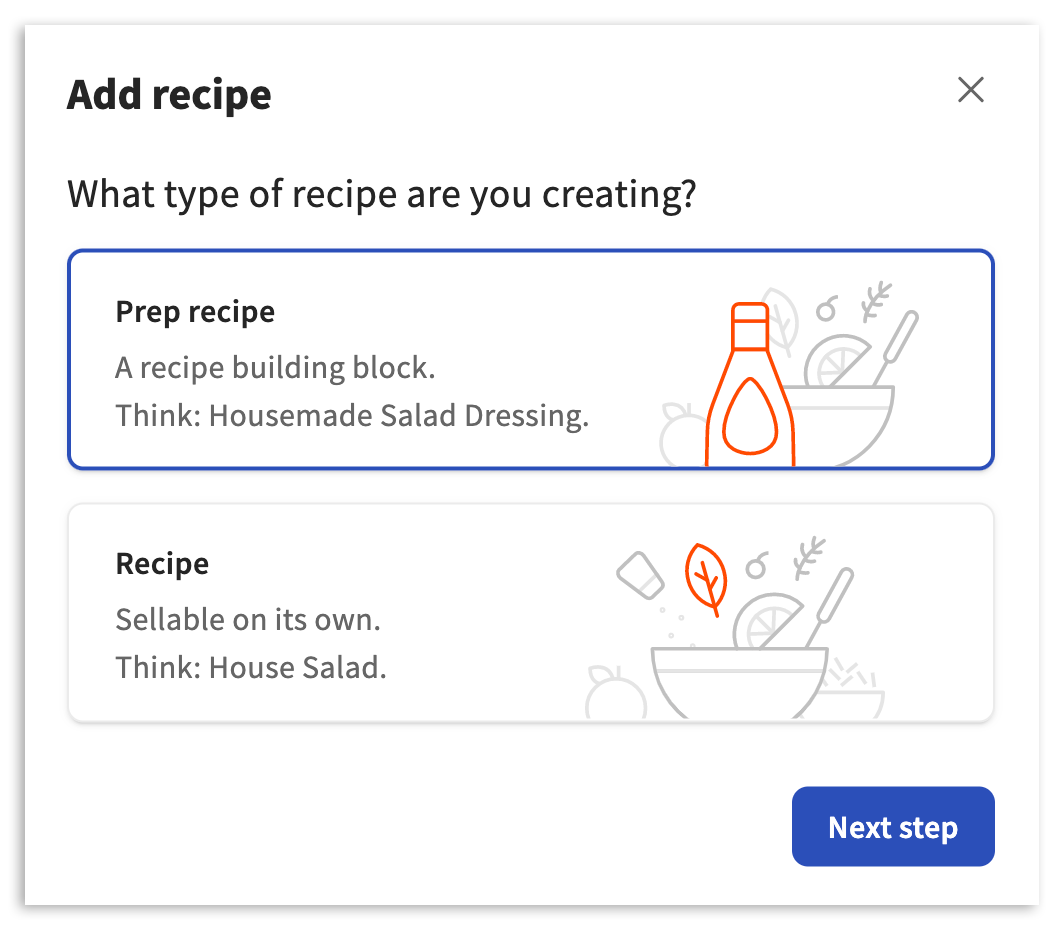
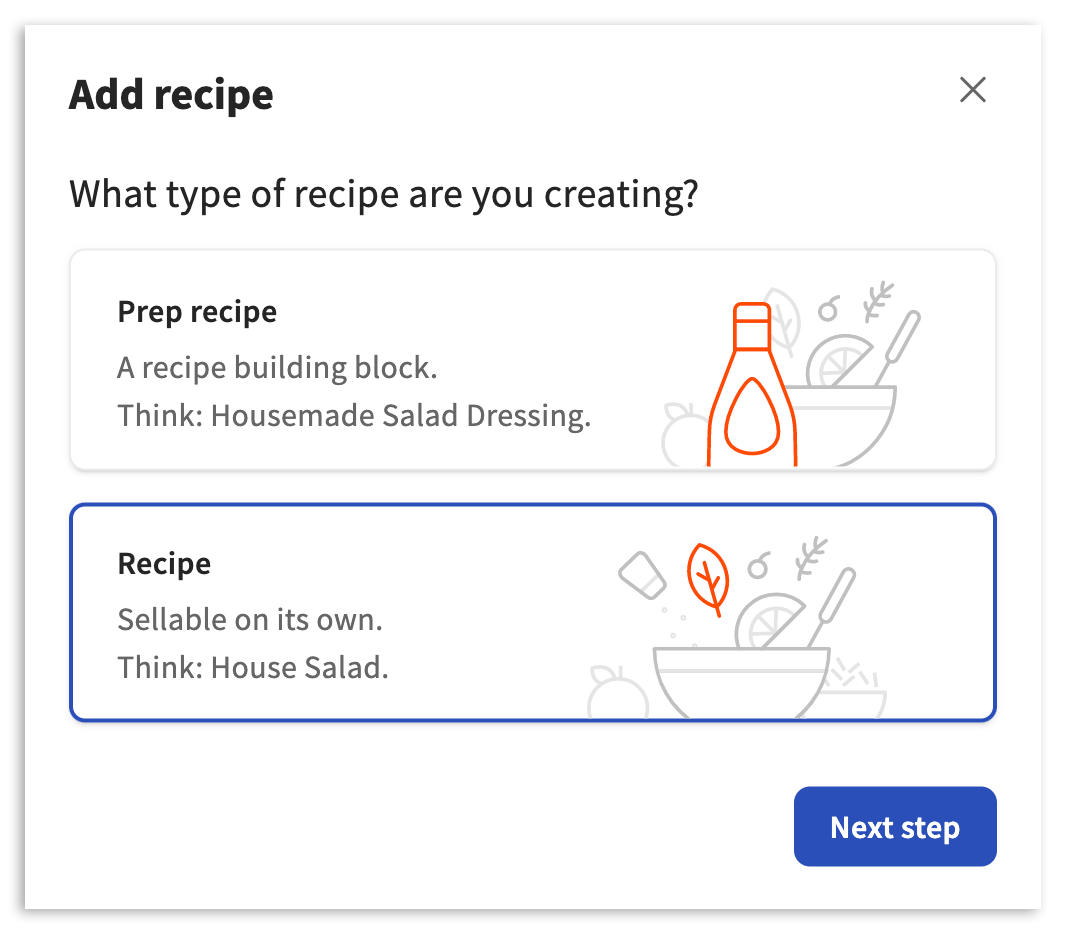
- xtraCHEF will then ask you which type of recipe you would like to create.
- Prep recipes are any items in your kitchen or bar that are made from scratch and allocated to recipes or dishes. In many cases, it's helpful to start with your prep recipes. Examples of prep recipes might be house-made sauces, salad dressings, dough batches, prepared proteins, etc. While they contain multiple ingredients, they aren't the whole dish. Instead, these are used to simplify the creation of your recipes later on and save you time rather than recreating house-made ingredients in multiple dishes. See this section to create a prep recipe.
- Recipes, on the other hand, are your main dishes, entrees, or items that are sold directly to customers. These may contain both ingredients and prep recipes. See this section to create a recipe.
Prep Recipes
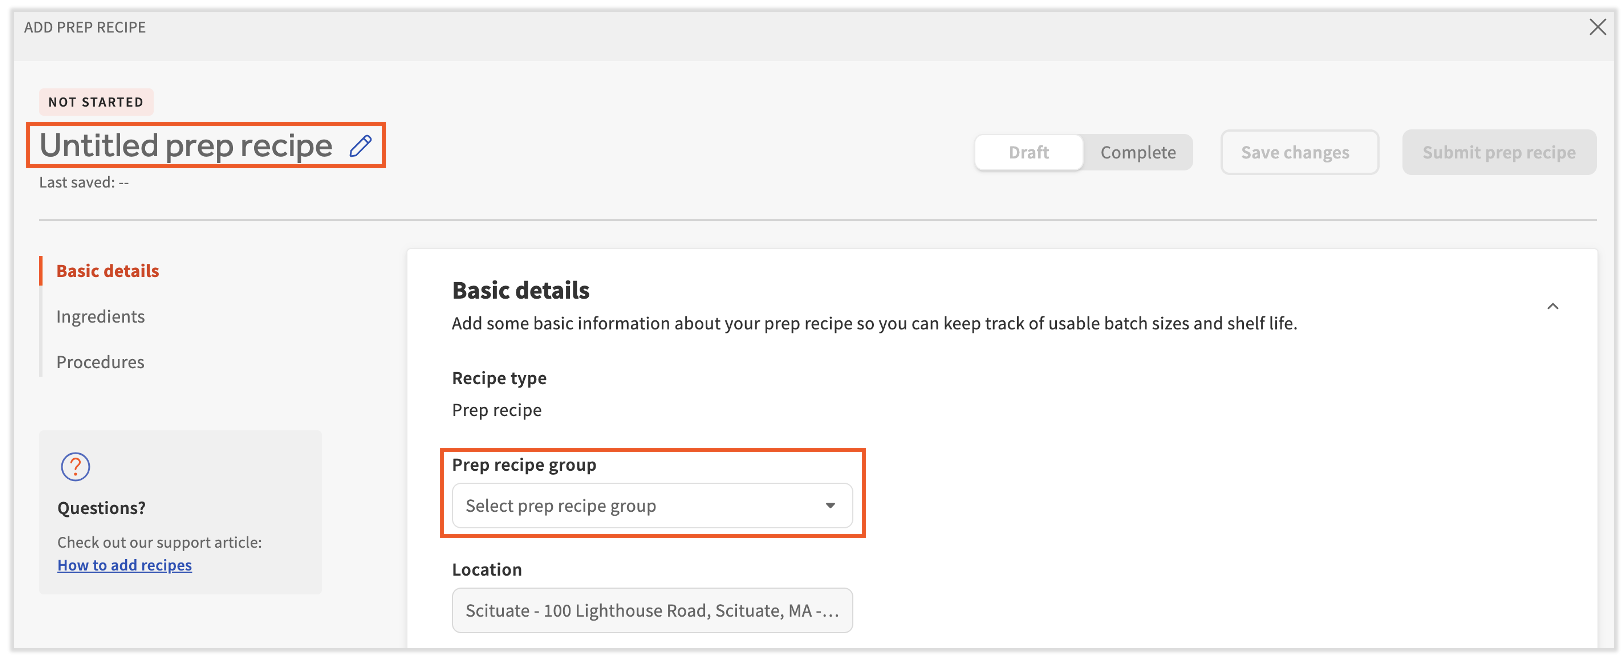
Choose Prep recipe and Next step to be brought to the prep recipe builder.
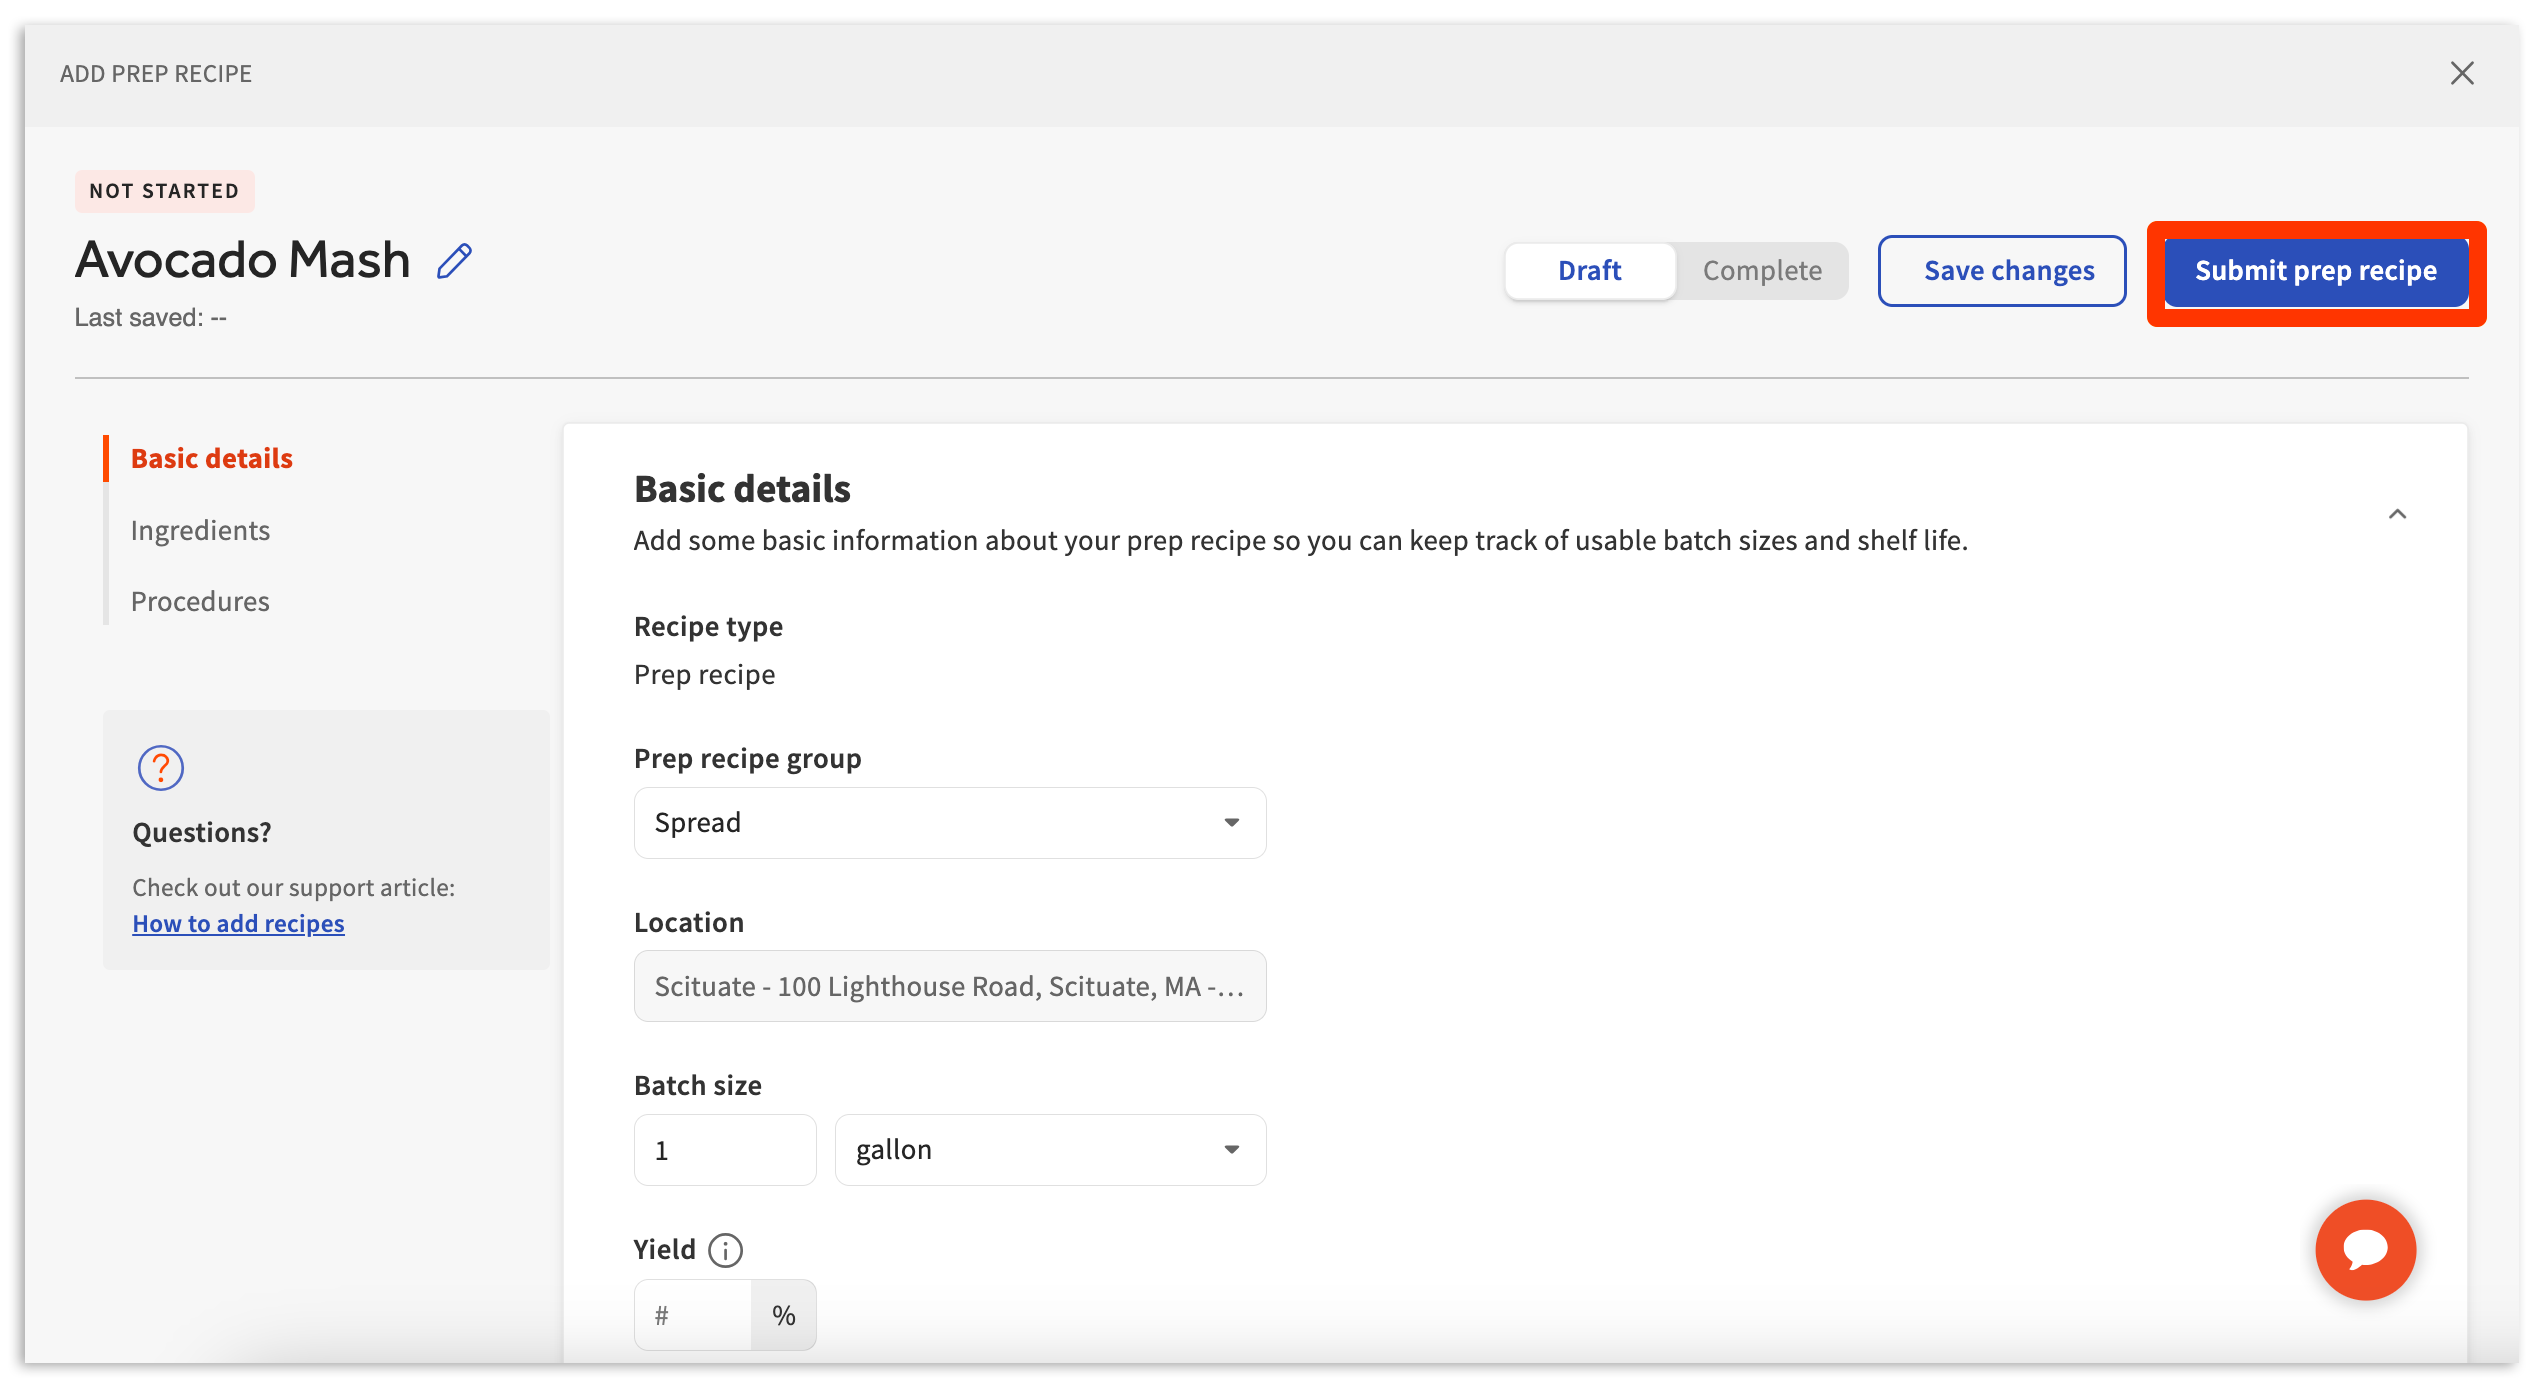
Step #1: Basic Details
By default, you will start with Basic details. Not all Basic details are necessary or required. To begin, select the empty fields and either type or select an applicable option. Basic detail fields include:
| Detail Name | Description |
| Prep recipe name | Names/renames the Prep recipe. |
| Prep recipe group | Groups the Prep recipe with similar prep recipe types (ex., Dressings, Sauces, etc.) |
| Location | Defines the location the Prep recipe is being created for. Note: Prep recipes can be copied to additional locations later on. |
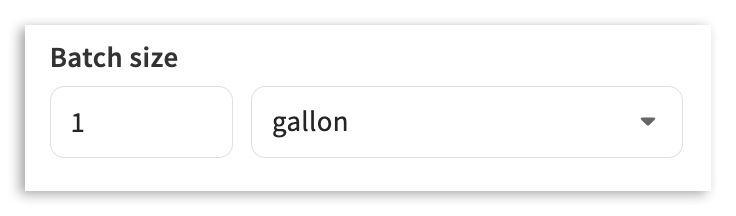
| Batch size | Defines the size of the Prep recipe batch once finished. Note: This field determines how your Prep recipes are priced by measurement when used in Recipes. |
| Yield | Percentage of the batch that is useable. |
| Shelf life | Determines how long the Prep recipe is typically good for. |
| Notes | Description of the Prep recipe, if needed. |
Not all basic details are required. However, we recommend always attributing a Prep recipe name, Prep recipe group, and Batch size.
Batch size is particularly important. This is the prep recipe's approximate final measurement which future costing is based on when your prep recipe is used in other prep recipes or recipes. To do this, select the empty field and type in the number of units. Then select the unit of measure.
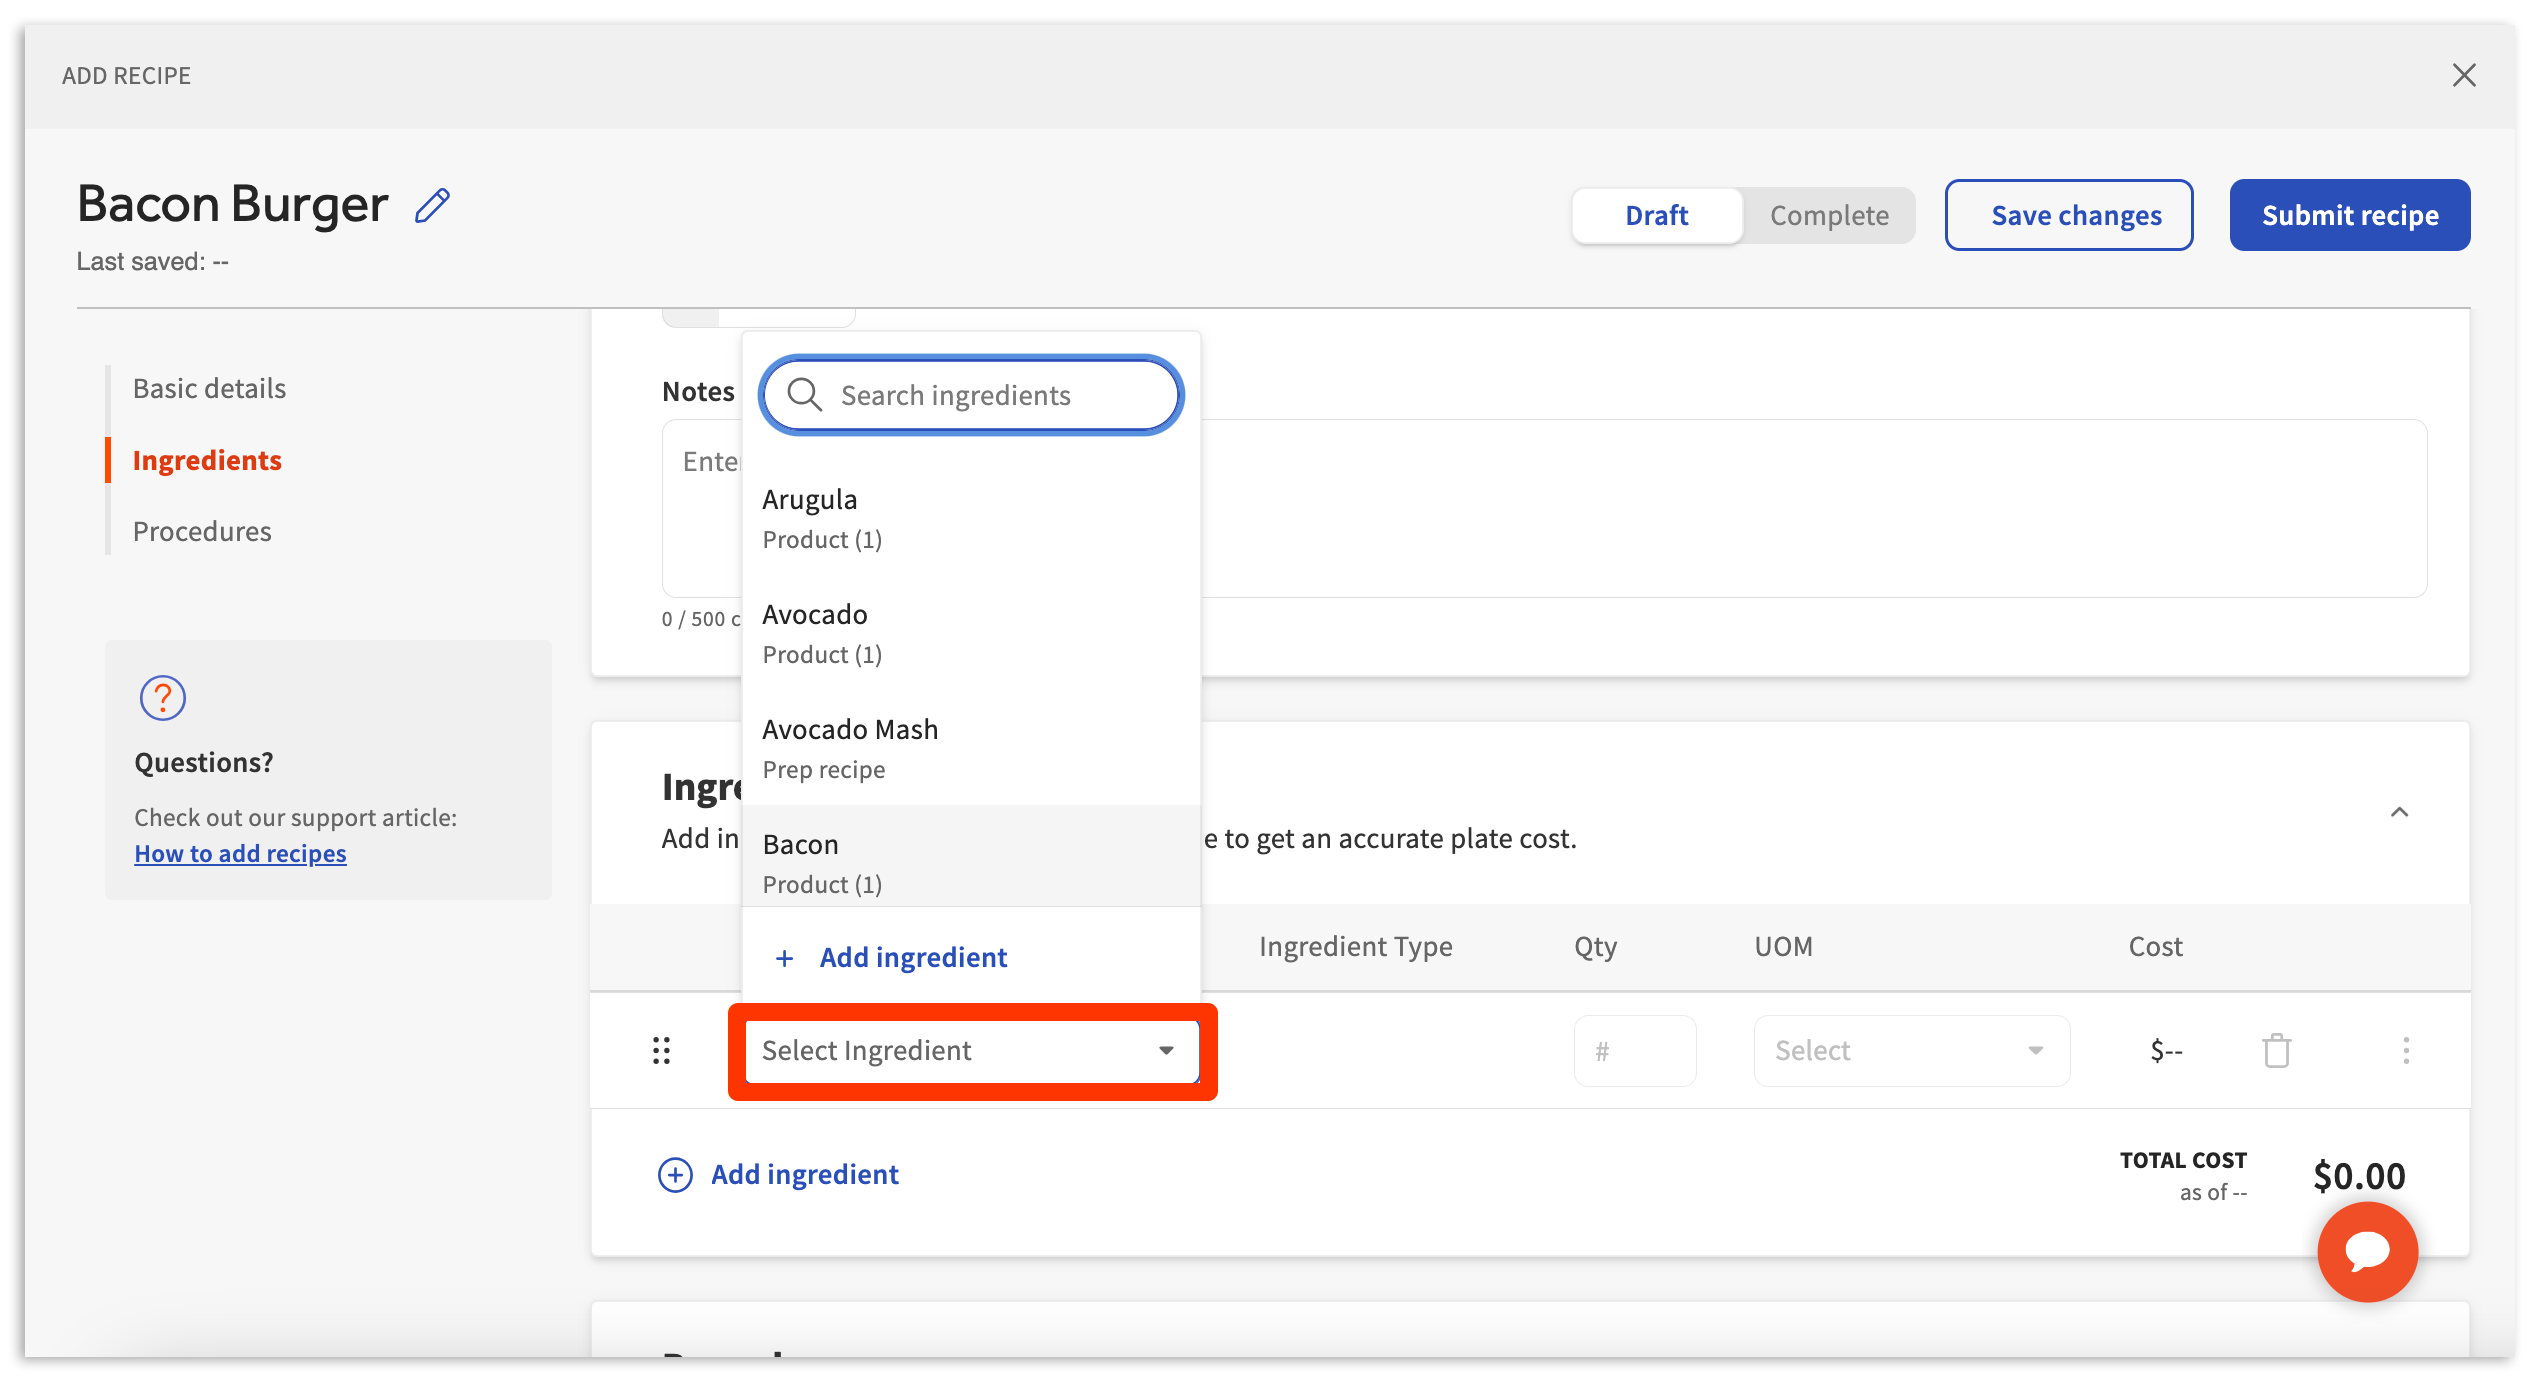
Step #2: Ingredients
Once basic details are entered, proceed by scrolling down to the Ingredients section. Here, you can begin to add ingredients and measurements to your prep recipe. Choose Select Ingredient and pick your ingredient from the drop-down menu.
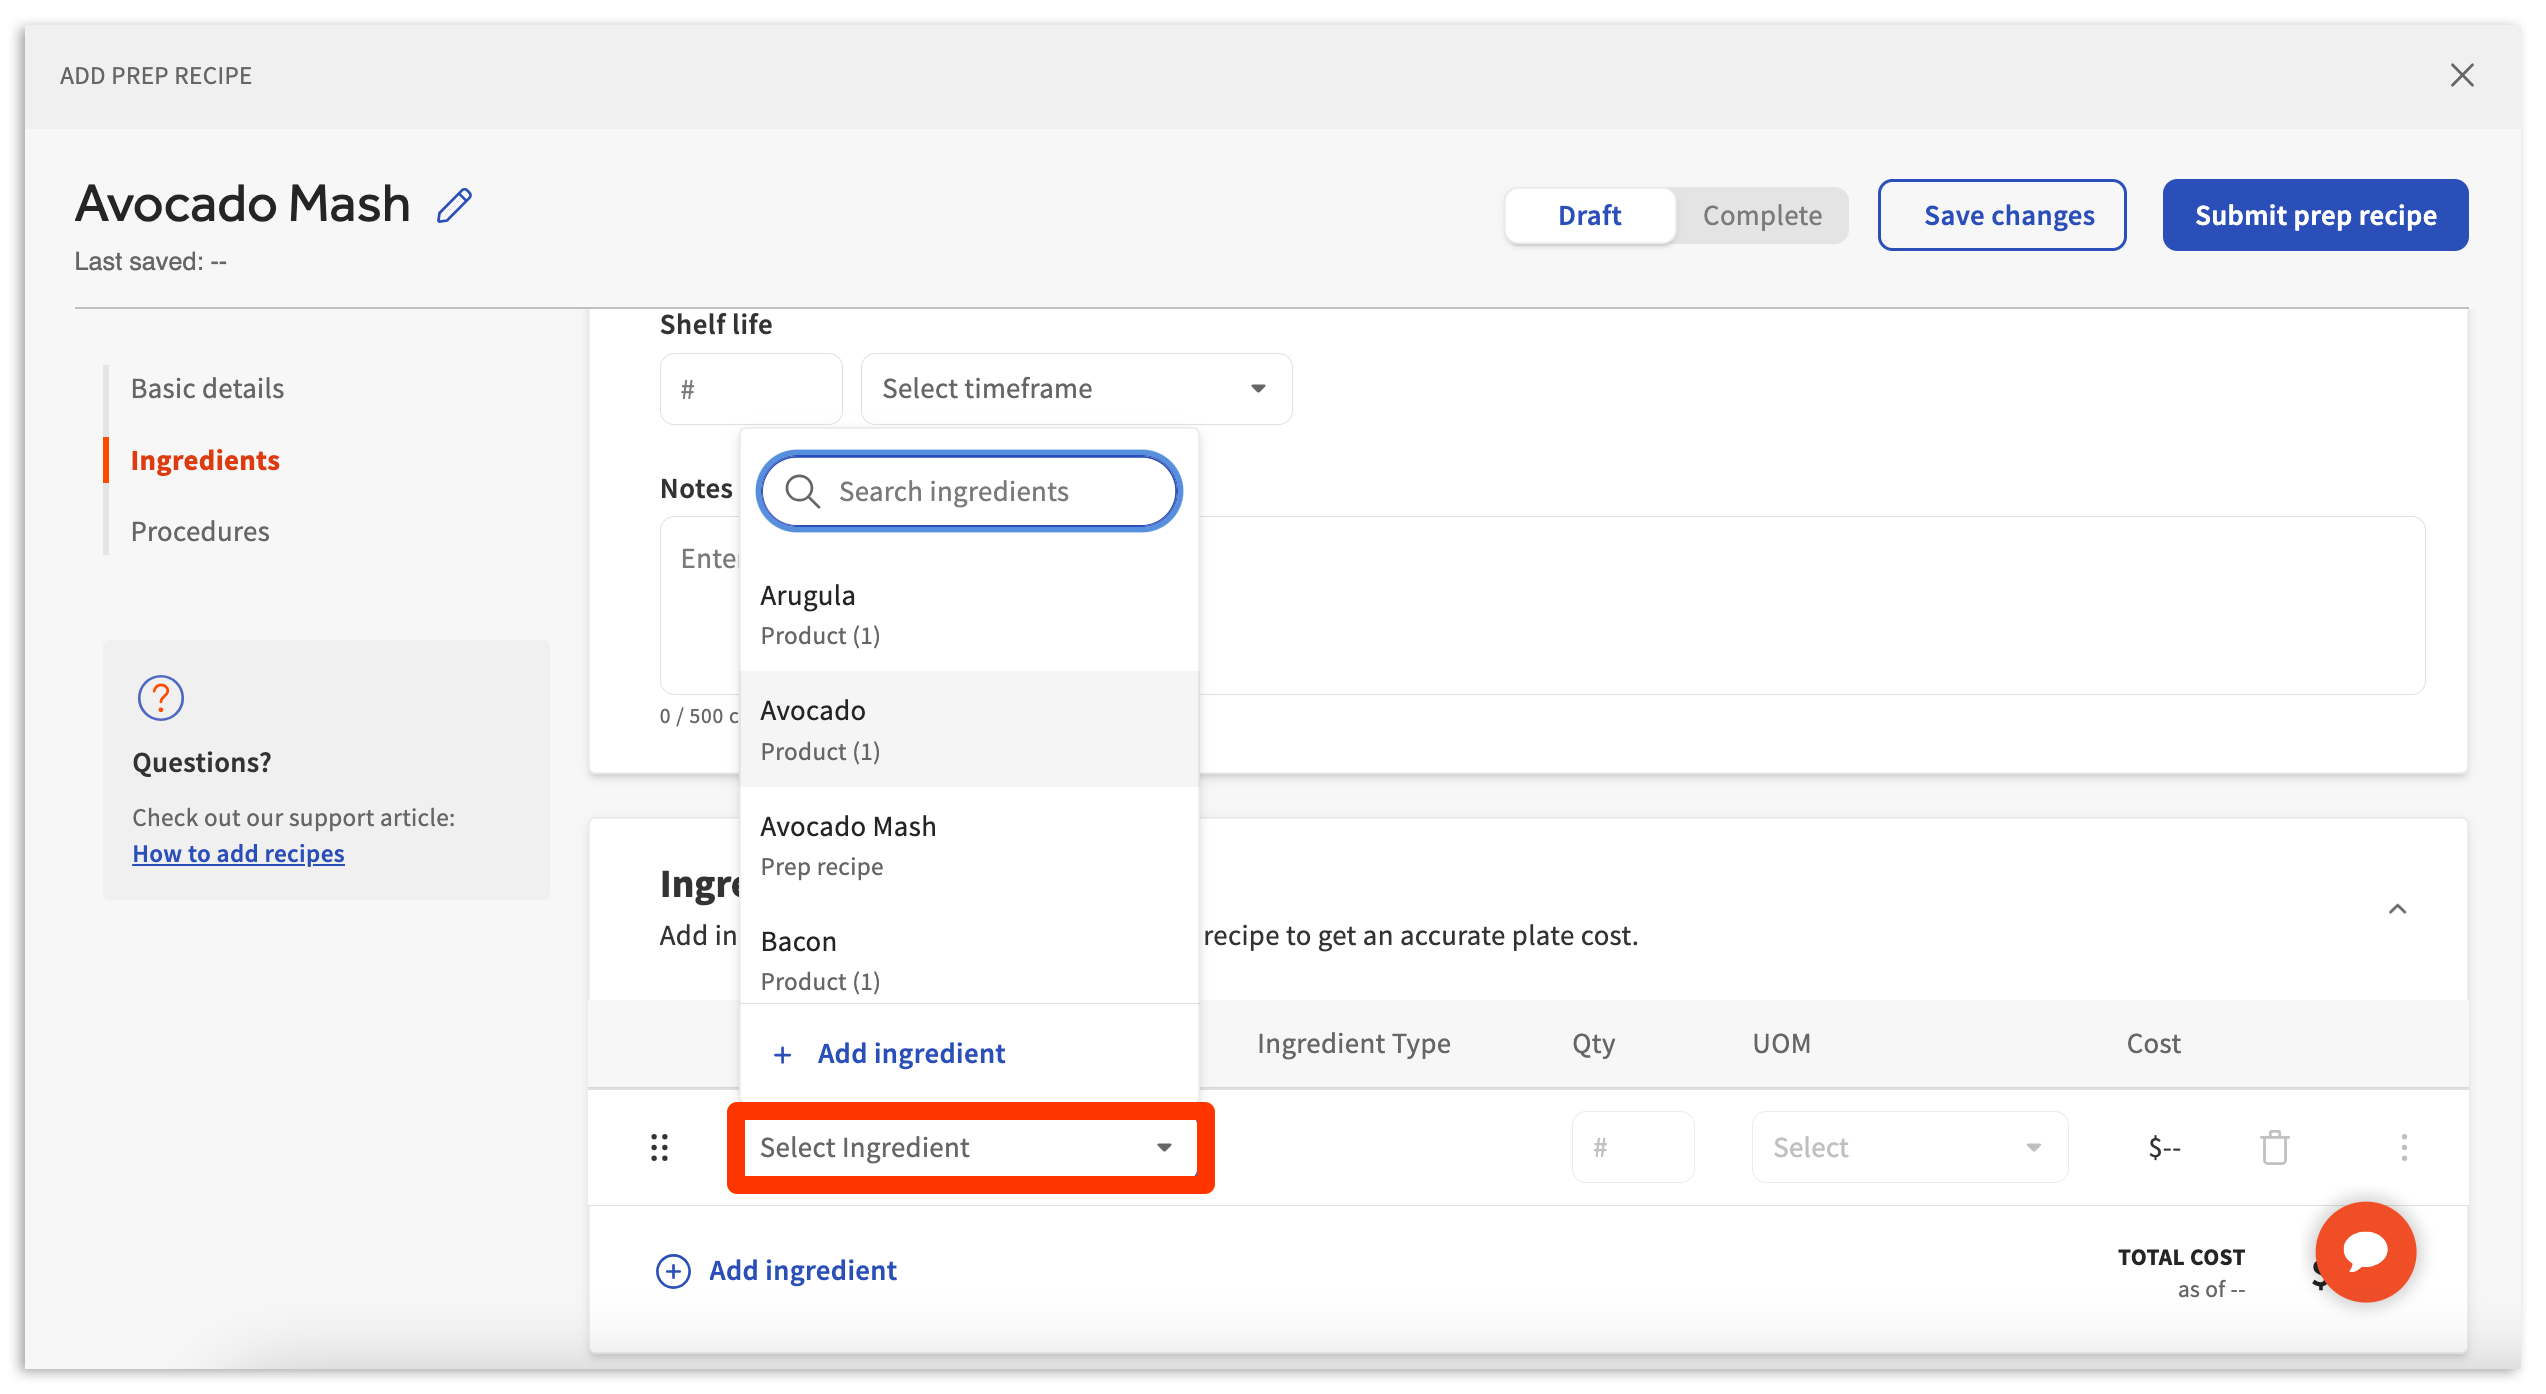
Note: If you are missing an ingredient, this is likely because a product has not been created and linked to an invoice item. For more information on creating products, visit xtraCHEF: Create Products.
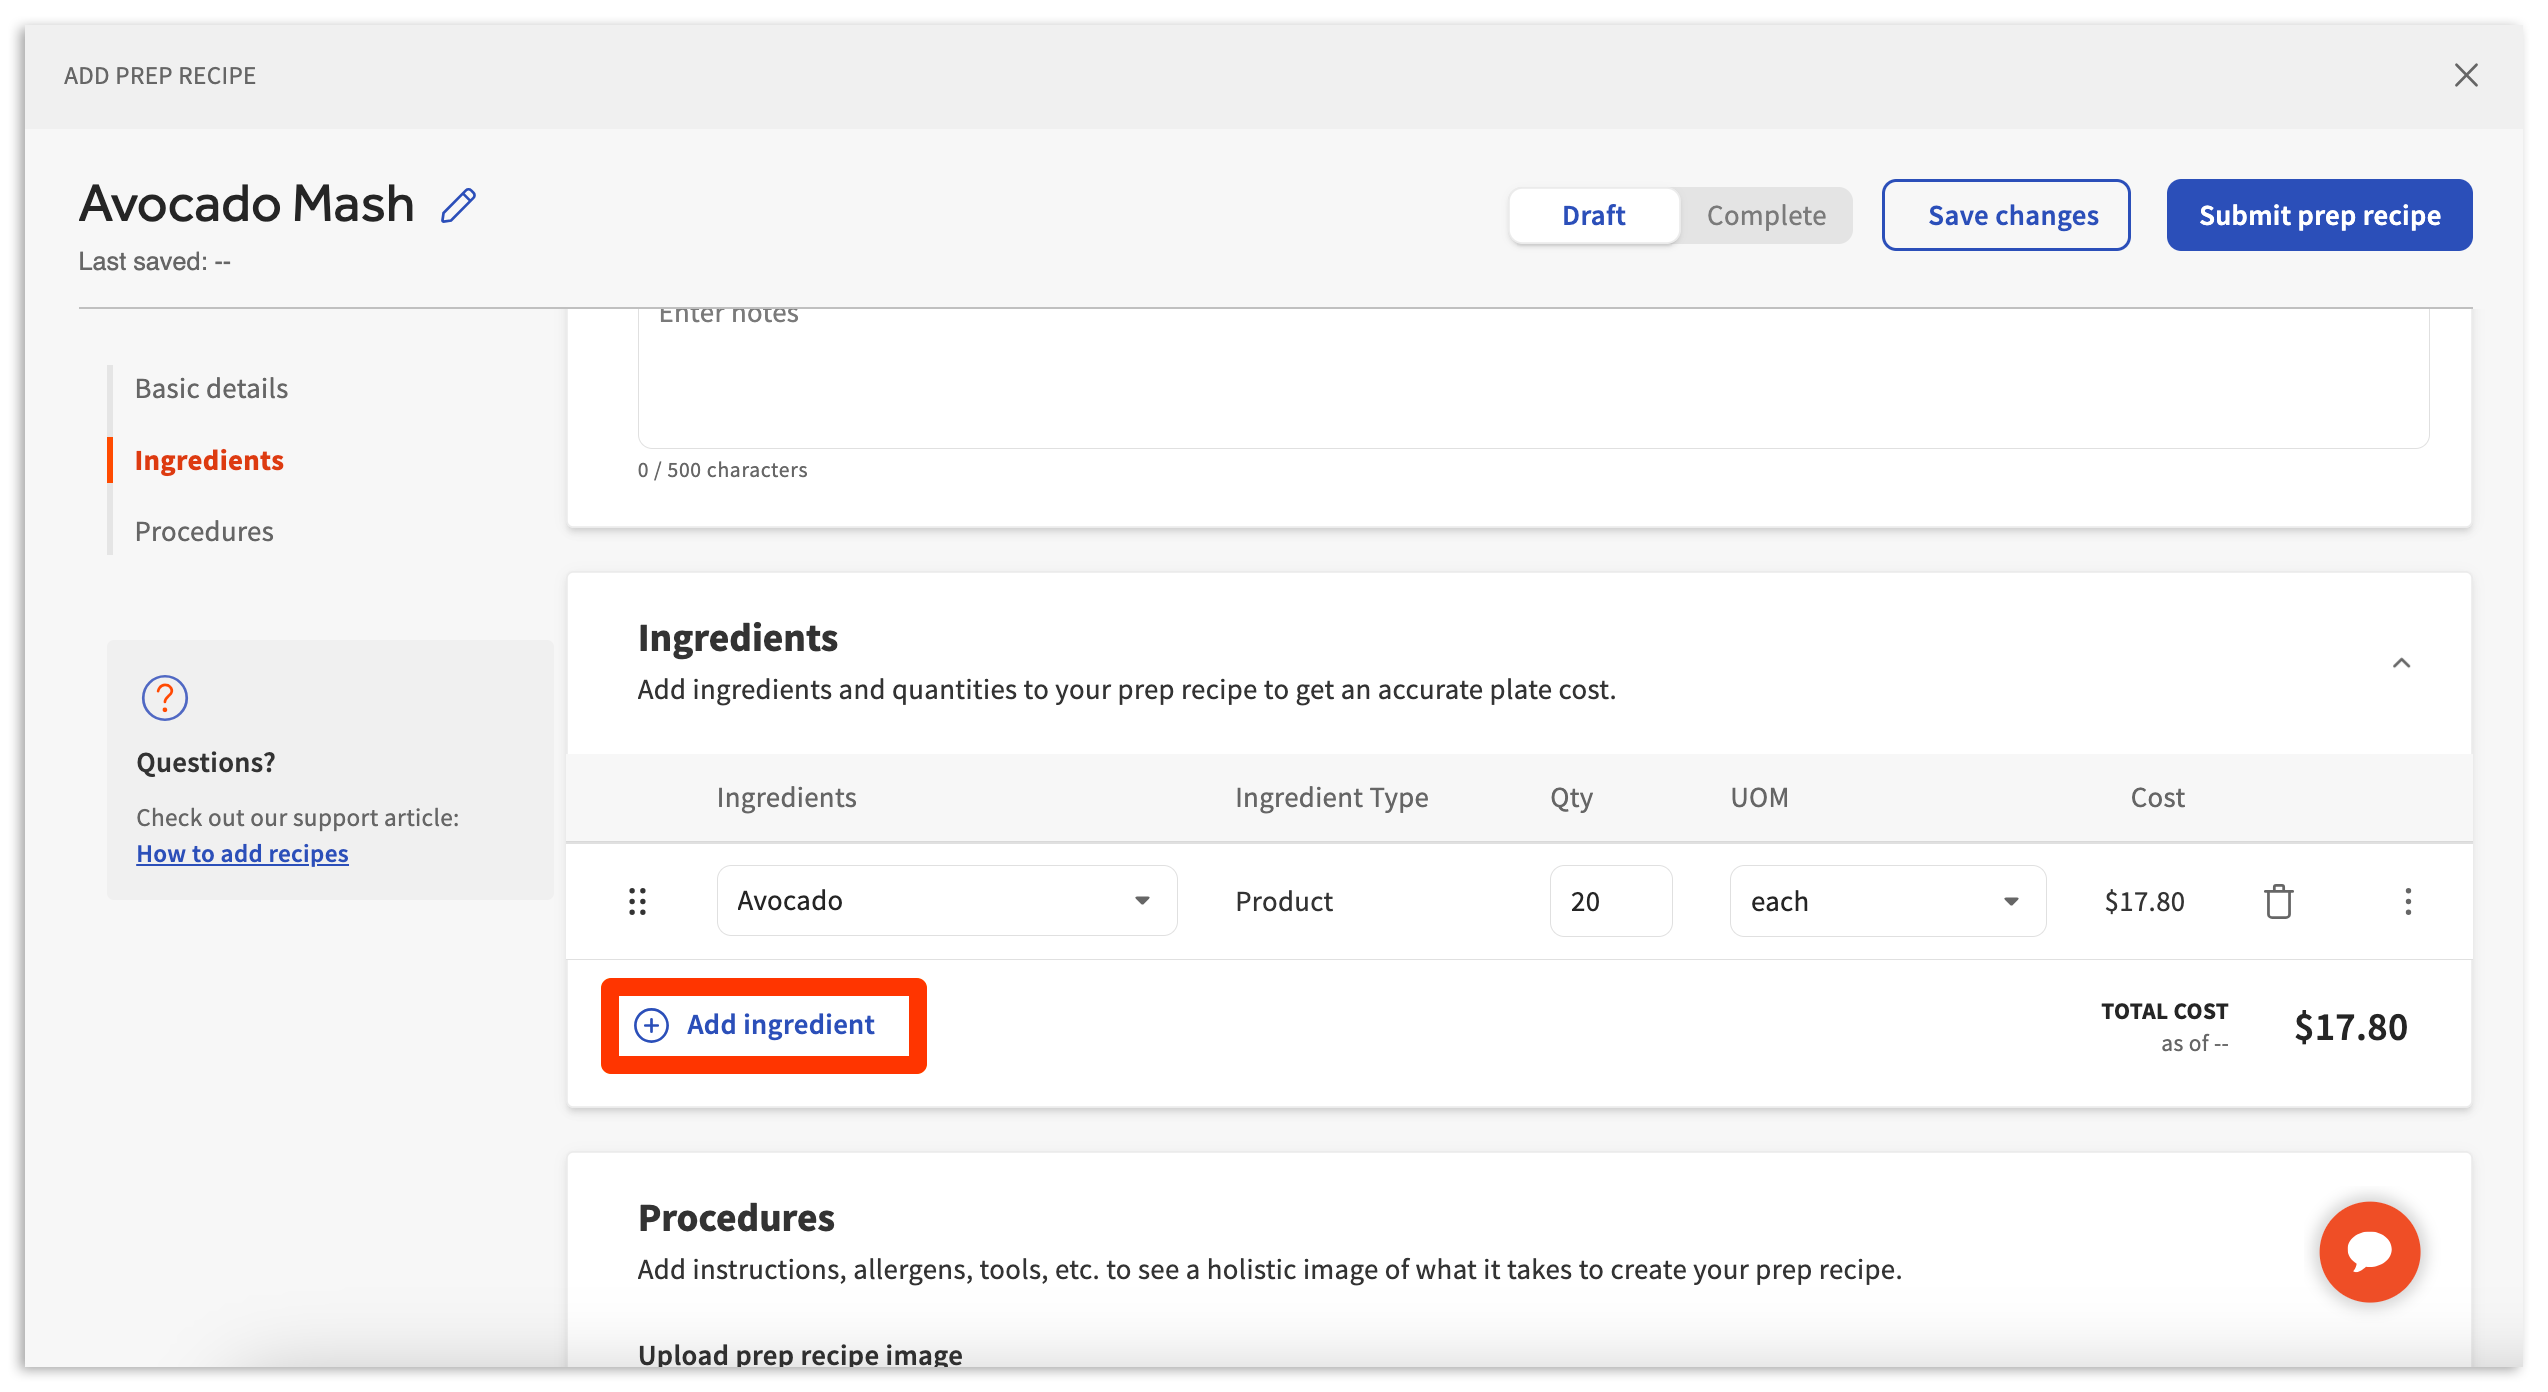
Next, indicate the Qty (quantity) and UOM (unit of measurement) for the ingredient that is added to the prep recipe.

Shortly after adding your ingredient and measurement, a price will appear next to Total Cost. You can continue to add additional ingredients by selecting Add ingredient and repeating the steps above.
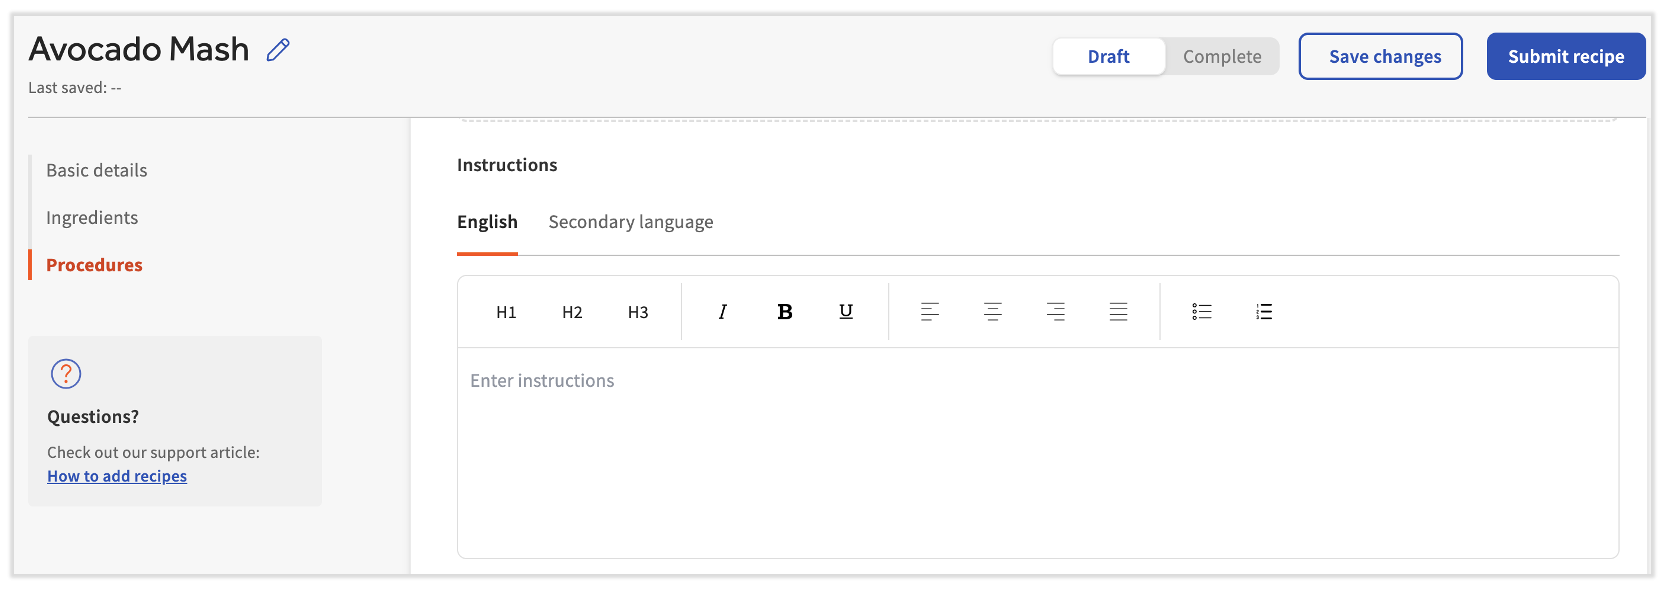
Step #3: Procedures
Next, continue to the Procedures section. Here, you can continue to add additional prep recipe details. Procedures do not contribute to costing information or data. Instead, they exist to help educate or inform your staff on details such as:
| Detail Name | Description |
| Prep recipe image | Image of the prep recipe for use on a printable/downloadable recipe card. |
| Instructions | Written instructions on how to prepare the prep recipe. These can be written in English or a secondary language. These will be included should you print or download the prep recipe's recipe card. |
| Prep time | Approximate time to prepare the dish. |
| Cook time | Approximate time to cook the dish |
| This prep recipe contains (allergens) | Indicates which allergens this prep recipe may contain. |
| This prep recipe may contain traces of (allergens) | Indicates which allergens this prep recipe may contain traces of. |
| Tools | Indicates any specific tools this prep recipe will require for preparation. |
The procedures listed in the Instructions text box are available to employees when reviewing prep recipes in xtraCHEF or viewing a downloaded recipe card.
Step 4: Save Changes or Submit Prep Recipe
Once you have completed your prep recipe, publish it by selecting the Submit prep recipe in the top right corner of your builder. This will make it live in your xtraCHEF account and allow you to use it in other prep recipes, recipes, and in product mix mapping for your modifiers. If you are not yet finished with your prep recipe and would like to simply save your work, you can also select Save changes and return to it later.
Recipes
Choose Recipe and Next step to be brought to the recipe builder.
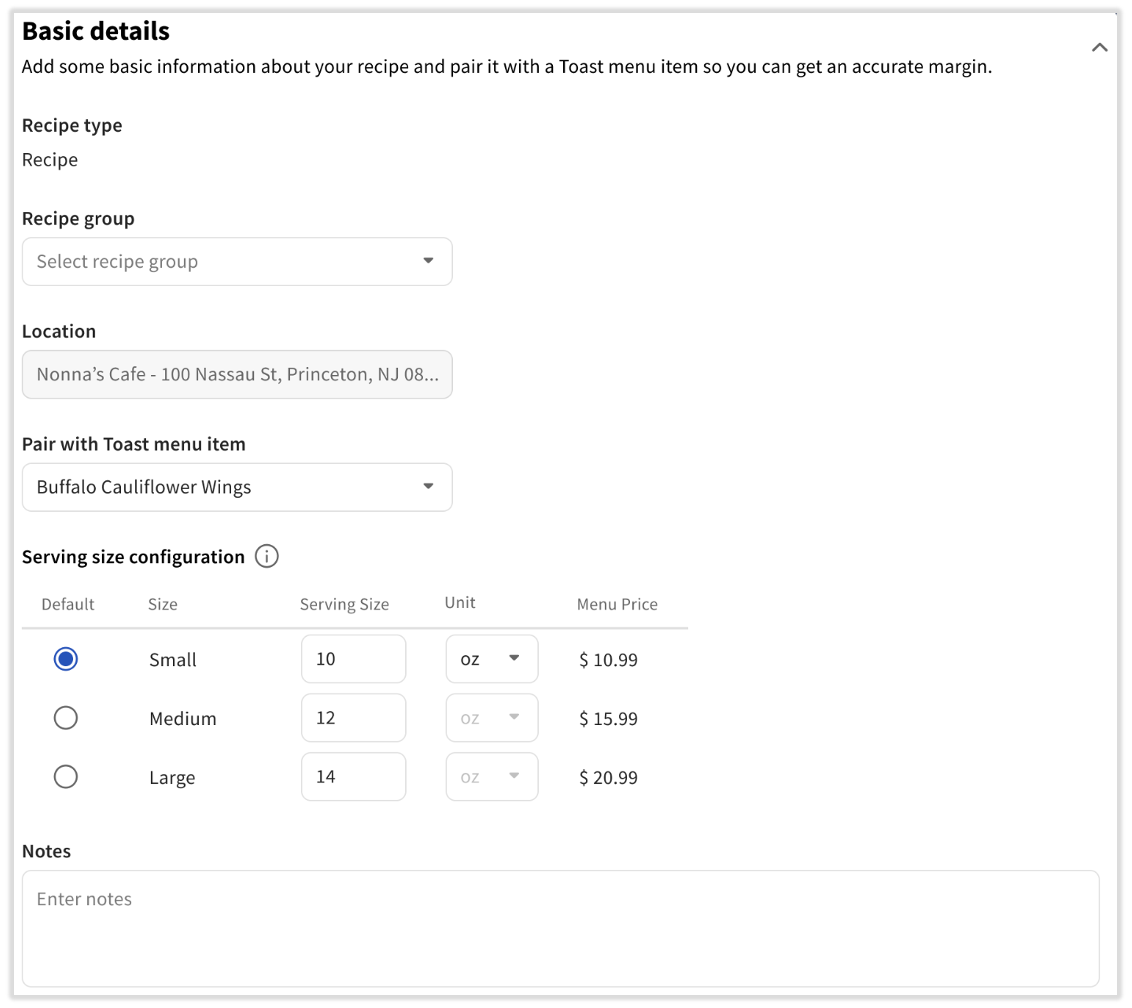
Step #1: Basic Details
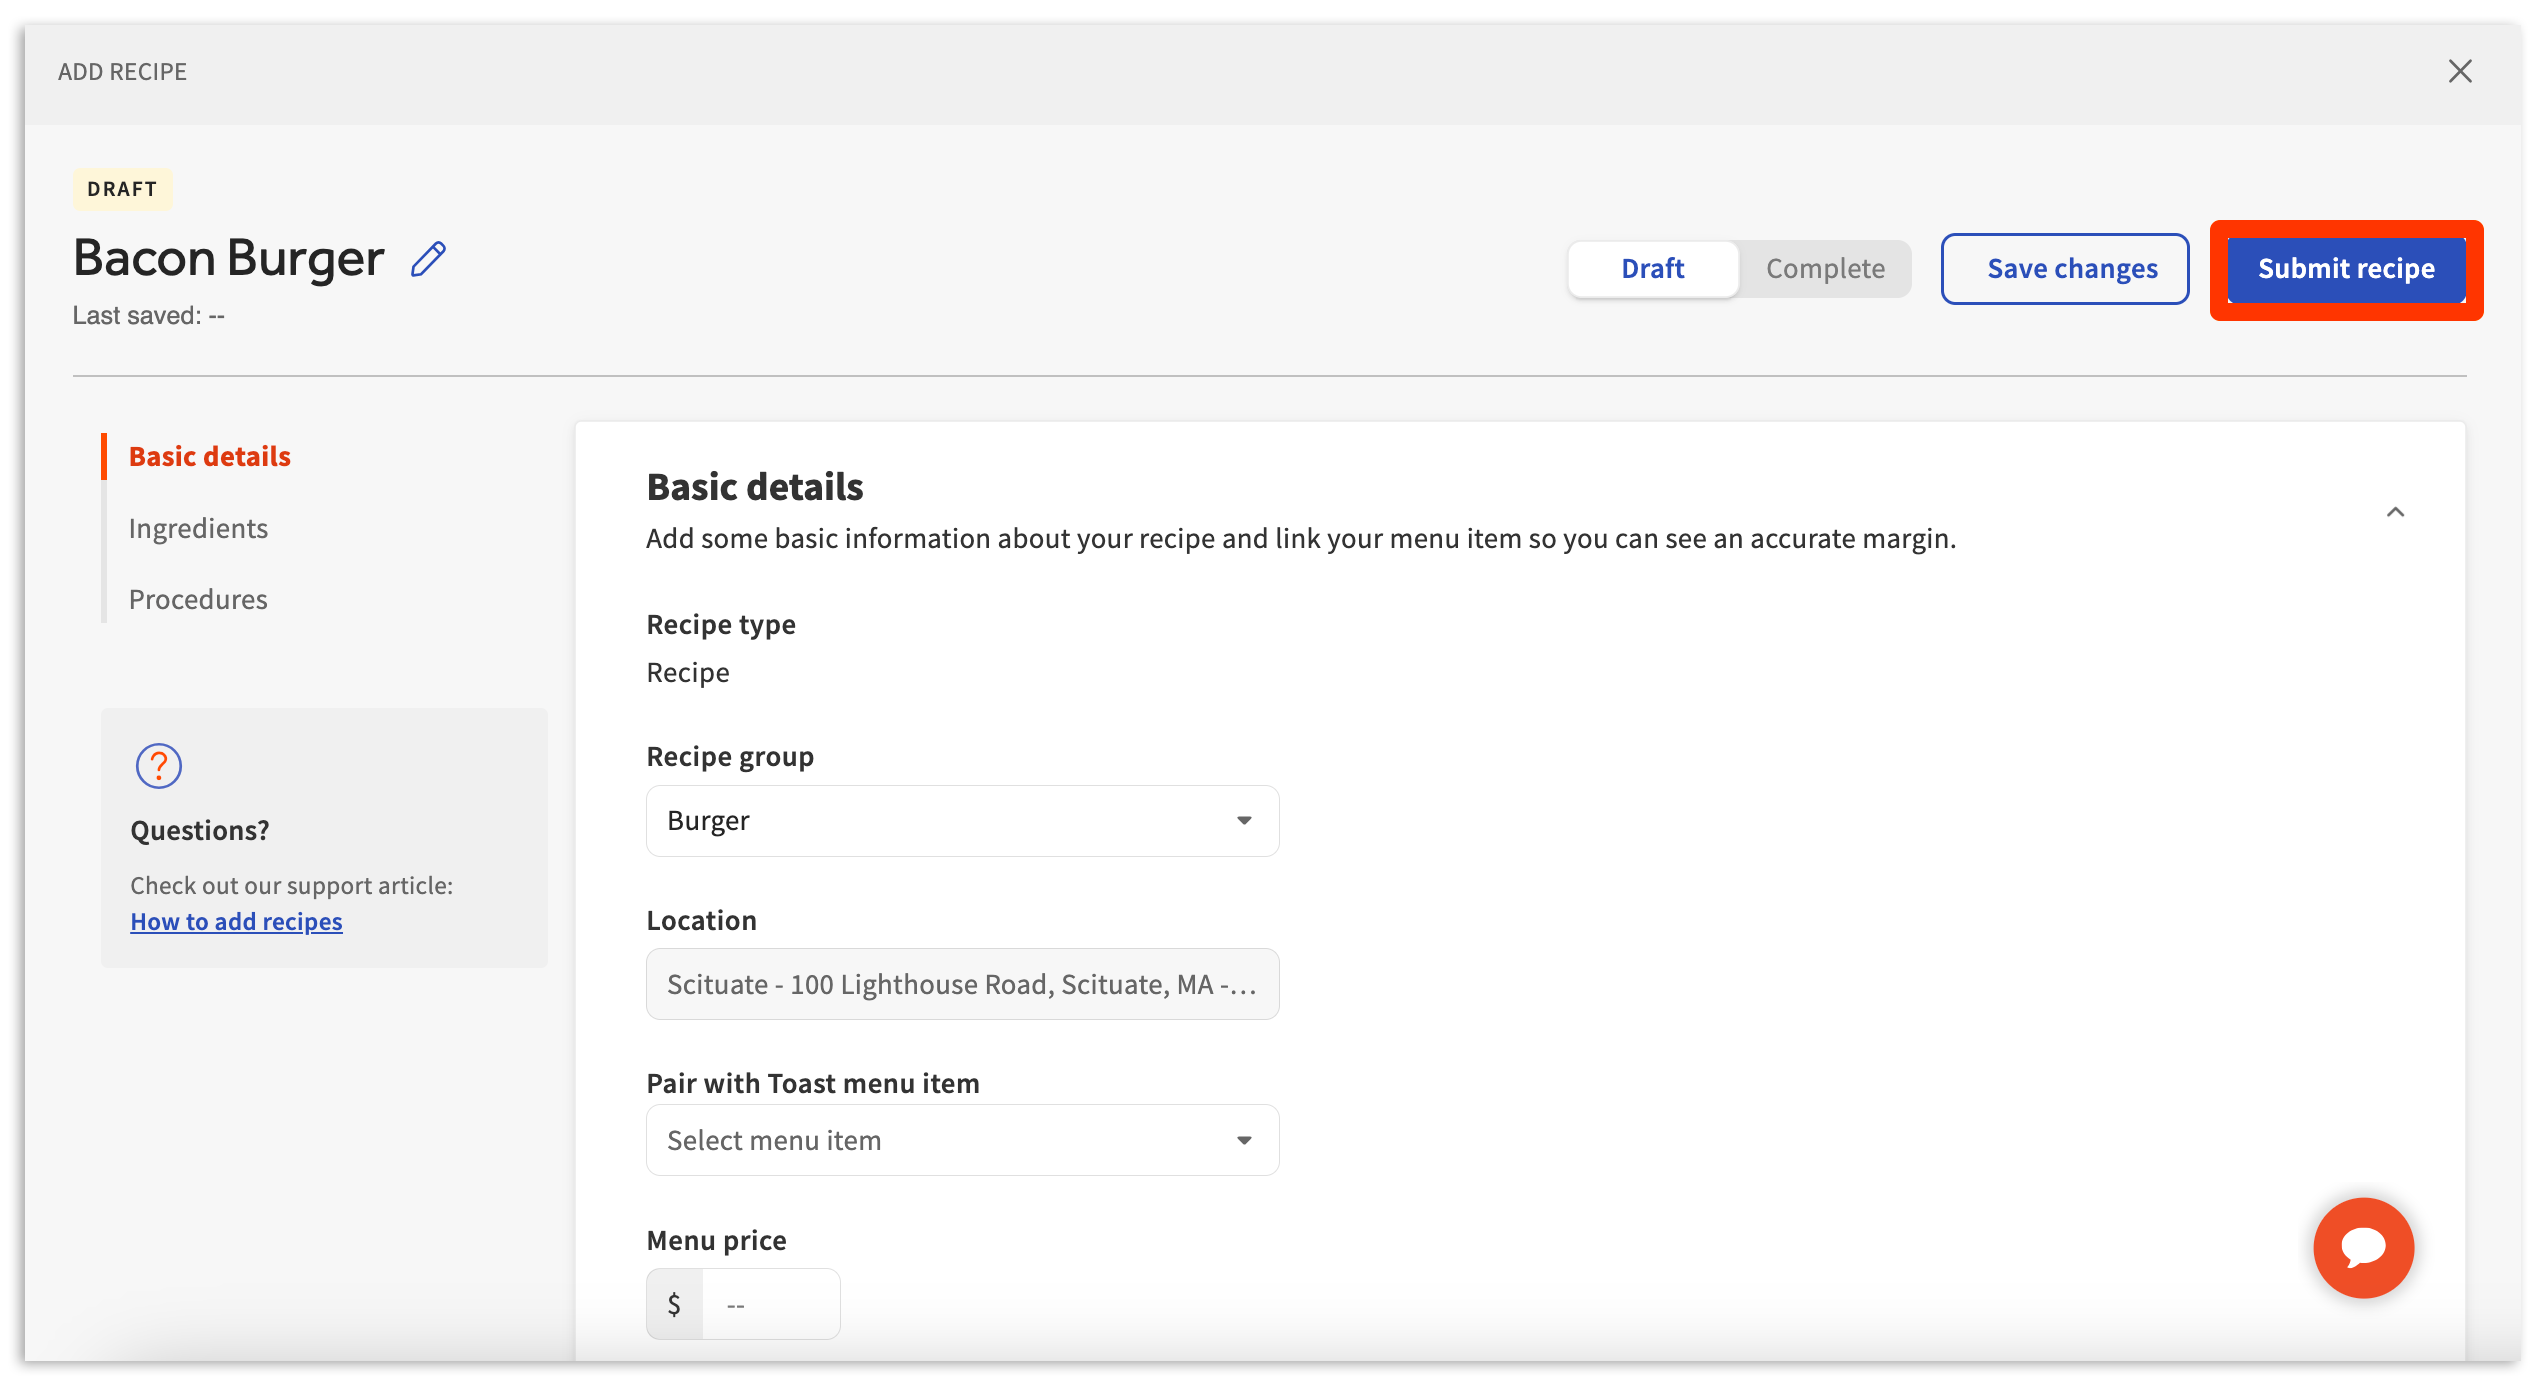
By default, you will start with Basic details. Not all basic details are necessary or required. To begin, select the empty fields and either type or select an applicable option. Basic detail fields include:
| Detail Name | Description |
| Recipe name | Names/renames the recipe. |
| Recipe group | Groups the recipe with similar recipe types (ex., Burgers, Pizzas, Entrees, etc.). |
| Location | Defines the location the recipe is being created for. Recipes can be copied to additional locations later on. |
| Pair with Toast menu item | Matches your recipe to the corresponding menu item in your Toast menu. This can also be done later on via product mix mapping. |
| Serving size configuration | Indicates the serving size via a numerical value and default set of unit options (this replaces the need to use product mix mapping for size modifiers). |
| Menu Price | Indicates the menu price for basic reporting. Once mapped to a Toast Menu item, this field will be filled out automatically. |
| Notes | Description of the recipe, if needed. |
Not all basic details are required. However, we recommend always attributing a Recipe name (upper-left corner with a blue pencil icon), Recipe group, and completing Pair with Toast menu item (if applicable).
Within the Pair with Toast menu item drop-down, you can select Re-sync from POS. This is useful for when you've changed a menu item or its modifiers in Toast Web. This change normally takes up to a day to sync over to xtraCHEF, but if you are running inventory or need accurate reporting sooner than that, select this option. Keep in mind two things that will prevent accurate syncing: not publishing the menu changes in Toast Web or if the menu where the item is stored is not active. This feature is only available with Recipes, not Prep Recipes.
Step #2: Ingredients
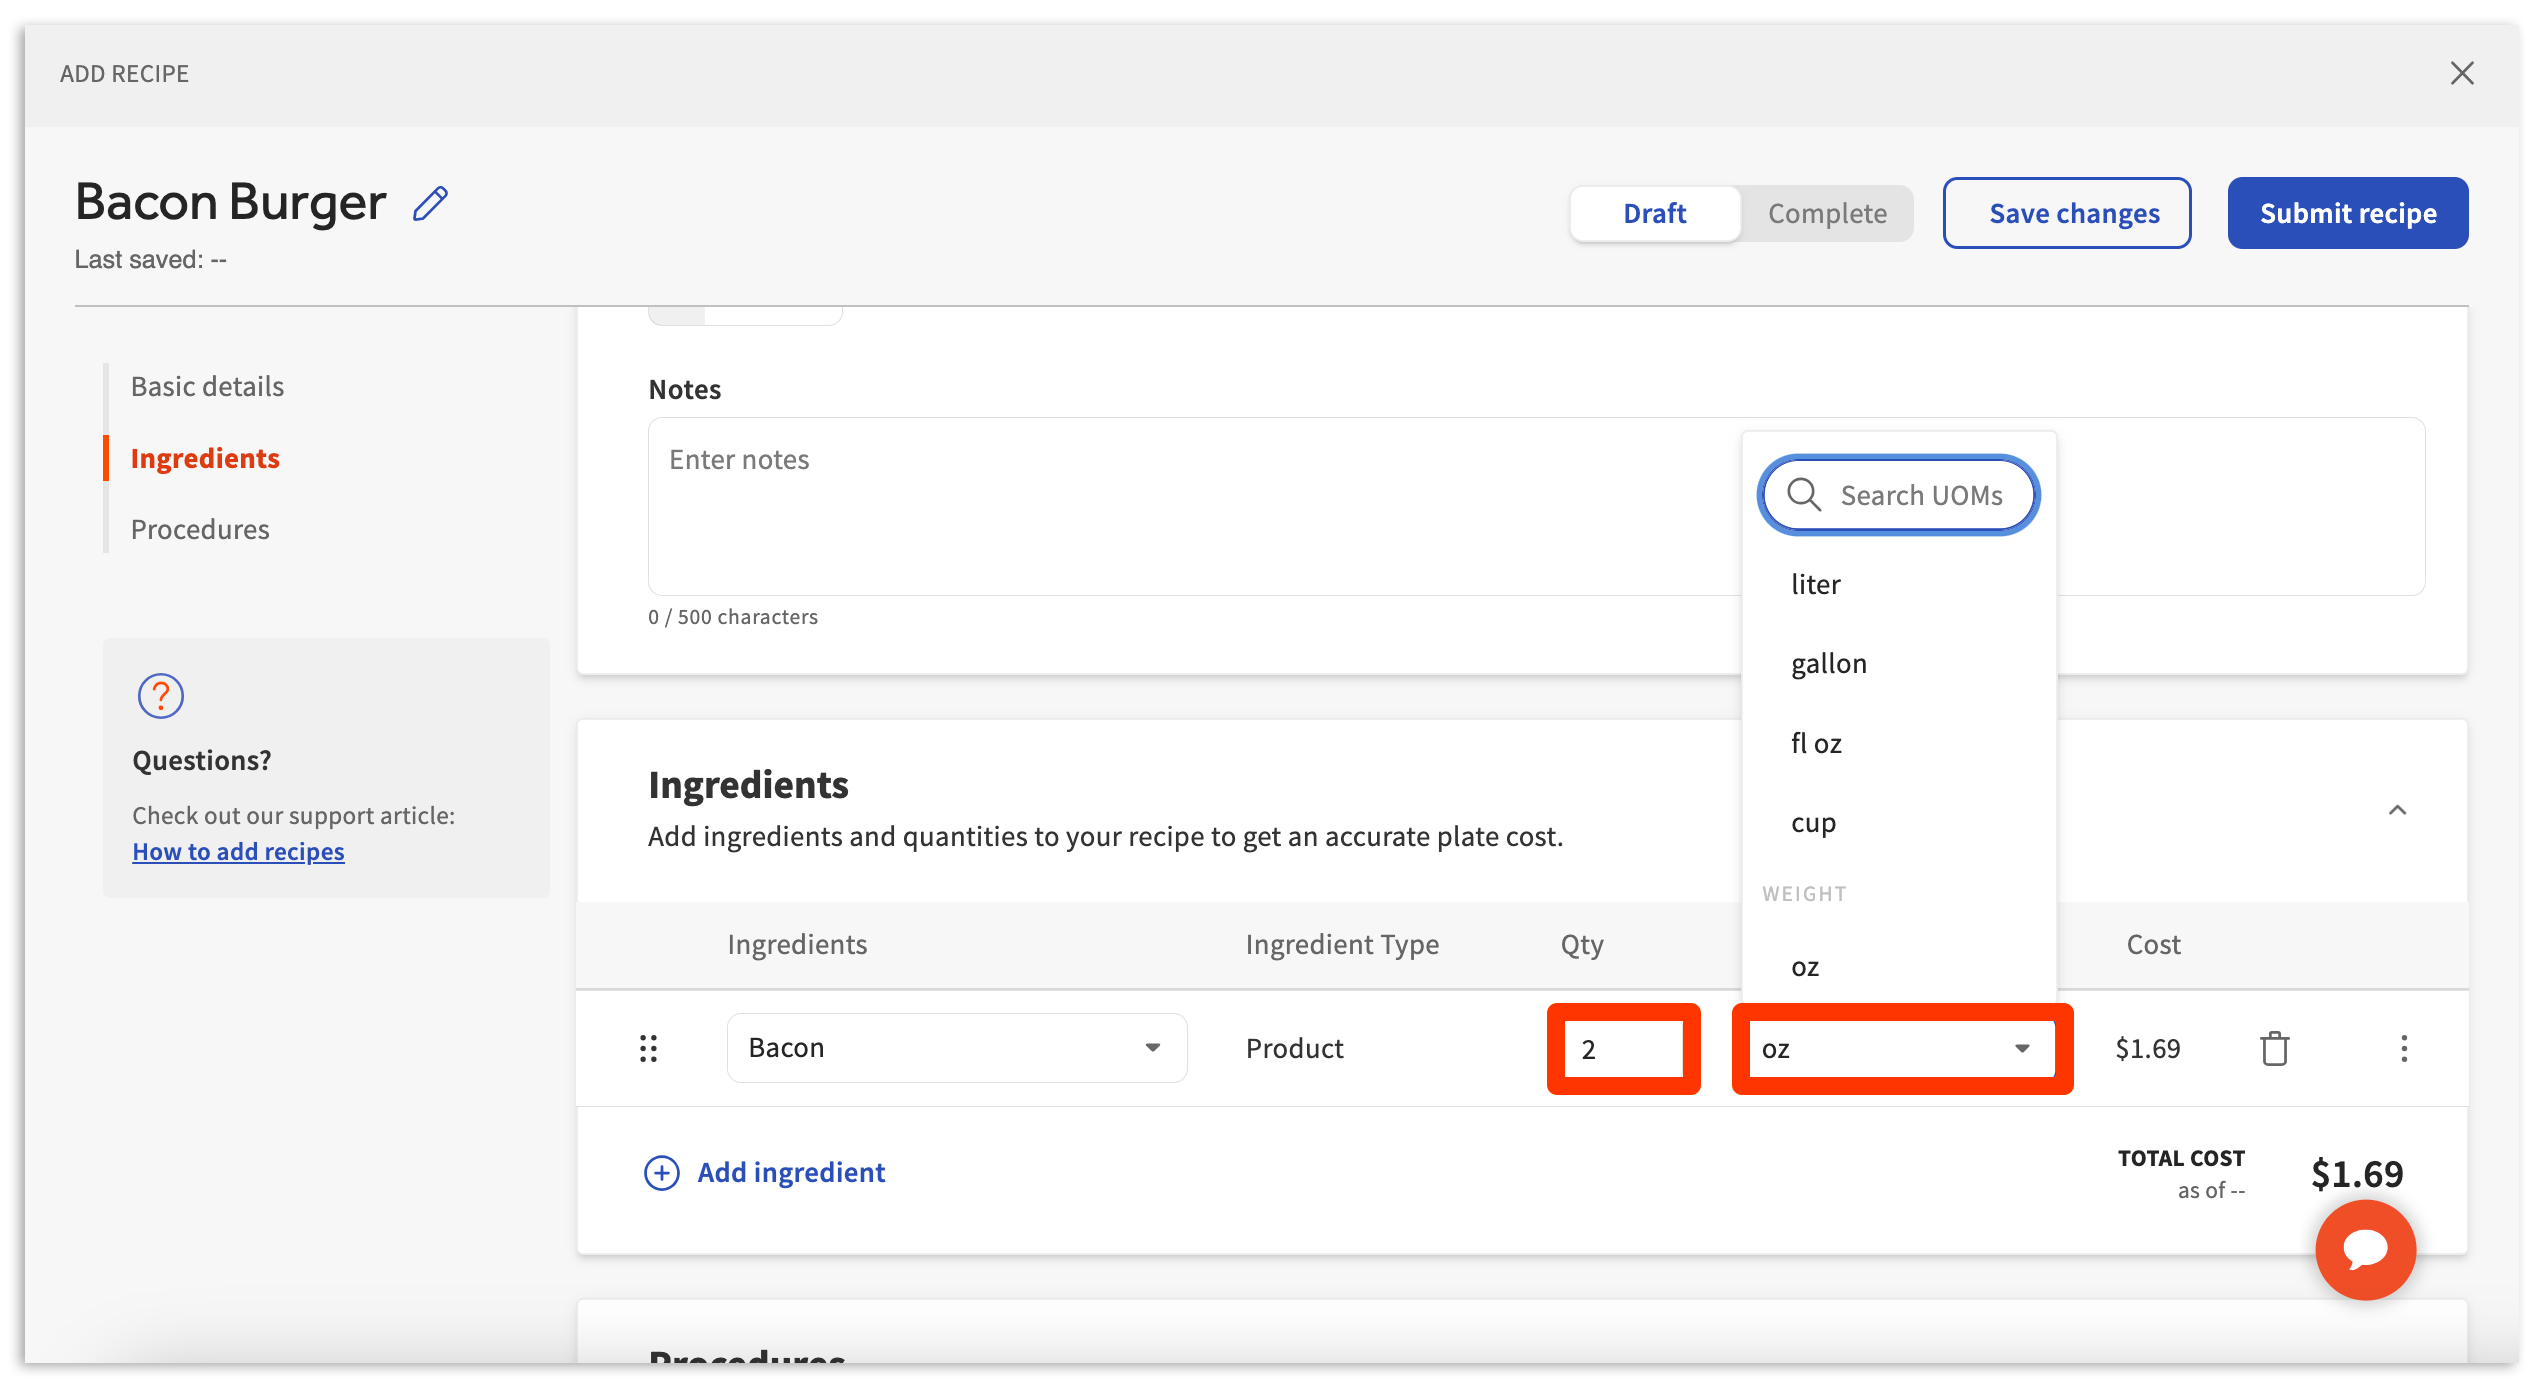
Once basic details are entered, proceed by scrolling down to the Ingredients section. Here, you can begin to add ingredients and measurements to the recipes. Choose Select Ingredient and pick your ingredient from the drop down.
Next, indicate the Qty (quantity) and UOM (unit of measurement) for the ingredient that is added to the prep recipe.
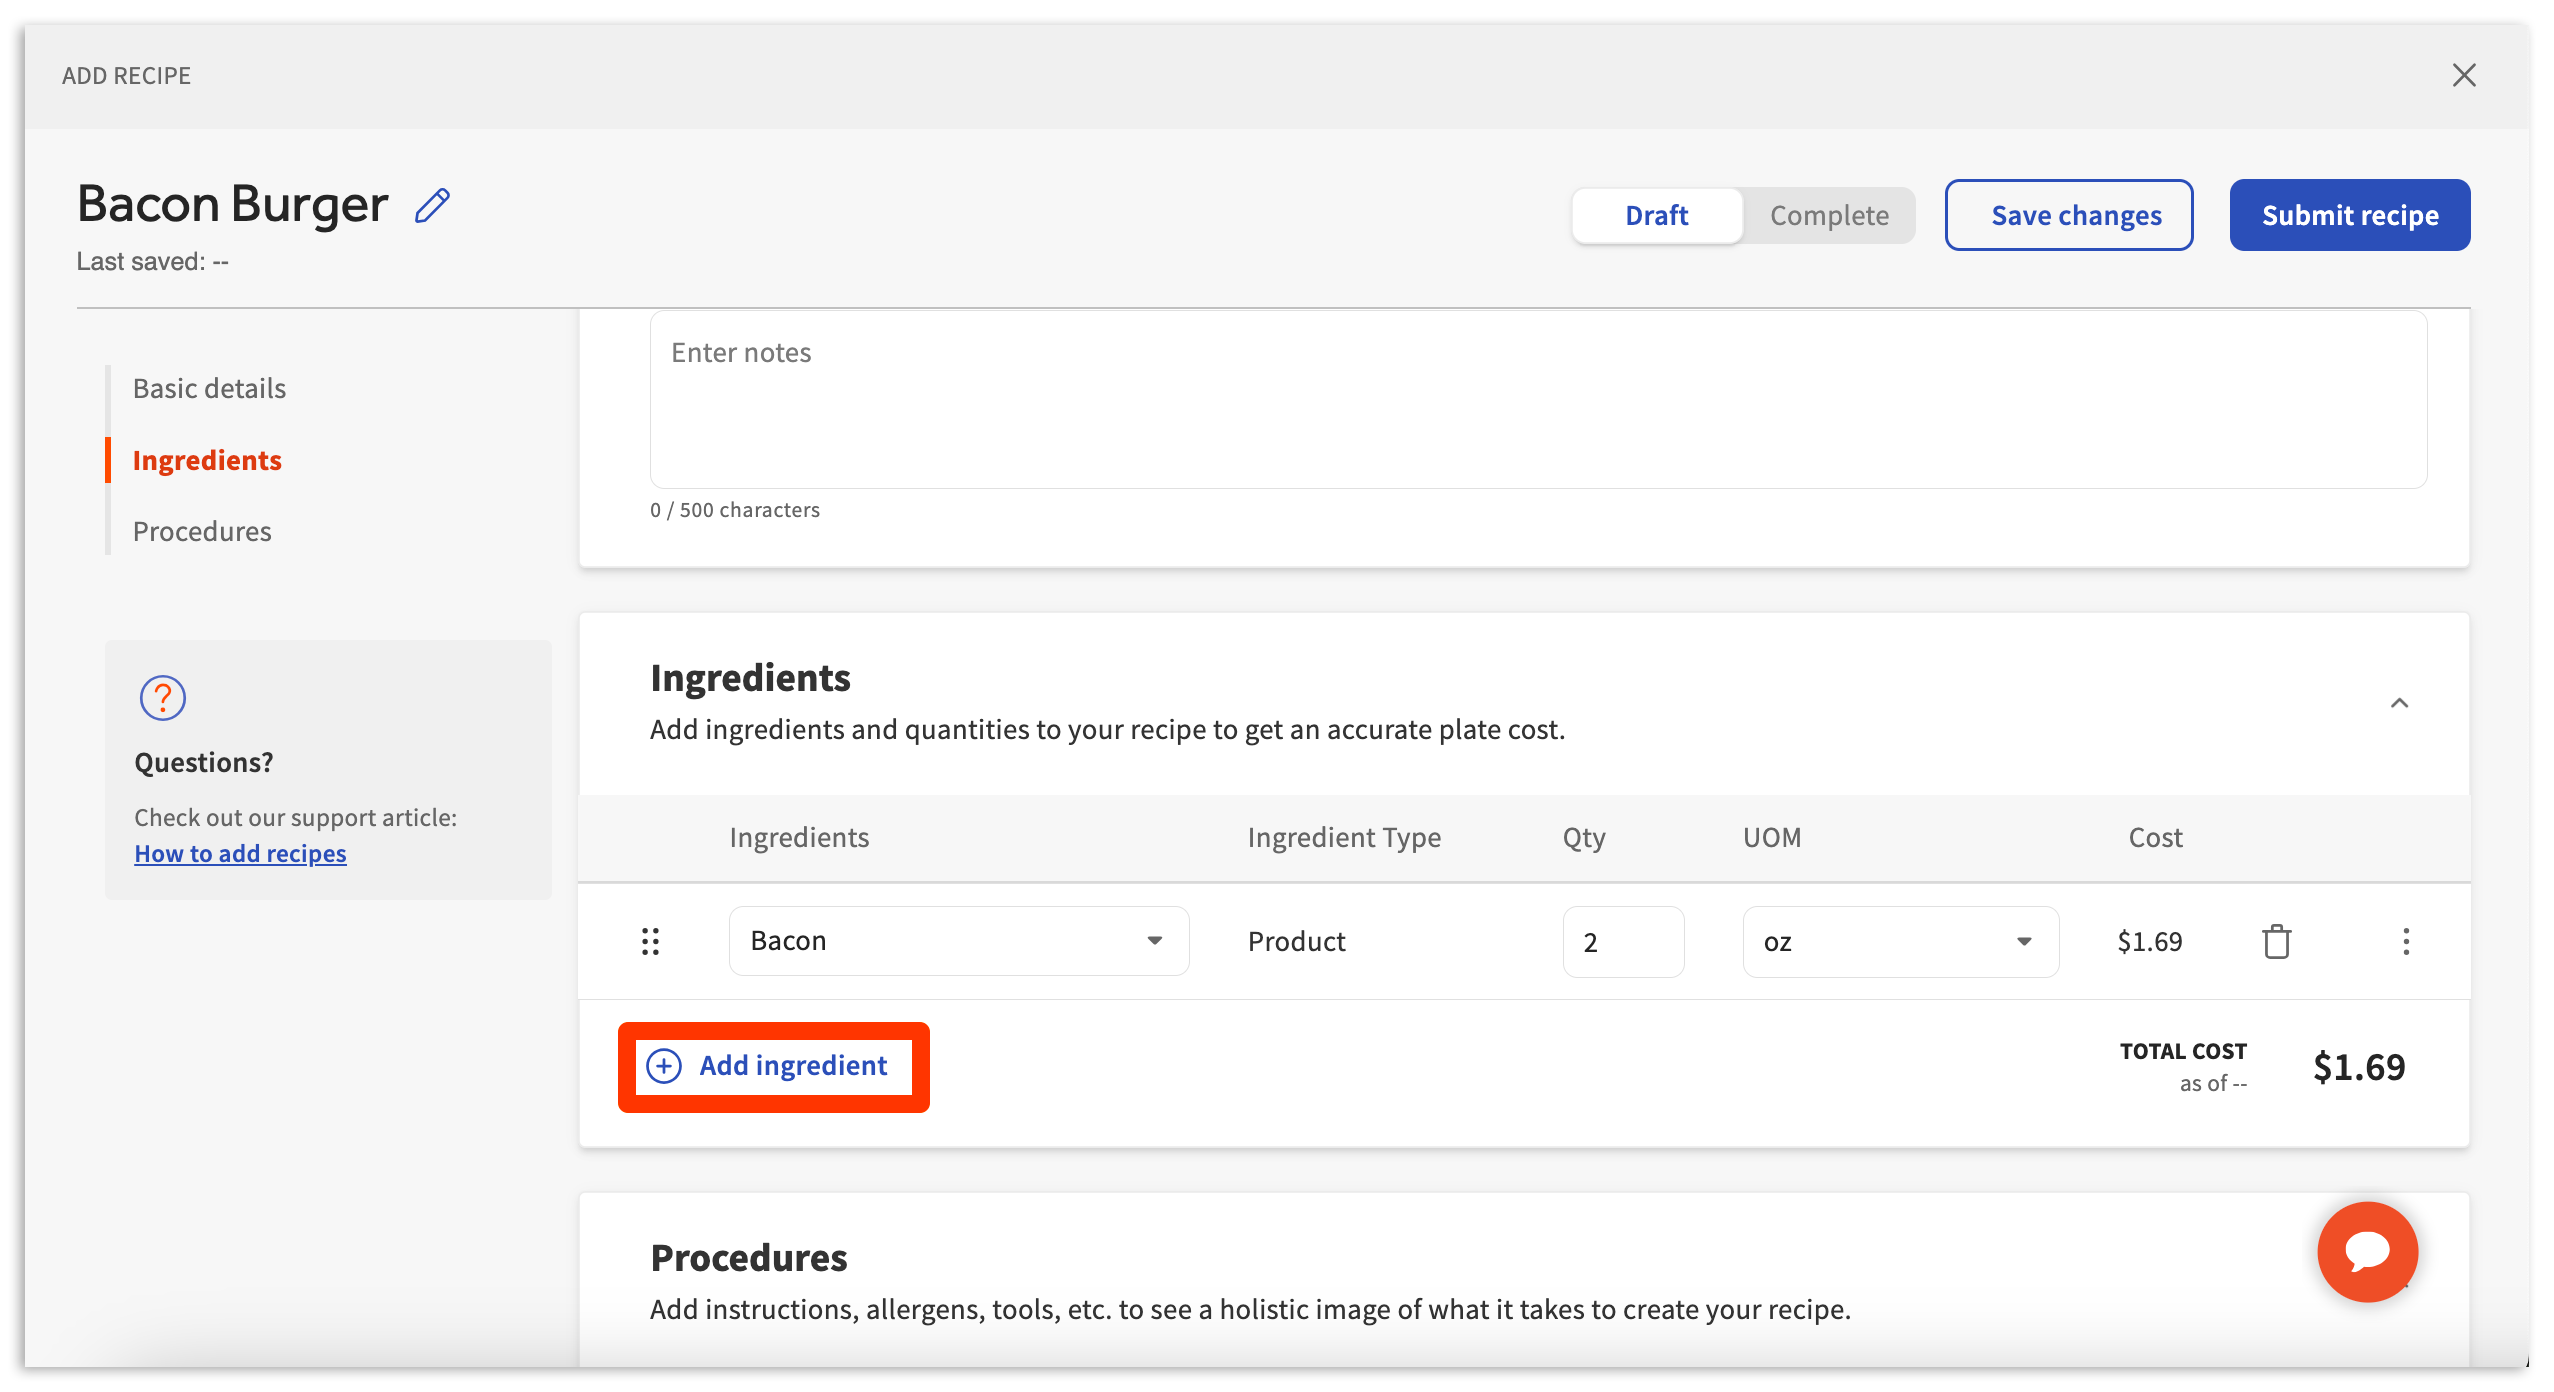
Shortly after adding your ingredient and measurement, a price will appear next to Total Cost. You can continue to add additional ingredients by selecting Add ingredient and repeating the steps above.
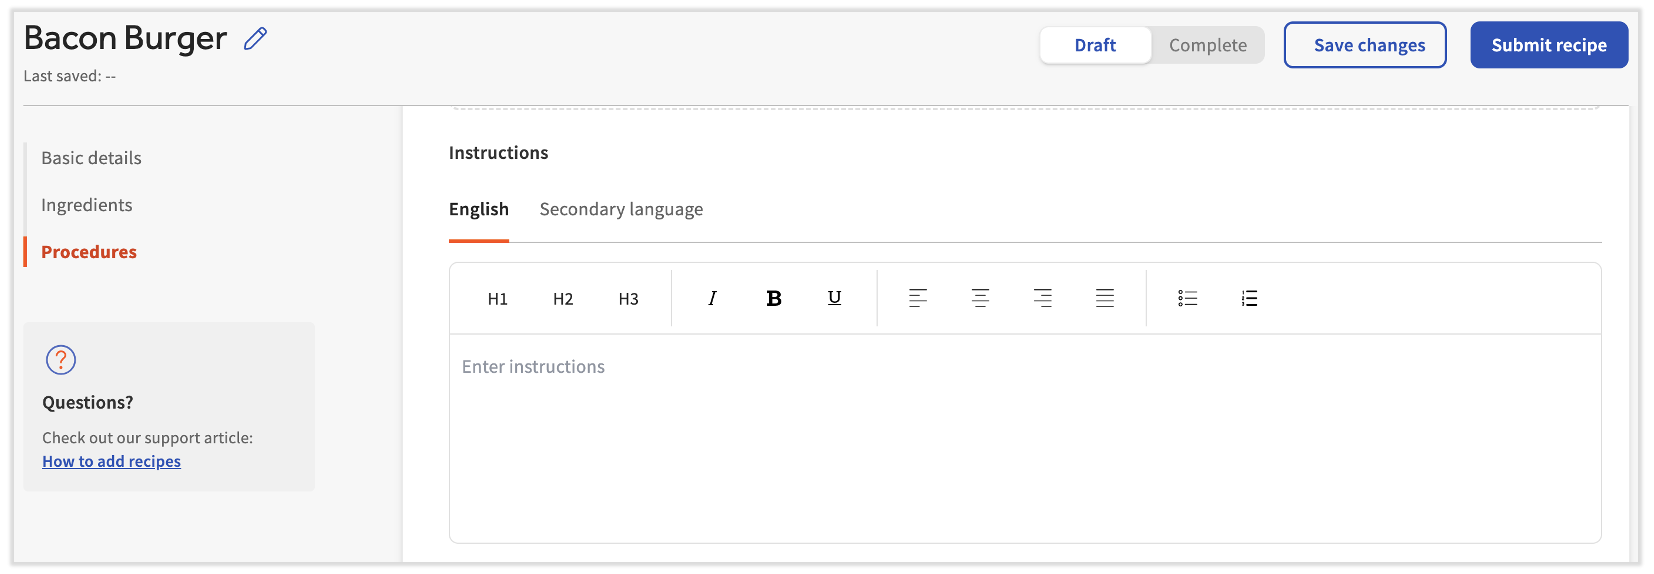
Step #3: Procedures
Next, continue to the Procedures section. Here, you can continue to add additional recipe details. Procedures do not contribute to costing information or data. Instead, they exist to help educate or inform your staff on details such as:
| Detail Name | Description |
| Recipe image | Image of the recipe for use on a printable/downloadable recipe card. |
| Instructions | Written instructions on how to prepare the recipe. These can be written in English or a secondary language. These will be included should you print or download a recipe card. |
| Prep time | Approximate time to prepare the dish. |
| Cook time | Approximate time to cook the dish |
| This Recipe contains (allergens) | Indicates which allergens this recipe may contain. |
| This Recipe may contain traces of (allergens) | Indicates which allergens this recipe may contain traces of. |
| Tools | Indicates any specific tools this recipe will require for preparation. |
Procedures are available to employees when reviewing recipes in xtraCHEF or viewing a downloaded recipe card.
Step 4: Save Changes or Submit Recipe
Once you have completed your recipe, publish it by selecting the Submit Recipe in the top right corner of your builder. This will set it as active in your xtraCHEF account for product mix mapping and reporting. If you are not yet finished with your Recipe and would like to save your work, you can also select Save changes.
Copy Prep Recipes and Recipes
Once created, your prep recipes and recipes can be found under the originally selected location. However, if you serve the same dish at another location, these can be quickly copied to all locations within your xtraCHEF tenant (account). Find the prep recipe or recipe that you wish to copy, then select the overflow menu (three dots) and Copy.
From here, you can customize the copied prep recipe or recipe name and select the Locations you wish to add it to. Once additional locations have been chosen, select Copy.

Download Recipes
After you have all your prep recipes and recipes created in xtraCHEF, you can choose to download either a CSV (spreadsheet) or a PDF of all your prep recipes and recipes at a selected location. You can even download a CSV file of all your prep recipes and recipes at all your locations.
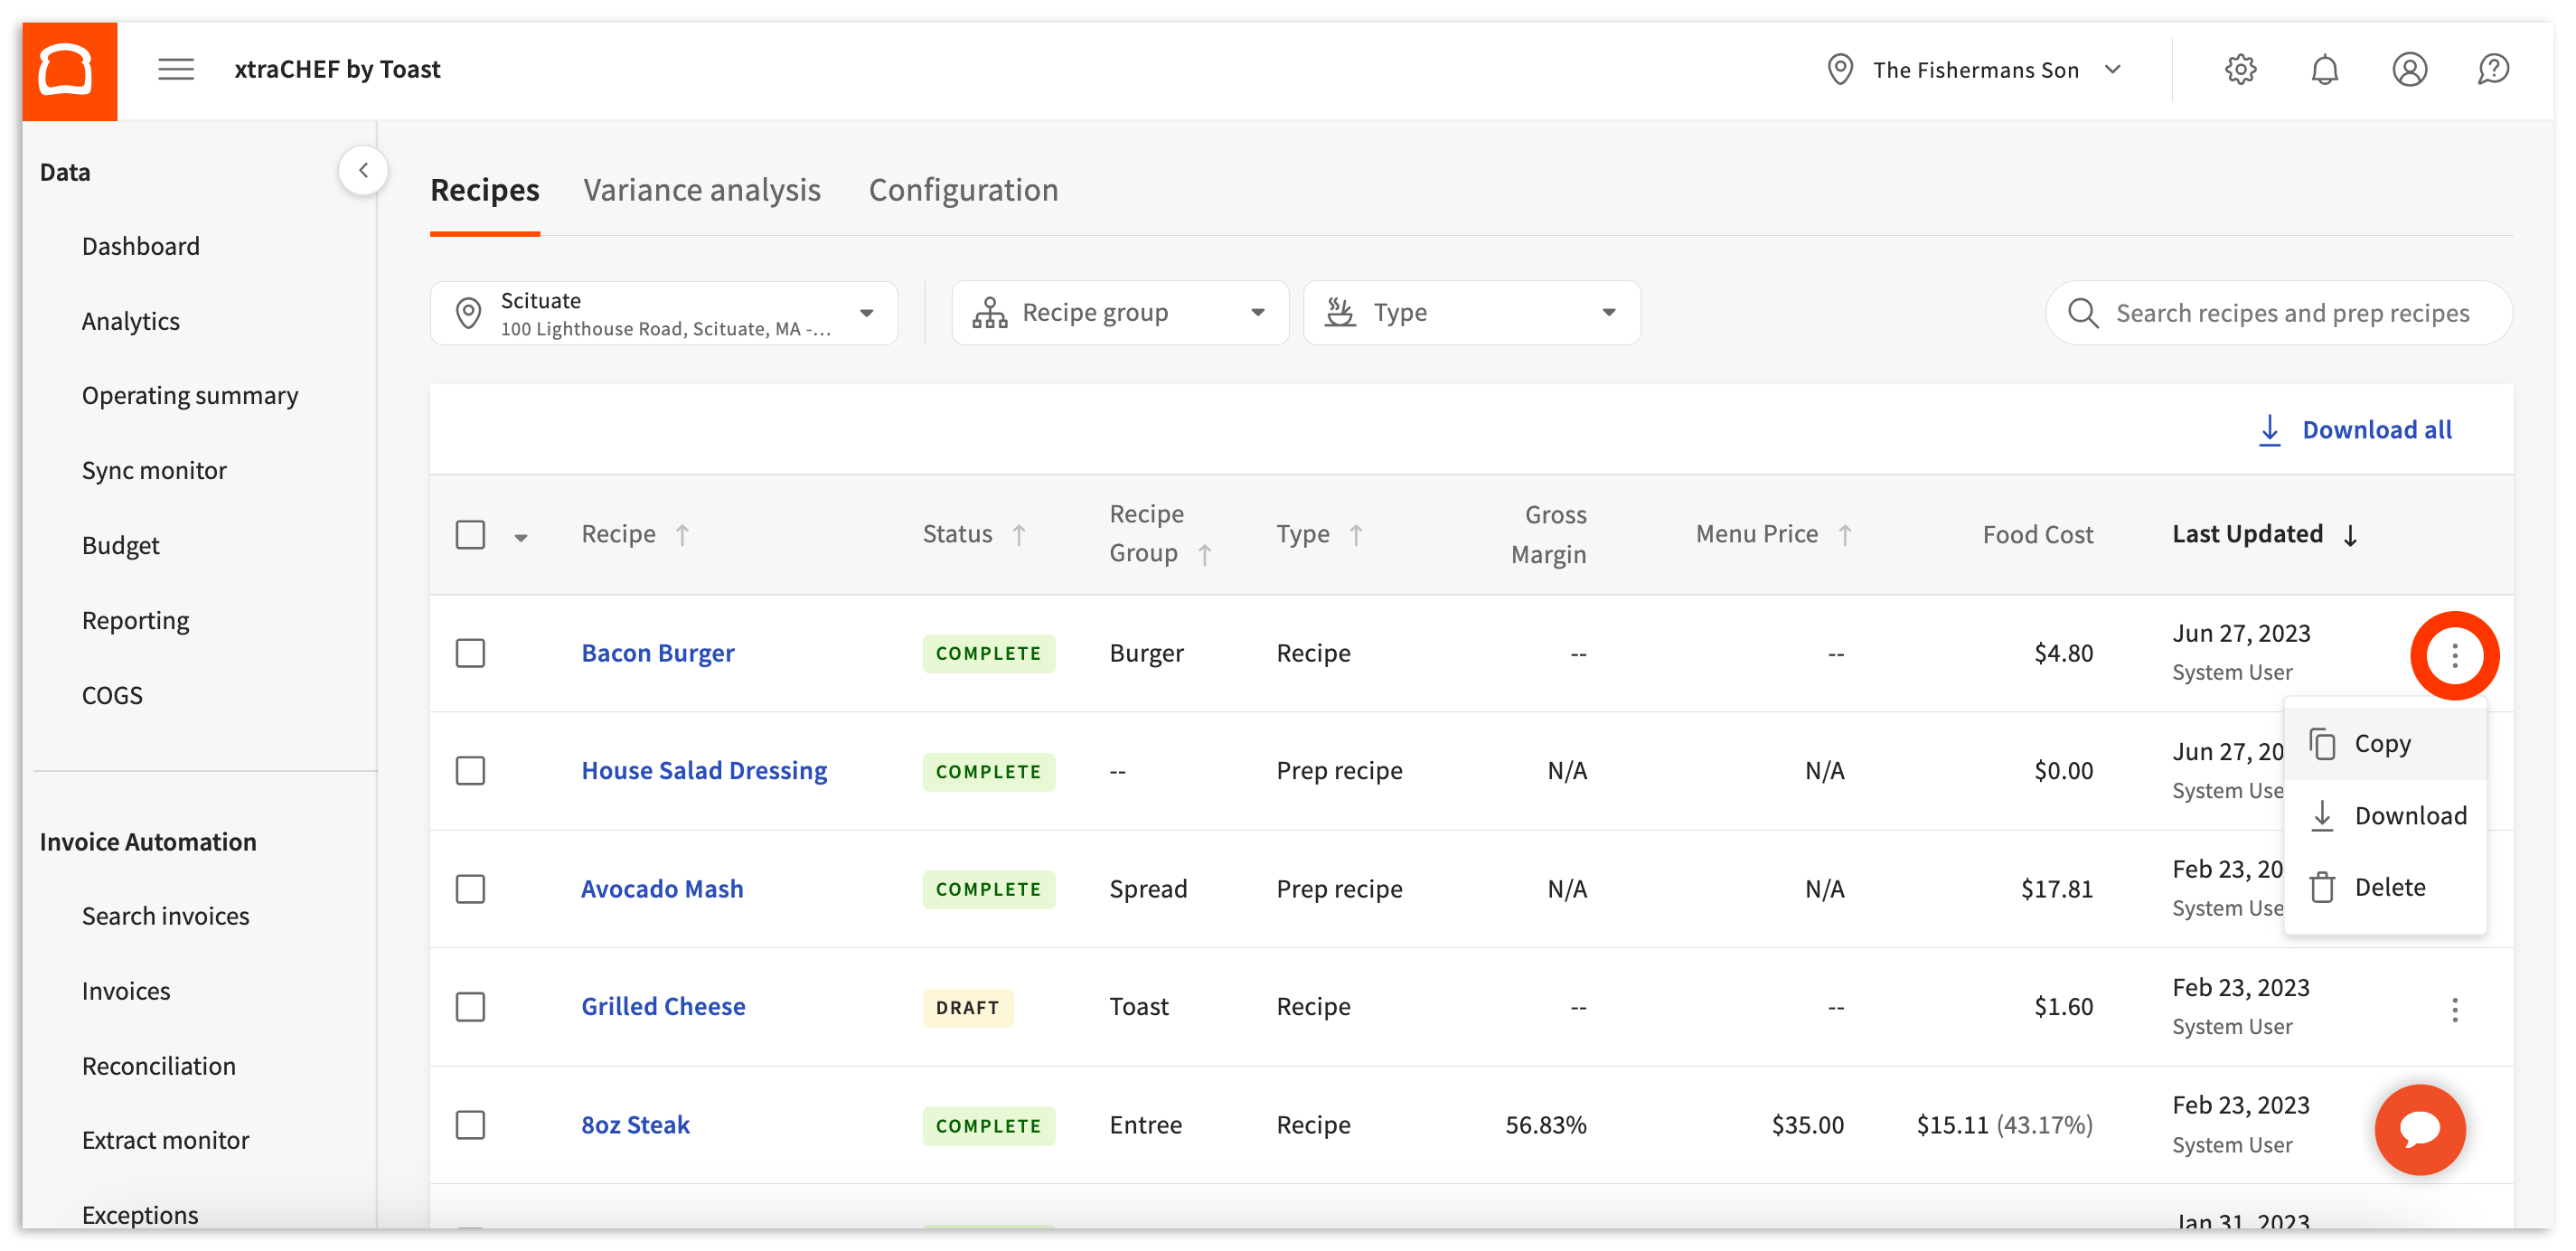
To download individual recipes , Navigate to Recipe, choose a location from the drop-down menu, click the three dots to the right of the recipe, and select Download.
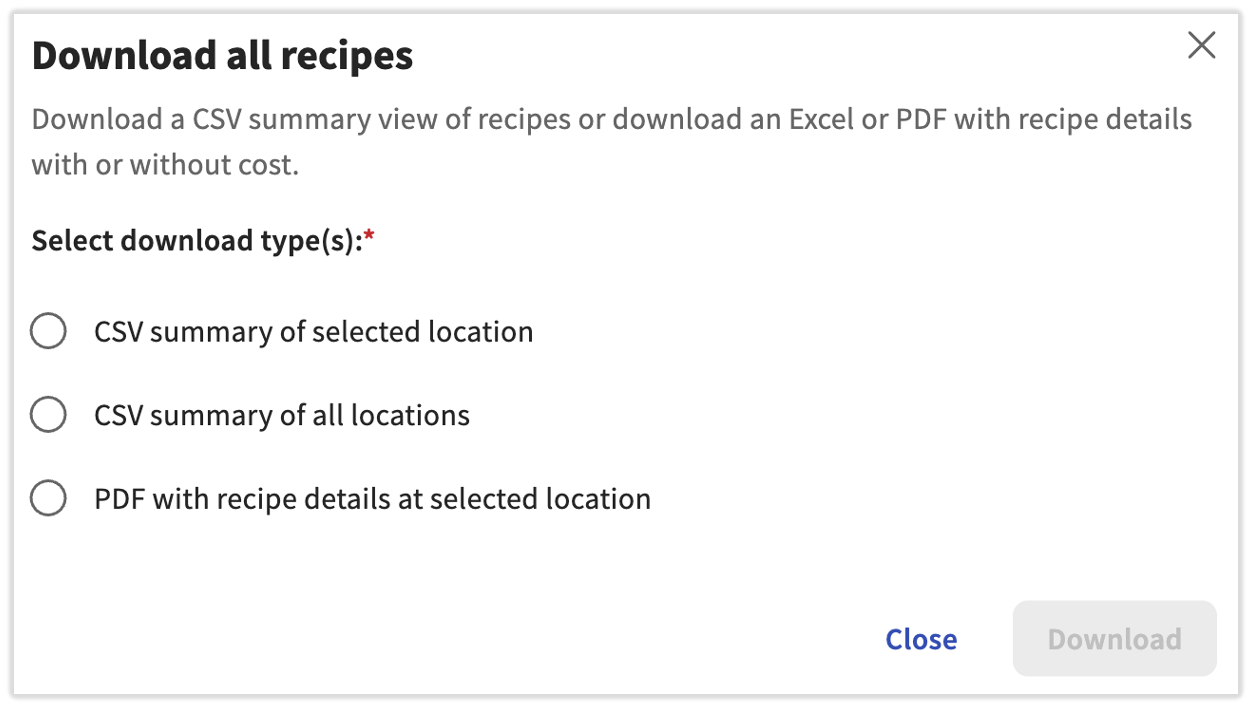
To download all recipes, Navigate to Recipe, choose a location from the drop-down menu, and select Download all .
- This pop-up lets you choose what type of file you'd like and, if you want a CSV, the option of including one or all your locations.
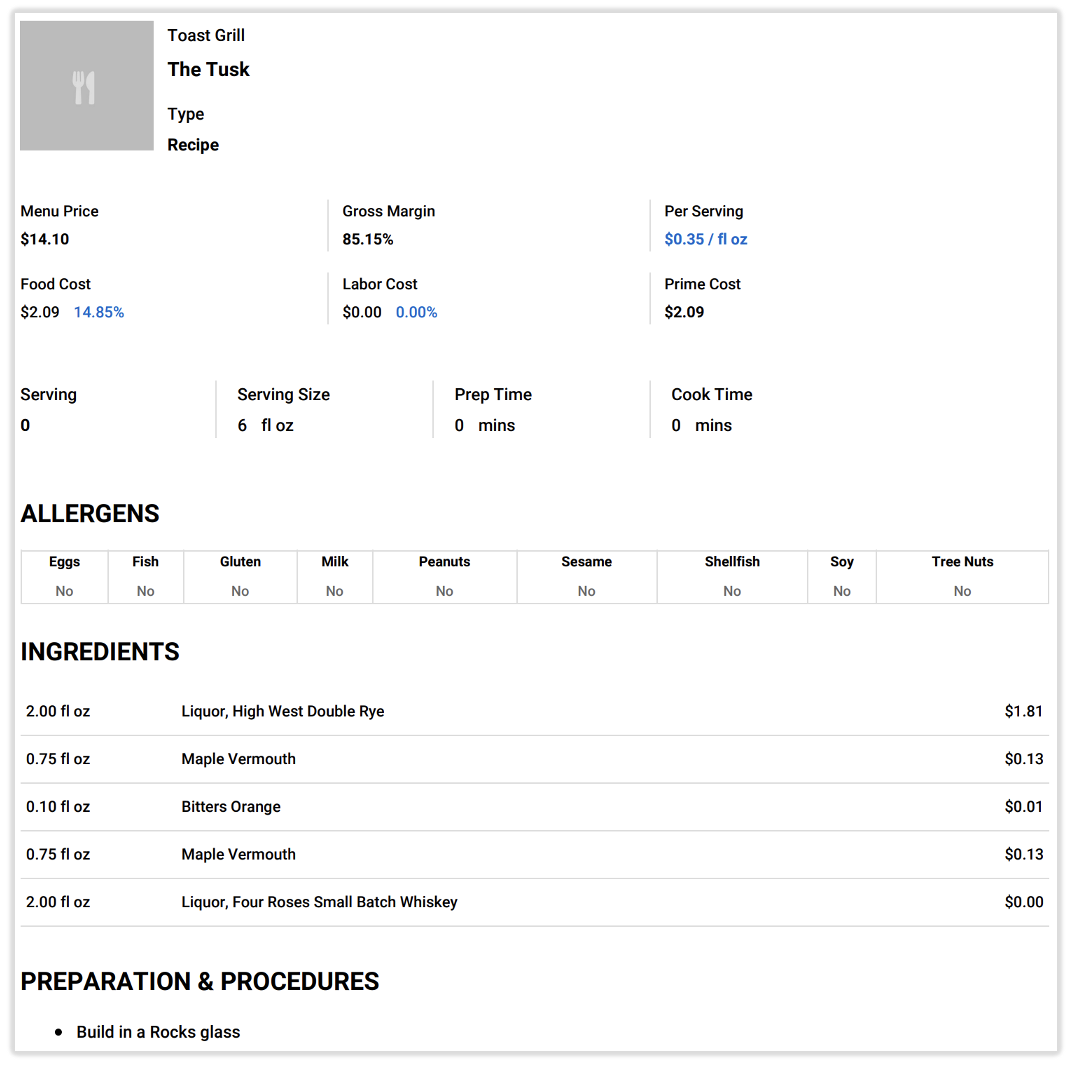
- If you choose to download a PDF, you can select Show cost to include fields like Menu Price, Labor Cost, Food Cost, ingredient costs, and more.
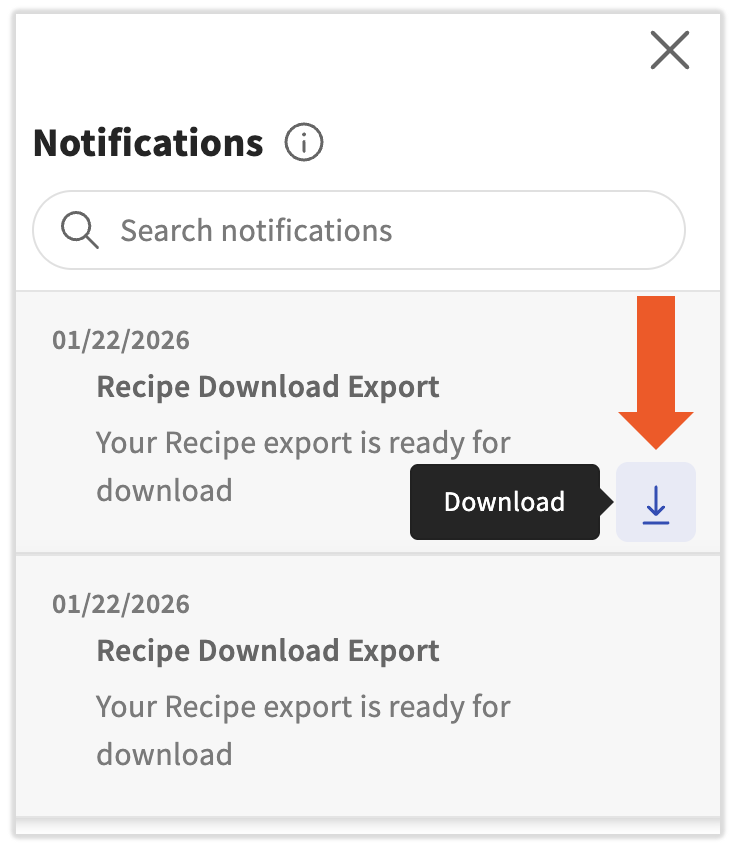
If you selected a PDF, you'll receive a small notification indicating this request is being processed. When it's complete and ready for download, you'll get a notification located in the upper-right corner of any xtraCHEF page. Once you see a red dot next to the bell icon, select the bell icon. Now select the download arrow for your Recipe Download Export.
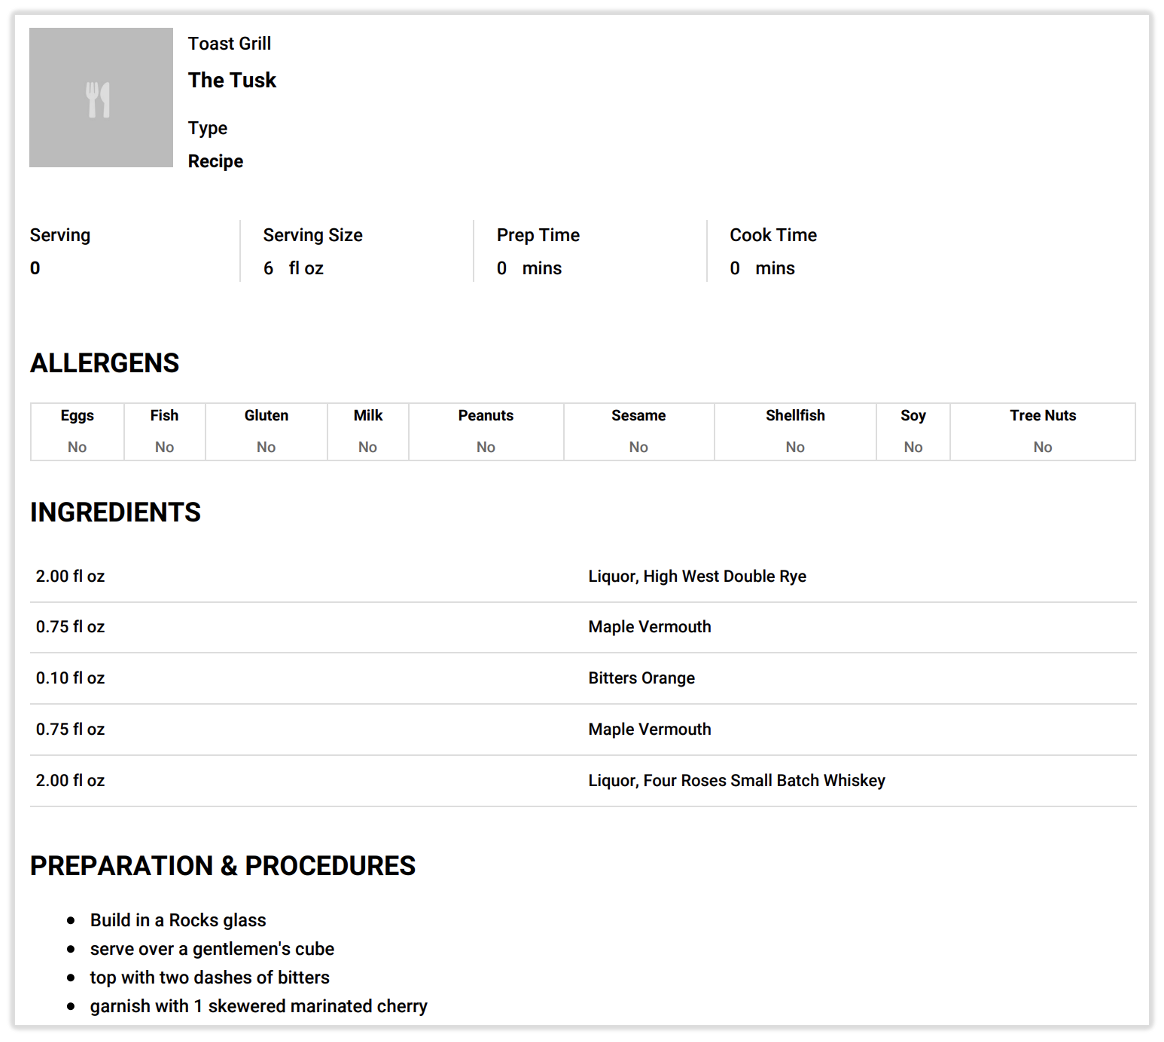
This is an example PDF recipe export without the Show cost checkbox:
This is an example PDF recipe export with the Show cost checkbox selected:
Product Details and Unit Conversions
Have you found yourself looking to convert items from volume to weight? weight to volume? Each to weight or volume? Sometimes a product's purchase unit makes it tricky to cost out your ingredients later on. Unit conversions can help simplify this.
Density Calculator
In the event that you attempt to use a product by an alternate unit of measurement (UOM), a Density Calculator will automatically populate. To create a conversion, indicate what one weighted/volume measurement is in volume/weight. Then select Save.

Custom Conversions
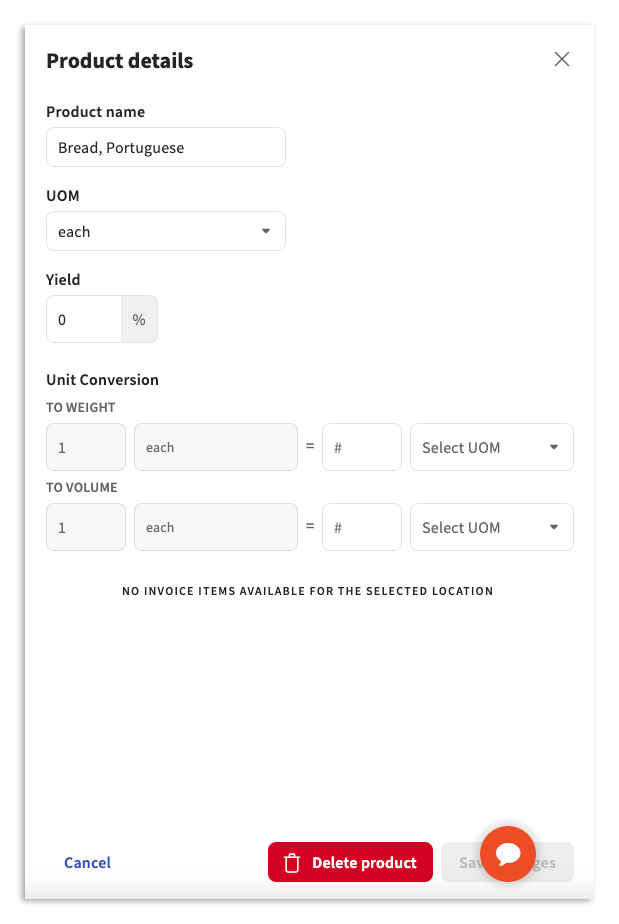
Custom conversions are used to create a relationship between a product's base unit (each) and its weight or volume. To do this, select the overflow menu (three dots) located next to an ingredient in your recipe or prep recipe and choose Product details. There, you can indicate or edit the conversion (e.g., 1 each = 8 fl oz). Once finished, select Save changes.
Note: Yield can be edited here as well. For more on Yields, visit our article titled xtraCHEF: Recipe Yield and Density Calculator.
Cost Configuration
By default, xtraCHEF calculates your recipe and prep recipe prime costs based on the most recent purchase prices for your ingredients.
Next Steps

Additional Recipe Configuration
There are a few other ways you can customize Recipes. Visit xtraCHEF: Recipe Configurations to learn about the Unit Conversion, Dining Options, and Delivery Fees options in xtraCHEF. If you need additional help and resources for Recipes, watch the video at the top of this article or sign up for Office Hours with a Toast expert.
Product Mix Mapping
Product mix mapping is where you can begin connecting the dots between your recipes in xtraCHEF, and the menu items that have synced from Toast Web. Product mix mapping can also apply to your modifiers, including nested modifiers, allowing xtraCHEF to calculate your most accurate cost as customers add or subtract additional ingredients to dishes or beverages on your menu. This step is vital in order to unlock advanced xtraCHEF Recipe and Inventory related analytics and reporting.
Recipe Reporting
With prep recipes and recipes configured and product mix mapping completed, you're ready to begin reviewing recipe-related reporting, such as your Variance Analysis and Product Mix Report. For more on these reports, visit xtraCHEF: Recipe Reporting.
Inventory Analytics
Want to see how variables such as waste, shrinkage, theft, and more might be affecting your margins? Start taking physical inventory counts in xtraCHEF. Doing so will enable you to view your Inventory Analytics and track your theoretical and actual inventory consumption, monitor inventory depletion, identify waste, and control your restaurant costs for maximum profitability.
Learn how to get started with Inventory in xtraCHEF: Get Started With Inventory Area Setup and Count Lists