xtraCHEF: Get Started With Vendors
Last updated: Apr 28, 2026, 4:20 PM
- Vendors Overview
- Vendor Information
- Vendor Codes
- Default Category
- Extract Preference
- Payment Terms
- Approval Rule
- Add New Vendor
Vendors Overview
As you begin uploading invoices and setting up your account, xtraCHEF will start recording vendor information. It does this to ensure consistency with your accounting software (if applicable) and categorize expenses by vendor for your reporting.
Your Vendors page, also known as the Vendor Hub, stores this information and allows you to check on or change vital vendor details as well as customize specific preferences.
To begin, navigate to Vendors from the left-hand navigation menu. This will bring you to your Vendors page where xtraCHEF records any vendor information synced from your accounting (if applicable) or read from uploaded invoices and receipts.

By default, xtraCHEF will immediately show you a list of all active vendors. However, you can use your Filter drop-down to include inactive vendors or those with rebates only. Selecting the checkbox on the left of a vendor allows you to make it active or inactive if you use the Action dropdown menu. You can also use the Download button to export a spreadsheet of this data.

Vendor Information
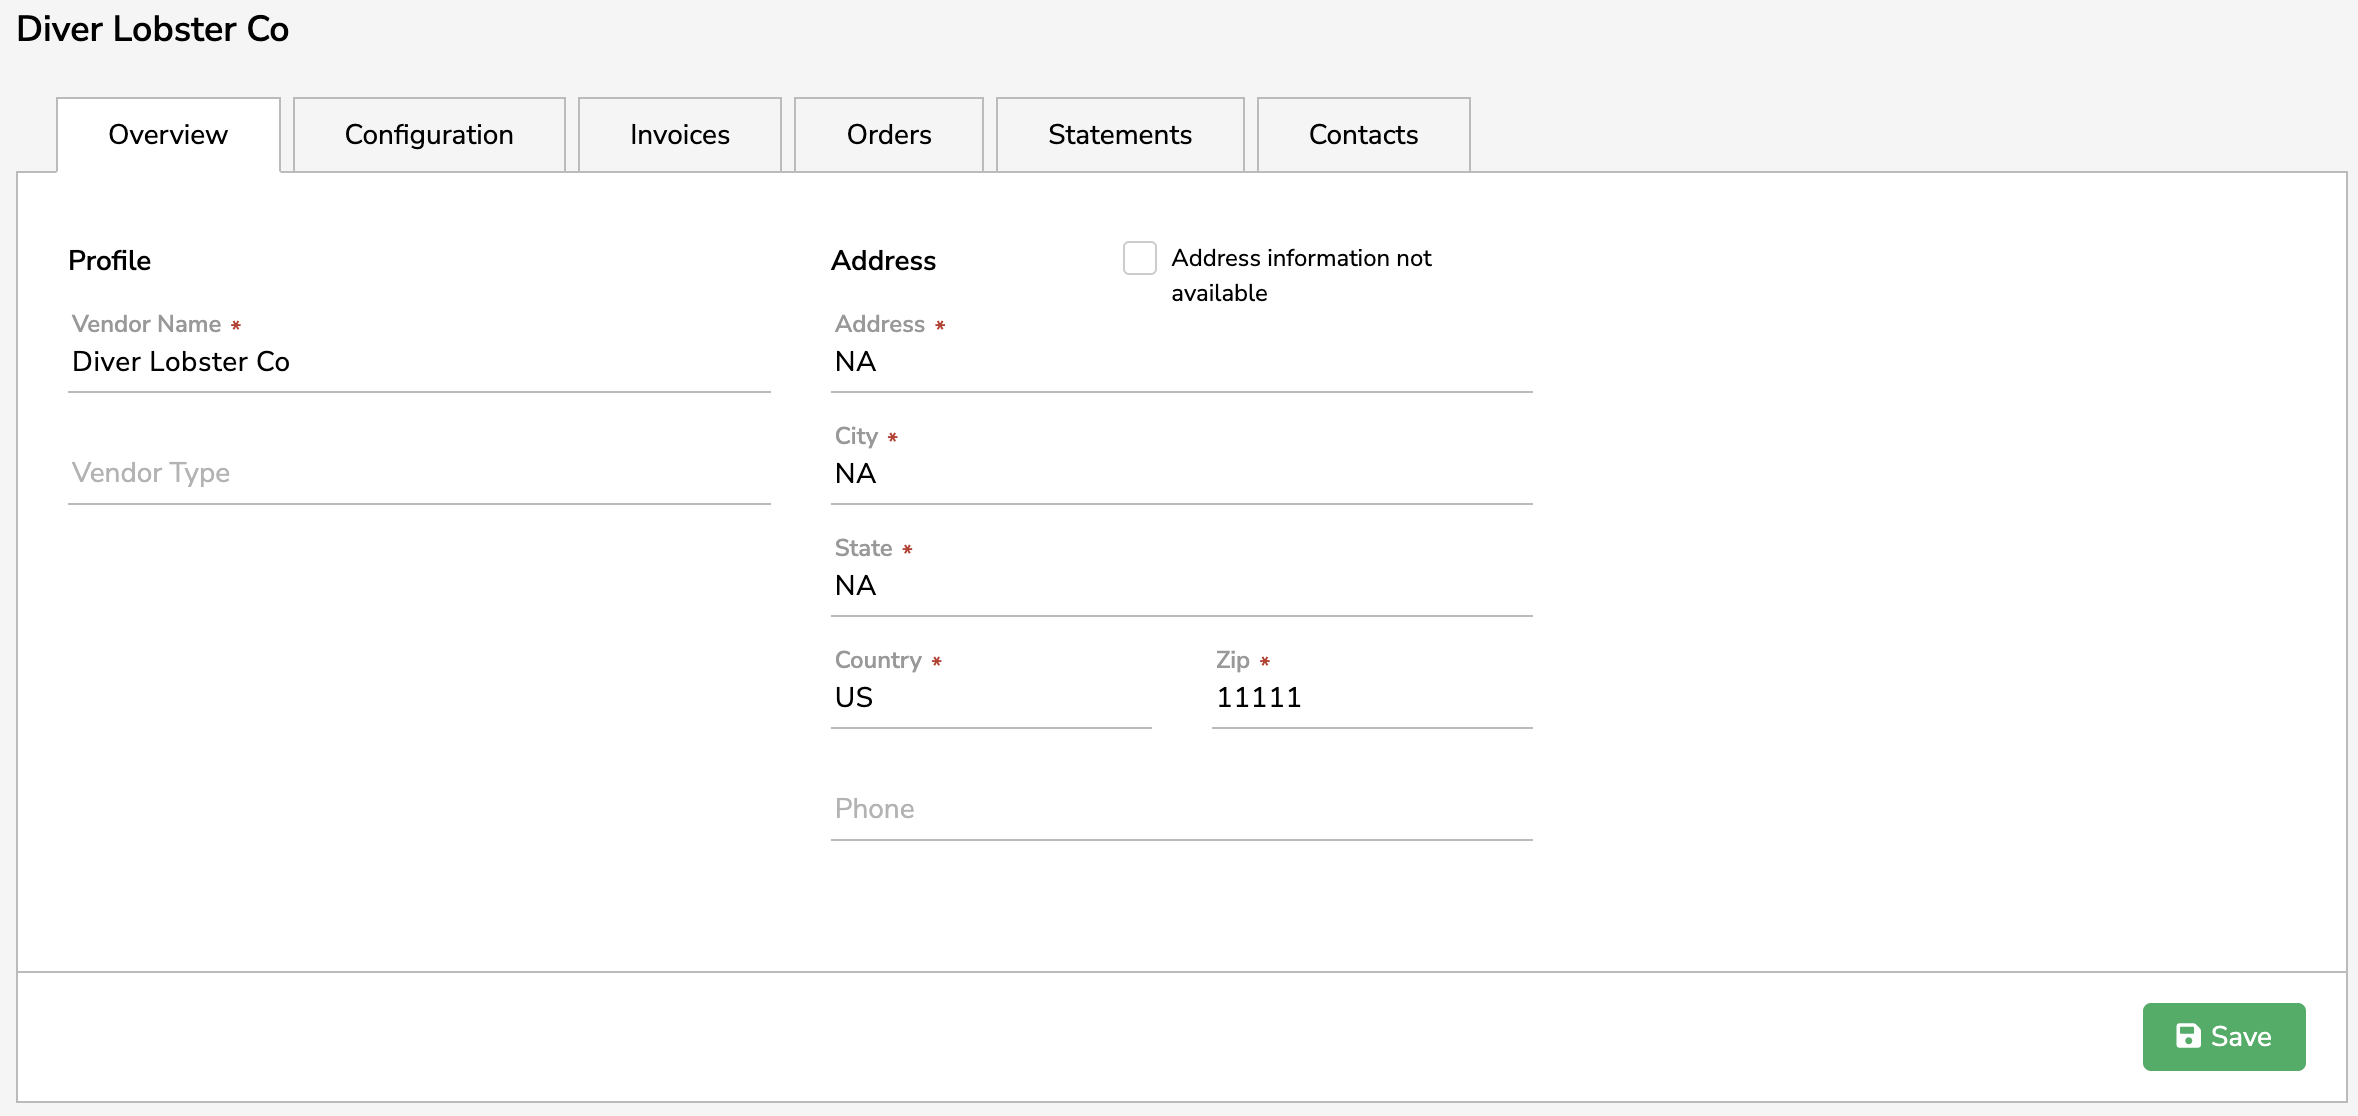
Select a vendor name from the Vendor Information column to see all the corresponding information on file in xtraCHEF, including addresses, sales contacts, and any invoices or outbound orders for the vendor. By default, you will first see an Overview of the vendor.
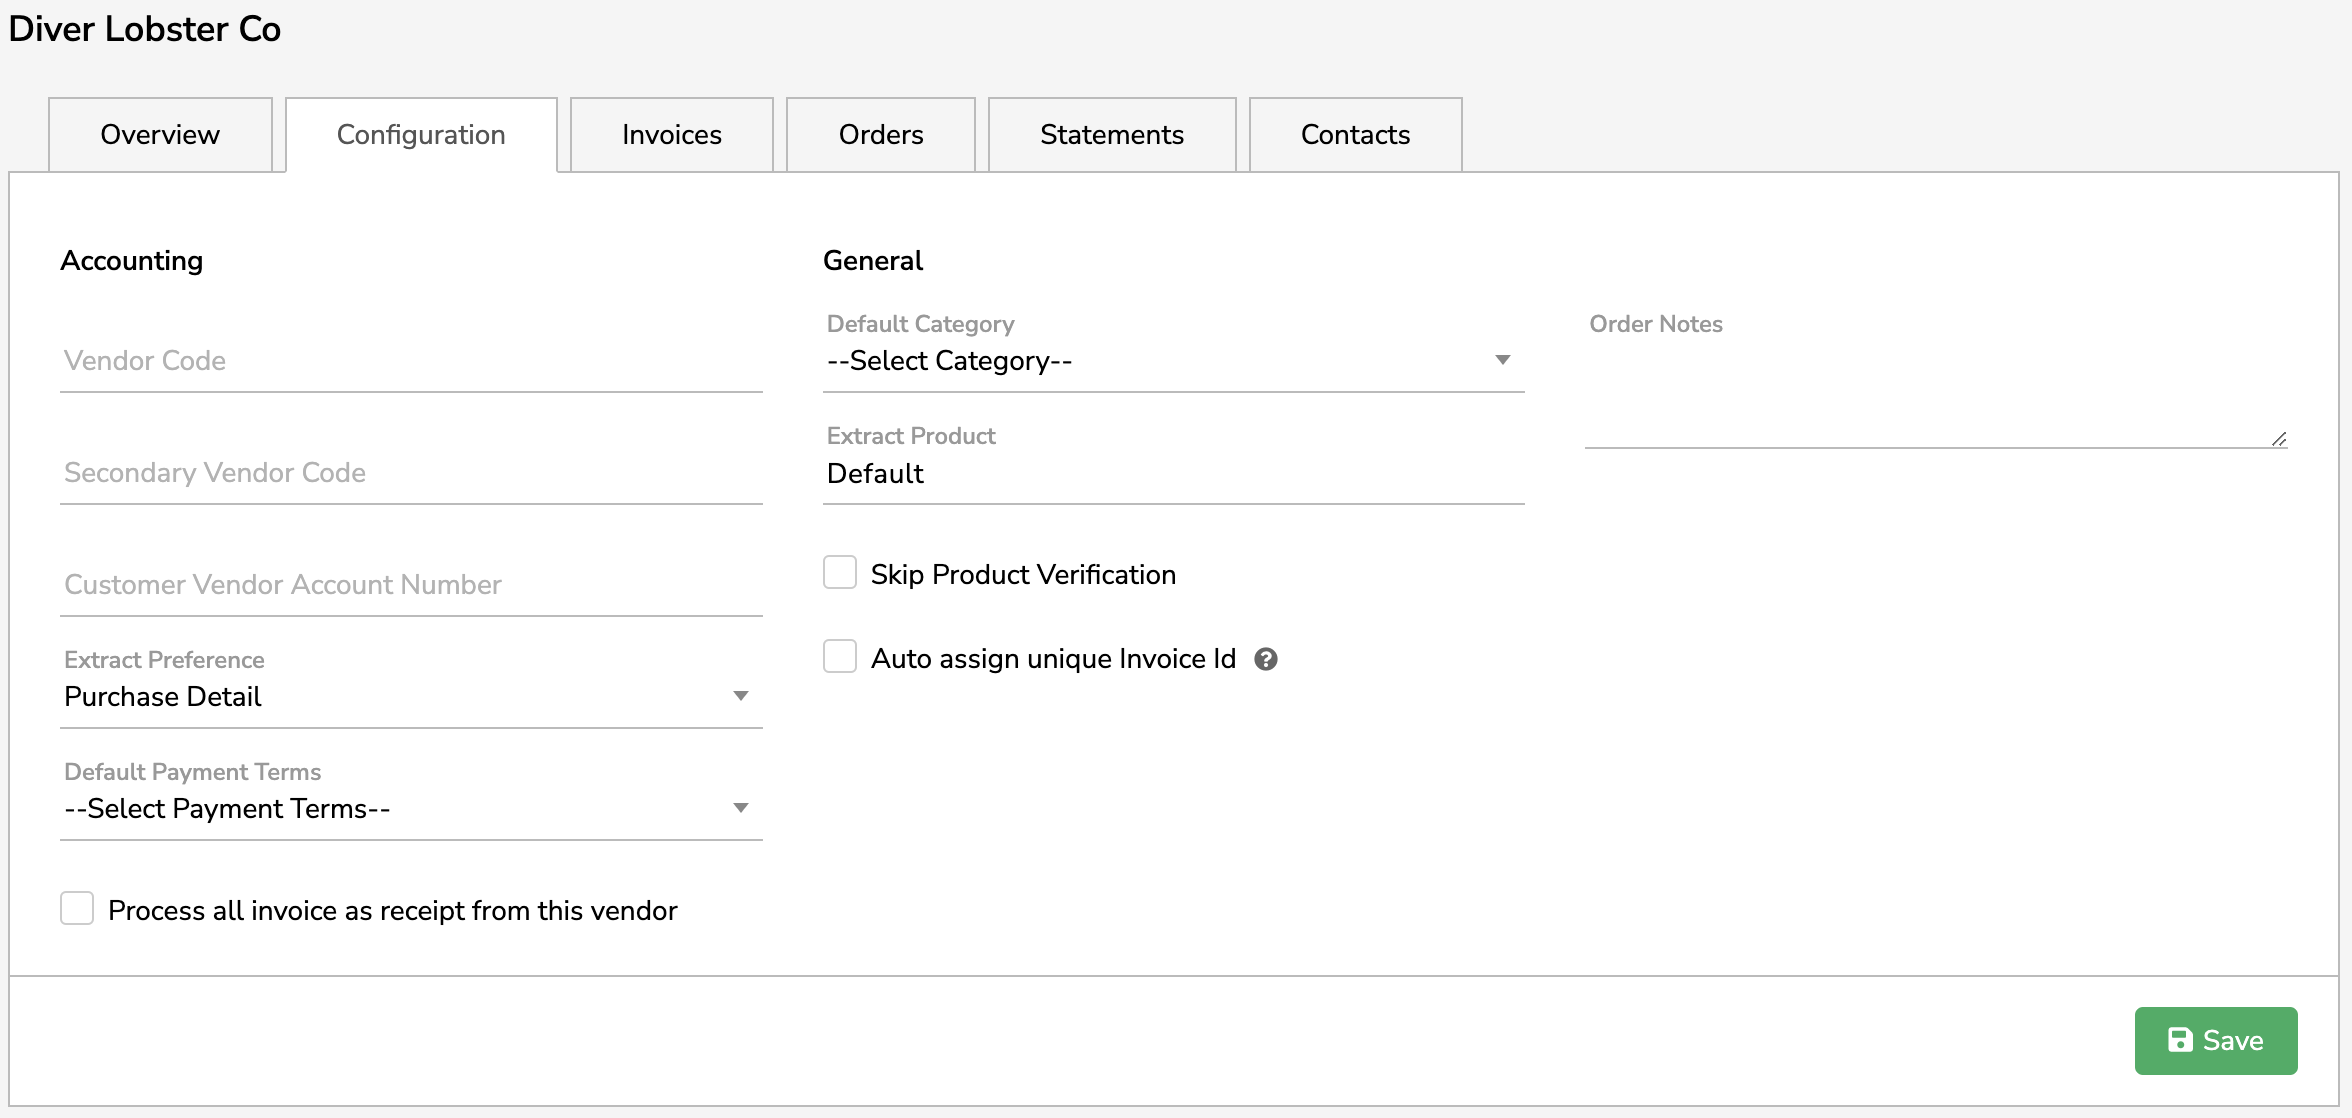
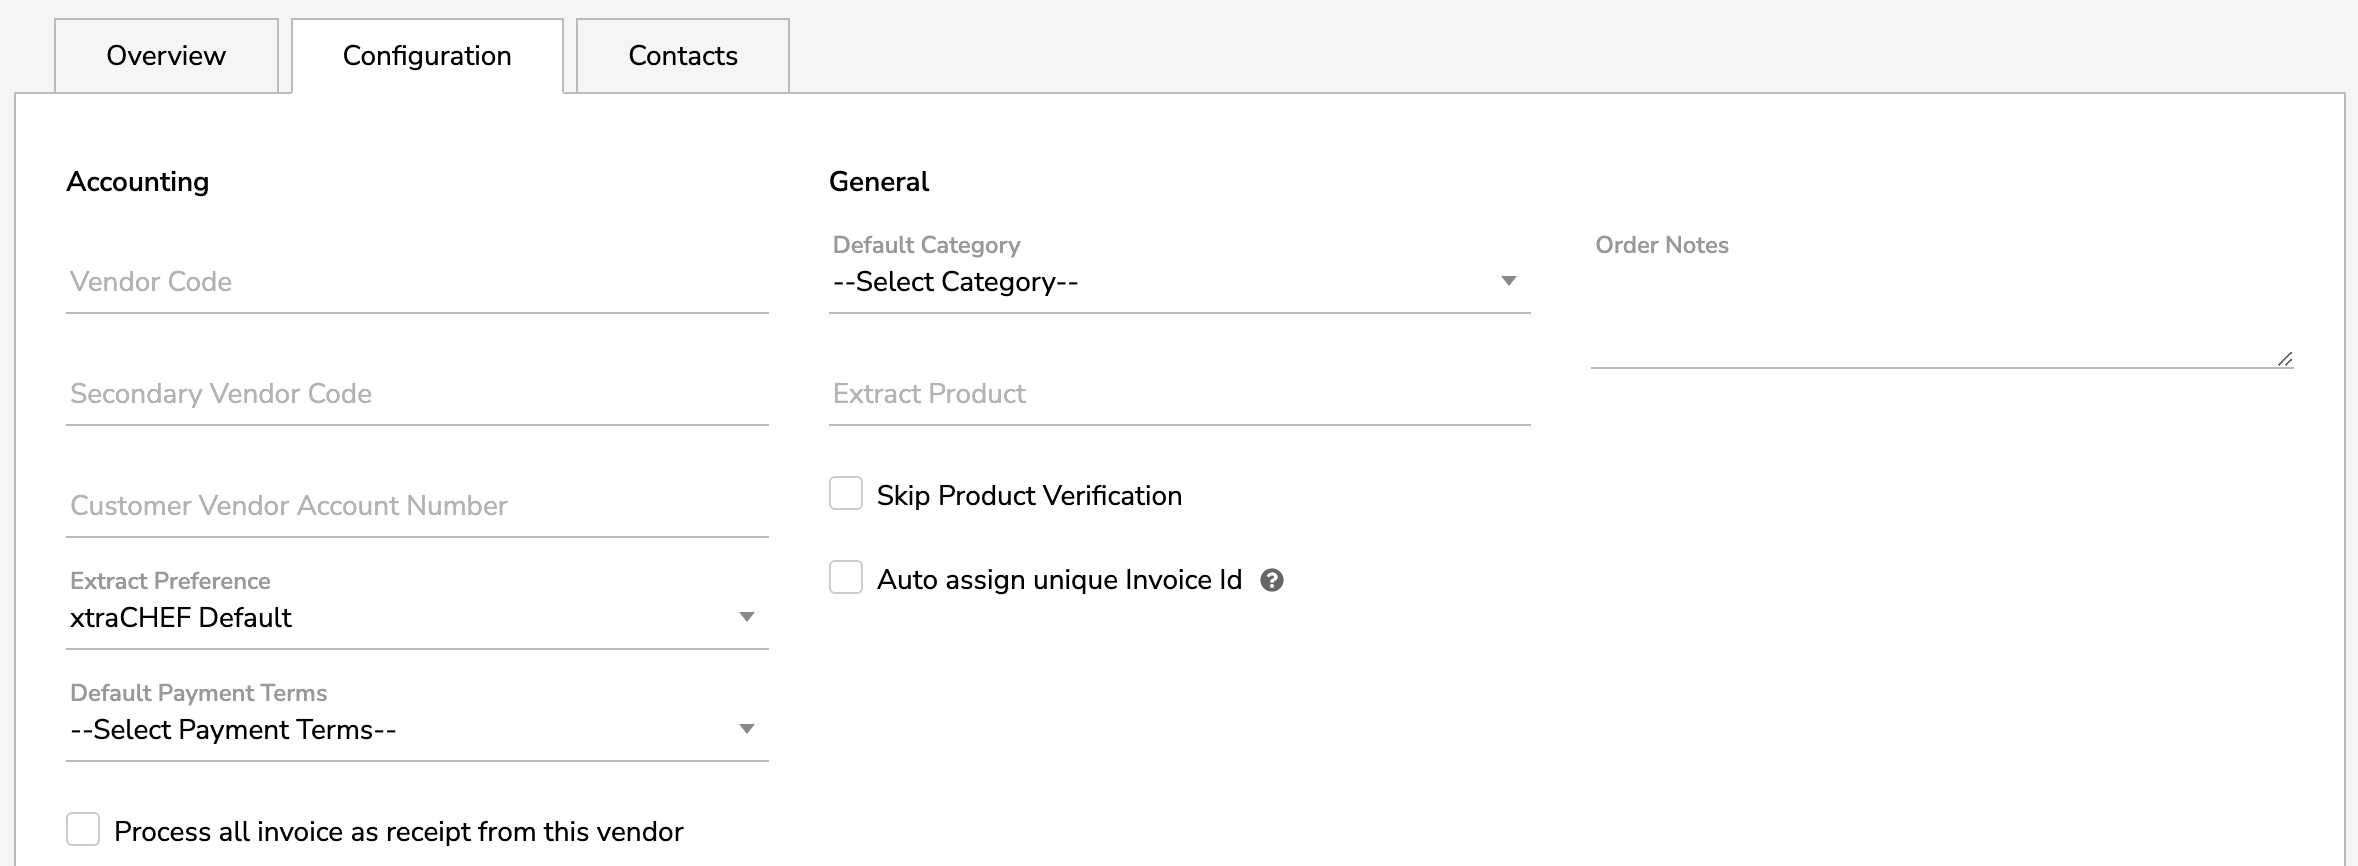
From here, select Configuration to set specific Accounting and General preferences, customizing how xtraCHEF processes your documents moving forward. Many of these configuration details can also be customized from your Vendor page itself.
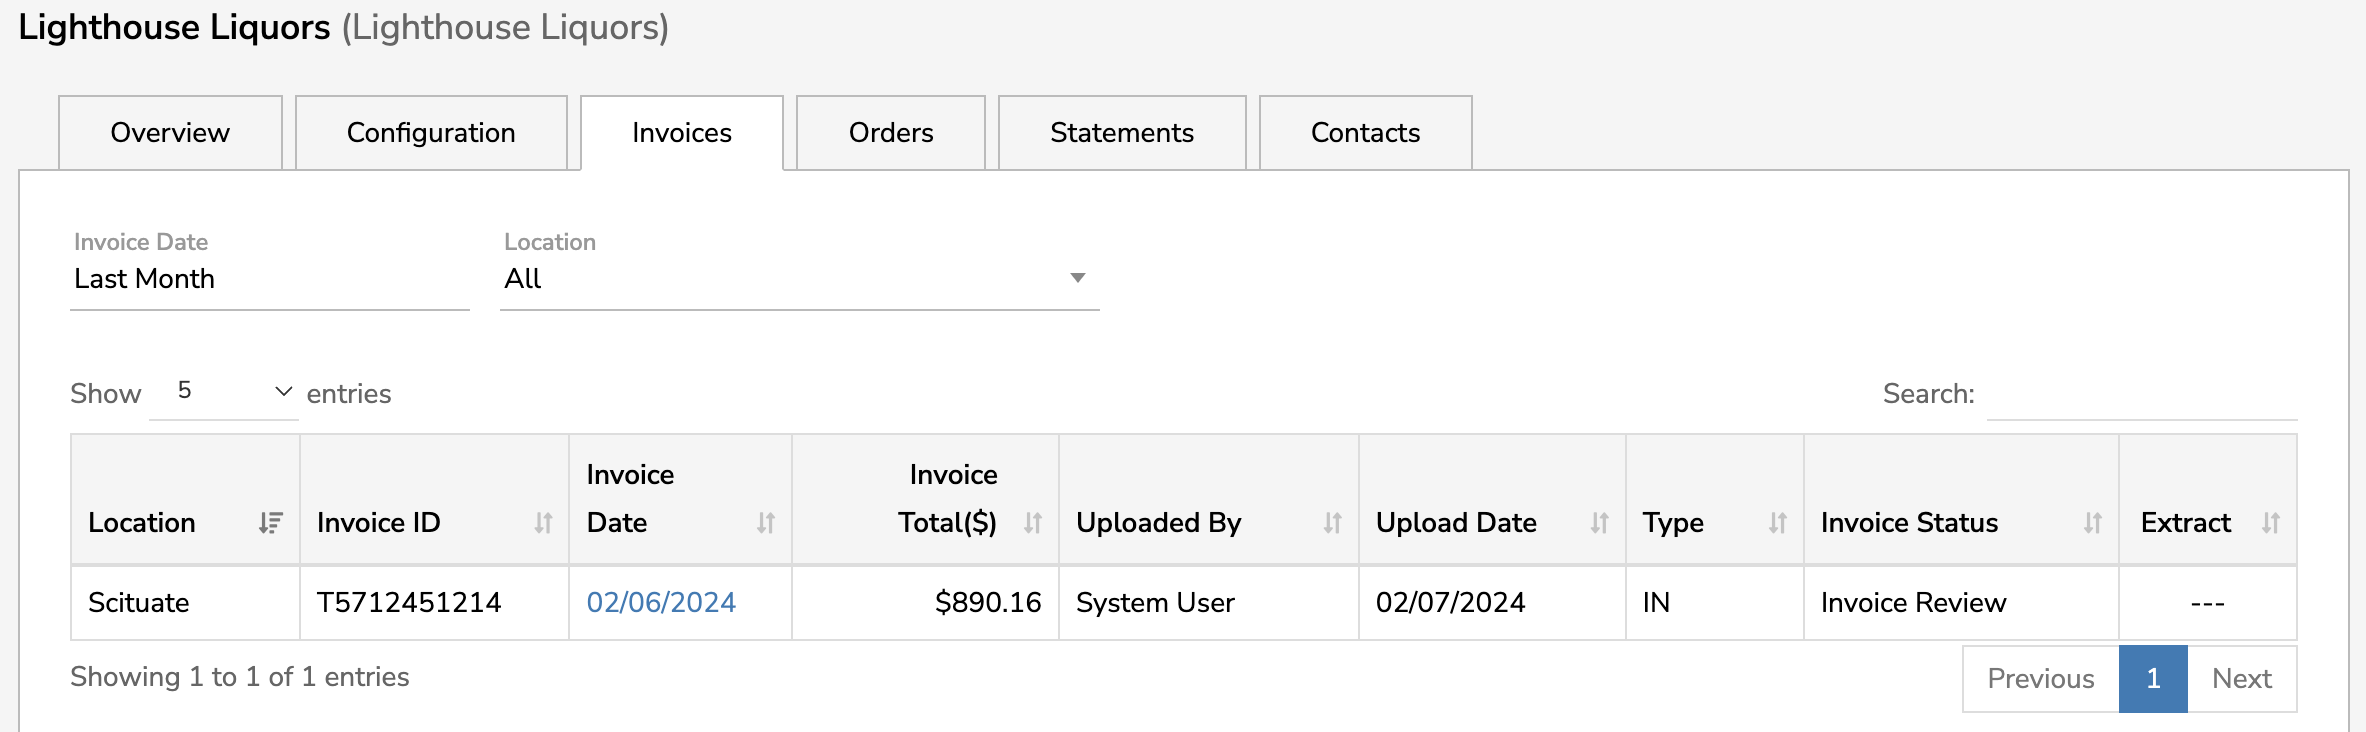
Select the Invoices tab to view recent invoices attributed to your selected vendor. Set the Invoice Date and Location to view more invoices.
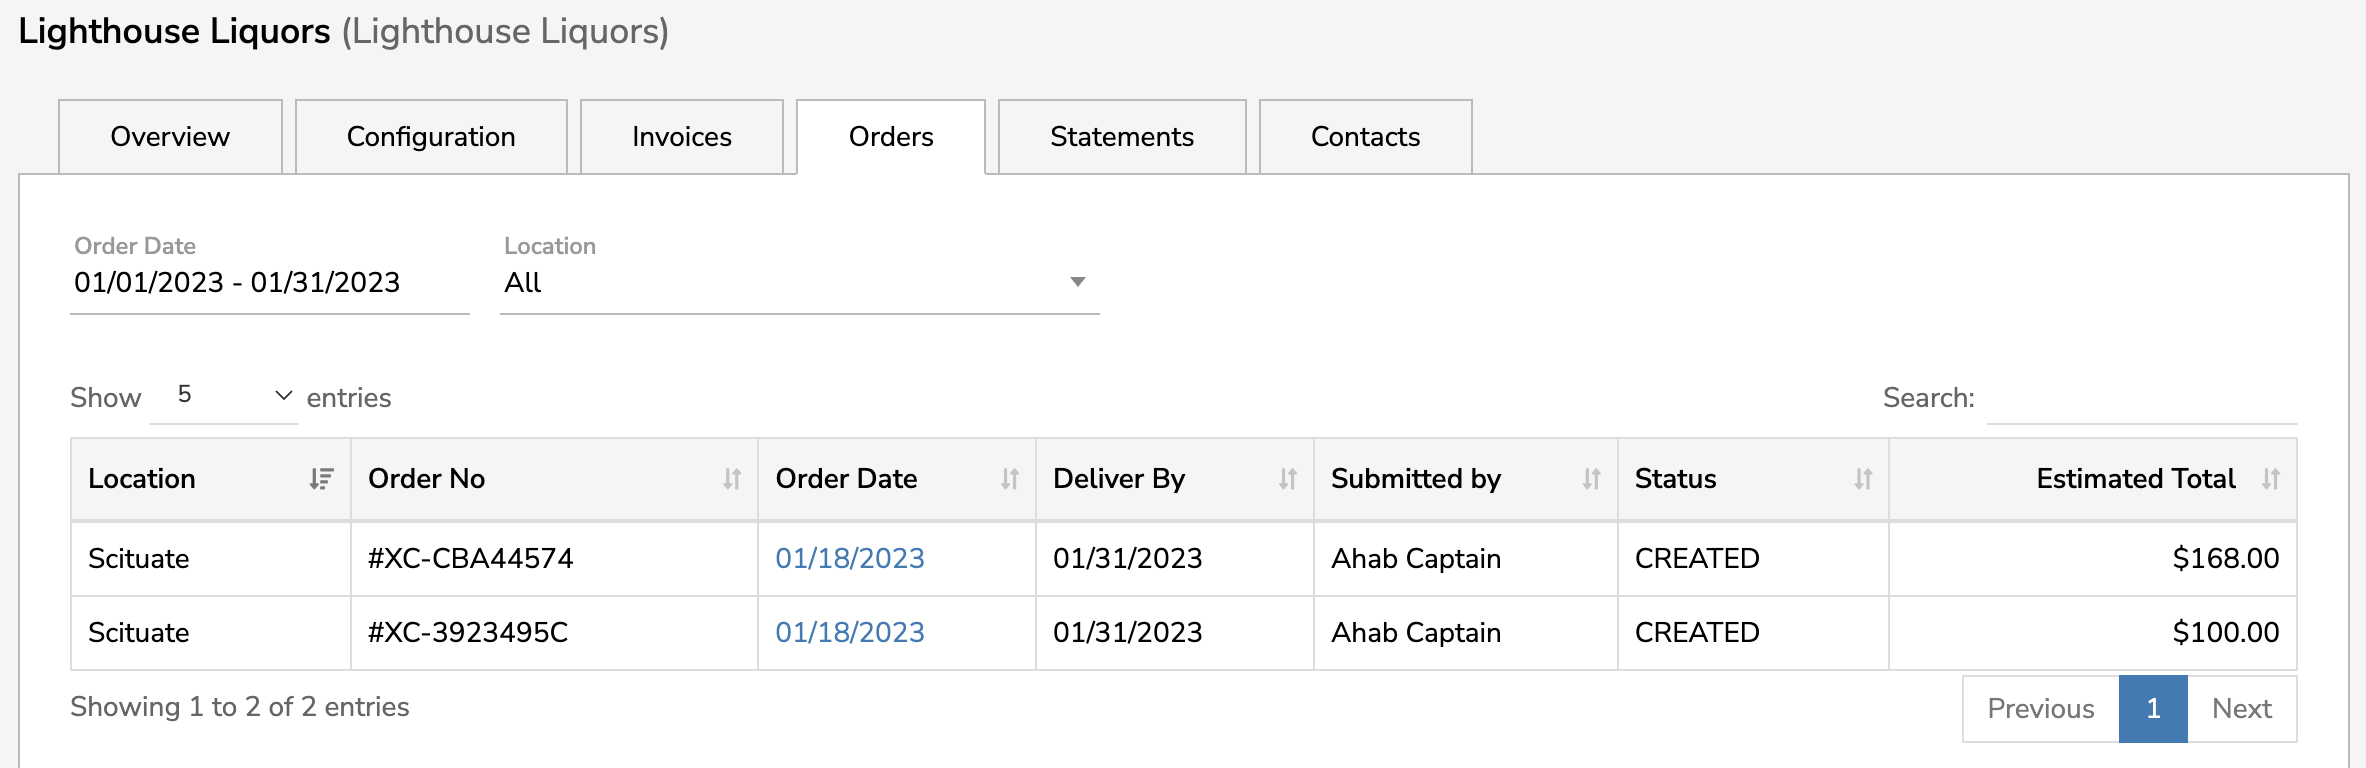
Similarly, select the Orders tab to see recent orders placed in xtraCHEF that are attributed to this vendor. Set the Invoice Date and Location to view more orders.
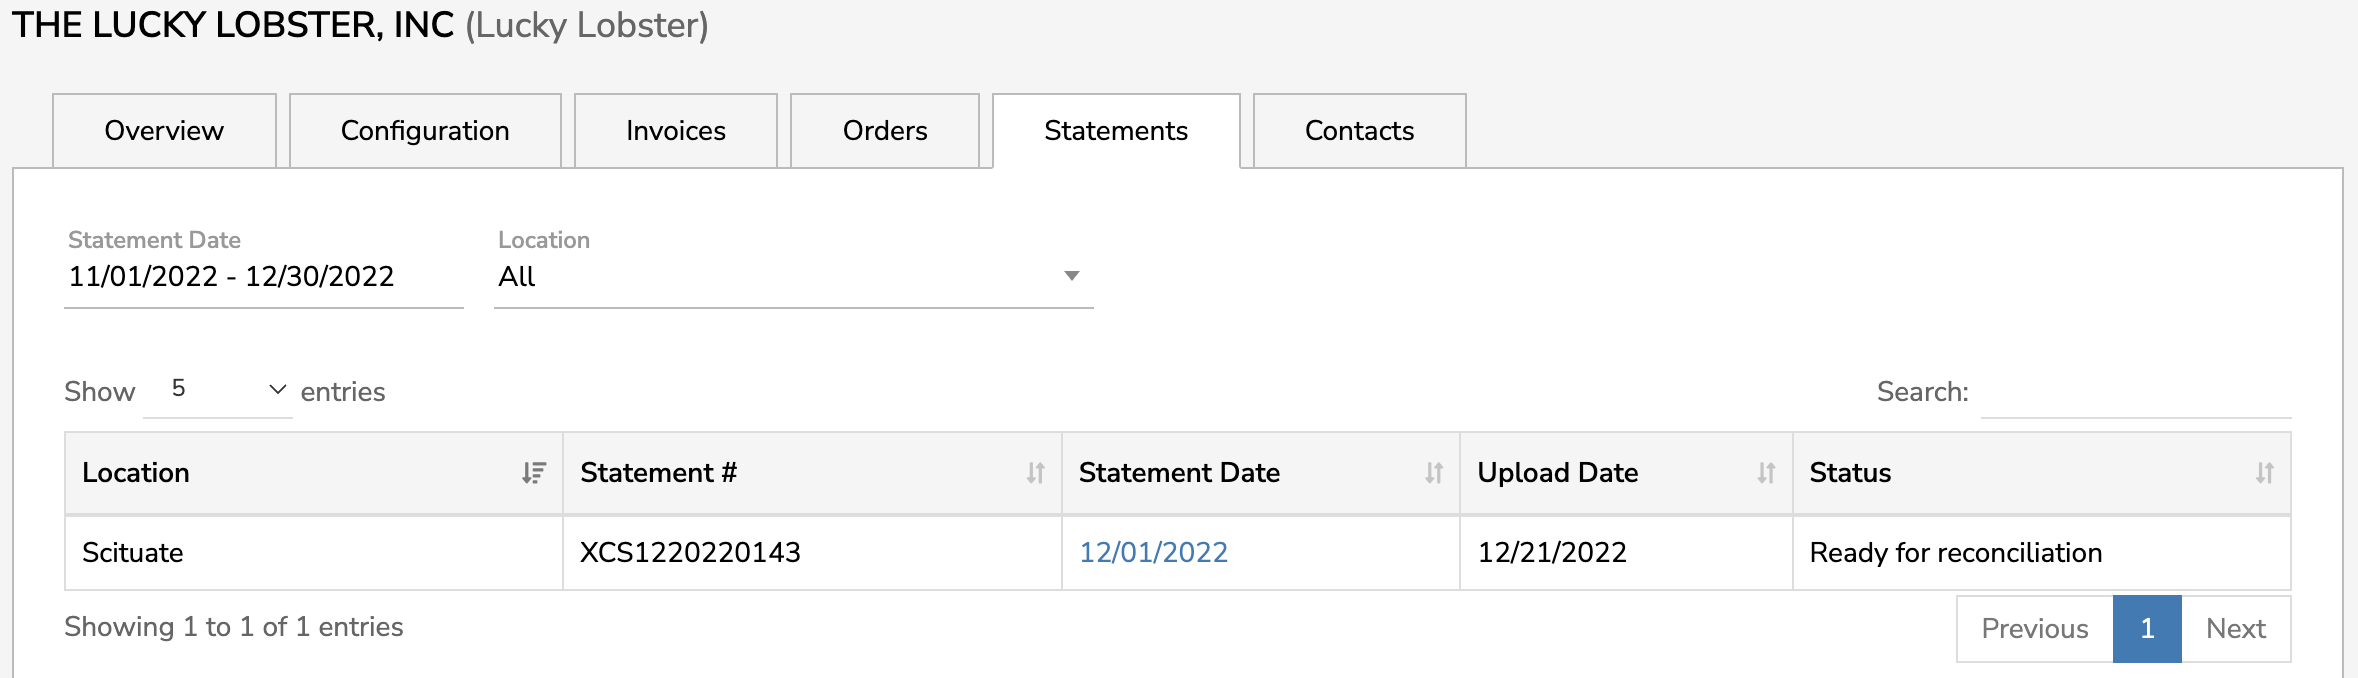
If you use xtraCHEF Pro, the next tab you'll see is the Statements tab. Statements may list invoices or invoice items, but they do not require payment.
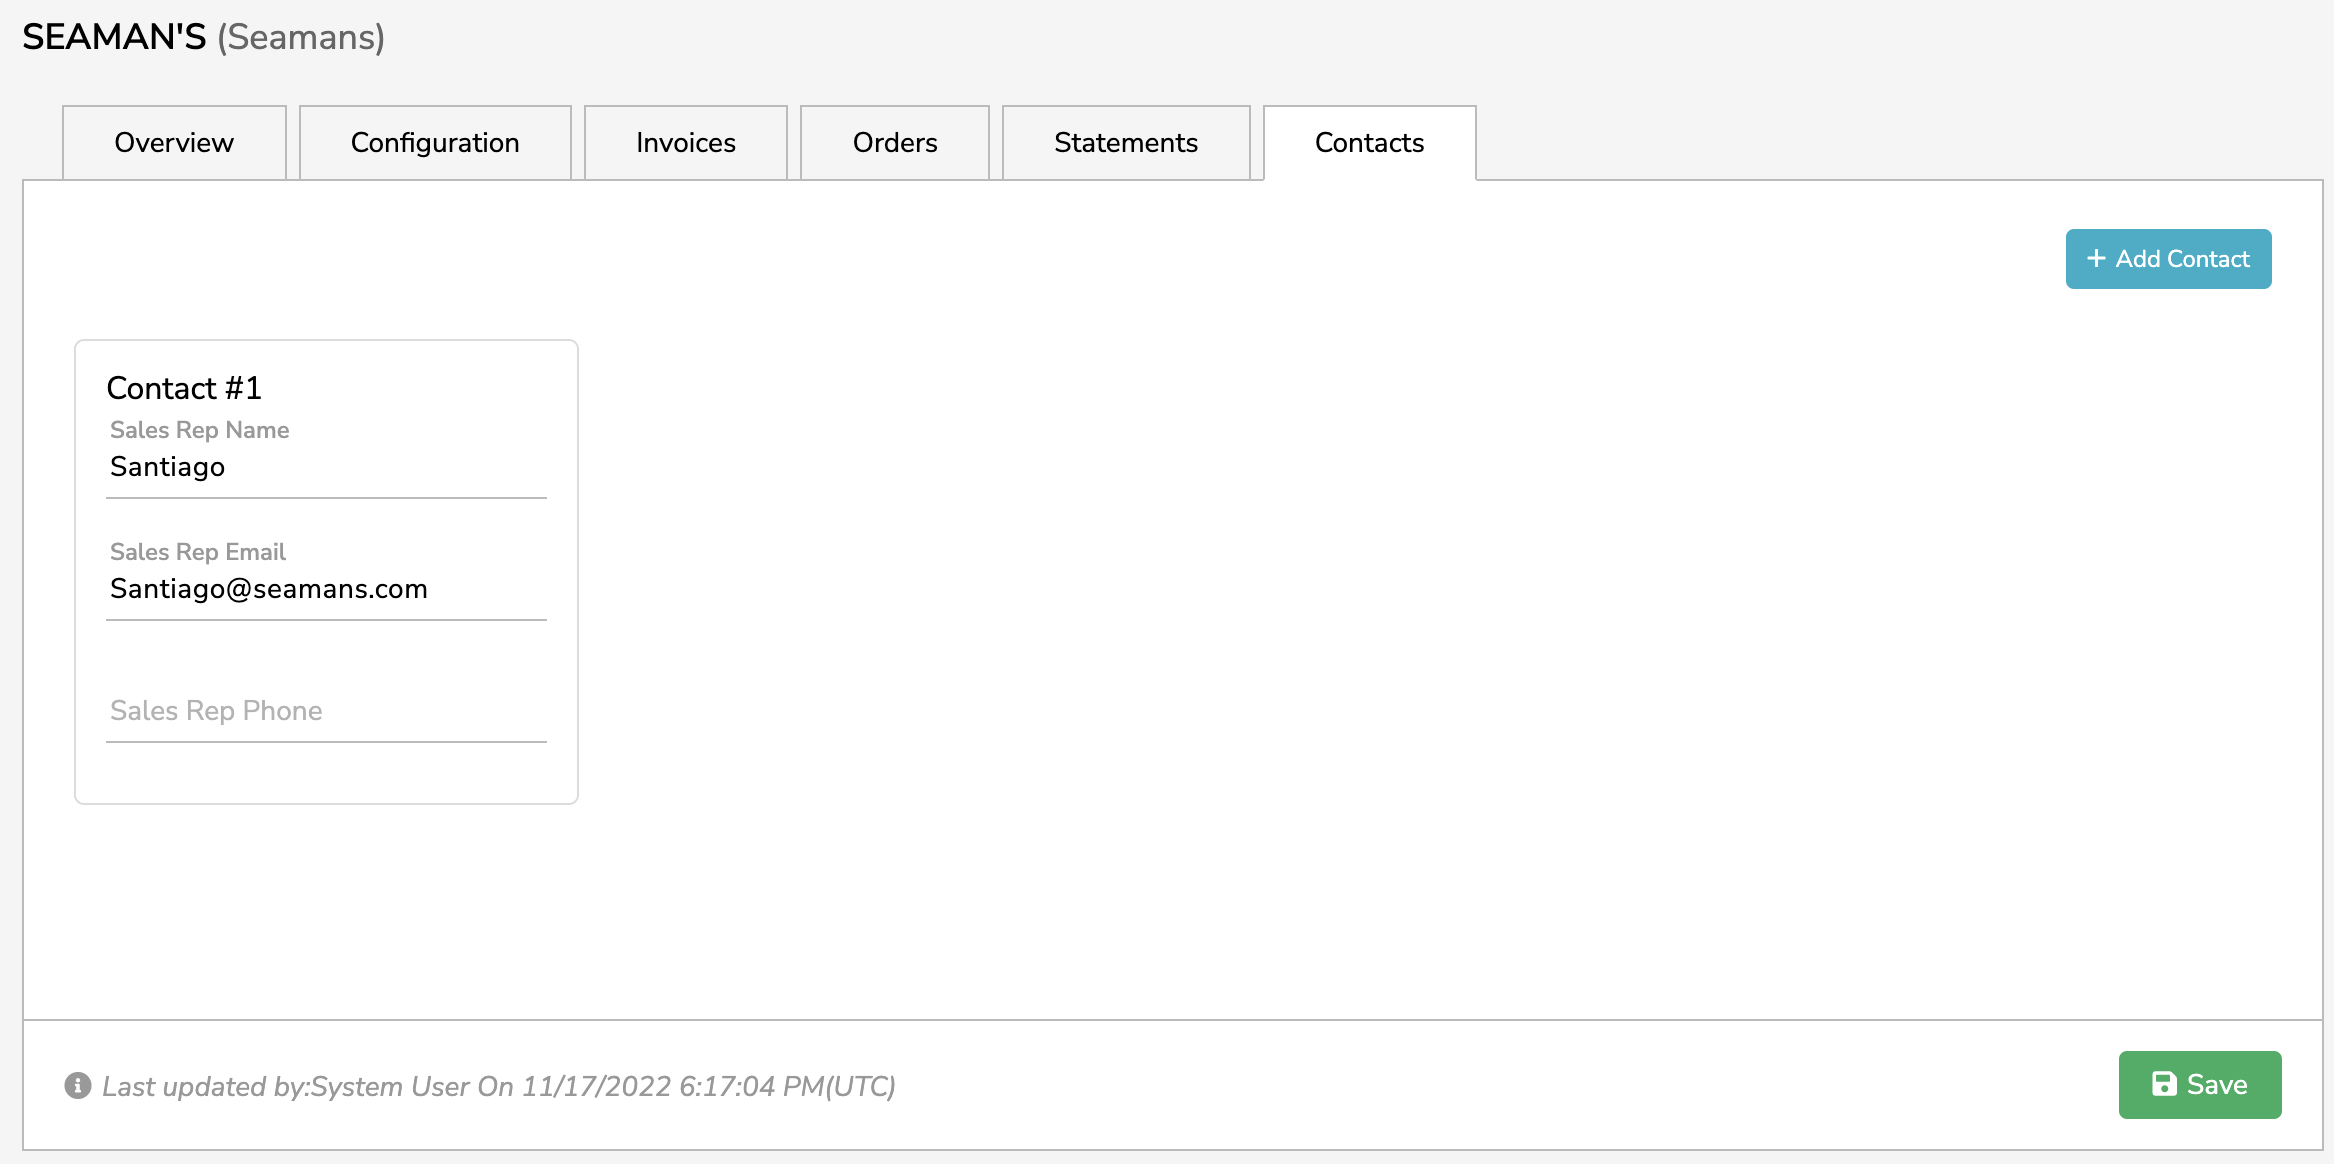
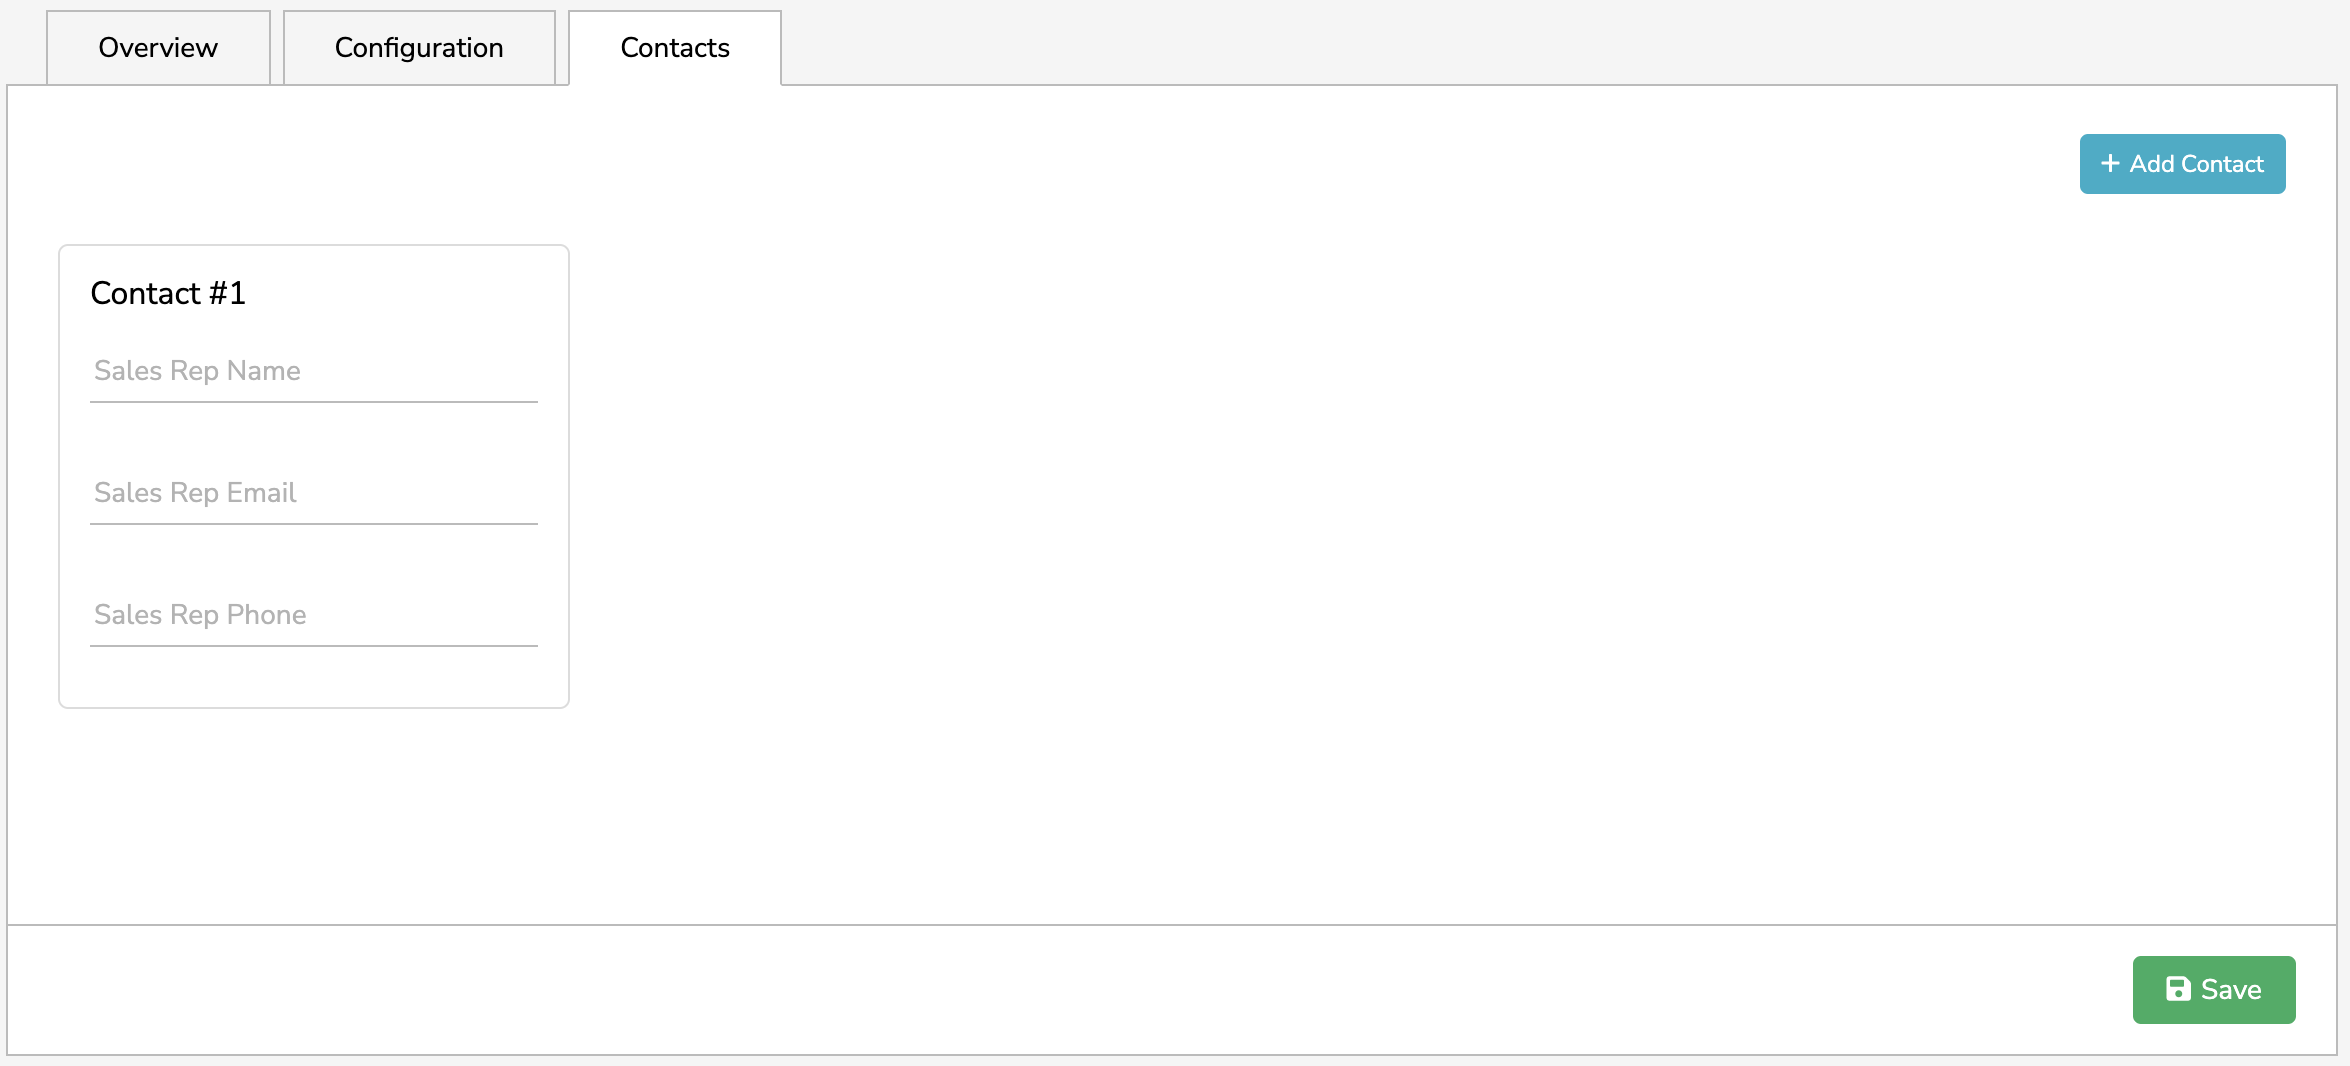
Lastly, under the Contacts tab, you can add or edit contact information for your selected vendor. Your Contacts information set's the framework for xtraCHEF's Create Orders function and allows you to email order PDFs directly to your point of contact with the vendor.
Vendor Code
You can quickly edit your Vendor Code from the Vendor Hub itself. To do this, select the space underneath your vendor code column and type in your vendor code.
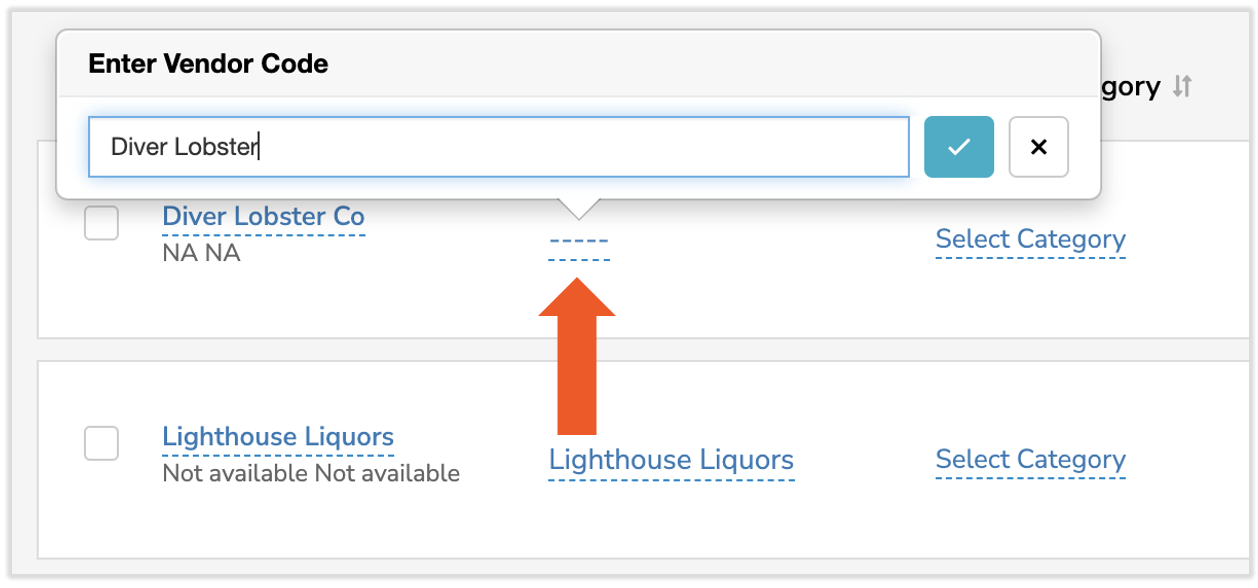
In xtraCHEF, your Vendor Code is the vendor name you utilize for accounting purposes. Vendor codes ensure accuracy should your vendor's name differ on any invoices, receipts, or documents from what your accounting system may recognize.
Note: If you sync invoices with your accounting, your vendor code should be an exact match with the vendor name used in your accounting system. Capitalization, punctuation, and spacing should be observed to ensure invoices extract properly and align with your accounting.
Back to top
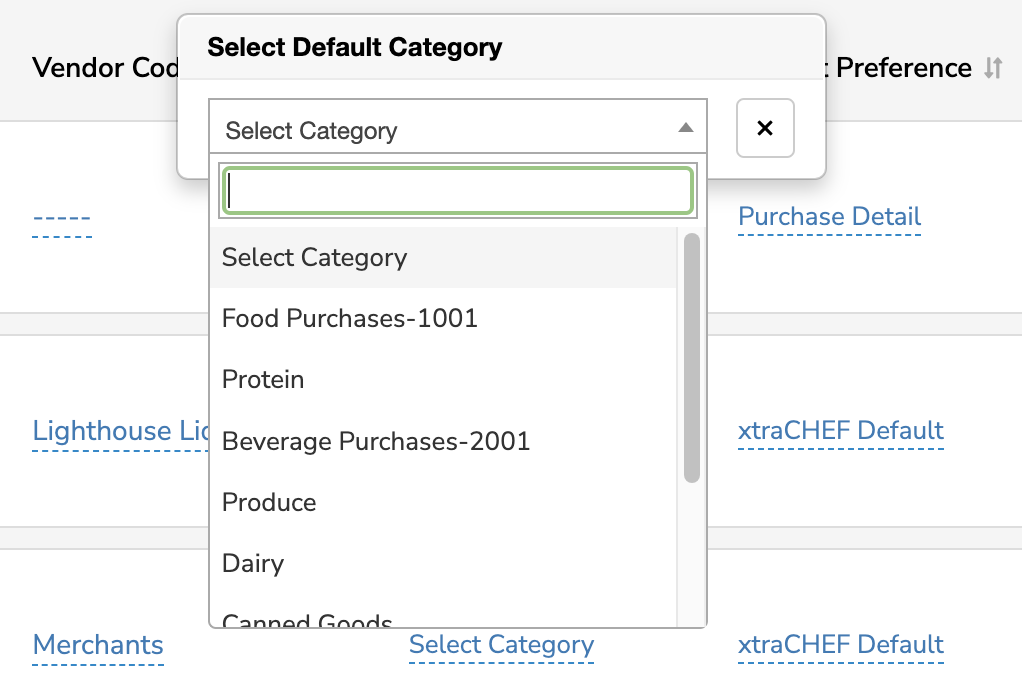
Default Category
From your Vendor Hub, you can also assign a Default Category. Setting a default category will attribute all future purchases and invoices from the corresponding vendor to the selected GL code or custom category. To do this, select the space under your Default Category column. You'll want to revisit this if you think the automatic mapping of vendors to invoices is incorrect.
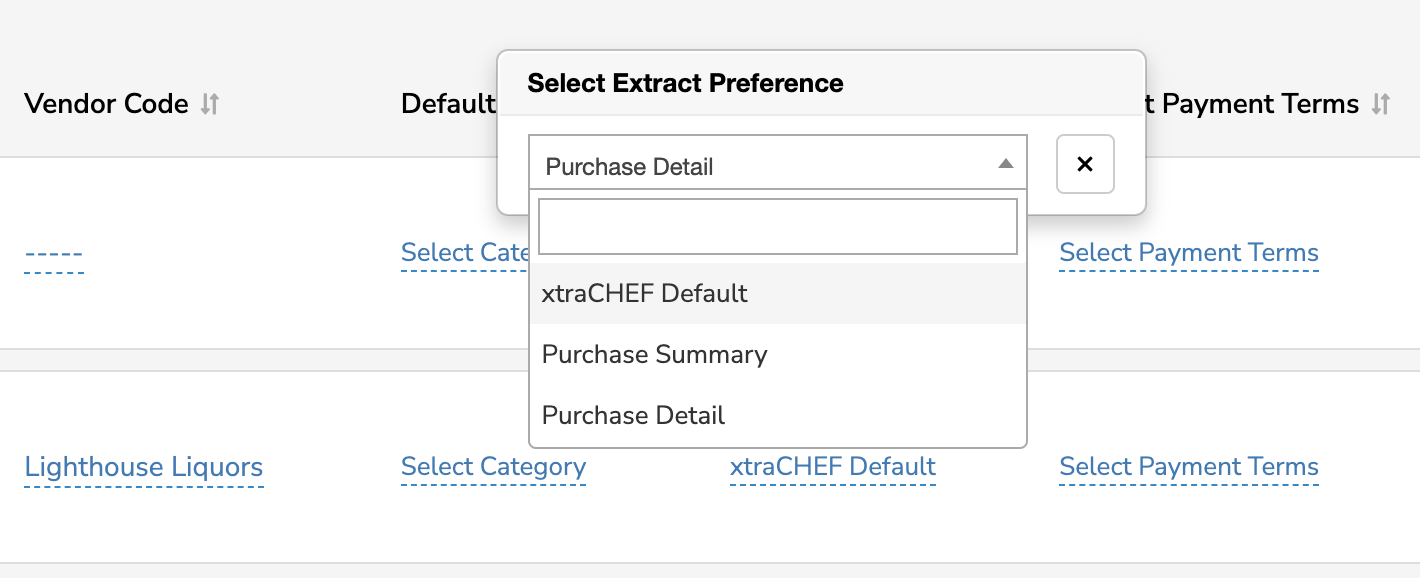
Extract Preference
Extract preference can also be customized here on a by-vendor basis. To assign this rule, select the space in the Extract Preference column and choose the option that best fits your vendor. You have three options:
- xtraCHEF Default: xtraCHEF will process documents on a by-invoice basis, either by Purchase Detail or Purchase Summary.
- Purchase Detail: Line detail is captured from all invoices for the vendor.
- Purchase Summary: Only invoice summary information is captured from all invoices for the vendor.
Payment Terms
Payment Terms are used in instances where you have agreed to pay a vendor within a certain time frame or upon delivery. If you utilize payment terms in your accounting system, you may sync these and customize this vendor setting by selecting the space underneath the Payment Terms column.
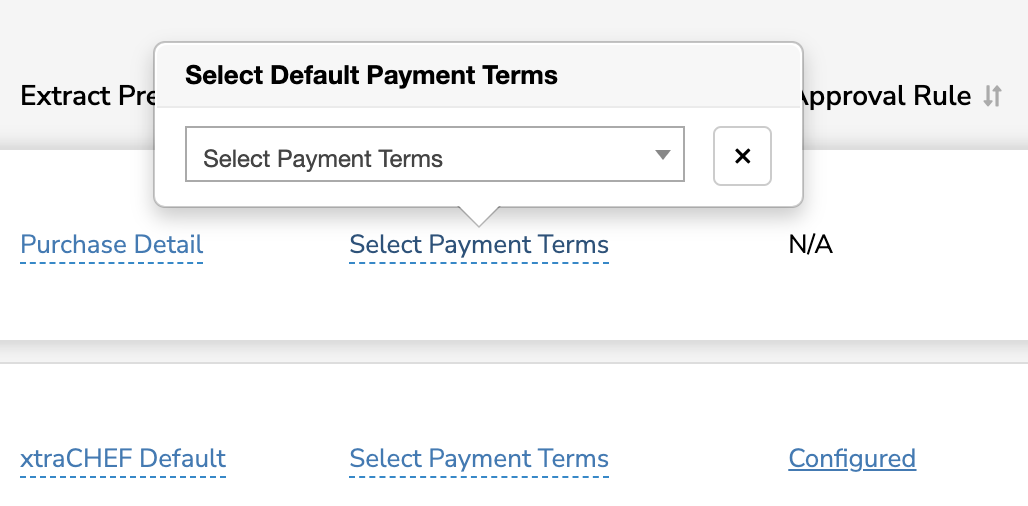
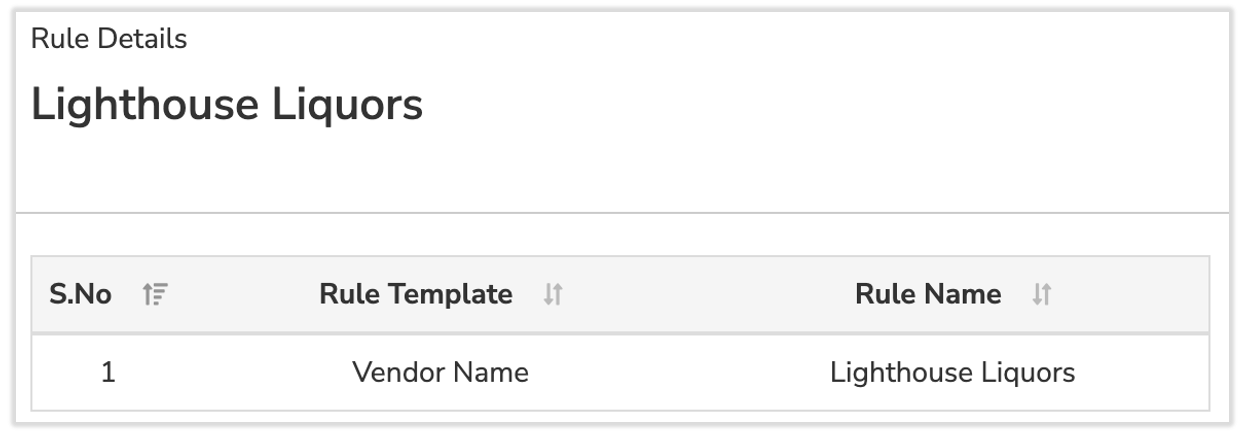
Approval Rule
Your Approval Rule column will indicate if you have created any approval rules that apply to a specific vendor. If the column has a Configured link, select it to view the approval rule.
By default, no approval rules will be configured. To learn more about establishing approval rules, check out xtraCHEF: Approvals.
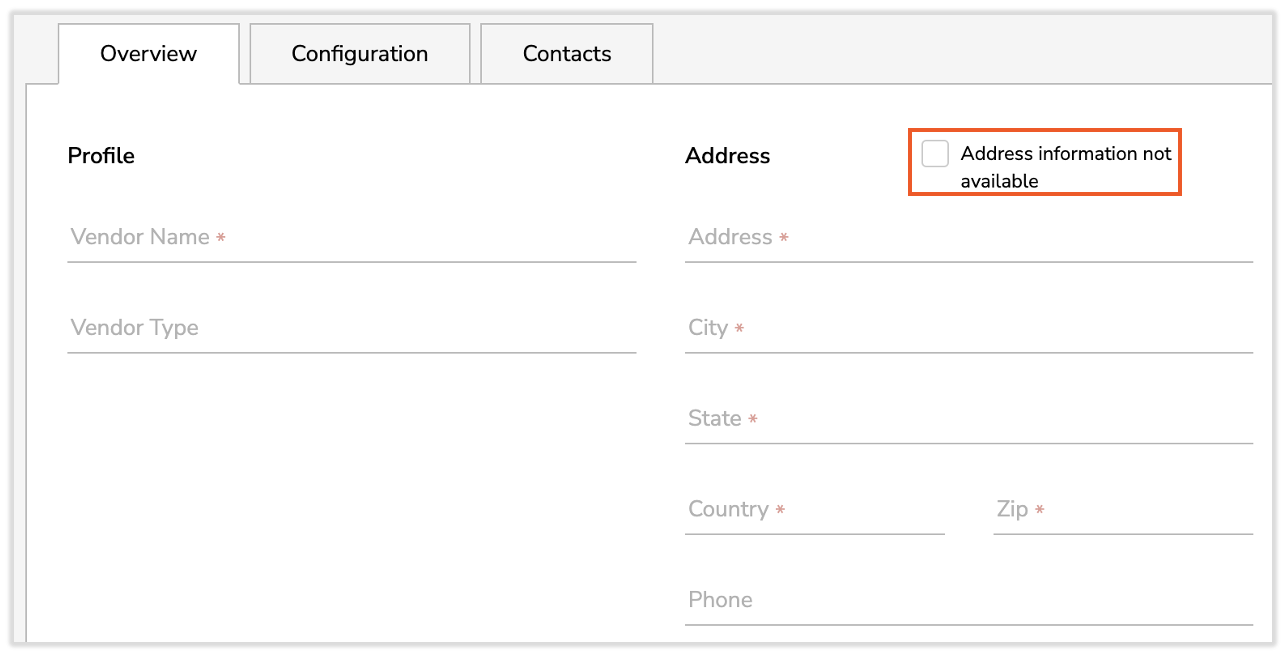
Add New Vendor
To add a new vendor to your Vendors page, select + Add Vendor. Fill out the Overview tab with your vendor's name, address, and other relevant information. Use the Address information not available checkbox when necessary and xtraCHEF will auto-fill the Address fields with "Not available."
Select the Configuration tab to add detailed payment and invoicing information such as vendor code, category, payment terms, and more.
If you intend to place orders via xtraCHEF's Order function, you can add your sales representative and/or account manager information to the Contacts tab for easy future reference. select the + Add Contact button to create additional contacts for this vendor.
Select Save when you're finished and your new vendor will automatically be added.
Back to top