Nómina Toast: Configurar proveedores
Última actualización: 28 abr 2026, 4:21 p.m.
Un proveedor es una organización que acepta pagos en nombre de un cliente, normalmente para embargos, pero también para HSA y algunas opciones de jubilación.
Nómina Toast: Aspectos básicos del proveedor
Un proveedor es una empresa u organización que acepta pagos en nombre de un cliente. En Nómina Toast, los proveedores son organizaciones en las que el pago se envía desde la nómina mediante cheque o depósito directo. Los proveedores se utilizan con mayor frecuencia junto con los embargos porque las órdenes de embargo pueden dirigir los fondos para enviarlos a una agencia.
Si tu empresa recibe un nuevo pedido de embargo, el servicio de atención al cliente de Nómina Toast puede agregar los detalles de la cuenta de depósito directo o la dirección postal del cheque para manejar los pagos cuando se procesan en la nómina. Si en la nómina se retiene un embargo o una deducción de HSA (Cuenta de Ahorros Sanitarios) con un proveedor incluido, el monto se transferirá directamente al proveedor.
Ejemplos comunes de proveedores incluyen agencias de manutención de niños, tribunales, abogados, agencias federales, algunos programas de jubilación y organizaciones de la HSA. Sin embargo:
- Nómina Toast no envía pagos médicos a proveedores en nombre de nuestros clientes.
- Los proveedores o programas estatales 401(k) (como el plan de jubilación obligatorio estatal de CalSavers) no se pueden configurar como proveedores a través de Nómina Toast.
Nómina Toast: Configurar un proveedor
| Si recibiste una orden de embargo de manutención de un empleado activo en tu negocio, te recomendamos que envíes la orden de embargo completa a nuestro equipo de atención al cliente para que podamos configurarla en tu nombre. Envíanos todo el pedido a través del botón de chat azul en la esquina inferior derecha de cualquier página de Nómina Toast. |
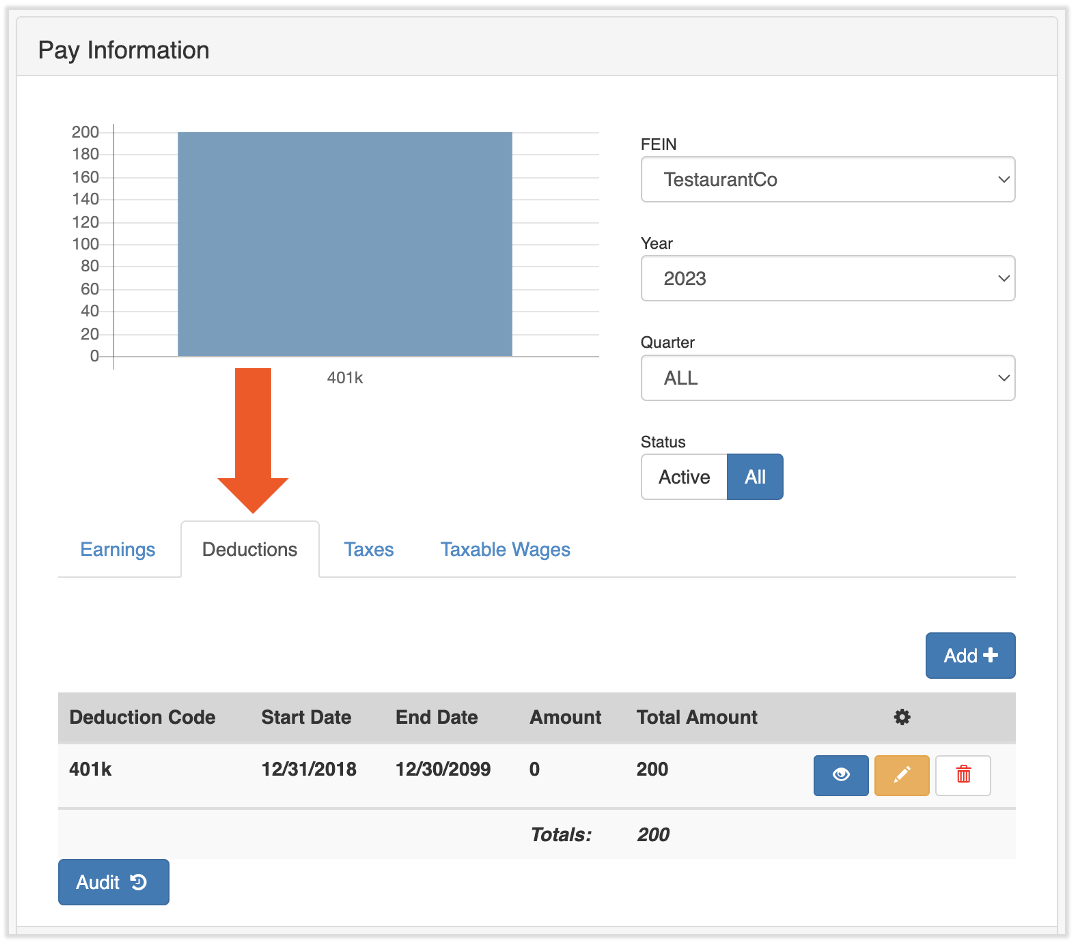
- Para configurar un proveedor, ve a Configuración > Nómina > Proveedores.
- Selecciona Agregar+.
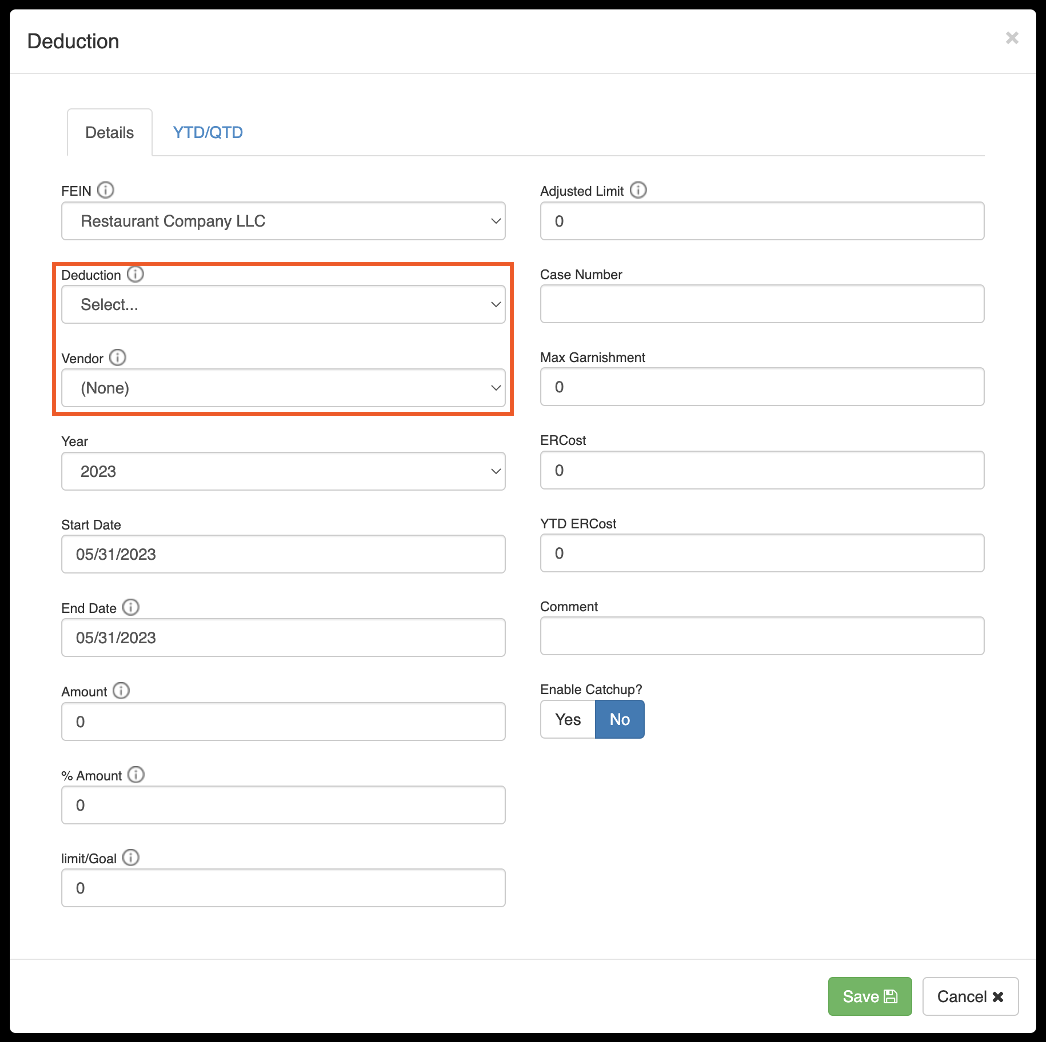
- En la página de configuración, agrega los siguientes campos para el proveedor:
- Nombre: Nombre de la agencia que recibirá los fondos.
- Dirección: Solo se necesita en el caso de que un cheque se imprima a la agencia. Si los fondos se envían mediante depósito directo, deja el campo de dirección en blanco.
- Ruta bancaria #/Cuenta bancaria #: Se necesita si los fondos se envían mediante depósito directo. Si se envía un cheque para los fondos, estos campos quedarán en blanco.
- Cuenta #: Si corresponde un número de cuenta, introdúcelo aquí.
- Pagar: Este es un campo importante que debe reflejar la información que se ingresó para el proveedor.
- Ninguno: Si no se deben enviar los fondos, se retendrán.
- Por cuenta: Si se ingresó una dirección para el proveedor y se debe imprimir un cheque físico y enviarlo a la agencia.
- Por depósito directo: Si se agregó un número de ruta y de cuenta arriba, esta selección debe realizarse para garantizar que los fondos fluyan a través de ACH (depósito directo).
- Tipo de cuenta: Esto se suele mantener al valor predeterminado de la cuenta
- Está activo: Este indicador solo debe elegirse después de que se haya configurado el proveedor.
- ¿Este es un proveedor de manutención infantil?: Debe marcarse como Sí si se debe incluir un número de caso con la cuenta. Esta marca garantizará que el número incluido en el número de caso se imprima en cualquier cuenta que se envíe a la agencia.
- Código FIPS: Este es un código de 5 dígitos que se usa para identificar correctamente los pagos de manutención de los hijos. Si un código FIPS (Federal Information Processing Standard) figura en la orden de manutención de los hijos, introdúcelo aquí.
- Cargar adjunto: Suele dejarse como múltiples adornos que pueden usar el mismo proveedor.
- Una vez que se hayan agregado los campos, selecciona Guardar en la parte inferior de la página.
Nómina Toast: Vincular una deducción a un proveedor
Una vez que se configura y activa un proveedor, se puede agregar dentro de un código de deducción (y vincularlo a ese código de deducción) para que los fondos retenidos se envíen directamente a una agencia o ubicación especificada. Si una deducción de empleado está vinculada a un proveedor, una vez que se procese la nómina, los fondos se enviarán a la agencia.
Nota: Si una deducción no está vinculada a un proveedor, pero se aplica a través de la nómina, no se generará un pago de cuenta o proveedor. En su lugar, serás responsable de remitir el pago a las agencias. Las deducciones no vinculadas a un proveedor indican que los fondos se dedujeron del empleado, pero no de tu cuenta para un proveedor. Por lo tanto, Nómina Toast no puede facilitar la remisión a un proveedor. Es importante seguir los pasos a continuación para vincular a un proveedor con la deducción.
- Ve al perfil del empleado y selecciona Recurrente > Deducciones.
- Selecciona Agregar+ y, luego, el código de deducción en el menú desplegable de deducciones.
- En el menú desplegable Proveedor, selecciona el proveedor apropiado al que se deben enviar los fondos para esta deducción. El proveedor también aparecerá en el informe de proveedores una vez que se haya procesado la nómina.
- Agrega cualquier otra información aplicable (p. ej., Monto, Límite ajustado, Número de caso, etc.). Usa los botones de información junto a diferentes campos para obtener más información. Si tienes más preguntas, comunícate con nosotros a través del punto de chat azul en la esquina inferior derecha de cualquier página de Nómina Toast.
- Selecciona Guardarpara finalizar.
- La deducción llegará a la nómina y, una vez procesada, Nómina Toast enviará automáticamente los fondos al proveedor mediante cheque o depósito directo, dependiendo del tipo de pago.
Este contenido se publica con fines informativos y no tiene como propósito brindar asesoramiento legal, fiscal ni referido a recursos humanos, ni constituye ningún otro tipo de recomendación profesional. Para recibir asesoramiento, comunícate con un abogado u otro profesional.