翻译仅供参考。您与 Toast 签署的任何法律协议(包括但不限于《商户协议》和《终端用户许可协议》),其订立语言可能不同于以上页面所使用的语言,无论是否提供本页面其他语言的译文,均应以您所签署的协议条款为准
Toast 厨房打印机快速入门指南
上次更新时间:2026年5月14日 12:39
使用本指南快速启动您的新Toast厨房打印机。
Toast 厨房打印机概述
Toast 厨房打印机正面视图
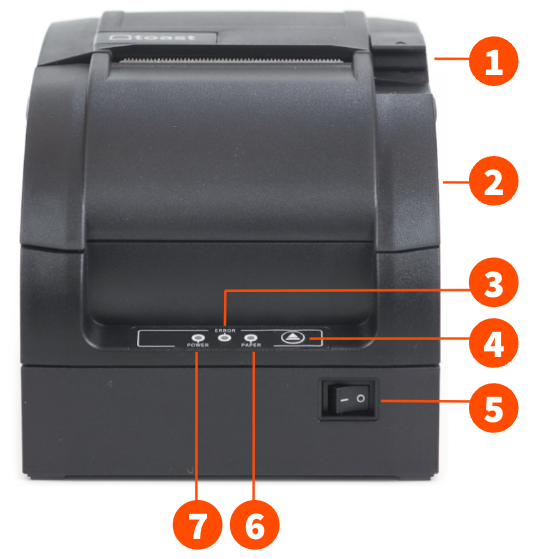
- 打开锁扣(以添加纸张和更换墨带)
- 前盖
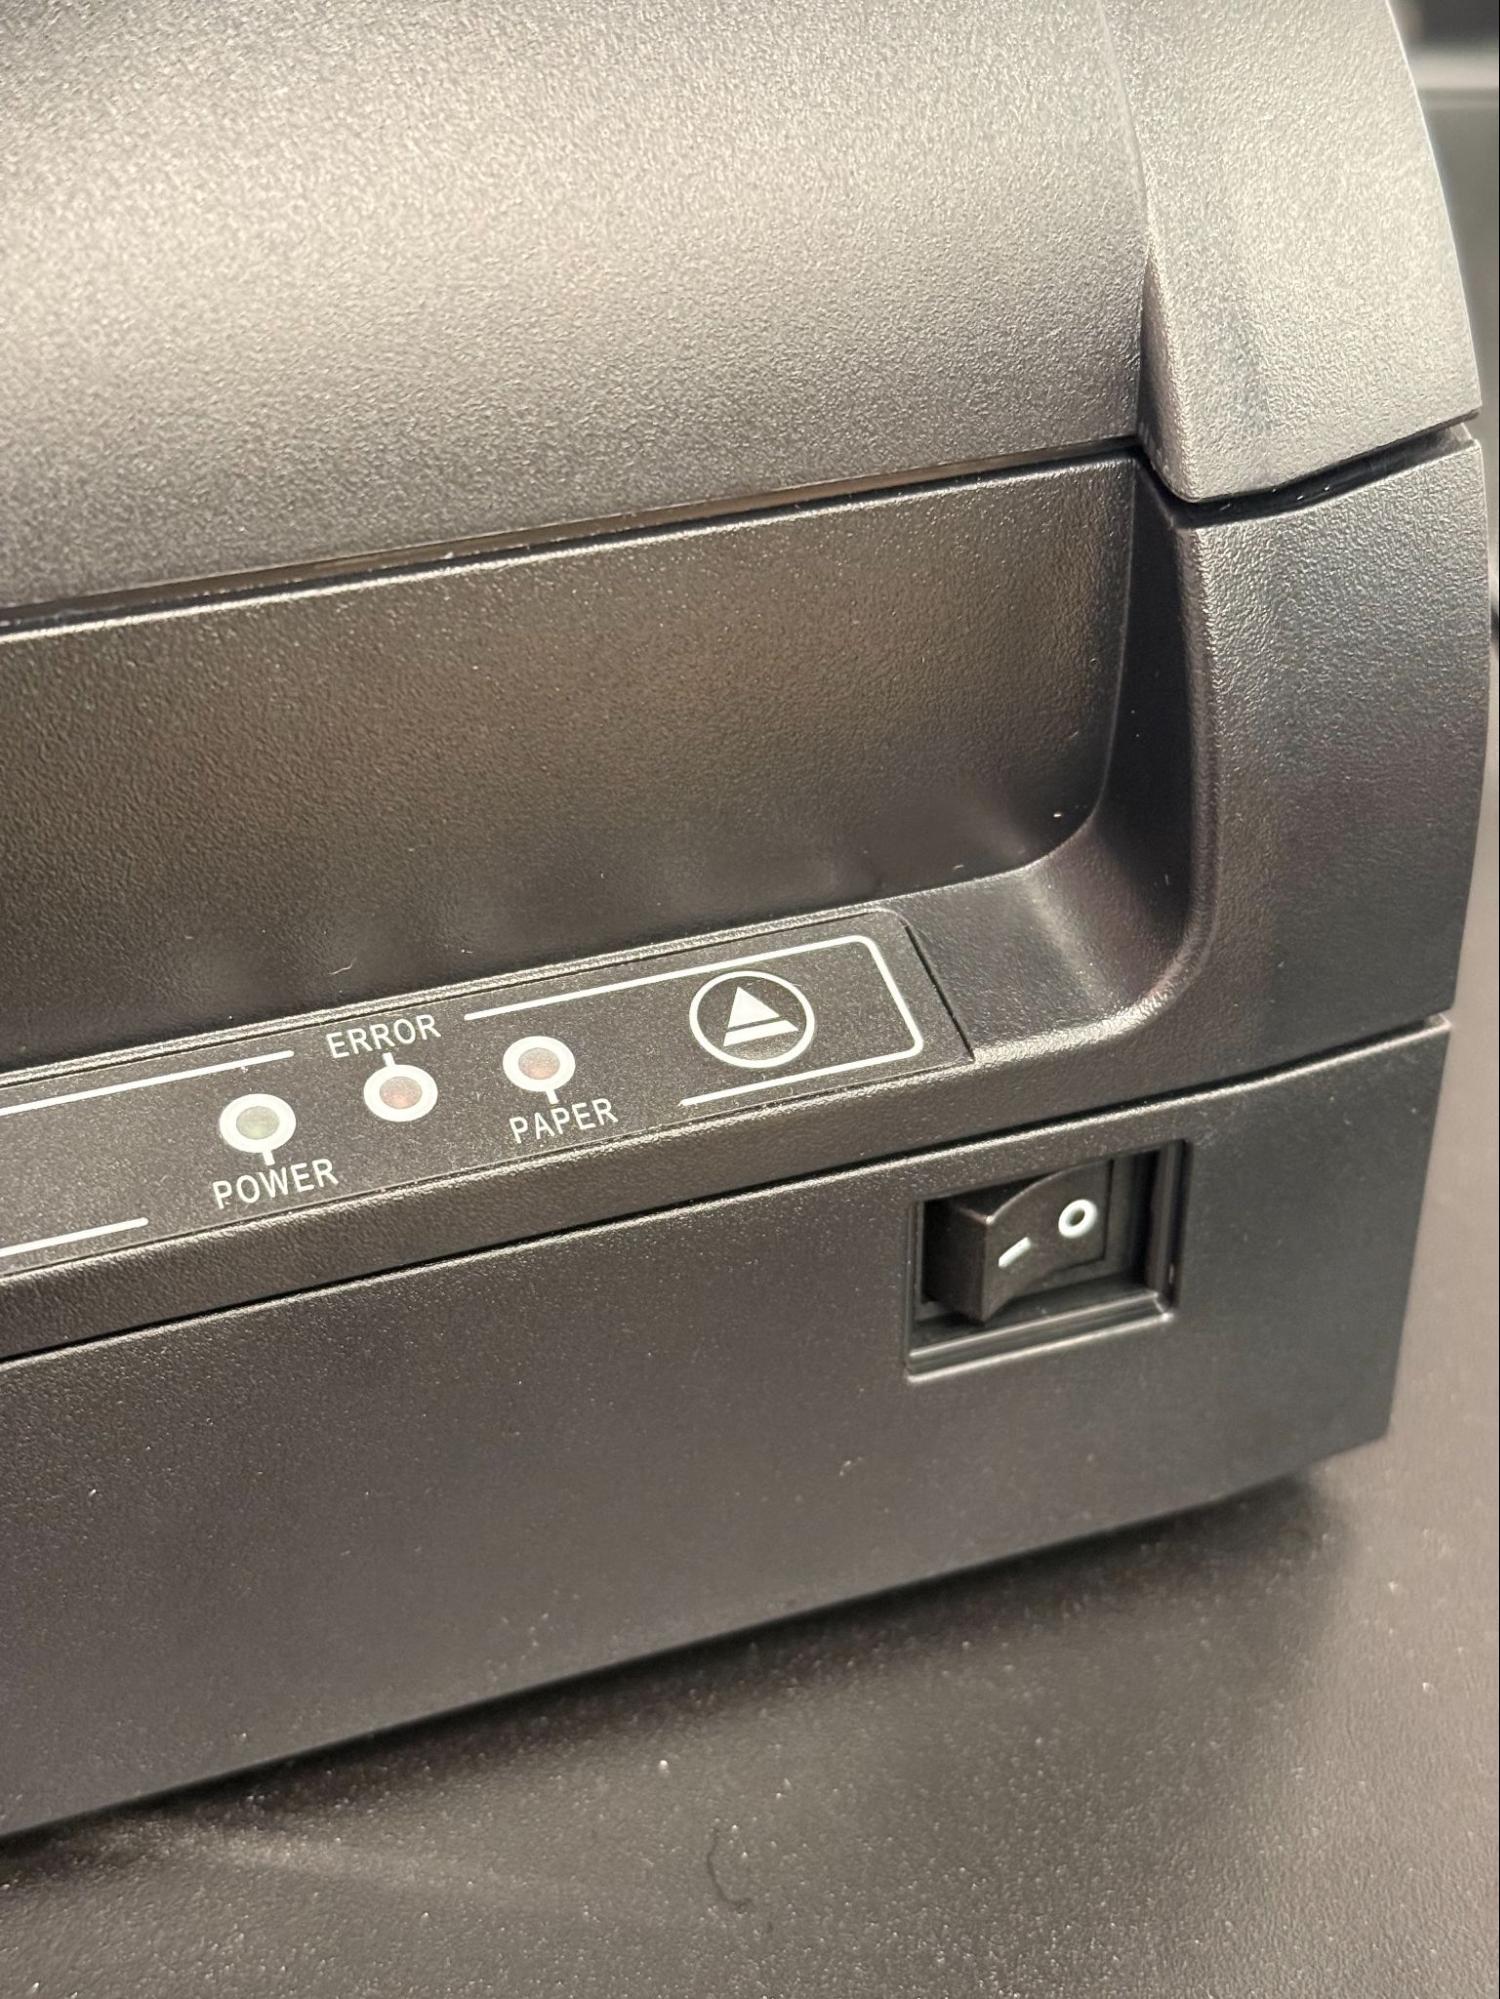
- 错误指示灯
- 进纸按钮
- 电源按钮
- 纸张错误指示灯
- 电源指示灯
Toast 厨房打印机电源按钮盖
Toast 厨房打印机的电源按钮盖有助于防止区域被污垢或意外按压。注意:电源按钮盖是可拆卸的。
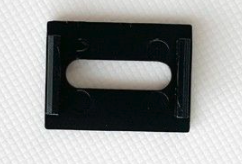
没有电源按钮盖的 Toast 厨房打印机:
Toast Kitchen Printer带电源按钮盖:

Toast Kitchen Printer的背面和底部视图
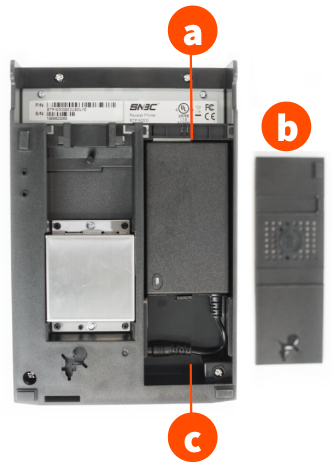
- 电源块
- 覆盖
- 电源块电缆
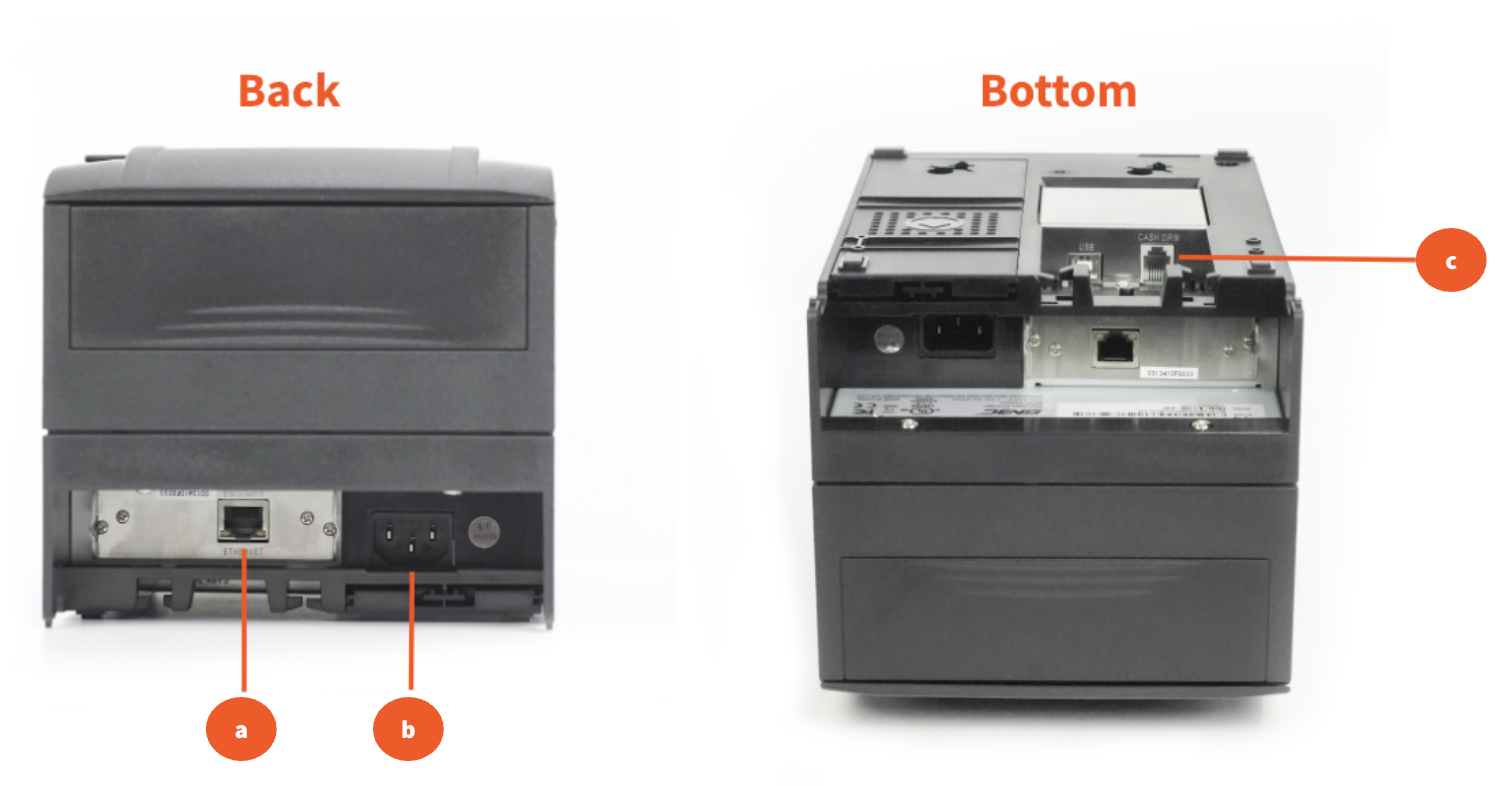
- 以太网端口
- 电源端口
- 现金抽屉连接器
Toast Kitchen Printer硬件设置
| 要将打印机设置为在收据上显示欧元货币,请在Toast Web的打印机设置部分配置语言包设置。有关更多信息,请参阅此支持中心文章《配置打印机以显示欧元》。 |
步骤 1:Toast Kitchen Printer开箱和配置
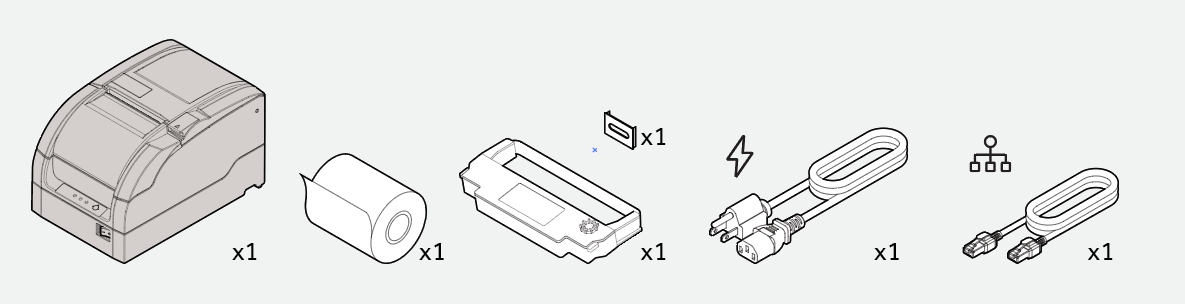
以下部件包含在您的Toast Kitchen Printer包装盒中:
- 打印机
- 3英尺以太网电缆
- 电源电缆
- 纸卷
- 墨带
- 电源按钮盖
- 首先打开打印机及上述列出的内容
- 接下来,按照下图所示安装纸卷。
- 然后,按照以下步骤安装墨带:
- 打开前盖。
- 转动墨带旋钮2到3次以收紧墨带。
- 根据下图安装墨带。
- 最后,插入并连接以太网和电源线。您的电源线应直接连接到插座,以太网线应直接连接到您的网络交换机或路由器。注意:您的打印机应与您所在位置的POS设备连接到同一网络。
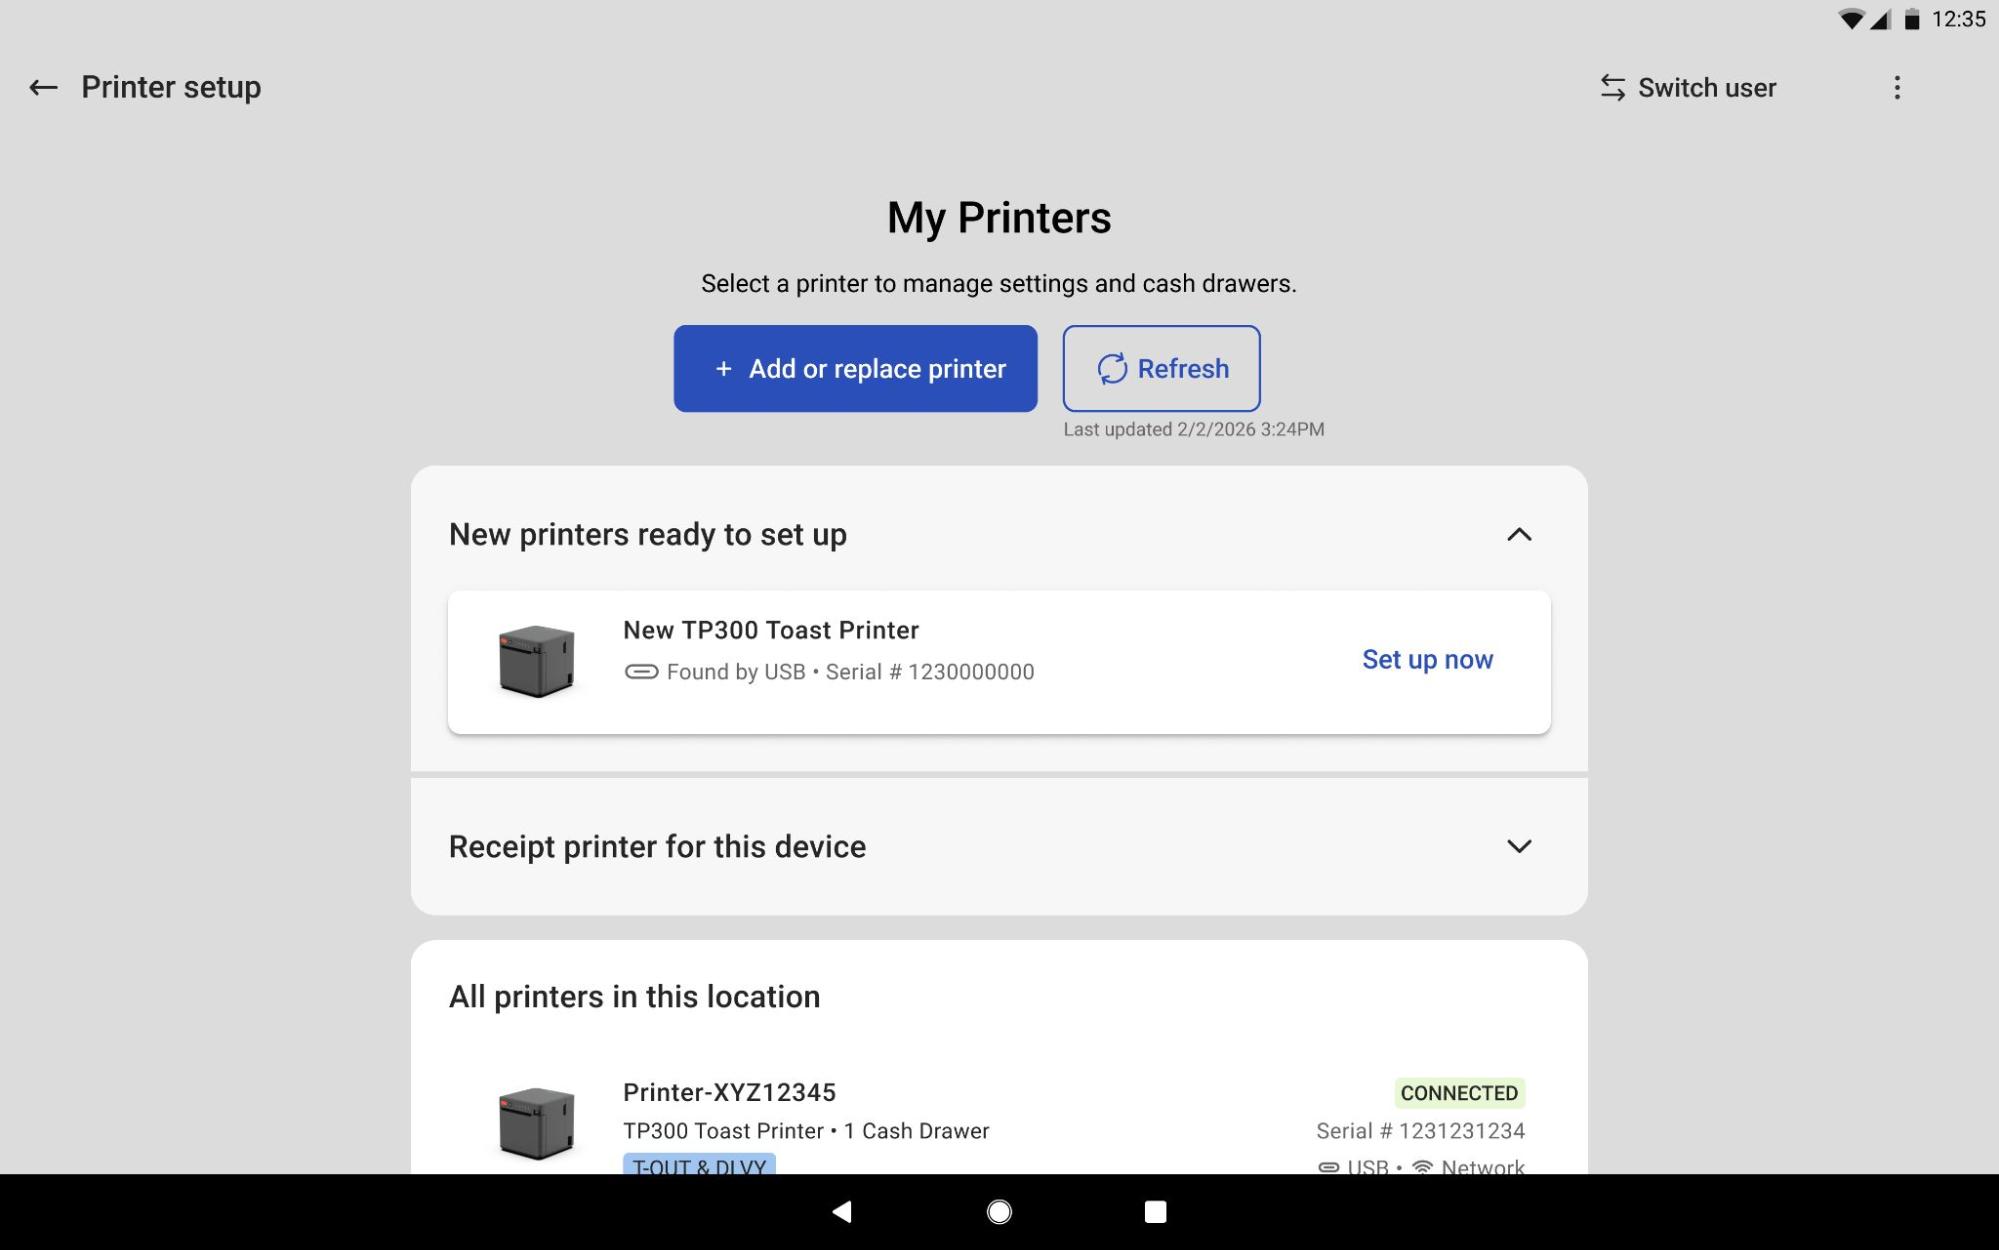
- 安装新打印机后,导航到Toast应用中的打印机设置以配置您的打印机:
- 在Toast应用的主菜单仪表板上,导航到设置 > 打印机设置。
- 选择+添加或替换打印机以完成设置。
- 继续到步骤2以完成打印机配置。
步骤2:Toast厨房打印机Toast应用程序设置
安装新打印机后,请在Toast应用程序中导航到打印机设置以配置您的打印机:
- 在Toast应用的主菜单仪表板上,导航到设置 > 打印机设置。
- 选择+添加或替换打印机以完成。
- 如果您已经打开了打印机,可以选择立即设置以完成Toast中的打印机配置。
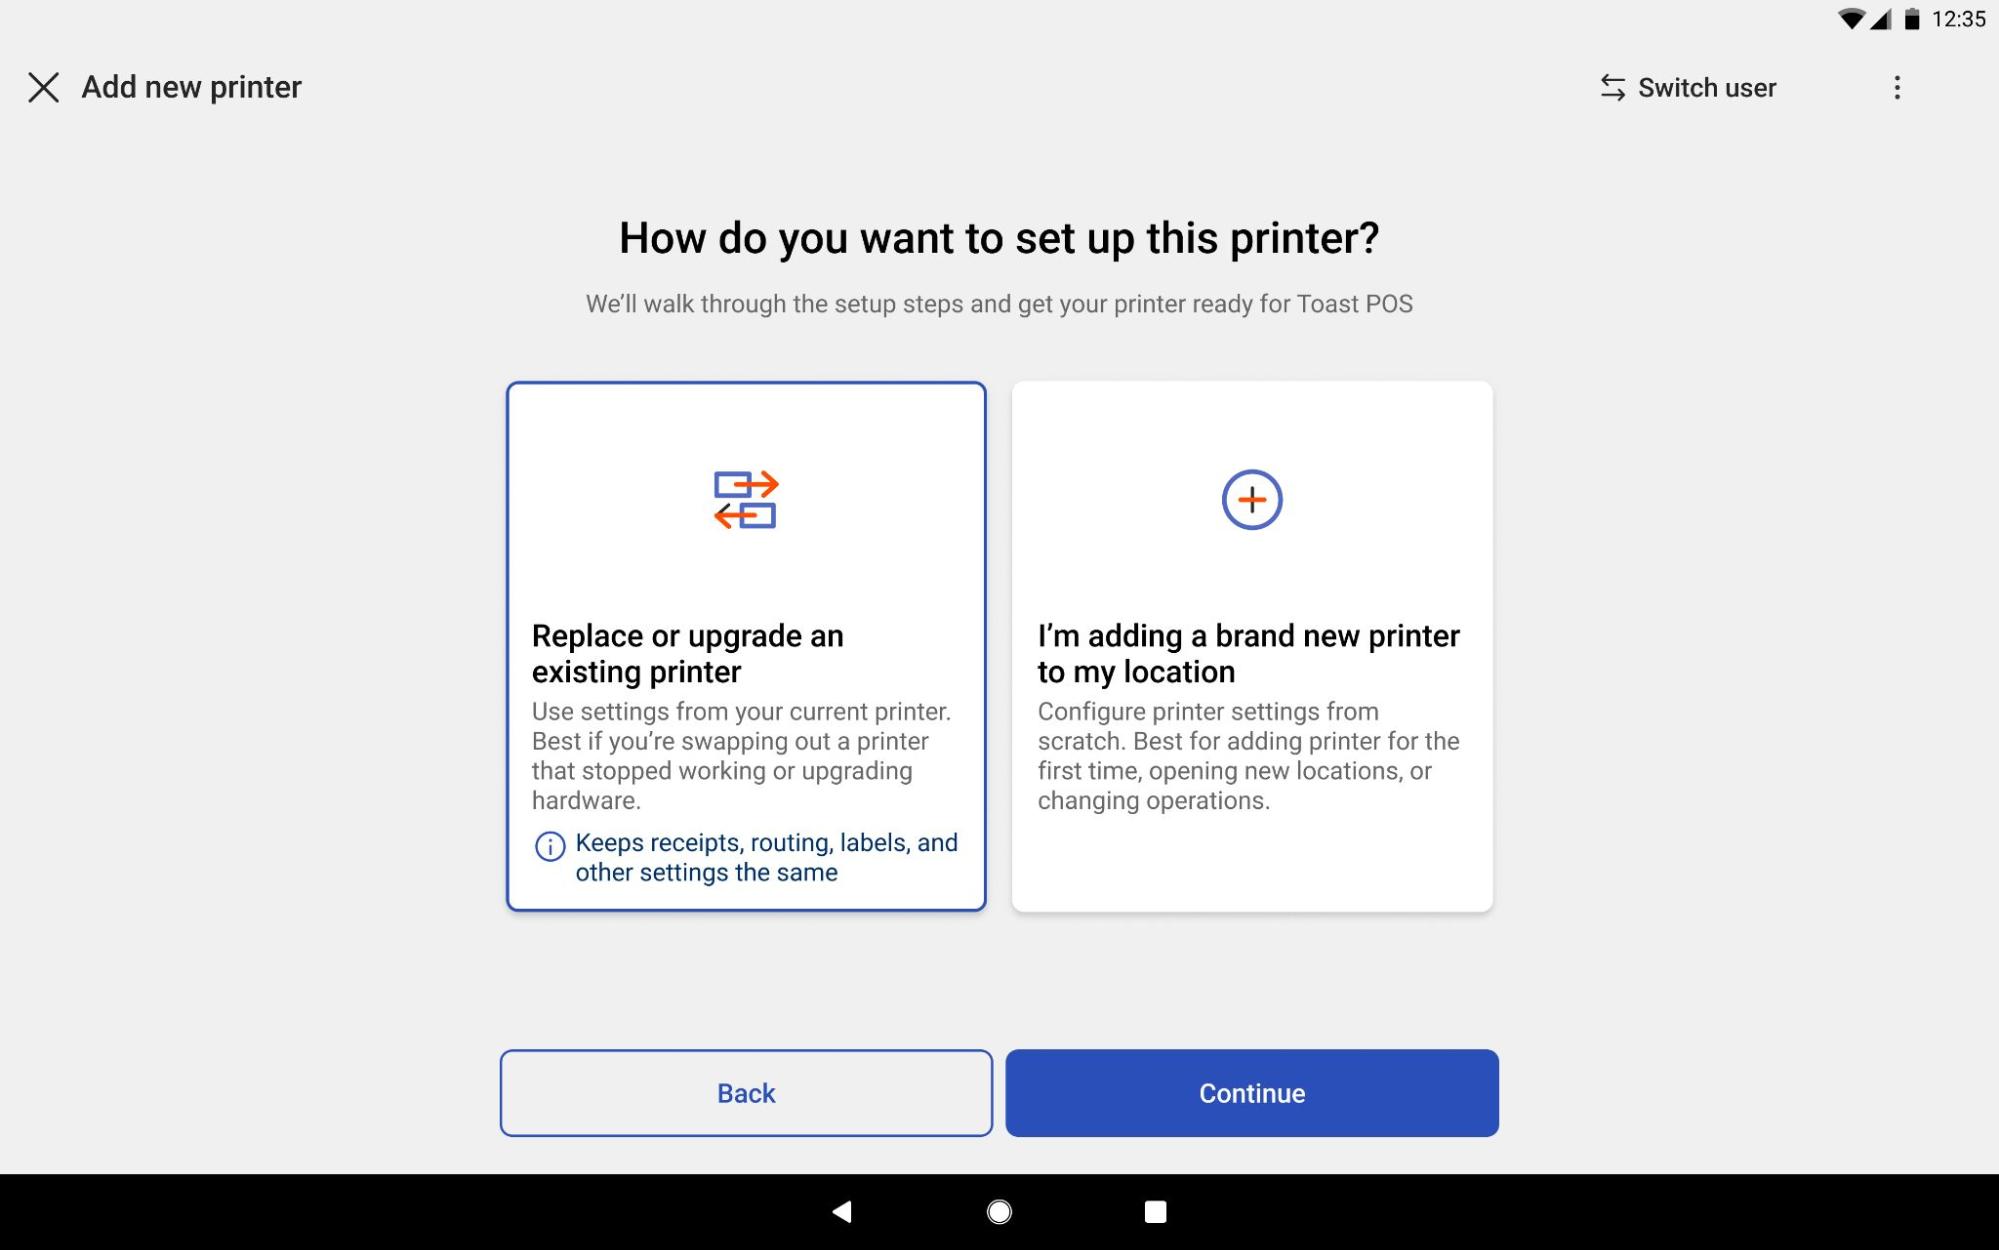
| 要替换损坏的打印机或升级旧硬件并保留所有现有打印机配置,例如厨房路由和标签,请选择替换或升级现有打印机。 |
- 按照屏幕上的向导进行操作。系统会提示您选择准备站、打印测试票据并完成打印机的配置。注意:如果您尚未创建菜单和准备站,或找不到所需的准备站以配置打印机,请参见配置和分配准备站。
其他Toast厨房打印机信息
Toast厨房打印机将发出嗡嗡声并使用灯光提醒用户错误。请查看下表以获取更多信息:
| 浅色 | 功能 |
| 错误 | 在下面列出的错误条件下,错误灯将闪烁 |
| 纸张 | 在纸张接近末端的条件下(了解更多信息),纸张灯将亮起并保持亮起 |
| 电源 | 当打印机开启时,LED灯将保持亮起 |
| 错误 | 蜂鸣器 | 浅色 |
| HP错误 | 间隔哔声 | 错误灯间隔闪烁 |
| 打印头过热 | 6声哔声 | 错误灯闪烁6次 |
| 切割器错误 | 4声哔声 | 错误灯闪烁4次 |
| 纸张接近末端 | 2声哔声 | 纸张LED灯将亮起,且错误LED灯将闪烁一次 |