Get Started With Toast Websites
Last updated: Oct 5, 2026, 2:02 PM
Toast Websites allows you to build a fully customized, SEO-optimized, and beautifully designed website and connect it to your domain.
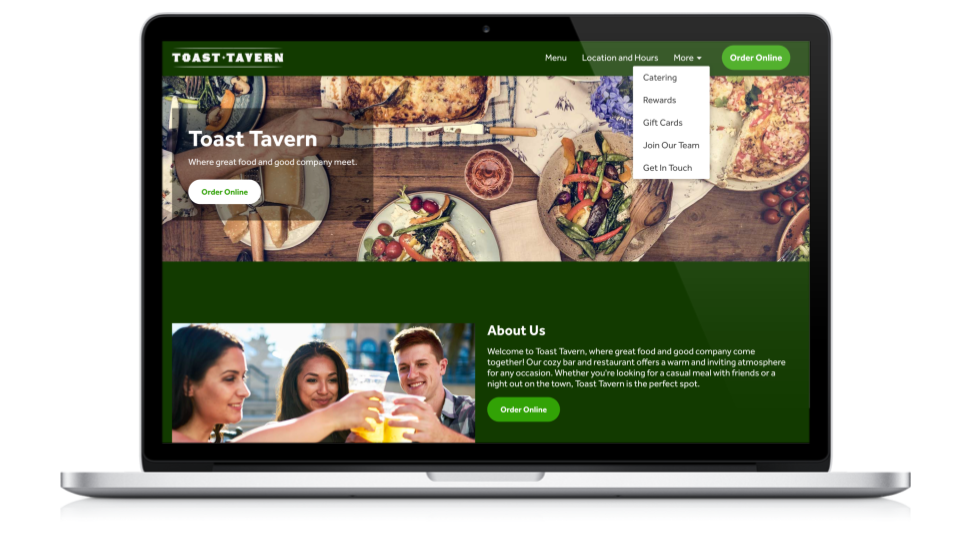
Reduce complexity by providing a comprehensive integration with all Toast products on a singular platform. Toast Websites provides an intuitive and delightful experience that enables your guests to find restaurant information, contact the restaurant, make a reservation, or place online orders seamlessly.
Note: You are responsible for maintaining a legally compliant website. For more information, see Ensure Legal Compliance for Toast Websites in this article.
- Ensure Legal Compliance for Toast Websites
- Toast Websites Overview
- Toast Websites Onboarding
- Express Setup with AI-Driven Onboarding
- Step 1: Branding and Basics
- Step 2: Pick Your Websites Pages
- Step 3: Websites Layout
- Step 4: Configure Online Ordering for Websites
- Want to Learn More?
Ensure Legal Compliance for Toast Websites
Note: Toast does not provide any advice or warranties regarding compliance with applicable laws, rules, or regulations in connection with Toast Websites.
Toast Websites helps you build a fully customized website, including options like customizing footer colors to match your preferences. Please note that laws, rules, and regulations—such as those requiring ADA and/or WCAG compliance—may vary depending on your jurisdiction. It is your responsibility to ensure your website meets these requirements.
Additionally, it is your responsibility to ensure that you own or have properly licensed rights to any content or other intellectual property displayed on or used in the creation of your Website. If you're unsure about your Website's compliance with ADA, WCAG, intellectual property, or other regulations, we recommend consulting an attorney for guidance.
Cookie Consent on Toast Websites
Toast Websites now includes a built-in cookie and privacy consent banner to ensure your site complies with regional regulations. Depending on where your guests are located, their tracking preferences will behave differently:
- Opt-out by default: Guests in California, Florida, Pennsylvania, Europe, the U.K., and Quebec are opted out of tracking by default and must manually opt in.
- Opt-in by default: Guests in all other U.S. states, Australia, New Zealand, and Canada (excluding Quebec) are opted in by default but can choose to opt out at any time using the cookie settings in your website's footer.
Tracking scripts (such as GA4, Google Tag Manager, Meta Pixel, and custom scripts) will only fire for users who have consented to tracking.
Note: Because tracking now relies strictly on guest consent, you may notice a drop in your reported analytics data. This represents a shift to consent-based tracking, not an actual decline in your restaurant's website traffic or conversions.
Toast Websites Overview
Once the Digital Storefront Pro Suite is added to your location(s), you can log in to Toast Web and start creating your restaurant’s website. To access these configurations, you’ll need the 6.9 Websites setup permission (learn more about permissions in our Permission Reference Guide). You can access Toast Websites from the left-hand navigation menu in the back end.
Preview Toast Websites
If you haven’t purchased Toast Websites but are interested in previewing your potential site, follow the steps below to preview it. This feature captures brand information and photos to help you build your site.
- In Toast Web, navigate to Websites.
- In the Toast Websites preview page, select Get started.
- If you have an existing website, Toast IQ will automatically begin crawling it to capture brand information and images. Note: You will be able to preview your website on desktop and mobile.
Your Toast Websites preview will be available to view and purchase for 7 days. To purchase, select Save & continue to editor. Select Buy Today, and you can purchase with the Digital Storefront Pro Suite or schedule a demo.
Note: After seven days, the website preview will be deleted, and you will need to follow the steps above again to build the preview of your website.
Before You Get Started With Toast Websites
To complete all of the initial steps required to set up your website, it’s helpful to have the following information and files ready to go:
- Logo image file - The highest quality image you have (.jpg, .jpeg, .png, .webp, or .svg), with a max file size of 5MB.
- Favicon image file (optional) - An icon that is used for web browser tabs. If you don’t have one, your logo image will be used.
- Accent color - The hex code of the color that will be used for buttons and design elements. Note: This step is optional if pulling from an existing site.
- Your domain name - The web address where you’d like your site to appear. Note: This step is optional if pulling from an existing site. Be sure to check for accuracy.
- Font files (optional) - There are a number of font options available, but you can upload your own file (.otf, .ttf, .woff) for a custom font if you’d like.
- Any pictures you’d like to use on your website! Your menu images will be pulled in automatically.
- Video files - Choose a video relevant to your brand, with a max file size of 50MB and in landscape orientation ONLY. Note: Video files are NOT pulled automatically.
Saving and Publishing with Toast Websites
Saving and publishing with Toast Websites functions similarly to any changes you make in Toast Web, but there are a few things to keep in mind while working in Toast Websites:
- The Sites editor has a Save button and a Publish button
- Selecting the Save button saves the site in its current working state, but does NOT publish changes to your website.
- All changes are saved in the Sites Editor automatically and are not pushed to your actual Toast Website until you select Publish. These saved changes will be retained across multiple sessions until you select Publish.
- Selecting Publish pushes your saved changes to your website.
- Selecting the Save button saves the site in its current working state, but does NOT publish changes to your website.
Toast Websites Onboarding
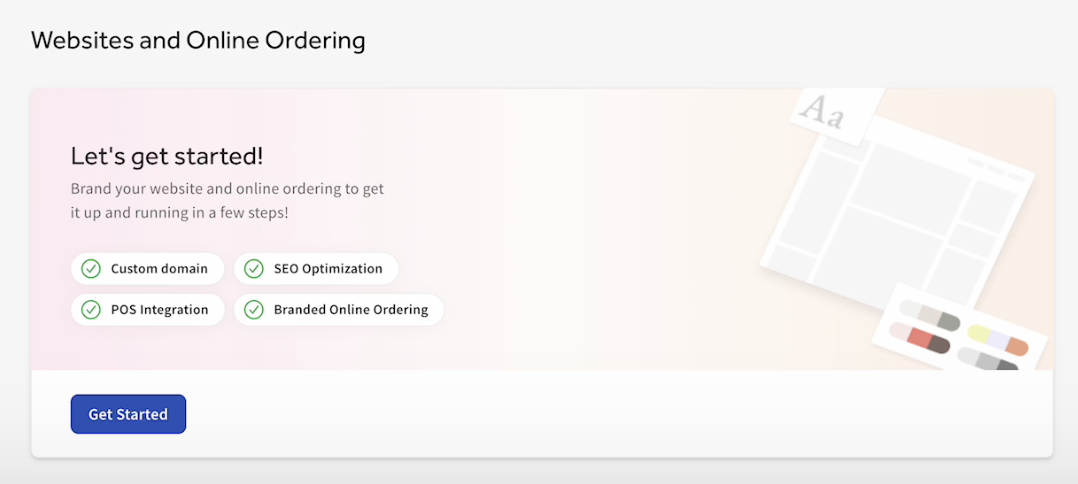
You will start on the onboarding page to get started:
- Log in to Toast Web and navigate to Websites.
- Here, you will see the onboarding page below. Select Get Started.
- Select which products you intend to use: a Full Digital Storefront or Online Ordering Only page.
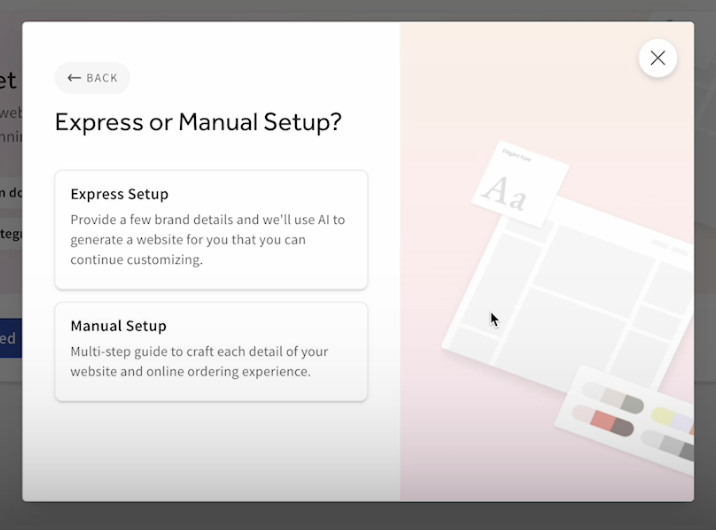
- You will have the option to select:
- Express Setup: Provide a few brand details, and we’ll use AI to generate a website for you that you can continue customizing
- Manual Setup: Multi-step guide to craft each detail of your website and online ordering page.
Express Setup With AI-Driven Onboarding for Toast Websites
Express Setup uses AI to build a full website draft that matches your restaurant's brand and personality, with little input from you. Toast gathers information about your restaurant and uses it to generate your site. You then edit the draft in the Site Editor and publish it.
| Certain Toast products and services may offer generative artificial intelligence ("GAI") capabilities. Generative AI refers to a category of AI algorithms that are trained on data sets and can generate text, images, video, sound, or other work product (output) in response to prompts (input). For more information, see Toast Generative AI Tools: Responsible Usage for Customers |
Note:
- Express Setup is available to customers in the US, Canada, the UK, Ireland, and Australia.
- Want to move information, color, theme, and images from your non-Toast website? See Use a Web Crawler to Generate a New Website in this article.
What Express Setup Uses to Build Your Site
Express Setup builds your site draft from these sources, when they are available:
- Your Google Business Profile, if it is connected to Toast (photos sorted by category and your business description)
- Information about your restaurant that is available online
- Your existing website, including its images, text, branding, and page structure
- Your Toast menu data
- Menu images that you upload
Create Your Site With Express Setup
- In Toast Web, navigate to Toast Web > Websites.
- Select Get Started.
- Select the product you intend to use: Full Digital Storefront or Online Ordering Only.
- Select Express Setup. Toast begins gathering information about your restaurant.
- Toast will gather information, images, logos, and colors to help inform the brand identity for your new Toast Website. Toast will also gather the site structure and URL paths already built into your old website, making the transition to your Toast Website smoother by avoiding broken links and ensuring no negative impact on your SEO. This information will be provided to the AI-driven workflow.
- If Toast cannot find your website or photos, add your website link or upload photos when prompted.
- Wait while Toast generates your site draft, then review it.
- To make minor layout changes, select Remix layout.
- When you are pleased with your draft, select Save & continue to editor.
- On your Websites dashboard, select Edit Site to customize your pages, text, and images.
- Select Publish to push your site to your live website.
Expected outcome: Your site draft is saved in the Site Editor, where you can keep customizing it. Your site goes live after you publish it.
Note: If you subscribe to and use Toast Tables™, Toast Loyalty, Email Marketing, Toast Gift Cards, and/or Catering & Events, you can customize the pages for these products in the Site Editor.
If Express Setup Cannot Find Your Restaurant
Express Setup builds your site using information already available online. If your restaurant is new, or Toast cannot find enough information about it, Toast takes you to Manual Setup instead. In Manual Setup, you can choose a template or customize every detail yourself. For steps, see Step 1: Branding and Basics in this article.
If you still cannot create your site, see Get Help With Toast Websites.
Manual Setup for Toast Websites
Step 1: Branding and Basics
The first time you select Websites from the left-hand navigation menu in Toast Web, you’ll see the Toast Websites setup walkthrough. Select Get started and follow the guided instructions to add your restaurant description, colors, fonts, logo, and banner. As you update these fields, you will be able to see your changes in your preview window in real time. When you are ready to proceed, select Save and Continue.
Step 2: Pick Your Websites Pages
Once you’ve completed the basic setup steps, you can select which pages you would like to have to start when your site is created. Select from the list of available pages. Your Homepage, Menu, and Online Ordering pages will be selected by default. If you want to preview these pages, you can select the eye icon to view each page on the preview window. If you have additional Toast products such as gift cards, loyalty, or email marketing, those products will be available to select from the list of pages. Visibility for all pages can be updated at any time. Select Save and Continue once you have made your selections.
Step 3: Websites Layout
Step 3 in setting up Toast Websites is selecting your site's starter layout from our predefined templates. These templates will populate in real-time with the selected information for your branding and basic setup selections. Once you are pleased with the template selection, select Save and Continue.
Step 4: Configure Online Ordering for Websites
The last step in setting up your Toast Website page is configuring your Online Ordering page. The branding choices selected in your branding and basic setup are applied in this section. You will then select the menu layout elements of your Online Ordering page. You can select from Classic Presentation, Left Image, or Top Image for the layout. You will see your selected option in real time with the information set up in Toast Web for your menus. Select Save and Continue once you have made your selections.
Congratulations! You have set up your Websites page. On the confirmation page, select Go to editor. This will take you to your website editor, where you can continue editing your page. Next, learn how you can Optimize Toast Websites. In this article, you can learn how to customize modules, add featured items, and adjust colors and themes.