Set Up Your Toast Router
Last updated: Mar 17, 2026, 1:27 PM
This guide will help you install your Toast Router and ensure your network is properly configured to support your Toast system.
| The steps below are intended for Toast Router users. If you are a Meraki router user, please see Set Up Your Meraki Router. |
Site Readiness – Before You Get Started with Your Toast Router
| Before you get started with setting up your Toast router, review the Networking & Devices Site Readiness Guide. |
Note: Restaurants are required to purchase new networking equipment when establishing a new Toast account. This could be a new restaurant opening, an existing restaurant that is new to Toast, or an existing Toast restaurant that is adding a new location.
Video overview of installing your Toast Networking Hardware.
| Toast does not support repurposing, reusing, or transferring network equipment between previous Toast locations. |
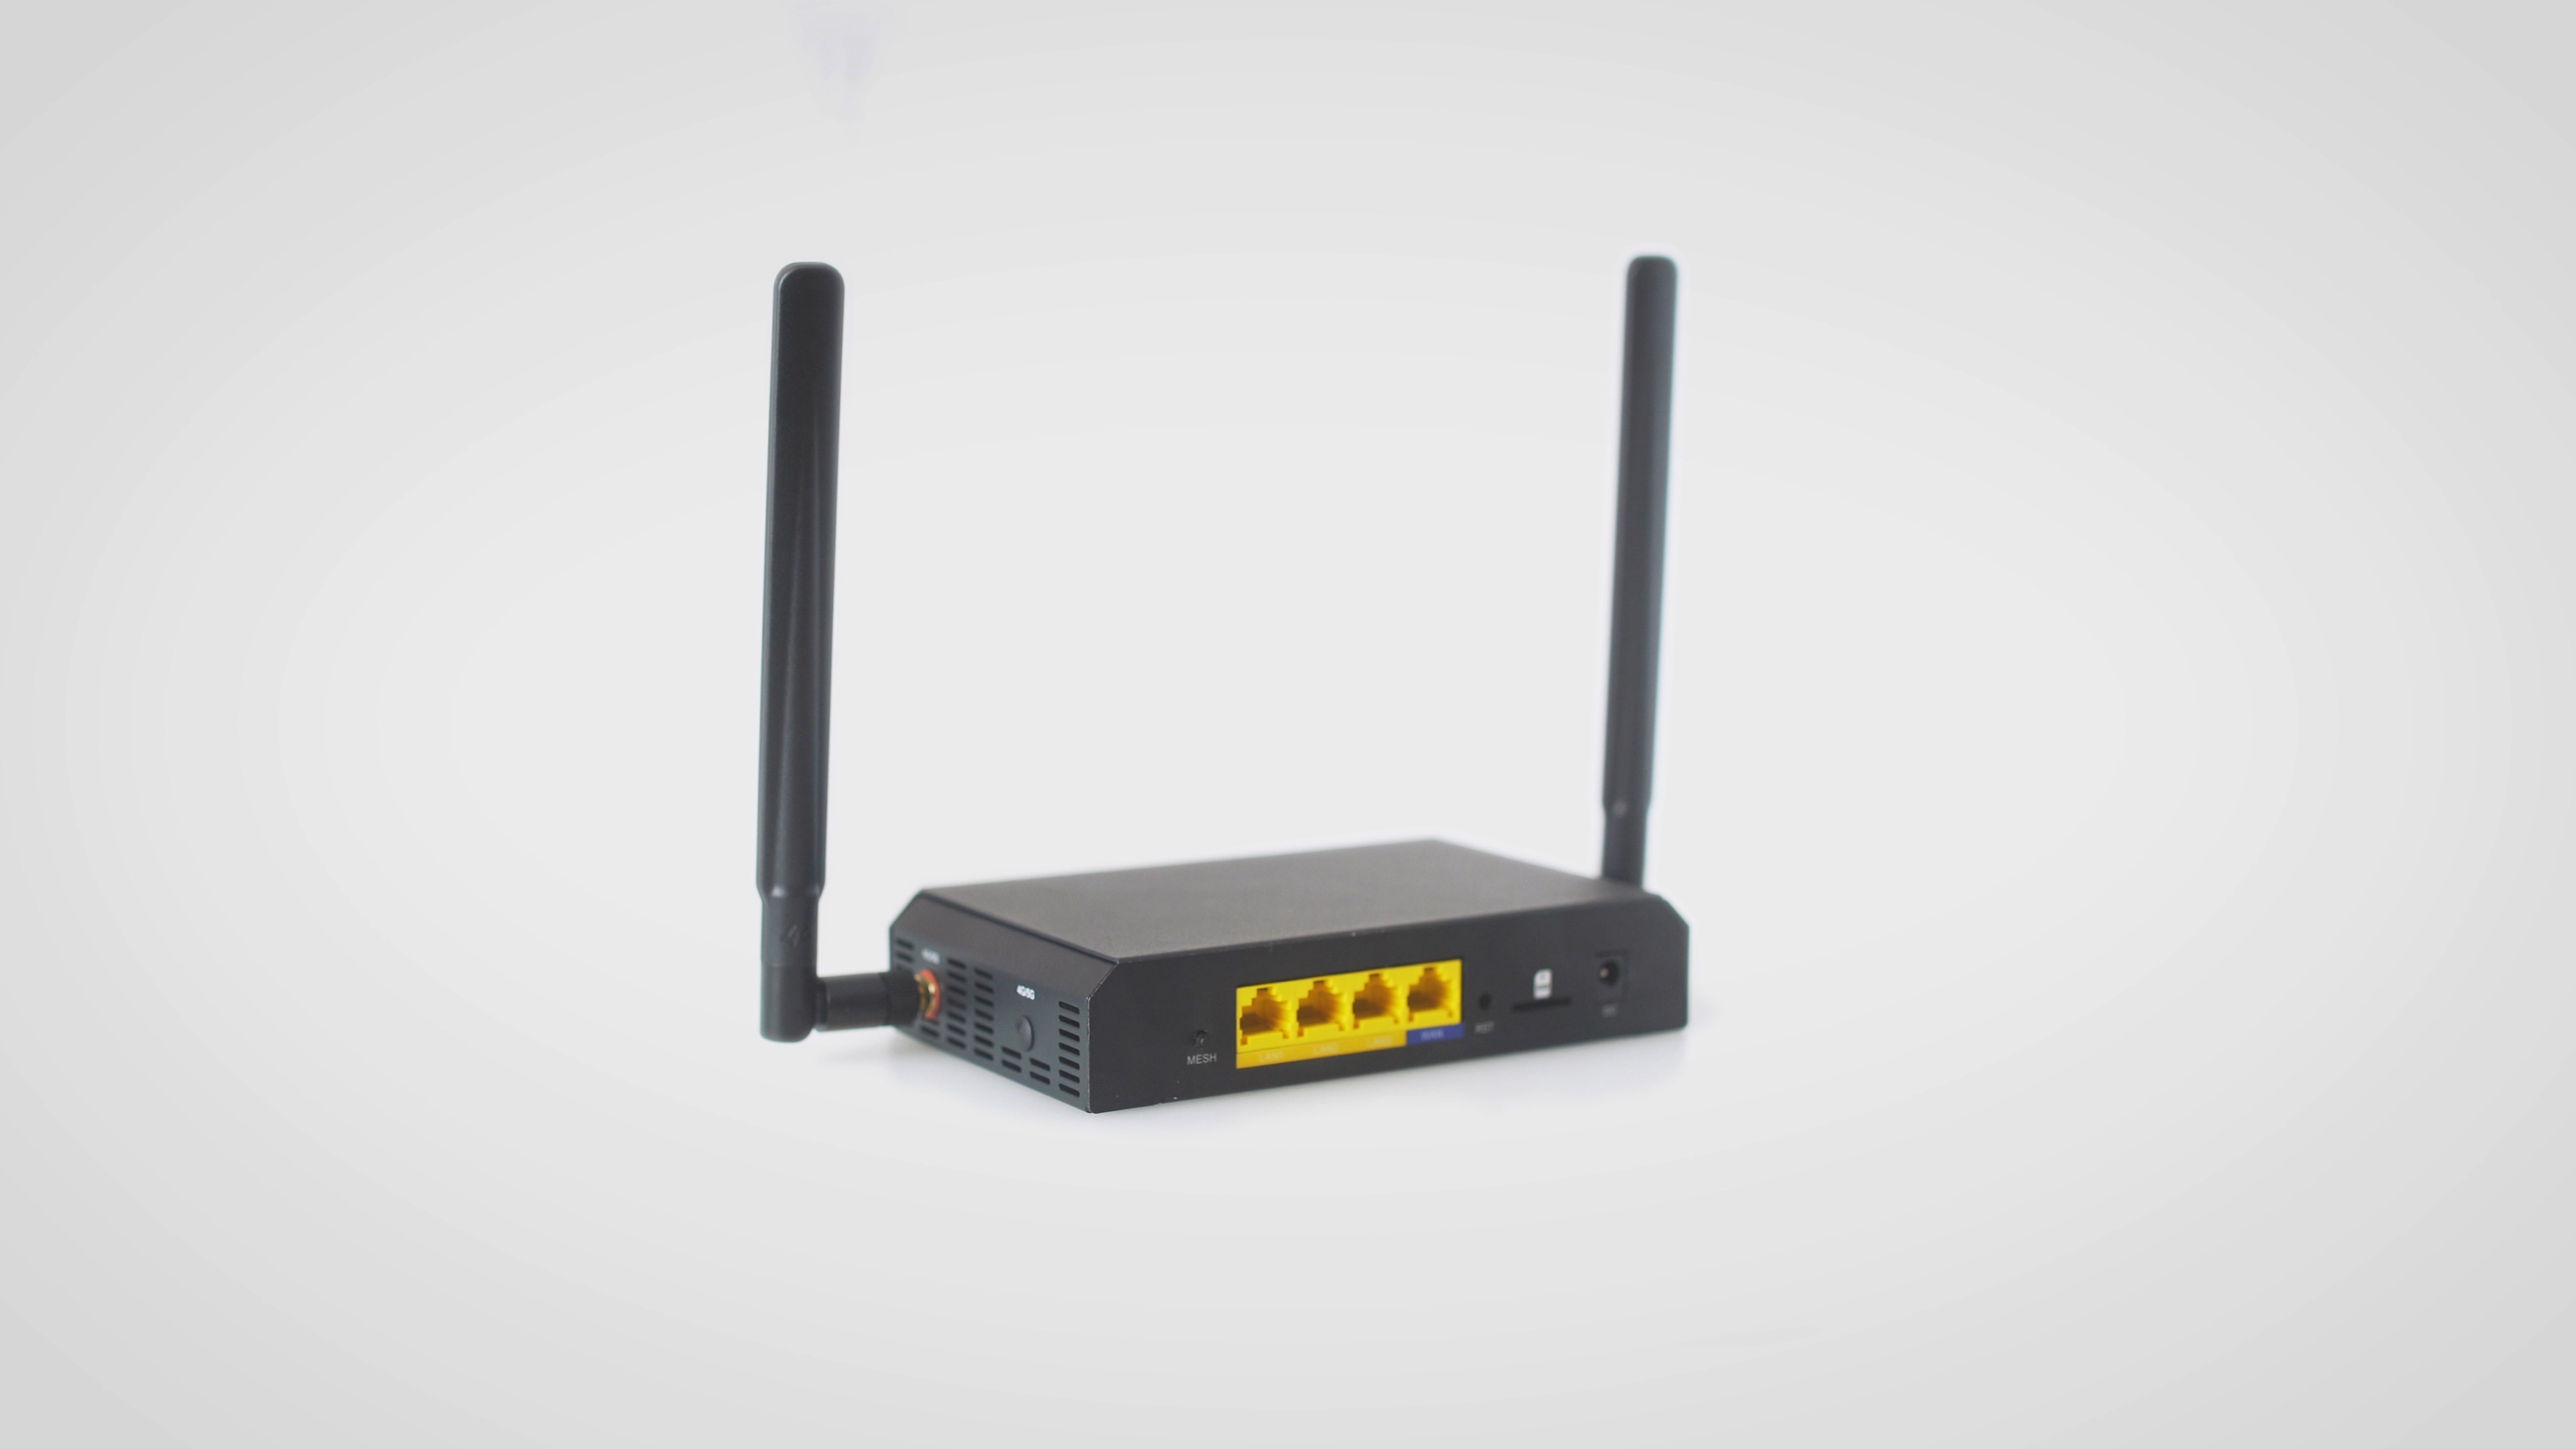
Toast Router Details
Now that you’ve reviewed your site readiness and networking requirements, it’s time to move on to the next step: installing your Toast Router. This will ensure your network is properly configured to support your Toast system.
Toast Router Install Steps
Note: For customers in Ireland and the U.K., please install your SIM card before turning on your Toast Router. For more information, see Install Your Toast Router SIM Card.
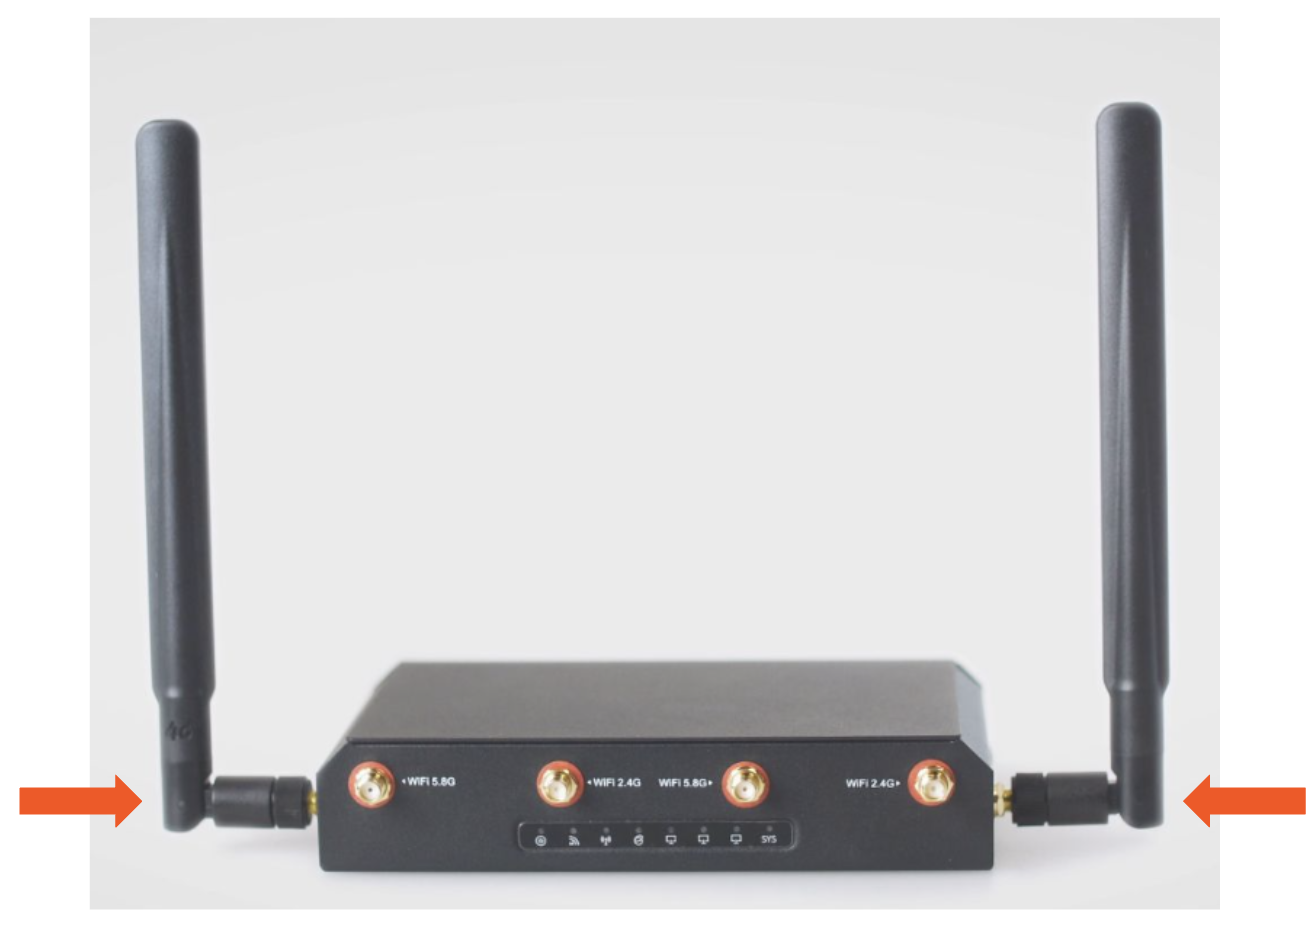
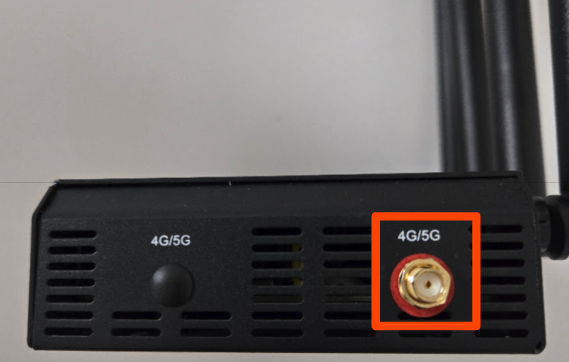
- Packaged with your router are two sets of antennae – a plastic bag of two flat antennas and another package of four cylindrical ones. Take the two flatter ones – which are the cellular antennas – and screw these onto the ports on the side of the router labeled “4G/5G” (show below).
- If you would like to use your router to provide the Wi-Fi directly to your devices, take the remaining four cylindrical antennas – these are for Wi-Fi – and screw them into the front of the device. This is a rare use case for small spaces or food trucks. Typical Toast business network setups rely on Access Points to provide Wi-Fi for devices. There are no negative impacts to installing these antennae, even if you choose not to use your router for Wi-Fi.
- The 4G/5G marking next to the open port is a non-functional plastic plug that doesn’t require any action and does not impact your device's functionality.
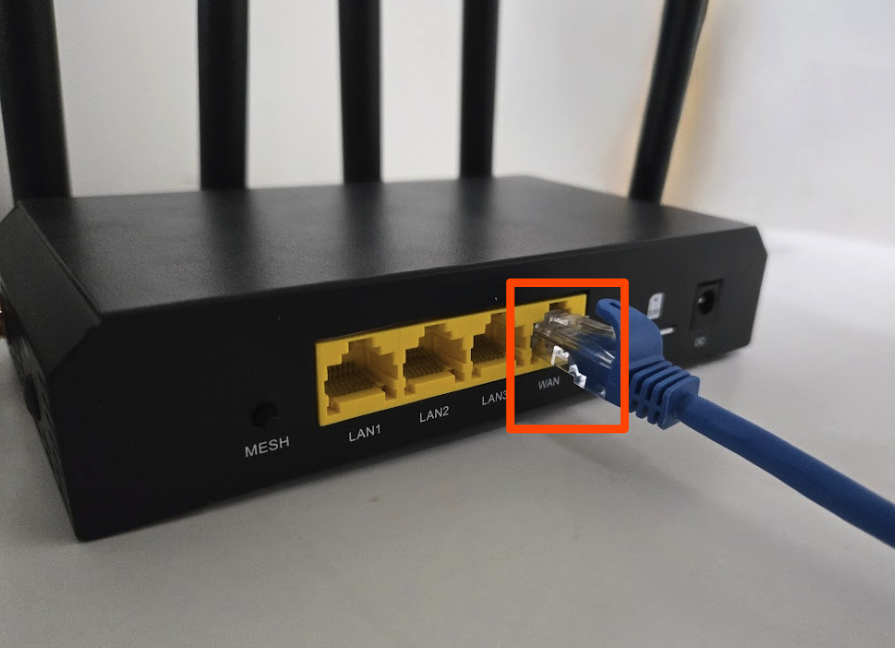
- Using the provided Ethernet cable, connect one end into an open port on your cable modem (the box provided by your internet service provider) and the other end into the WAN port of the Toast router.
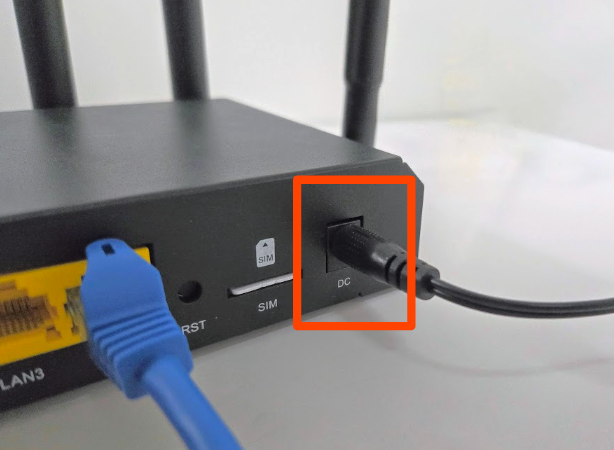
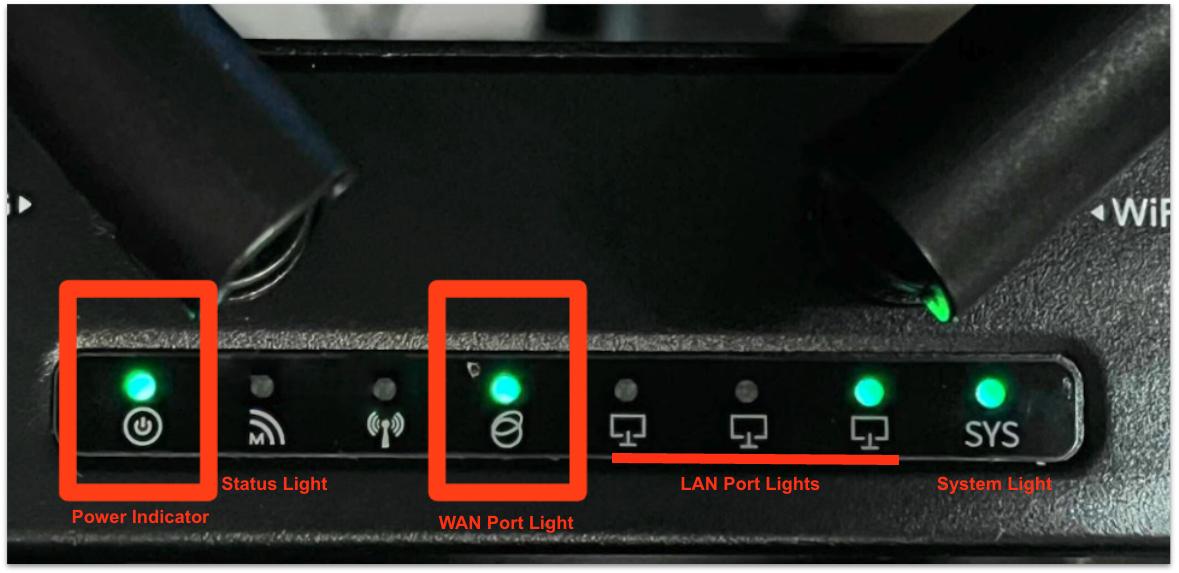
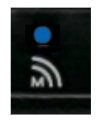
- Plug one side of the Toast router's power adapter, which was included in the box, into the jack on the device marked DC. Then plug the device into the wall outlet. The devices will automatically turn on when power is connected. The router is fully turned on when the power light, WAN port light is blinking green, and SYS lights are green. Wait until all lights are on before connecting additional devices. If you're using Wi-Fi, the third indicator light (with the antenna icon) will also illuminate green when connected.
Install Your Toast Router SIM Card
Every Toast Router comes with a SIM card. The card is either pre-installed or in an envelope packaged in the box along with the router. If you receive the SIM in an envelope, please follow the instructions below on how to install.
If you have your Toast Router and SIM card, but still need to purchase a cellular subscription, visit the Toast Shop. Note: Customers located in Ireland and the U.K. must contact your Toast Representative or Customer Care to purchase your subscription.
- Make sure your router is off before you install your SIM card. If you do not turn off your router, the device may have trouble booting up.
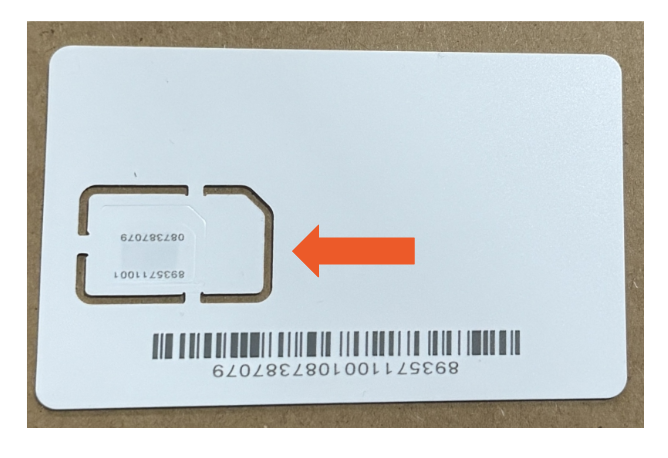
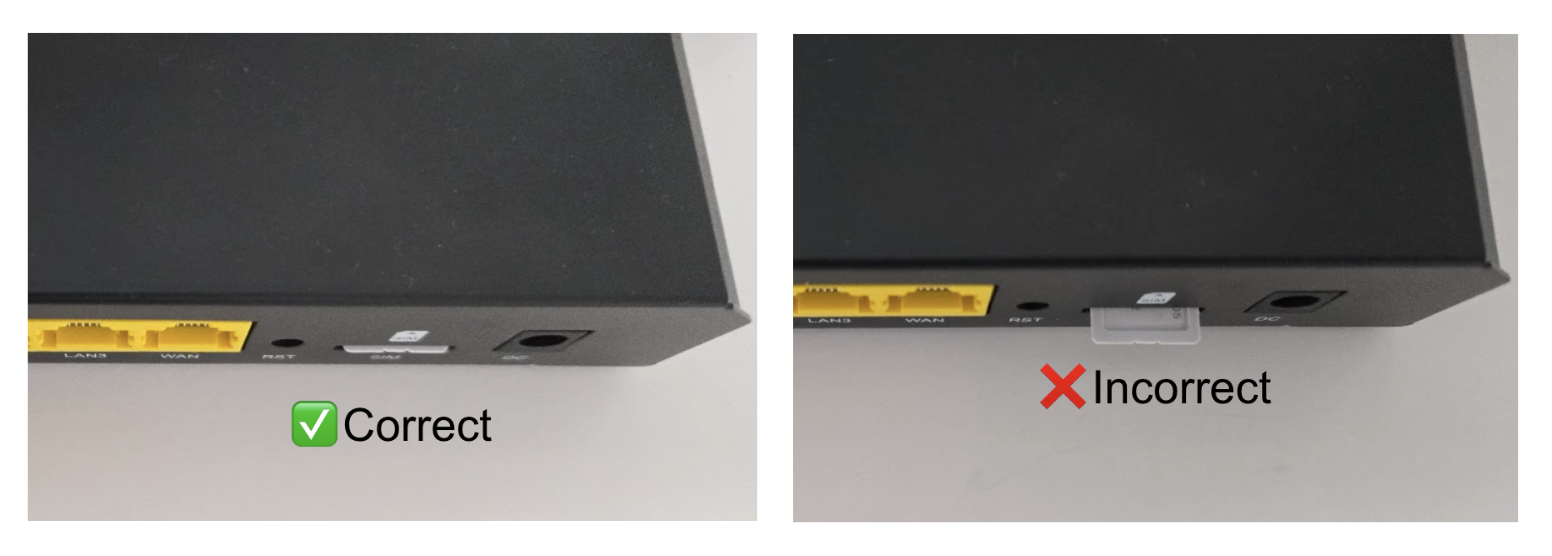
- Punch the SIM card from the plastic card, following the larger perforations. Do not separate the smaller card (nano SIM) from the larger one.
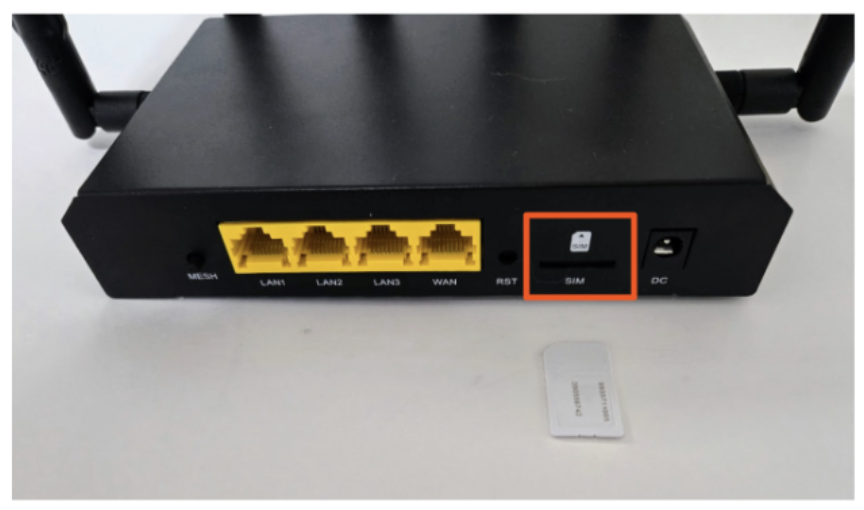
- Locate the SIM card slot on the back of the Toast router.
- Place the SIM card into the slot with the chip facing down, then press the SIM card in by placing your thumbs on the corners and pressing firmly towards the router, until you feel and hear a “click”.
- Ensure the SIM card is inserted correctly and does not stick out from the back of the router. This prevents it from being gripped or falling out.
A blue light indicates active cellular use on the Toast Router. The router automatically switches to cellular within 10 seconds if the internet connection drops (as long as it has cellular reception).
Port Mapping for Mixed Stacks
Your router has a specific port layout to ensure optimal functionality and quicker troubleshooting. This port map is mandatory for customers with mixed stacks.
| Port | Port type | Supported devices |
| WAN | Uplink | ISP Modem |
| LAN1 | Trunk | Toast Switches |
| LAN2 | Access | Toast Devices (Terminal, Printer, Wireless Access Point, etc.) |
| LAN3 | Access | Toast Devices (Terminal, Printer, Wireless Access Point, etc.) |
Toast Router Troubleshooting Video
Toast Router troubleshooting video overview.
Additional Resources for the Toast Router