Optimize Toast Retail
Last updated: Mar 25, 2026, 1:47 PM
- Sort, Filter, and Search Your Item Library
- Bulk Update Items
- Add Custom Attributes to Tag Your Retail Items
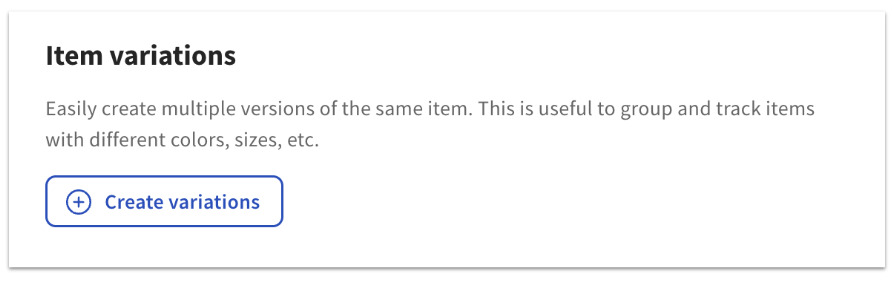
- Add Option Set Templates for Item Variations
- Hide Out of Stock Items From Online Ordering
- Retail for Multi-Location Management
- Additional Resources
Sort, Filter, and Search Your Item Library
There are several ways to quickly sort, filter, and search for items in your item library in Toast Retail to maintain an accurate retail inventory.
To customize the fields that are shown on your item library, select the Columns button near the top of the page.
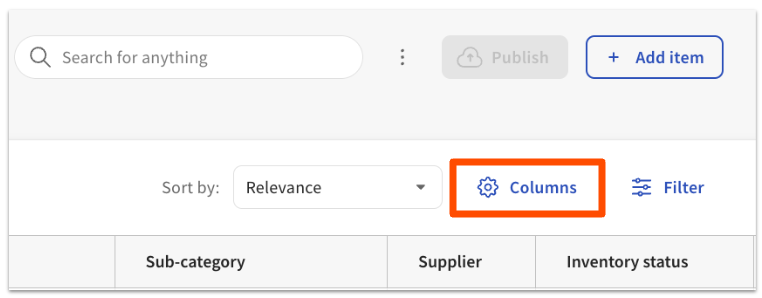
| This will open up a panel showing you all available columns, with the blue check marks showing columns that are currently visible in your item library. You can select or deselect columns as desired, or click and drag the dots beside a column name to rearrange the order. | 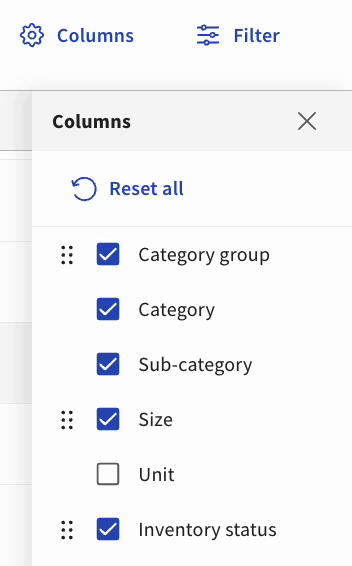 |
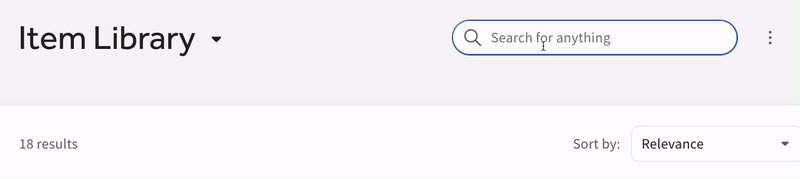
The search bar at the top of the item library can help you find specific items by entering one or more search terms. The search results will pull from item names, SKU, category names, and more.
When you use more than one search term, the results will search for all items that match the first term, and then out of that group it will search for the second term. In the example above, the results would show all items with the word “scones” that also contain the word “blueberry”.
Filtering provides you with another way to organize the items shown in your item library in Toast Retail. This is particularly useful for spotting data entry errors, or scanning your item library to find and remove duplicate items or barcodes. For example, you could filter items with a Blank inventory cost and fill in missing data.
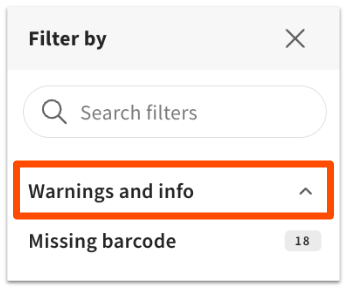
There are also a couple of filters that can help you identify information that is not compatible with Toast so that you can make corrections:
- The Warnings and info filter will show you if there are duplicate names, duplicate and missing barcodes, and invalid or unscannable barcodes present in the system.
- The Conflicting values filter will show you items that inherit conflicting settings from different menus or groups. This filter only shows up if you have items that belong to multiple categories. For example, a bottle of wine that is in the Retail category and in the Bar menu. These conflicting values do not necessarily require action.
Bulk Update Items in Your Item Library in Toast Retail
Bulk update is a valuable time-saving tool that can help you quickly and easily update your inventory of existing items. There are several ways to bulk update items in your item library in Toast Retail.
Note: If you are looking to remove all retail data and re-import to "start fresh", this would need to be accomplished by archiving all items and importing new items with a fresh template, instead of using bulk update. This won't permanently delete items, they will always remain in the Items database.
If you've only got a couple of changes to make, you can make bulk edits using the Actions drop-down right within your item library:
- Use the filter and/or search functionality described above to find the items you're looking for, and select the checkboxes to the left of each item name.
- Select from the desired action drop-downs that appear at the bottom of the page, and then select your desired action.
- Under Item actions, you can choose to archive items or use smart scan to update item details (learn more in the next section).
- Under Barcode actions, you can choose to fix invalid barcodes, generate barcodes, or print barcode labels.
- Under Set values you can choose to set category, inventory status, quantity, price, cost, PAR levels, EBT eligibility, receiving units, alcohol content, supplier, brand, selling strategy, or location for all selected items.
- A pop-up will appear on the item library page to guide you through the bulk update you selected.
If you've got a large number of items to update in the item library, you may prefer to use a spreadsheet:
- Select the overflow (three dot) menu button right next to the Publish button on your item library, and then select Export items.
- Select Export items to download a .CSV file with your item details. You can choose to export all items or only the ones that are visible on your item library. You can also choose whether you'd like to export all columns or only the visible columns.
- Open your preferred spreadsheet tool (i.e. Google Sheets or Excel) and import the .CSV file.
- Note: It's important to open your spreadsheet tool first and then import the .CSV file. Opening the .CSV file directly can cause issues with certain data fields (like barcodes) which will lead to errors when uploading your changes back to your item library.
- Make your desired changes, save your spreadsheet, then return to the overflow menu on your item library and select Update items.
- Upload your updated .CSV file.
- Note: If your file contains any new items, the upload will not be successful. The Update items workflow only allows you to make edits to the existing items in your item library.
- A pop-up will appear where you'll be able to upload your .CSV or Excel file. Note that the "inventory quantity" field on your spreadsheet might be outdated, so confirm that you want to include it before proceeding with the update.
- Review the summary, address any errors that were detected, and select Next.
- After the updates have been completed, select Import.
Use Smart Scan to Add Item Details in Toast Retail
Smart scan helps you expedite new item creation (pre-filling item name, brand, image, and AI-generated description) and update existing items in Toast Retail. Now available from your desktop, streamline item management in these three modes:
| At this time, if you add an image for an item, it will appear on online ordering and kiosks, but not on your POS or with the Shopify integration. Only the item name can be displayed on the POS. |
- New item creation: When you scan a new barcode on your item library in Toast Web, the system will recognize that the item doesn't exist and will start a new item workflow. If a match is found for the barcode you scanned, a pop-up will appear on the item details page so you can select which information to apply to your new item.
- There's nothing you need to set up in Toast Retail before using smart scan; you can create new category groups and categories as you're adding items via scanning.
- Bulk update items: You can select multiple items from your item library and then select Smart scan from the Actions drop-down at the bottom of the page to run smart scan on multiple items. On the pop-up that appears, you'll see all available data fields so you can quickly enhance item details as desired. This option is great if you have a lot of items you'd like to add images, brands, or descriptions for.
- Existing items: On the Item Details page of any existing item, the Smart scan button will show in purple text if a match has been found for your item. After you select Smart scan, you'll be able to review the matched data and decide if you'd like to update your item details.
Add Custom Attributes to Tag Your Retail Items
Custom attributes allow you to capture additional information for more flexible item searching and reporting. To create and manage your custom attributes, navigate to Retail > Item management > Custom Attributes and select +Add attribute at the top of the page.
Note: Custom attributes must be created in Toast Web before you add them to items on your retail import template.
You can choose from four types of custom attributes:
| Attribute Type | Description | Example |
| Number | A numeric value to describe an item. You can allow for decimal points if needed. | Attribute name: # of bottles in a case |
| Selection | A list of descriptive options that can be chosen for an item. You can allow for multiple selections for this type of attribute. | Attribute name: Beverage type |
| Text | An open text field to add notes associated with an item, beyond the item description that guests would see. | Attribute name: Tasting notes (for wine) |
| Toggle | A yes/no toggle for an item. When added to an item, the toggle will default to “no”/off. | Attribute name: Staff favorite |
Once you have your custom attributes set up, you can add them to an item on the item details page, in the Custom attributes section. You can then add the attribute as a column on your item library for easy sorting and filtering.
Back to top
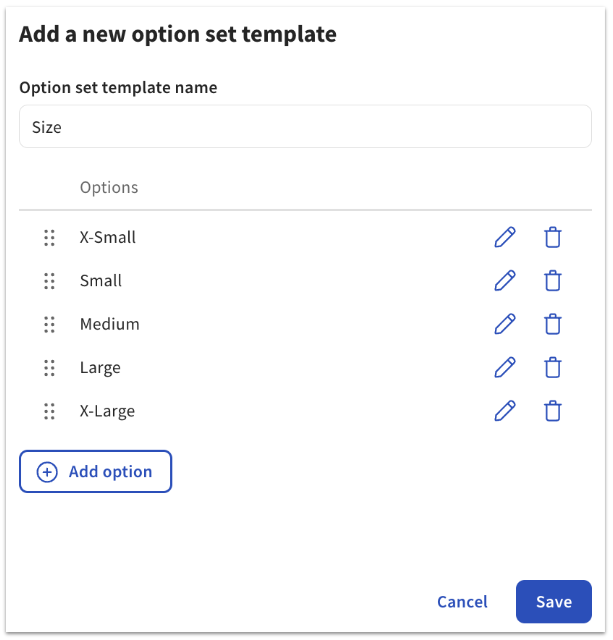
Add Option Set Templates for Item Variations in Toast Retail
Option set templates are used to describe item variations consistently for easier searching and reporting in Toast Retail. A common use case would be creating an option set template for size, which would apply to all apparel items.
To create and manage your custom attributes, navigate to Retail > Item management > Option Set Templates page. Select +Add template at the top of the page to get started
Name your template, and then add all the desired options. The “size” example is shown below.
Once you have your custom attributes set up, you can add them to an item on the item details page, in the Variations section.
Note: Variations belonging to the same group will have the same custom attribute. You cannot apply custom attributes to variations.
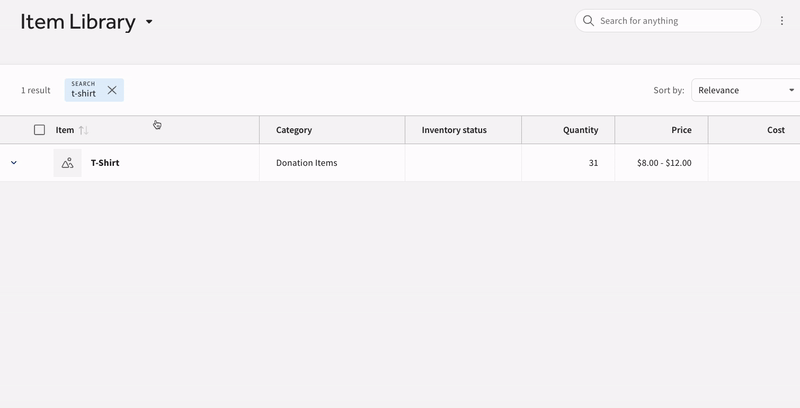
When you choose an option set template for your variations, you’ll be able to check which options you want to include. For the size example, you can see what your item library would look like if you created a T-Shirt item and checked the box for each of the size variations in the option set template.
Note: Option sets cannot be removed from items. You will have to archive and create new items.
Hide Out of Stock Items From Online Ordering in Toast Retail
To hide items that are out of stock from your online ordering page, complete the following steps:
- In Toast Web, navigate to Retail > Settings > Online ordering.
- Toggle Hide out of stock items to the On position.
Back to top
Retail for Multilocation Management
For businesses using Toast Multilocation Management (MLM), it's important to know that category group ("menu") versions cannot be created within the Toast Retail module, but do affect what is visible in the Retail module for each location. The location that a user is working from determines what is visible in the Retail module.
To create versions of retail categories, you'll need to use the menu tools (see Create Menu Versions in this Support Center article, Copy Menus to Other Locations Using Multilocation Management). You can't select "all locations" or different location groups to view retail items from. Instead, the items you see in the Retail module will default to the location you are viewing from.
When viewing an item's item details page within the Retail module, the Cost field in the Pricing and cost section will allow you to enter a location-specific cost to give you flexibility for items with more costly shipping, or differences in vendor pricing. Directly below the Cost field, you'll see any location-specific cost values that have already been added to this item at other locations in your management group.