Set Up Cash Drawers
Last updated: Sep 17, 2026, 5:31 PM
- Before you begin
- Step 1: Connect the cash drawer to a Toast printer
- Step 2: Configure the cash drawer on a Toast POS (recommended)
- Step 3: Configure the cash drawer in Toast Web
- Step 4: Name your cash drawer
- Step 5: Set the starting cash drawer balance
- Step 6: Save and publish your changes
- Related articles
Before you begin
Applies to: Toast POS, Toast Web
Permissions needed:
- 6.2 Kitchen/Dining Room Setup — enabling this also enables 6.10 Printer and Cash Drawer Setup by default
- 6.10 Printer and Cash Drawer Setup — required to access the Printer and Cash Drawer Configuration page if 6.2 is disabled
- 1.6 Apply Cash Payments — required for the employee taking the cash payment
- 1.7 Cash Drawer Access — required for the employee opening the drawer
What you'll accomplish: Connect a cash drawer to a Toast printer, configure it on a POS or in Toast Web, name the drawer, set a starting cash balance, and publish the changes so the drawer is ready to use for cash transactions.
Cash in Hand vs. Cash in Drawer
Toast tracks cash two ways, depending on how an employee is set up to handle it:
- Cash in Hand: The employee uses a personal cash bank for cash payments and is not assigned to a cash drawer during their shift. Because they're carrying the cash themselves rather than depositing it into a shared drawer, they'll need to pay the restaurant the total amount of their cash payments at the end of their shift.
- Cash in Drawer: The employee is assigned to a cash drawer and deposits all cash payments into it directly, rather than carrying the cash themselves. Tips must be held separately from the cash drawer.
Whether an employee's cash shows up as Cash in Hand or Cash in Drawer on their shift review depends on whether they were assigned to (locked to) a cash drawer for that shift — not on the starting balance or any setting on this page. The cash drawer setup in this article establishes the drawer itself; assigning employees to it happens separately in your shift review settings.
Toast supports two cash drawer models: an older APG drawer (identified by an APG label on the bottom) and a newer Toast drawer (identified by the Toast logo on the front). The two models use different cables that are not interchangeable.
If you're setting up two cash drawers on one terminal, additional cabling is required (a splitter for APG; the included kick cables for Toast). See Get Help With Cash Drawers for the cabling and configuration steps for a two-drawer setup.
Step 1: Connect the cash drawer to a Toast printer
Using the cable that came with your cash drawer, connect the drawer to a Toast printer.
Confirm the printer is powered on. If you haven't connected a printer yet, connect it to your network now and follow the on-screen Printer Wizard prompts on a Toast POS.
Expected outcome: The cash drawer is physically connected to a powered-on Toast printer and ready for software configuration.
Step 2: Configure the cash drawer on a Toast POS (recommended)
This is the recommended setup path. To configure the cash drawer using a Toast POS:
- Select the Toast icon in the top-left corner of the POS screen repeatedly until you reach the Settings menu.
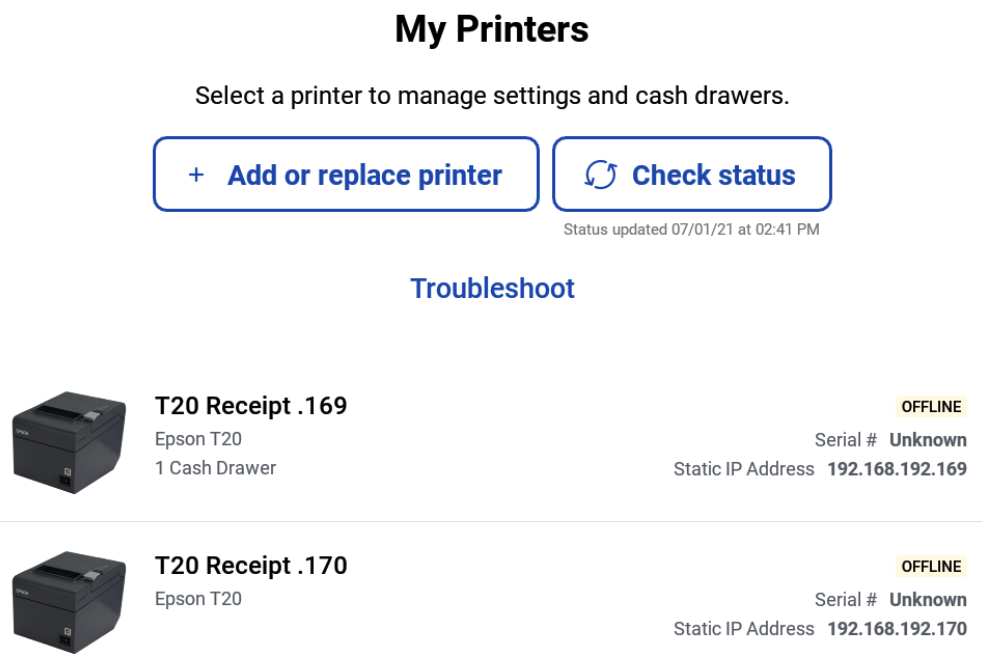
- Scroll down and select Printer Setup.
- Select the printer the cash drawer is connected to. If you haven't connected a printer yet, follow the on-screen Printer Wizard prompts to complete printer setup first.
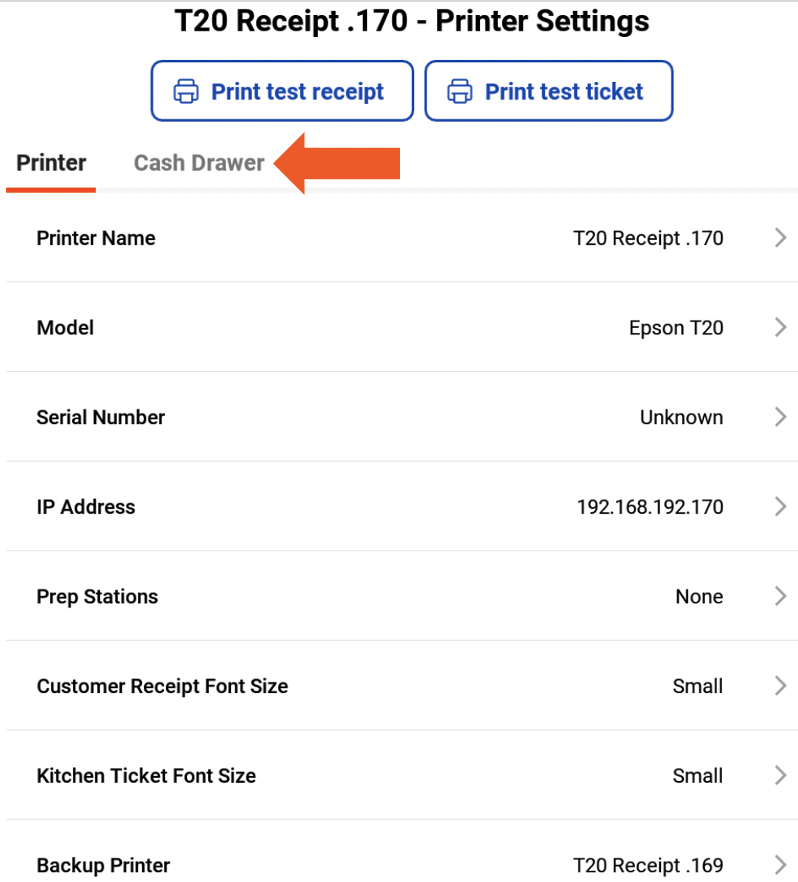
- Select the Cash Drawer tab, then select Drawer Count. Choose whether one or two cash drawers will be connected to this printer, then select Save Changes.
- The Wizard will bring you back to the Cash Drawer tab. You may now select Cash drawer name, Cash Drawer Delay, Starting balance, or Balance Reset to further configure your cash drawer settings.
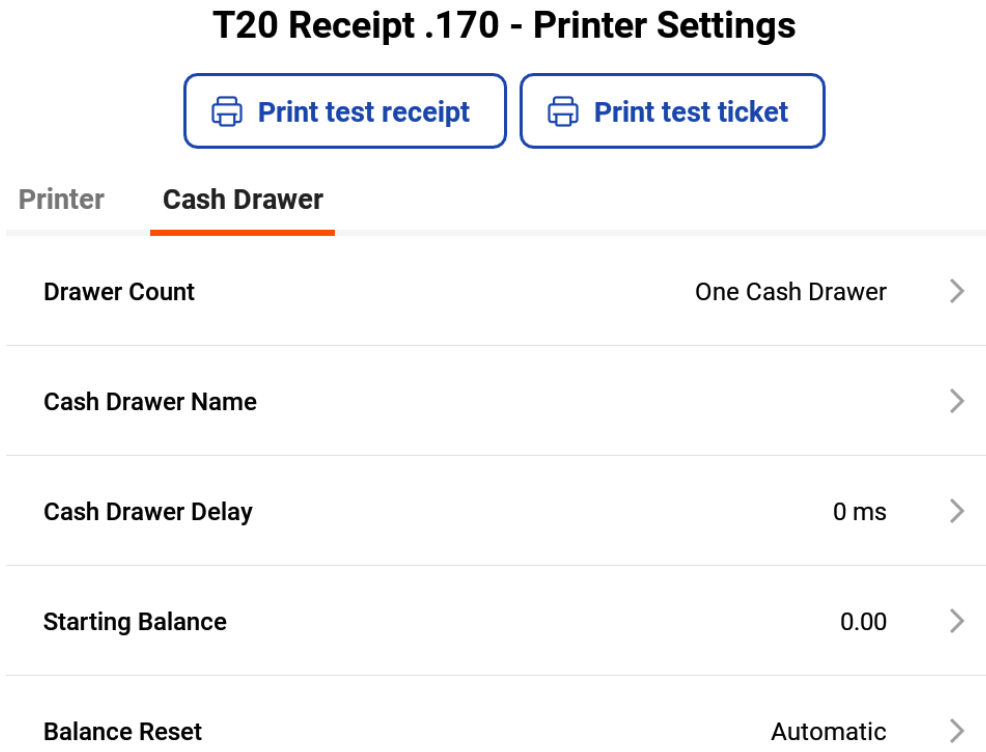
Expected outcome: The cash drawer is registered to the selected printer in the Toast POS, with the correct drawer count configured.
Step 3: Configure the cash drawer in Toast Web
Use this path if you prefer to configure the cash drawer from Toast Web rather than on a POS. To set up the cash drawer in Toast Web:
- In Toast Web, navigate to Finance > Related > Settings > Cash overview > Printers Cash drawers > View cash drawers.
- Select the Printer that is attached to the cash drawer.
- On the Printer Configuration page, scroll down to the Cash Drawers Configuration section and select One Cash Drawer or Two Cash Drawers.
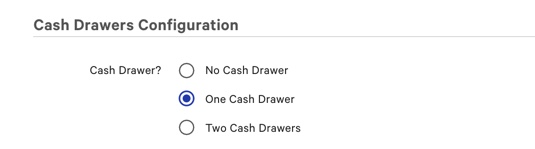
Expected outcome: The Printer Configuration page reflects the correct cash drawer count for the printer.
Step 4: Name your cash drawer
Naming each cash drawer helps when you have multiple drawers across the business and when you review the Cash Drawer Reports. To name a cash drawer:
- Navigate to Finance > Related > Settings > Cash overview > Printers and Cash drawers > View cash drawers > Add.
- Enter a name in the cash drawer name field. Names are limited to 30 characters.
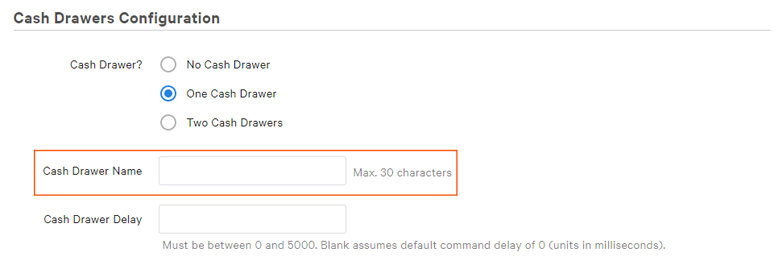
Note: If you leave the field blank, the cash drawer defaults to the name of the printer it is linked to.
To rename a cash drawer later, navigate to Finance > Related > Settings > Cash overview > Printers and Cash drawers > View cash drawers and edit the desired printer by selecting on the name.
Expected outcome: The cash drawer appears under the name you entered (or the printer's name, if you left the field blank) in Toast Web and on Cash Drawer Reports.
Step 5: Set the starting cash drawer balance
The starting cash drawer balance is the amount of cash the drawer holds at the beginning of each shift or business day. To set the starting balance:
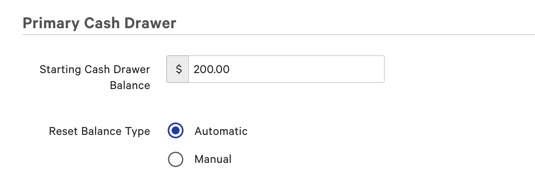
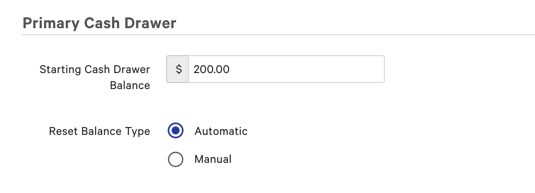
- Under Primary Cash Drawer, enter the default Starting Cash Drawer Balance.
- Set the Reset Balance Type:
- Automatic — When you close a cash drawer, a new one opens with your defined starting balance. All open cash drawers are automatically closed and reopened with the starting balance each night at 4:00 a.m. Recommended by Toast.
- Manual — When you close a cash drawer, you're prompted to enter a new starting balance to open the next drawer. Open cash drawers are not automatically closed overnight.
Expected outcome: New cash drawers will open with your chosen starting balance, using the reset behavior you selected.
To adjust a starting balance after initial setup, see Adjust Starting Cash Drawer Balance.
Step 6: Save and publish your changes
- Select Save to save your cash drawer configuration.
- Select Publish to push the changes to your POS terminals.
Expected outcome: The cash drawer is configured and ready to use for cash transactions at the connected POS.
Note: For a printable setup guide that includes two-cash-drawer instructions, see the Toast cash drawer setup PDF linked in the source article.
Related articles
- Get Started With Cash Management
- Use Cash Drawers
- Get Help With Cash Drawers
- Get Help With Cash Drawer and Shift Review
- Lock Down Cash Drawers
- Manage Multiple Cash Drawers for Employees
- Adjust Starting Cash Drawer Balance
- Cash Drawer Reports Overview
- Remove a Cash Drawer