Set Up Your Wireless M30 Printer on a Self-Managed Network
Last updated: Jun 30, 2026, 12:13 PM
- Hardware Requirements for M30 Printer Setup
- M30 Setup and Configuration
- M30 Setup and Configuration with Epson™ Utility Application on a Smartphone
- M30 Factory Reset Instructions
Hardware Requirements for M30 Printer Setup
Note: 6GHz bands are not supported for set up of this printer.
In order to set up your wireless printer, you'll need the following hardware:
- An Epson M30 printer
- An Epson wireless dongle (comes with the dongle extender and cover)
- A Smart phone, tablet or Wi-Fi capable computer (Mac or Windows) - Note: The device used for set up will depend on if you use the smart phone application or the Epson net configuration page in a web browser
M30 Setup and Configuration
To setup and configure the Epson M30 printer, follow the steps below:
- With the printer powered off, connect the Epson wireless dongle to the USB port located on the back of the printer. Do not connect an Ethernet cable to the printer. The printer would then see the Ethernet cable as a primary connection and it would cause issues as you attempt to make it wireless. If you connect an Ethernet cable, you'll need to factory reset the printer: disconnect the Ethernet cable with the power on and the dongle connected. Instructions for how to complete a factory reset are in the next section of this article.
- Turn the printer on. It should print a slip that says "SimpleAP Start" and list the SSID and passphrase of the EPSON_Printer network.
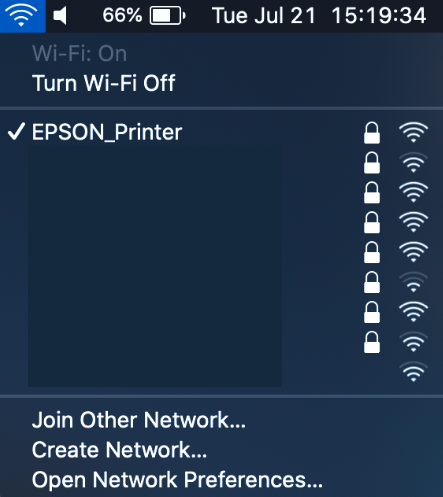
- On your computer, search for and connect to the Wi-Fi network/SSID: EPSON_Printer. If needed, the password is 12345678.
- If your computer doesn't show the Wi-Fi Network/SSID: EPSON_Printer, you'll need to factory reset your printer. See instructions in the next section of this article. Note: If the EPSON_Printer network is not visible, it could also be because the device being used for set up does not have the 2.4G band enabled.
- If your computer doesn't show the Wi-Fi Network/SSID: EPSON_Printer, you'll need to factory reset your printer. See instructions in the next section of this article. Note: If the EPSON_Printer network is not visible, it could also be because the device being used for set up does not have the 2.4G band enabled.
- After connecting to the printer, the printer will print a slip saying "SimpleAP connected to" and it will show the MAC Address of the connected device. Open your web browser and type in the IP address of the printer into the address bar. If you don't know your printer's IP address, you can print a self-test page:
- Turn off the printer.
- Hold the feed button and then turn the power back on while holding the feed button.
- A receipt will print as a result. The IP address will be printed near the middle of the receipt.
- If the steps above do not work, you can attempt these steps to print the self-test page:
- The printer should be turned on.
- Press and hold the small black pinhole button on the bottom of the printer next to the cash drawer port.
- Once the self-test page starts printing, you may let go of the black pinhole button.
- Type the printed IP address into the address bar of the internet browser being used. Epson login is usually "epson" for username and "epson" for password OR "epson" for username and your printer's serial number for password. The serial number password is case sensitive.
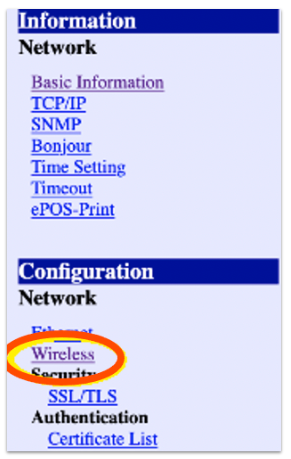
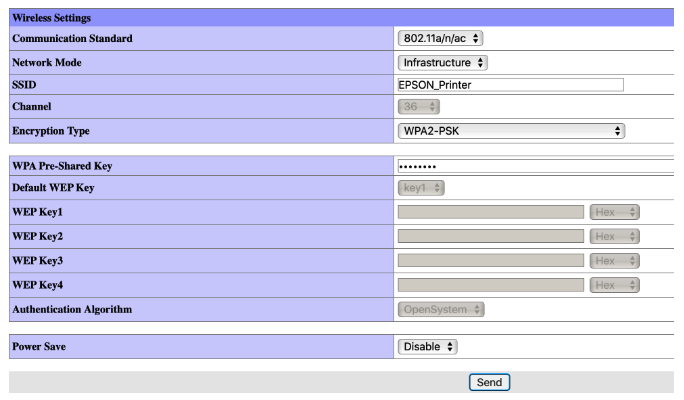
- The following menu will appear once you login into the printer in the previous step. Select Wireless under the Configuration section.
This will bring up the following screen:
- The Communication Standard may need to be set to different options depending on how the self-managed network is configured.
- Auto is the recommended setting if the Self-managed network is using both 2.4GHz and 5GHz wifi bands or 2.4GHz or 5GHz only. This is the most common scenario. If this fails try one of the other standards.
- 802.11b/g/n is recommended if the self-managed network is using only 2.4GHz.
- 802.11a/n/ac is recommended if the self-managed network is using only 5GHz.
- Network Mode should be set to Infrastructure.
- On the SSID line, where it says EPSON_Printer, erase EPSON_Printer and type in the SSID of the same Wi-Fi network that your Toast devices are using. Enter the SSID exactly as it appears. Note: If your Wi-Fi network is not set up, you will not be able to complete this step.
- Confirm that the Encryption Type is set to WPA-PSK (AES) (mixed mode WPA2/WPA). That is going to be the most common case and can be tried first. Certain circumstances might require a different setting here depending on how the self managed network Encryption type is configured.
- If the self-managed network Encryption type is configured for WPA2/WPA3 or WPA2 Only, WPA-PSK (AES) (mixed mode WPA2/WPA) is the appropriate setting in Epson Net Config.
- If the self-managed network Encryption type is set to WPA2 ONLY, WPA2-PSK is the appropriate setting in Epson Net Config.
- WPA2-Enterprise should not be used.
- On the WPA Pre-Shared Key line, type in your Wi-Fi network password.
- Select Send.
- On the next page that comes up, select Reset. The printer should reset itself and print a slip.
- The printer is now in DHCP mode. If you want to set the printer up with a Static IP address, use the steps for Epson printers in this article. If you are ready to set the printer up in Toast POS, follow the procedure in this article for Printer Setup and ensure the printer is added as a wired printer.
| To set up your printer to display euro as the currency on receipts, you need to configure the language pack settings in the printer setup section of Toast Web. Learn more in this Support Center article, Configure Your Printers to Display Euro. |
M30 Setup and Configuration with Epson™ Utility Application on a Smartphone
Use this alternate method only if you're unable to use the Epson app as outlined above.
- Make sure the wireless dongle is installed in the USB port at the bottom of the printer.
- Factory Reset the printer following the procedure below.
- Download an application called Epson TM Utility for smartphones. There is a version for iPhone and Android.
- Open the App and click Wifi Setup Wizard.
- Select their model M30 (M30/M30ii) (It will not work if you choose the wrong model, so try M30 if M30ii doesn't work).
- Turn the printer ON as directed and look for a printed sheet. If you factory reset the printer, it should already be on, and a slip should have already printed. Select Printed.
- The App will ask you to connect to the EPSON_Printer network; select Join.
- The phone will connect to the EPSON_Printer network, and the printer will print a sheet confirming.
- The Utility App will ask you to input the wireless network name or SSID of the Wi-Fi network, and it might also auto-populate if the Auto slide button is turned on for some smartphone models. If the Auto slide button is turned on, the network name will auto-populate to the same Wi-Fi network the smartphone is using already. If the network being used for Toast is different, turn Auto off and manually enter the correct SSID.
- The next question is a Security Selection. This may or may not prompt depending on the smartphone being used. The two options are WPA-PSK(AES) or WPA2-PSK(TKIP/AES). Select WPA2-PSK(TKIP/AES) and move to the next step.
- Enter the Passphrase or Wi-Fi network password for the Toast network and select Next.
- The next selection is to specify the IP Address Setting. In most cases, just select Auto (DHCP).
- Select Set to Printer.
- The printer will reboot, and then it will be connected to the Toast wireless network (The printer will print a slip with a new IP address).
- Now the printer can be added in the Printer Setup on a Toast device using this article. Note: If this procedure fails to configure the printer, continue to the next section for the printer setup.
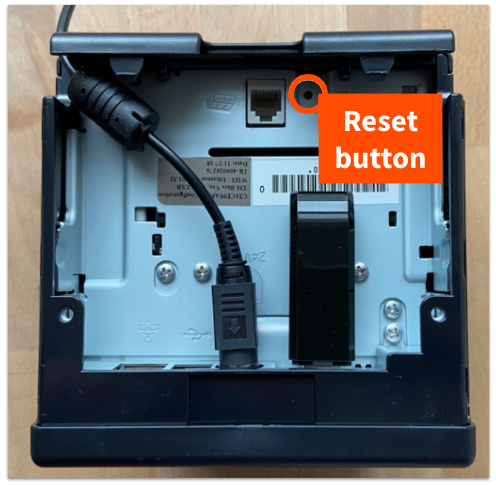
M30 Factory Reset Instructions
To factory reset the printer, begin by powering off the device. Then, using a pen or paper clip, push in or hold the reset button (pictured below) while powering the printer back on.
Note: In rare cases, you may see a red exclamation point on the front of the M30 printer after completing this step. This is due to a firmware issue. If you see the red exclamation point after turning your printer on, please contact your onboarding consultant or the Customer Care team in order to get your printer replaced.