Toast Printing Hub Installation Guide
Last updated: Jul 22, 2026, 10:28 AM
Follow the steps in this article to set up your Toast Printing Hub (TP300).
- Toast Printing Hub Installation for Toast Flex 3
- Toast Printing Hub Installation for Toast Flex 14
- Additional Resources
Toast Printing Hub Installation for Toast Flex 3
Follow the steps below to connect the Toast Printing Hub to a Toast Flex 3 terminal.
- Open the Printing Hub's back cover.
- Connect the power adapter to the printer, then plug it into a wall outlet. The printer will power on automatically.
- Connect an Ethernet cable to the Ethernet In port on the printer, and plug the other end into your Toast network switch, router or RJ45 wall outlet connected to your Toast network. See more details on Set Up Your Toast Network.
- Connect the Printer Power Plus Cable to your terminal base Power port, and the other end to the Terminal port on the printer, tighten the thumb screws.
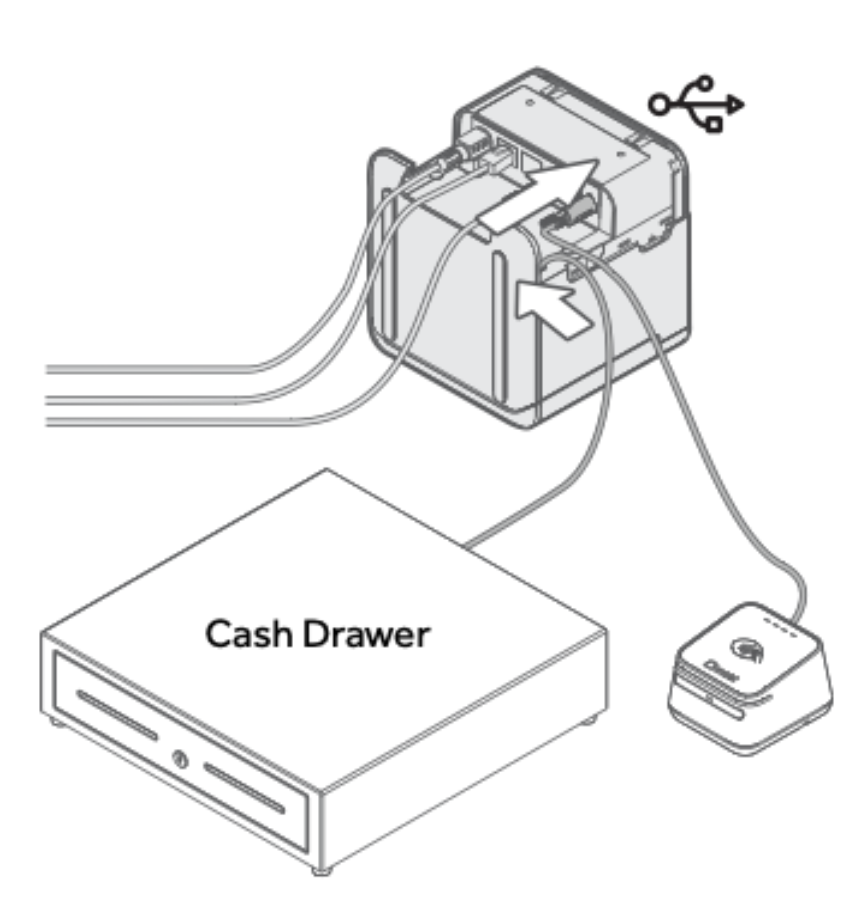
- Optional - Connect a cash drawer and/or USB accessories to the printing hub.
- Align the bottom edges and close the back cover.
- Open the paper compartment and load the thermal paper roll with the glossy side facing the status LEDs.
- After turning on the terminal, the Power, Network, and Terminal lights should all be green.
- On your Toast POS, follow: Printer Setup > Set up now. We will guide you through the setup of your new printer. Otherwise, choose the manual setup flow with + Add or replace printer.

Toast Printing Hub Installation for Toast Flex 14
Follow the steps below to connect the Toast Printing Hub to a Toast Flex 14 terminal, depending on if you’re using the Adapter or not.
Note: Using a TP300 Printing Hub Adapter will enable advanced features of the Printing Hub including USB networking of peripherals like scanners and scales.
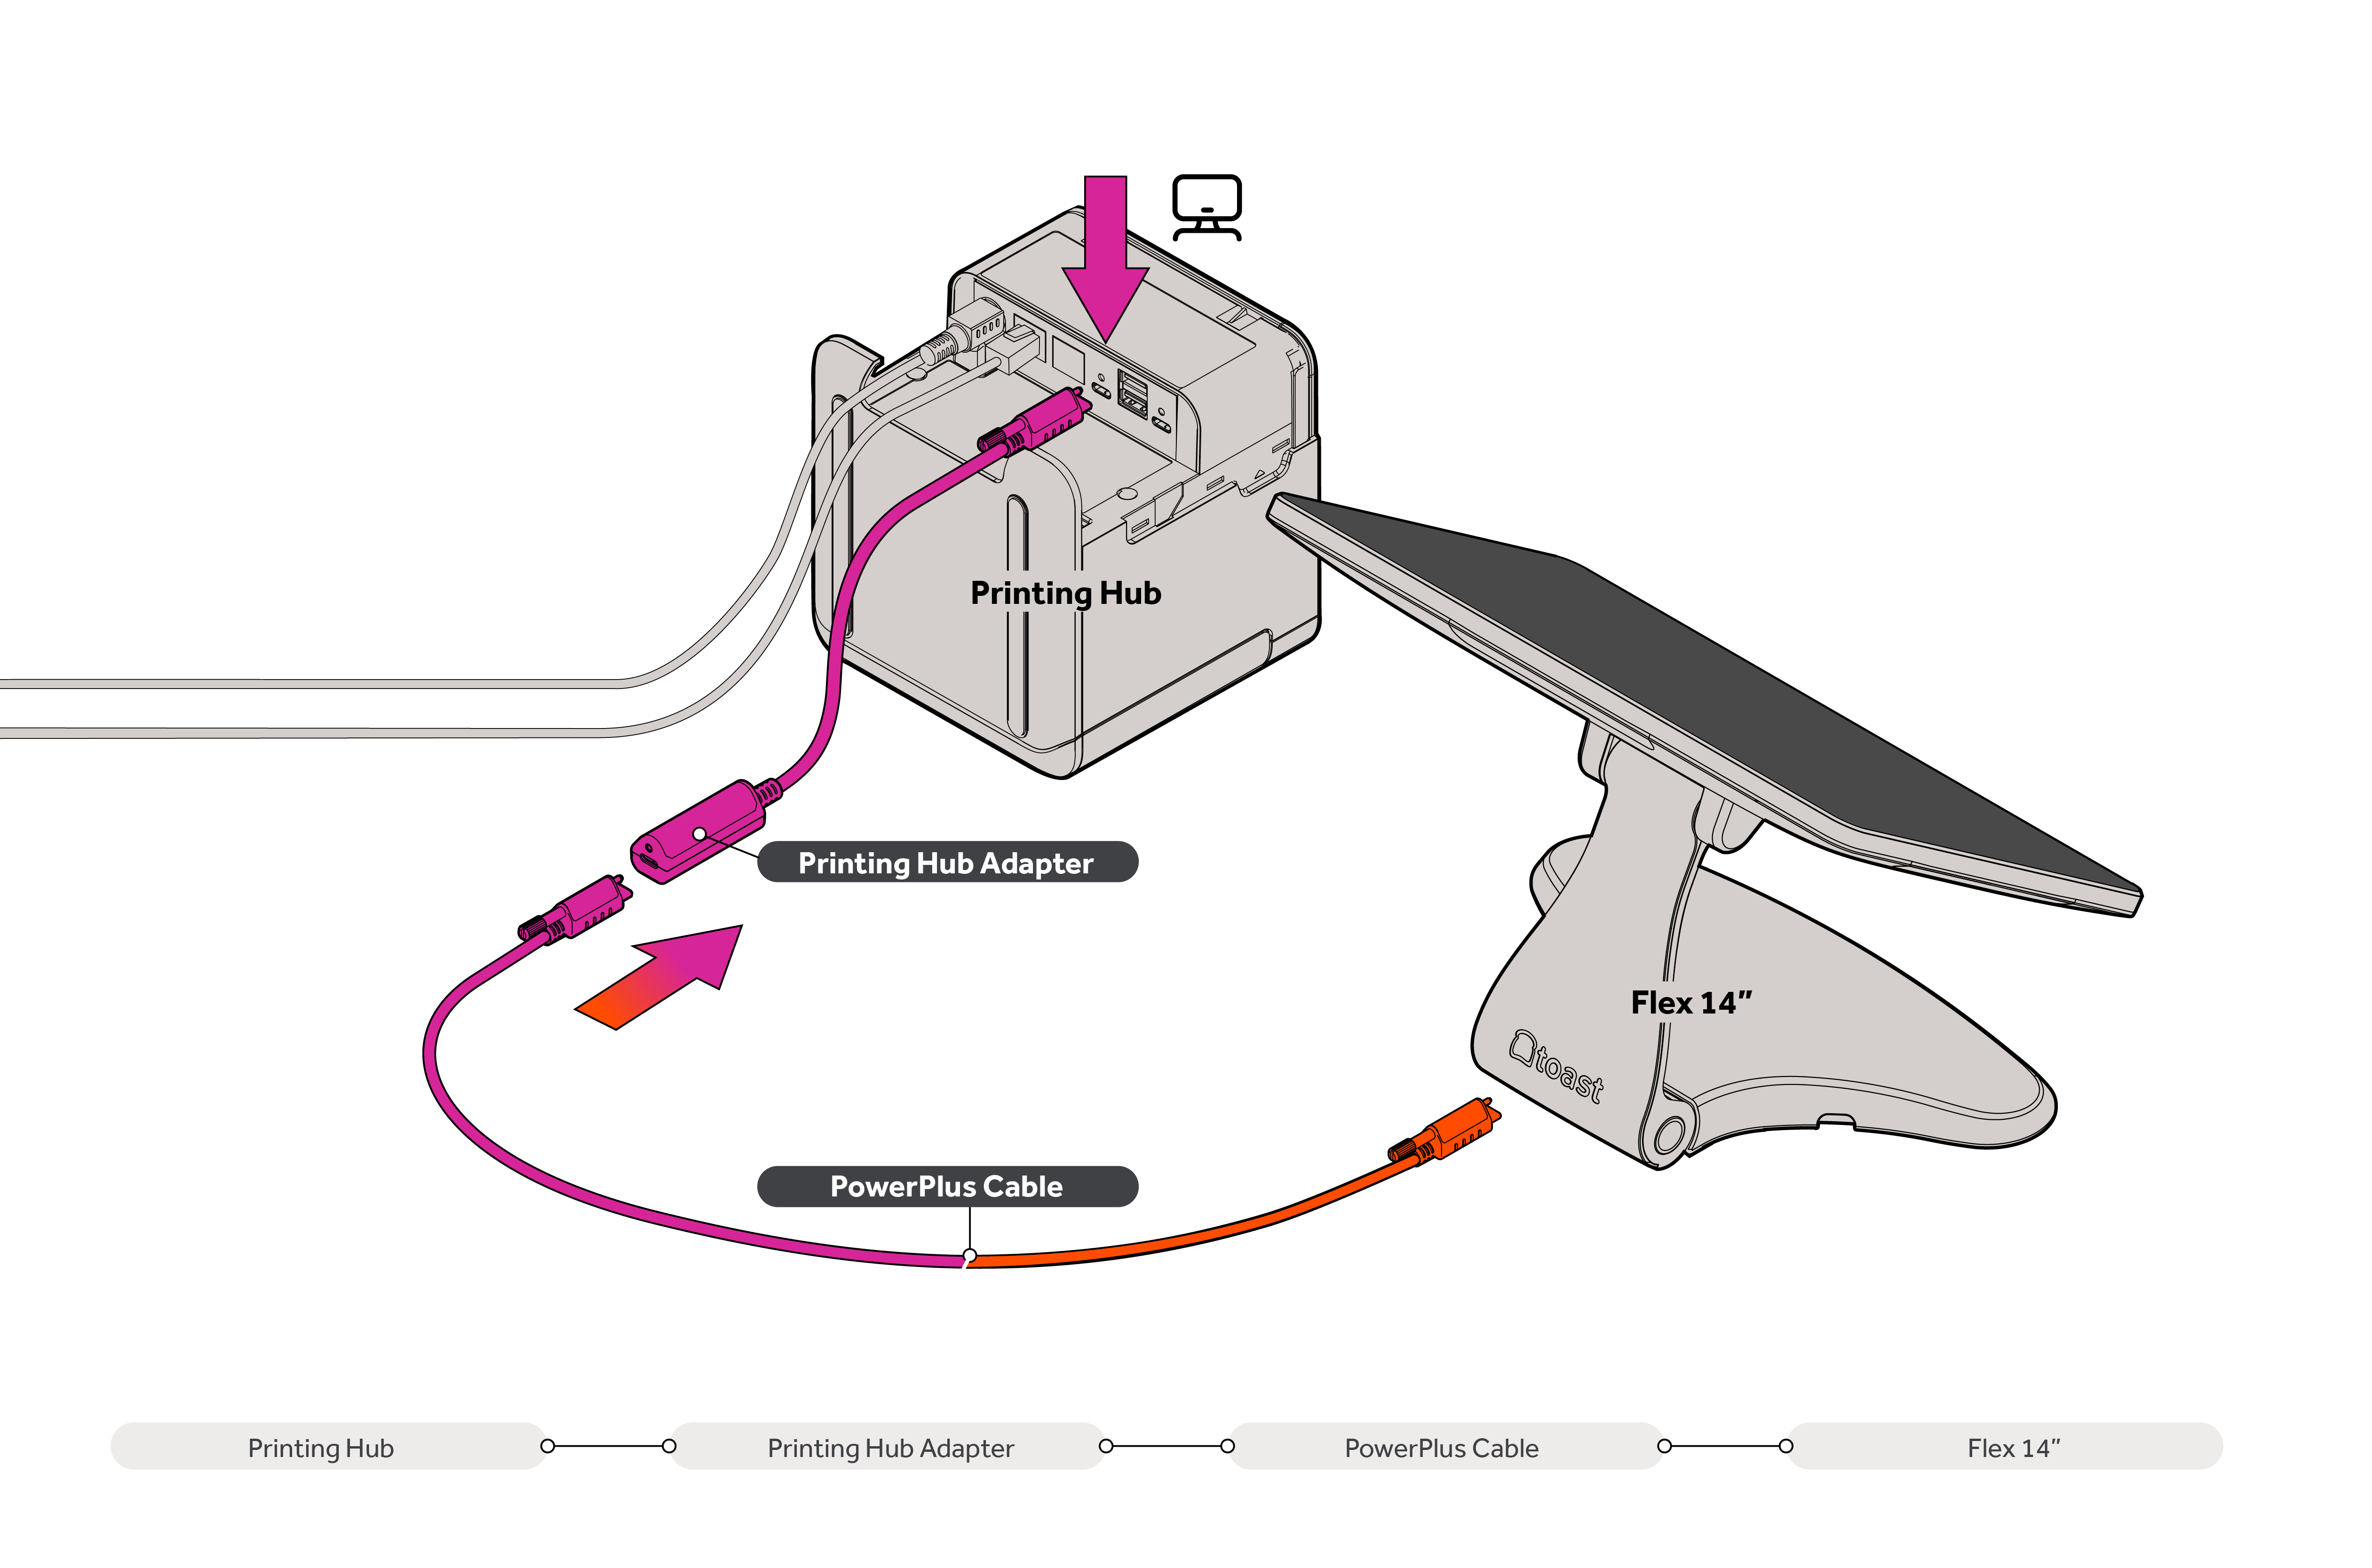
Follow these steps if connecting the TP300 Printing Hub using the Adapter:
- Printer port: Connect the end of the Printing Hub Adapter labeled "To TP300" directly to the Terminal port on the TP300 Printer. Secure the connection using the integrated thumbscrews to prevent accidental disconnects.
- USB cable: Plug the Printer Power Plus Cable provided with the Printing Hub into the receptacle on the adapter.
- Terminal port: Connect the other end of the Power Plus Cable to your Flex 14 (TT200) terminal.
- Optional: Connect a cash drawer and/or USB accessories to the printing hub.
- On your Toast POS, follow: Printer Setup > Add or replace printer. We will guide you through setting up your new printer.
Note: These connections will enable the following features:
- Power Delivery: power is supplied from the TP300 Printer to the Flex 14 terminal.
- Ethernet over USB-C: enables the terminal to access the internet over the USB cable and Adapter. In this configuration, an Ethernet cable plugged into the Flex 14 terminal is not required, but can be used as an additional Internet connection.
- Direct-Print over USB-C: facilitates reliable, high-speed receipt printing from the terminal to the TP300 over the USB connection, providing a backup if network connectivity is lost. Printing over the network from Flex 14 to other printers is also supported, as well as sending print jobs to TP300 from other devices in the restaurant (see article Printer Settings in Toast Web).
- USB Hub Networking: supports the use of peripherals (such as scanners, scales, or card readers) attached to the TP300's USB-A and USB-C ports, making them accessible to the Flex 14 terminal.
Follow these steps if connecting the TP300 Printing Hub without the Adapter:
- Follow steps 1-3 above.
- Optional: Connect an Ethernet cable to the Ethernet Out port on the printer, and plug the other end into the Flex 14 Ethernet port.
- Optional: Connect a cash drawer to the TP300 Printing Hub.
- Follow step 5 above to set up your printer.
Note: This connection will enable the following features:
- Ethernet over RJ45: enables the terminal to access the internet over the RJ45 cable when connected to the Ethernet Out port on the printer.
- Printing over the Network: supports receipt printing on TP300 over the network from Flex 14, as well as other printers on the network.
Additional Resources for the Toast Printing Hub