xtraCHEF: Extract Monitor
Last updated: Apr 8, 2026, 10:09 AM
- What Is the Extract Monitor?
- View Extract Details
- Re-Extract a Failed Extract
- Adjust Your Extract Date
- Initiate On-Demand Extract
- Extract Errors and Solutions
What Is the Extract Monitor?
The Extract monitor is where xtraCHEF prepares and records invoice extracts for your third-party accounting. Here, you can quickly view invoice extract statuses, re-extract failed invoices, and initiate on-demand extracts. The Extract monitor is also where you can download CSV file extracts for non-QuickBooks accounting systems.
View Extract Details
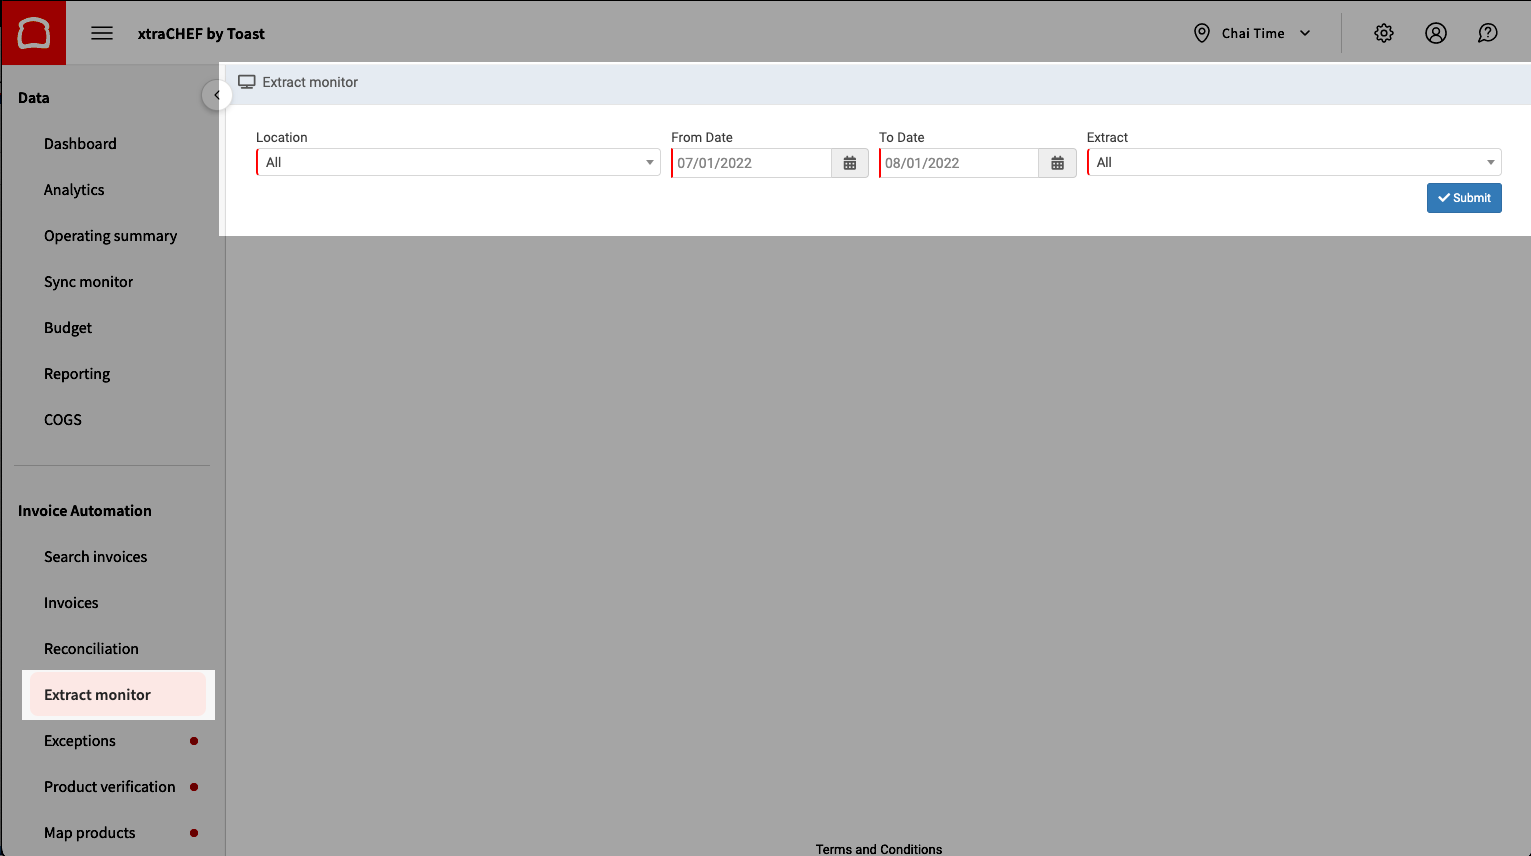
- To get started, select Extract monitor on the left side of your xtraCHEF account. Then choose your location, date range, and extract type (your extract type will be the software you want to sync your invoice data with). The From Date can only be set as far back as you have synced to.
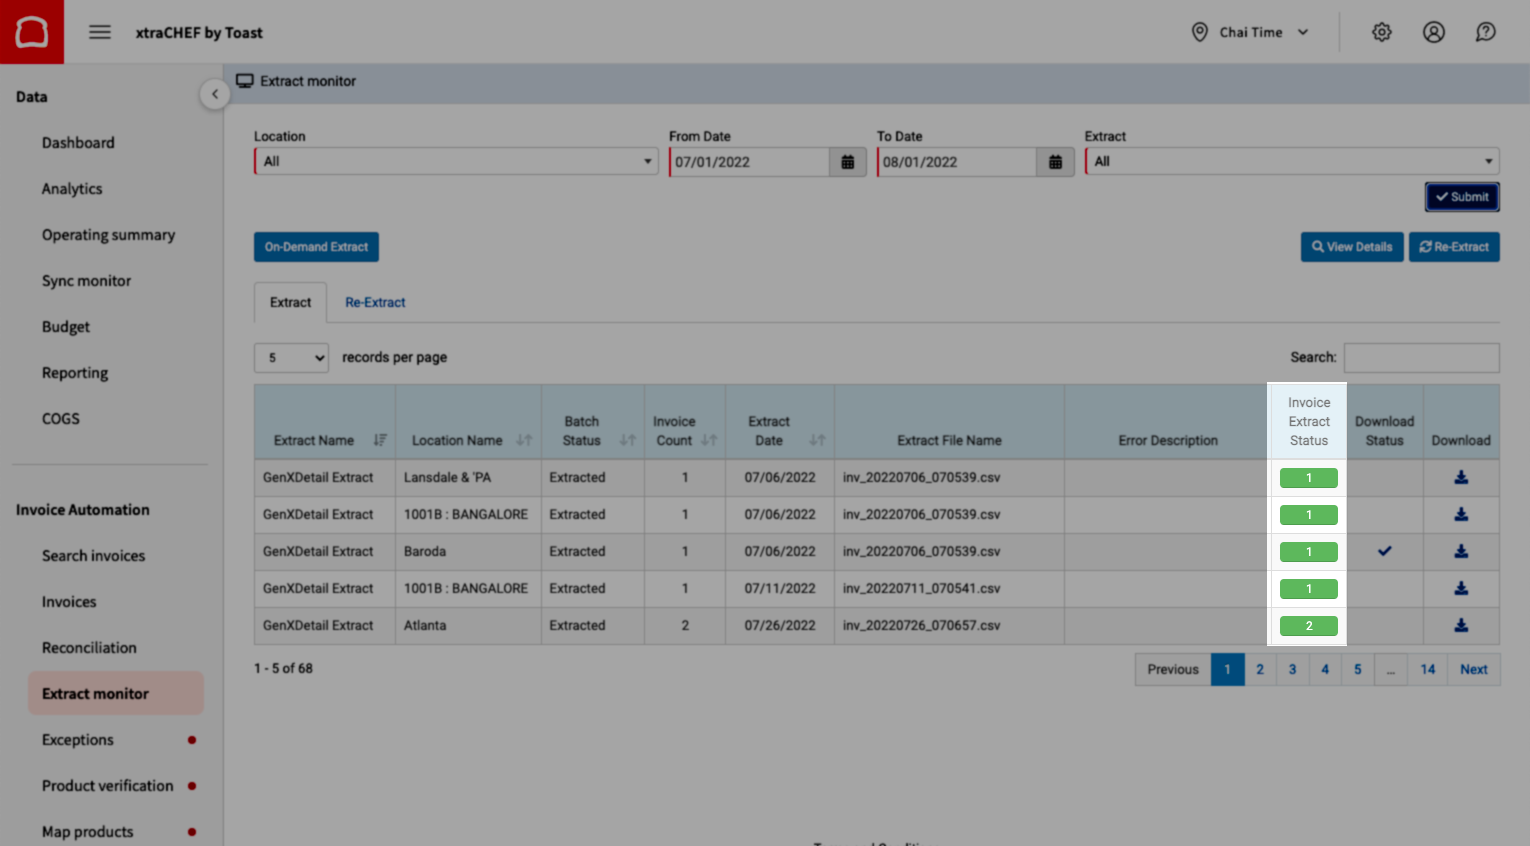
- Select Submit when you're ready and you'll see a record of when your invoice extracts and their batch status.
- Any extract that occurred between your set date range will populate below. Those extract batches may include more than one invoice. The extract status will highlight any successful extracts and note failed ones.
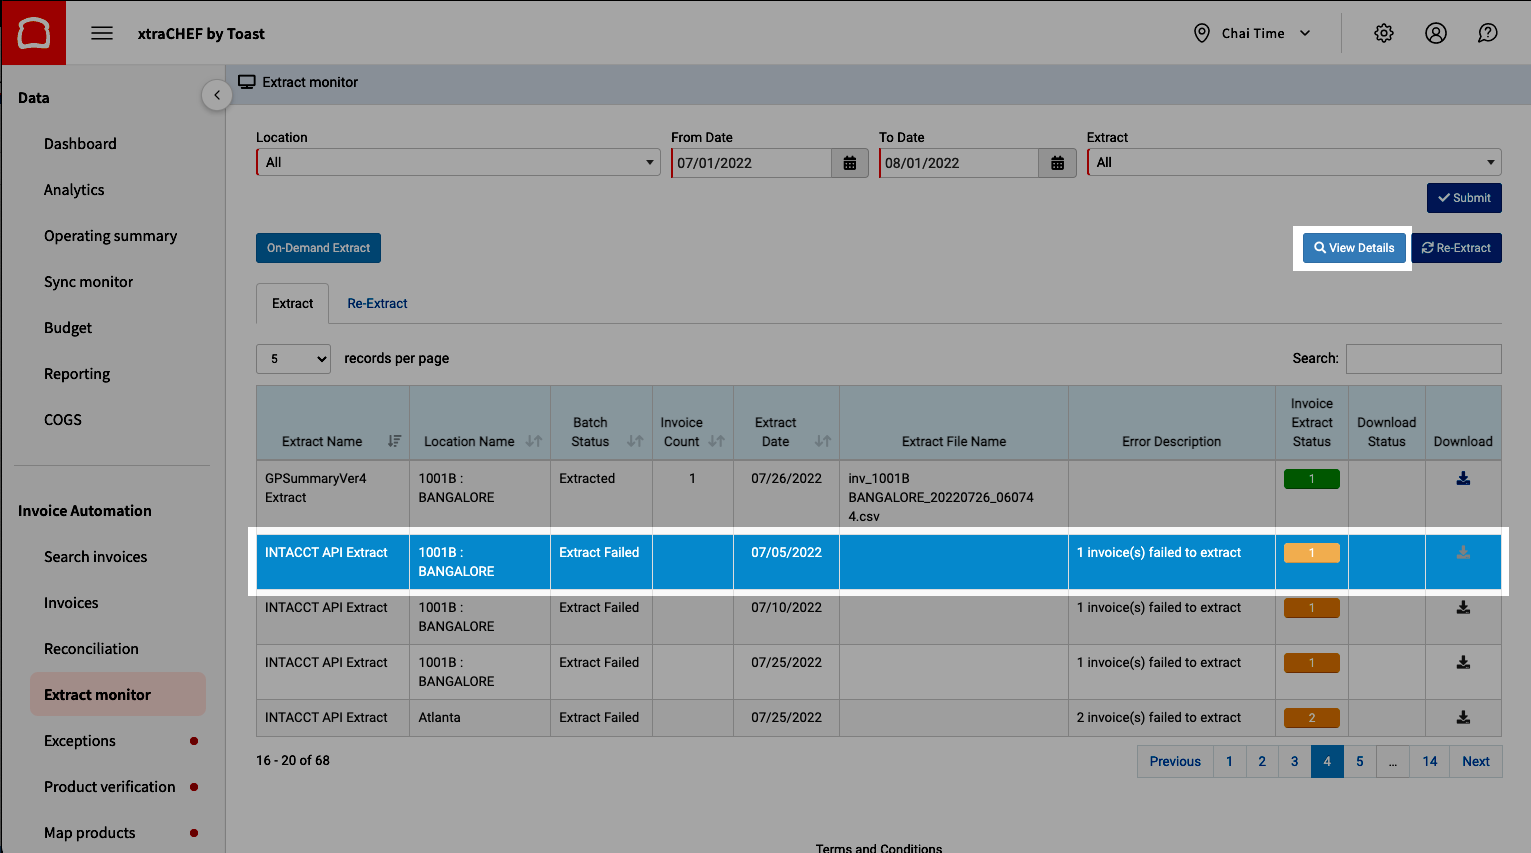
- Under the Invoice Extract Status column, successful extracts appear green, whereas failed extracts are color-coded orange. If there is an error with one of the invoices, it will appear as orange. Select View Details to learn more about the error with the specific invoice.
- In most cases, you will be able to resolve the underlying issue. Invoices can then be re-extracted for your accounting to ensure there are no gaps in accounts payable.
Re-Extract a Failed Extract
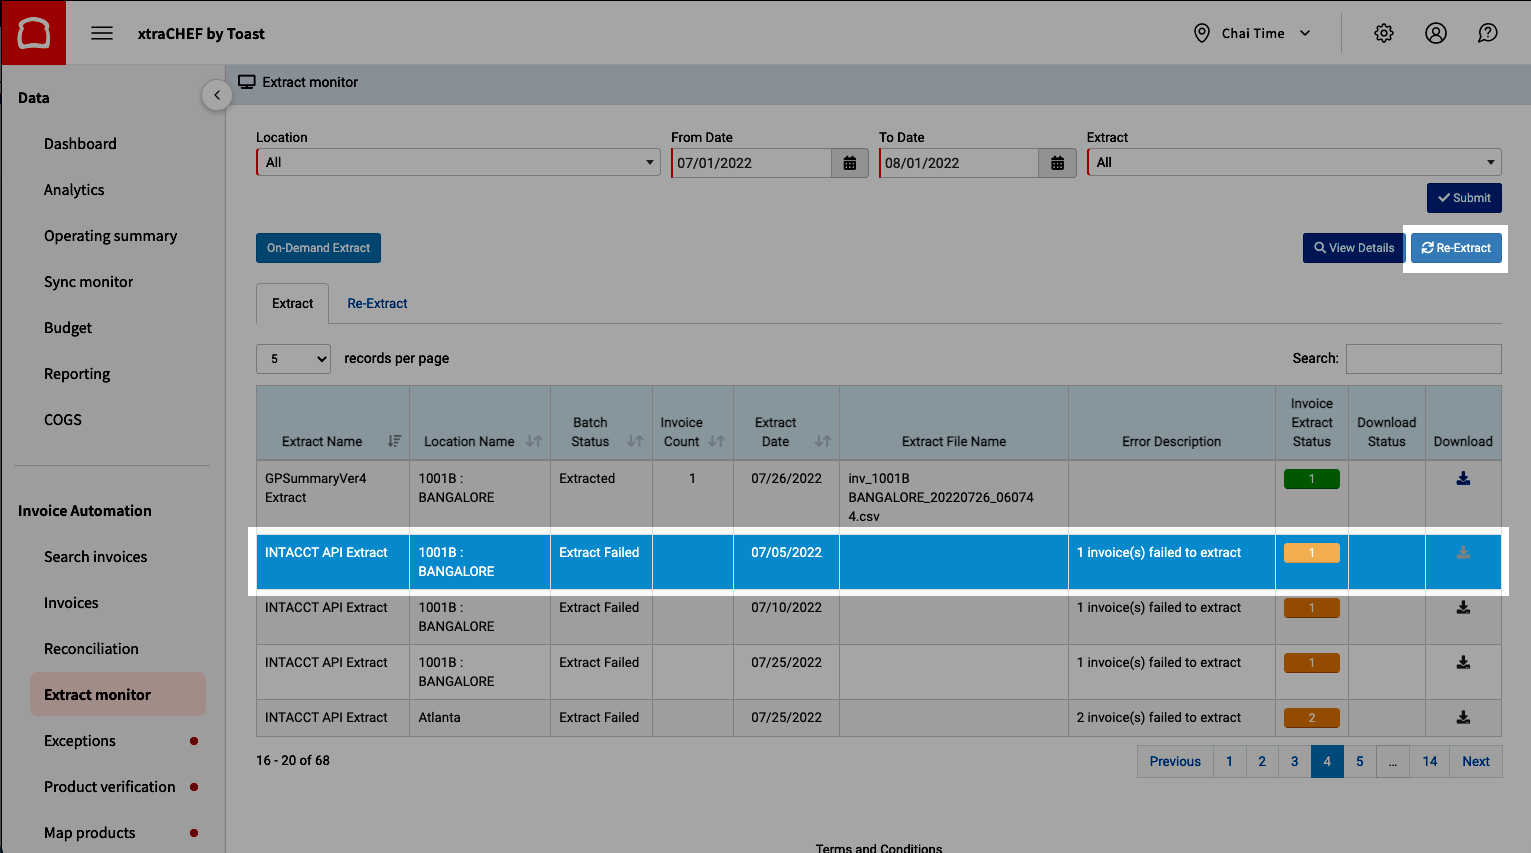
- After discovering why an invoice extract failed and resolving the underlying reason, you can re-extract invoices by selecting the invoice batch and Re-Extract.
- Then, select Yes on the confirmation message. Note: There is a limit on the amount of invoices that can re-extracted at once. The limit varies based on date range and/or invoice count.
You may notice that some invoices are not extracting due to the invoice date being older than the xtraCHEF account's extract date. There is an easy way to correct this in xtraCHEF. Note: If QuickBooks is enabled at the location level, contact Customer Care if you need to change the start date.
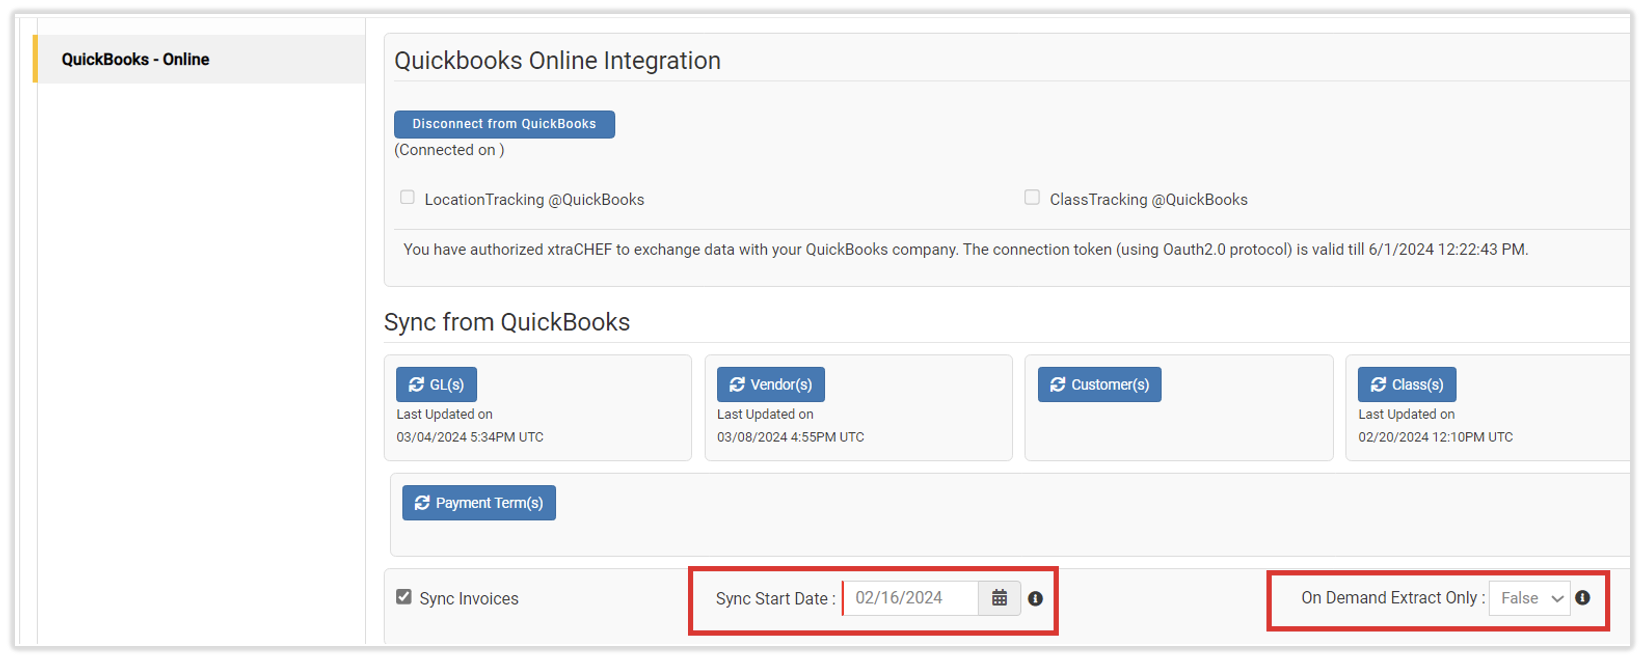
- Select the gear icon > Account Setup > Integration tab.
- Under the Sync from QuickBooks area, you can adjust the date that you would like the syncing of invoices to begin.
- Additionally, you can enable the on-demand option. This will only allow invoices to sync when you use the On Demand Extract Only button in the Extract monitor.
Initiate On-Demand Extract
You can initiate an on-demand extract via your Extract monitor. This will push any invoice in xtraCHEF that is currently processed into an extract. Running an on-demand extract will not disrupt your usual extract cadence. To do this, select On-Demand Extract. A list of qualifying invoices will be presented with the ability for users to manually exclude specific invoices (via invoice date and/or extract date) from the final extract request.

Extract Errors and Solutions
If you get an error message while using the Extract Monitor or performing an extract, quickly jump to your error message and solution via the list below:
- "There is an invalid reference to QuickBooks Vendor "Vendor Name" in the Bill. QuickBooks error message: Invalid argument. Or Vendor 'Vendor Name' does not exist in QuickBooks."
- "Account '1234' does not exist in QuickBooks OR There is an invalid reference to QuickBooks Account '1234' in the Bill. QuickBooks error message: Invalid argument. The specified record does not exist in the list."
- "Message=AuthenticationFailed; errorCode=003200; statusCode=401"
- "String length is either shorter or longer than supported by specification"
- "Feature Not Supported"
- "There is an invalid reference to QuickBooks Account "XCG-TAX" in the Bill. QuickBooks error message: Invalid argument."
- "Warning: Location Account number is not assigned in XtraCHEF. Bill has been pushed to QuickBooks Online without any class assignment."
- "Payment 'XXXXX' does not exist in QuickBooks."
- "Invalid account type: Check your account details before you continue. You may need to select a different type of account for your transaction."
- "QuickBooks connection not established."
- "QuickBooks Error Message: There is no row at position 0."
- "Account period closed, cannot update through services API."
- "There is an invalid reference to QuickBooks AP Account "XXXX" in the bill. QuickBooks error message: Invalid argument. The specified record does not exist in the list."
- "Invoice not in completed state"
- "Object reference not set to an instance of an object"
- "Duplicate invoice"
"There is an invalid reference to QuickBooks Vendor "Vendor Name" in the Bill. QuickBooks error message: Invalid argument. OR Vendor 'Vendor Name' does not exist in QuickBooks."
This type of error is due to the Tenant Vendor Code not matching what is listed as the Vendor Name or "Display Name As" for the vendor listed in QuickBooks. To resolve this, you must correct the Vendor Code in xtraCHEF's Vendors hub to match what is listed in QuickBooks.
Complete the following steps below:
- Select Vendors from xtraCHEF's left-hand menu bar.
- Search for the specific vendor in question.
- Select the Vendor Code that you wish to update.
- Ensure that the vendor code in xtraCHEF and QuickBooks are identical. To view this field, edit the vendor information in QuickBooks.
- QuickBooks Online: The vendor code should match the Display Name As field for the vendor.
- QuickBooks Desktop: The vendor code should match the Vendor Name within the desktop.
- Once the Vendor Code is updated, you can then re-extract the failed file from the Extract monitor or Search invoices.
"Account '1234' does not exist in QuickBooks OR There is an invalid reference to QuickBooks Account '1234' in the Bill. QuickBooks error message: Invalid argument. The specified record does not exist in the list."
This error will return when the GL Code listed for an invoice is not listed within your QuickBooks System. This error will appear on all invoices with the GL Code specified in the extract error message.
There are two possible but conditional solutions:
- If the GL code is correct but is listed differently in xtraCHEF than how it appears in QuickBooks, you can edit the GL code.
- If the incorrect GL code is being displayed in the error message, this would indicate the incorrect category was assigned to a product listed on the invoice. To correct this, you can update the GL code from your item library. Learn how here: xtraCHEF: Changing a Product's GL Code or Category.
"Message=AuthenticationFailed; errorCode=003200; statusCode=401"
This error is typically related to the QuickBooks Online token expiring. However, it could also be a timing-out error from QuickBooks. To confirm which it is, first attempt to re-extract the extract file or specific invoice from either the Extract monitor or Search invoices. If the same 401 error is received again, you'll want to refresh your QuickBooks token. To do this, follow the steps in xtraCHEF: QuickBooks Online Integration.
"String length is either shorter or longer than supported by specification"
The Invoice ID is too long. QuickBooks Online has a limit of 21 characters for an invoice ID.
- Navigate to Search invoices and open the invoice.
- Select View detail.
- Correct the Invoice Number field to reflect less than 21 characters and submit the invoice.
- You should then be able to re-extract the invoice from the Extract monitor or Search invoices.
"Feature Not Supported"
This error indicates your version of QuickBooks is not supported for API integration. Self-Employed and Simple Start QuickBooks Online versions do not support integration with xtraCHEF. Below are the supported QuickBooks Online versions that support API integration:
- QuickBooks Online Essentials
- QuickBooks Online Plus
- QuickBooks Online Advanced
"There is an invalid reference to QuickBooks Account "XCG-TAX" in the Bill. QuickBooks error message: Invalid argument."
This error is due to how your header-level charges are being distributed. xtraCHEF has four header-level charges that can be distributed to your preference: Sales Tax, Freight/Distribution Charges, Discounts, and Other Charges.
You have 3 options to handle these header level charges: Distribute evenly among all GL Codes applied to the invoice, Apply only to the GL Code with the highest cost listed on the invoice or apply to a specific GL code within your QuickBooks system.
If no preference is listed, xtraCHEF will apply these to default GLs: XCG-FC, XCG-OC, XCG-DC, and XCG-TAX. If this error is appearing and you need to have the default header breakout altered, please let us know your header level extract preferences at support@xtrachef.com.
"Warning: Location Account number is not assigned in XtraCHEF. Bill has been pushed to QuickBooks Online without any class assignment."
xtraCHEF only has location-based class assignments. Follow the steps below to extract invoices with class assignments.
- First, import the class from QuickBooks Online or QuickBooks Desktop into xtraCHEF. If you have already imported it, you can disregard this step.
- In xtraCHEF, navigate to the gear icon > Locations.
- Select Edit Location Details.
- In the account number field, enter a Class Name. Ensure that you enter the class name and not the reference number.
- Once the class is assigned, your invoices will then reflect the associated class name. Note: If both location and class tracking are enabled, then the account number will be synced to the location in your accounting system.
"Payment 'XXXXX' does not exist in QuickBooks."
This error message appears when the payment information entered in xtraCHEF does not match the information entered in QuickBooks. To resolve this, navigate to QuickBooks > Settings > All Lists > Payment Methods. Then, verify if the information entered in the Name column is an exact match of the information entered in xtraCHEF.
"Invalid account type: Check your account details before you continue. You may need to select a different type of account for your transaction."
Log in to QuickBooks and verify if the GL account type and code match with the one specified in xtraCHEF. If it doesn't match, update accordingly. Once changes have been made, re-extract the invoices in xtraCHEF under Search invoices.
Back to top
"QuickBooks connection not established."
You must first connect QuickBooks to xtraCHEF. Read xtraCHEF: Get Started With QuickBooks Online Integration or xtraCHEF: Get Started With QuickBooks Desktop Integration.
"QuickBooks Error Message: There is no row at position 0."
This type of error indicates that no payment method has been assigned for receipts. Whenever invoices are processed under the RC (receipt) document type, it is required that you assign a payment method to extract the invoice to QuickBooks.
To assign a payment method:
- Select Search invoices in xtraCHEF.
- Enter the invoice number.
- Then select Search > View detail > Edit invoice > Payment Details.
- In the Payment Details tab, select the correct payment method from the drop-down menu.
- Select Submit Invoice.
Once the payment method has been assigned, you can then re-extract all failed invoices for them to be reflected in QuickBooks.
"Account period closed, cannot update through services API."
This invoice is not being extracted due to the accounting period being closed for the invoice date. If you need to extract the invoice from QuickBooks, you can update the invoice date to the current accounting period.
"There is an invalid reference to QuickBooks AP Account "XXXX" in the bill. QuickBooks error message: Invalid argument. The specified record does not exist in the list."
This error message appears when there is a mismatch of GL code information. Please ensure that the GL code listed in both xtraCHEF and QuickBooks are identical.
"Invoice not in completed state"
To resolve this, you must move the invoice status from "Pending" to "Processed".
"Object reference not set to an instance of an object"
First, ensure that the GL code and category, vendor code, and invoice status have been assigned to the invoices.
- If there is no missing information, please re-extract the invoices.
- If you still encounter the same error message after re-extracting, contact Customer Care.
"Duplicate invoice"
This type of error indicates that the same invoice number has already been extracted into your QuickBooks. Check your accounting software if the same invoice number is already there.