xtraCHEF: Get Started With QuickBooks Online Sales Syncing
Last updated: Jun 22, 2026, 4:41 PM
| This article describes the sales and invoice syncing setup for xtraCHEF and QuickBooks Online. If you'd like to sync your payroll data to QuickBooks Online, visit Get Started With Payroll Accounting Sync. |
| Third-party products like QuickBooks Online are provided solely according to the warranty and other terms specified by the third party provider, who is solely responsible for service and support for its product. |
- QuickBooks Online Integration Summary
- Connect xtraCHEF and QuickBooks Online
- Invoice and Journal Entry Sync Examples
- Next Steps
QuickBooks Online Integration Summary
If you utilize QuickBooks Online, integrating directly with xtraCHEF will help streamline your accounts payable process. The result is a system that handles data entry for your bills and expenses and syncs sales from Toast to your QuickBooks Online account, all while providing an additional layer of visibility into your restaurant spending and profit margins. Note: You must have an active QuickBooks Online Essentials, Plus, or Advanced subscription in order to use this integration. QuickBooks Simple Start and QuickBooks Self-Employed versions do not support third-party integrations like xtraCHEF.
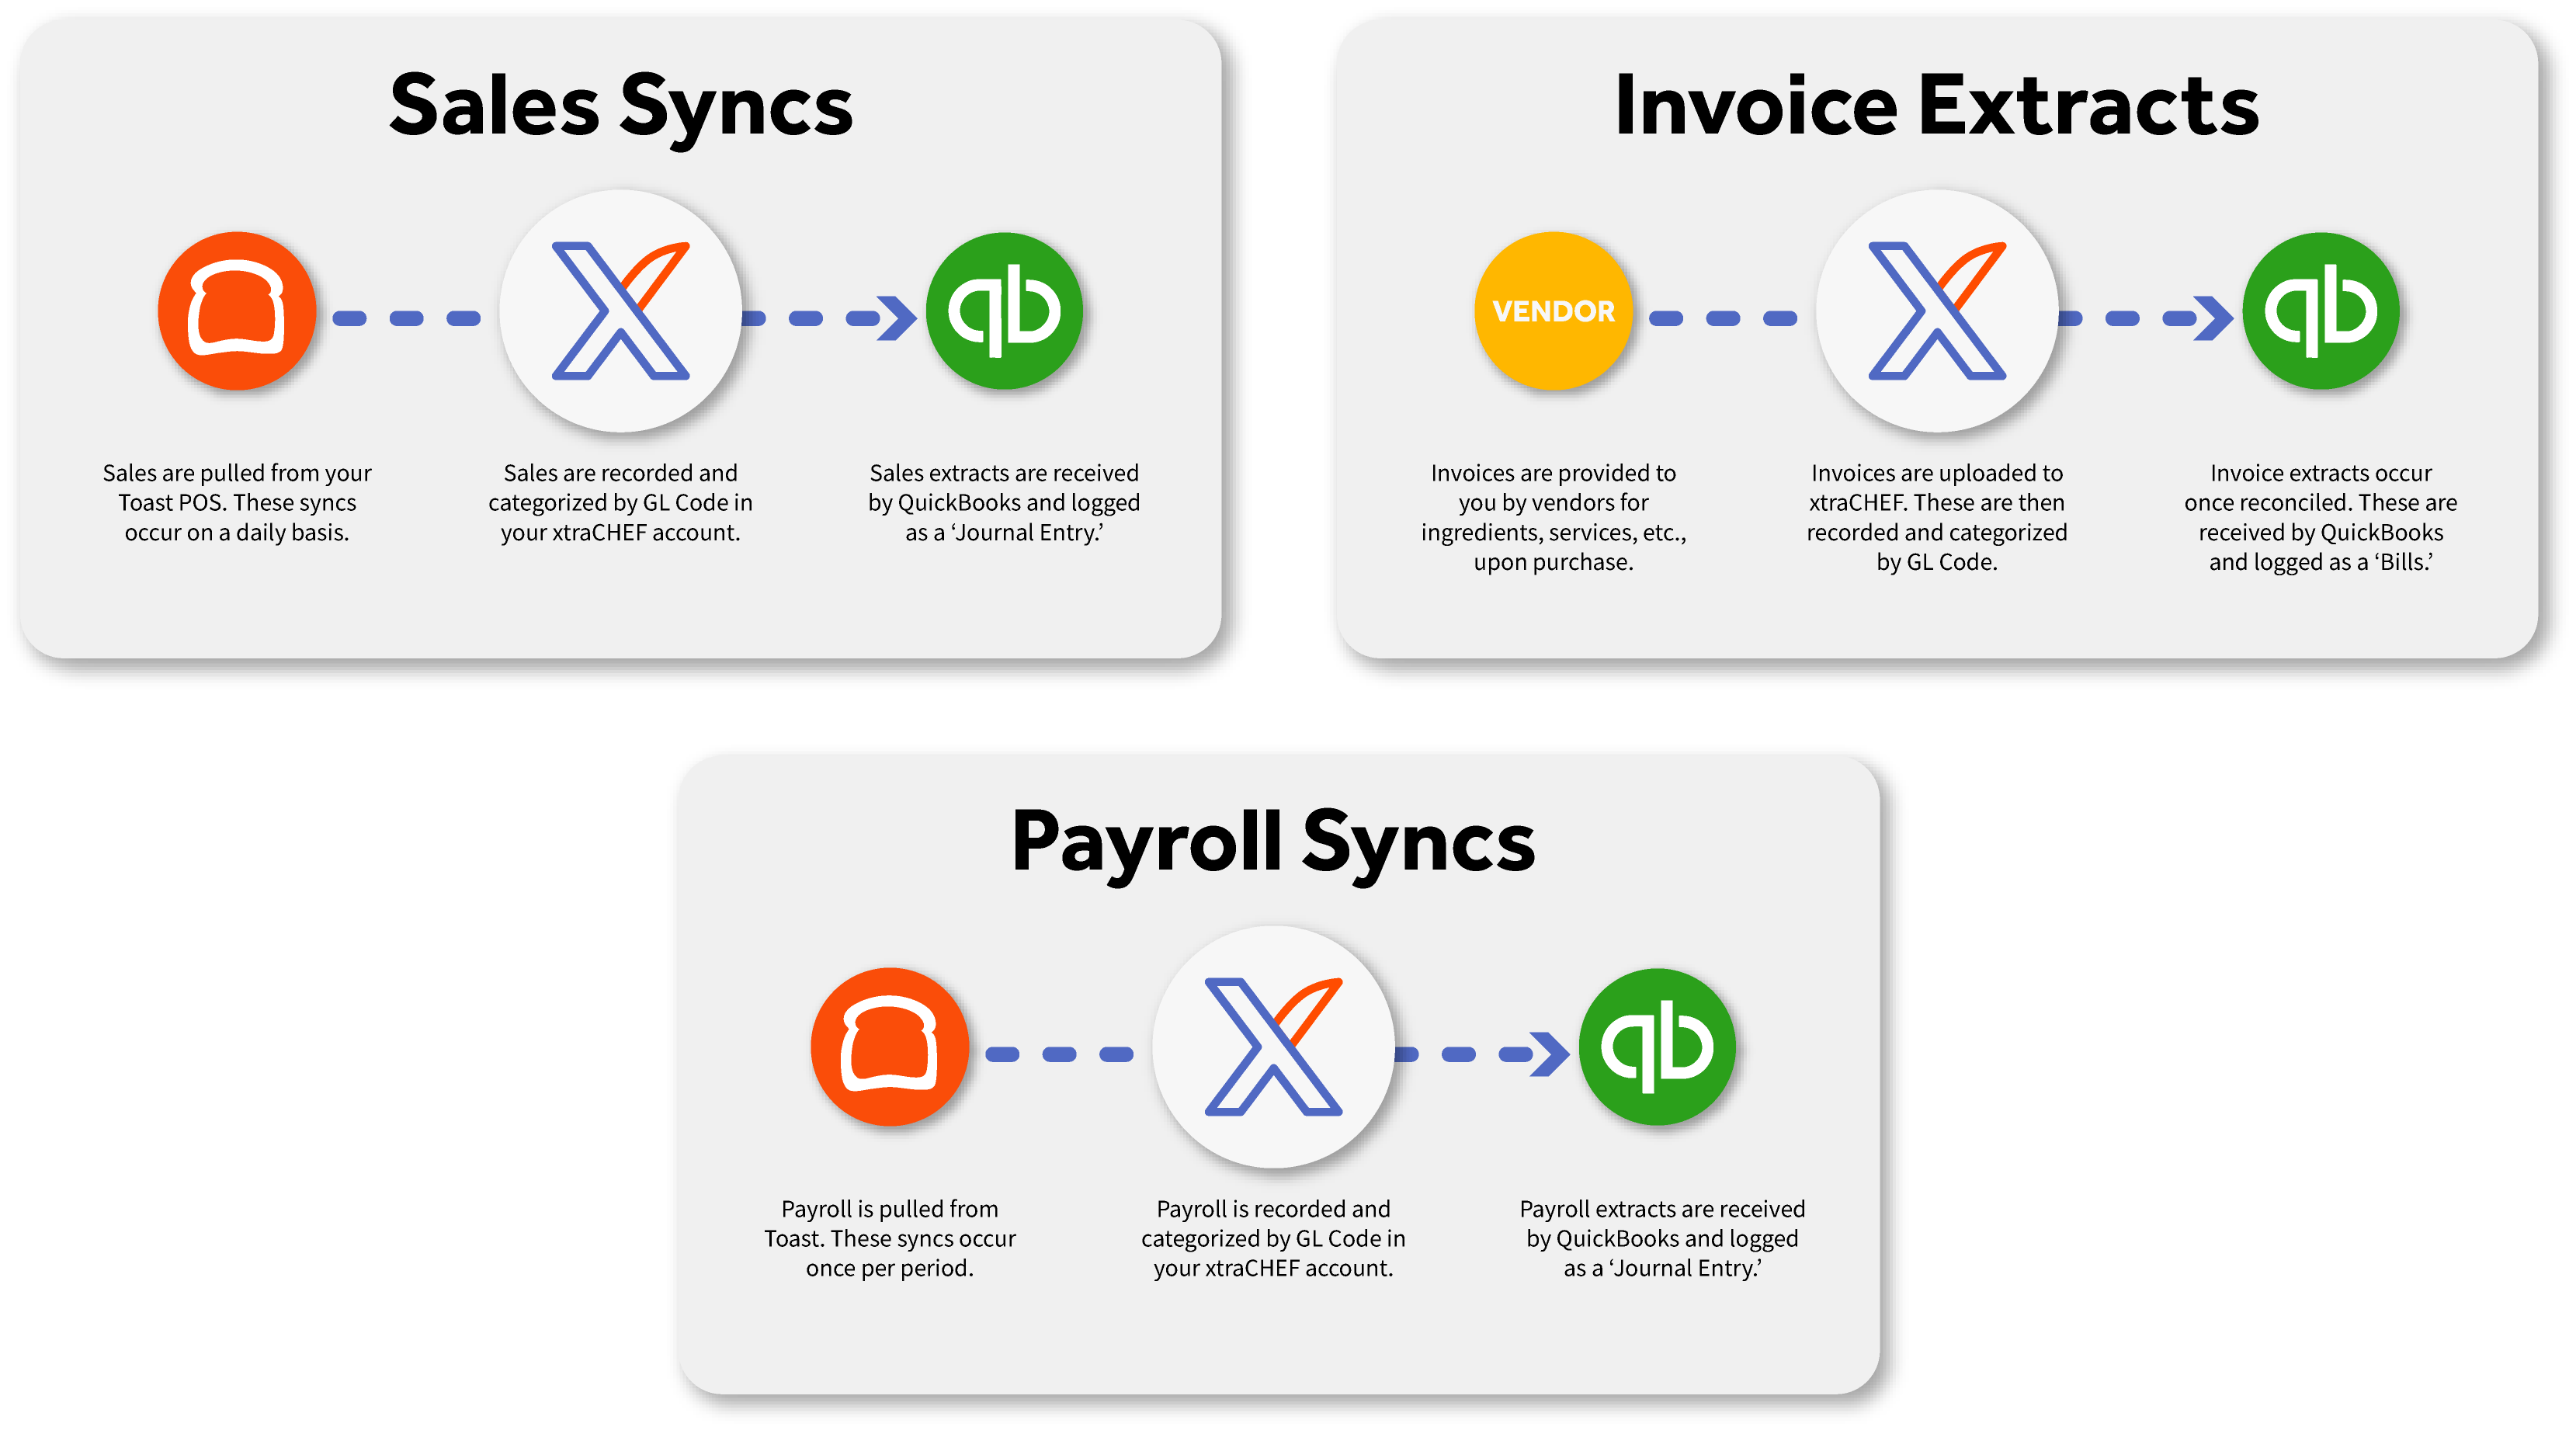
Once your integration is complete, you'll be able to:
- Automatically import your Chart of Accounts (General Ledger Codes) to xtraCHEF
- Automatically import vendors to xtraCHEF
- Sync your xtraCHEF invoices as Bills in QuickBooks Online
- Sync deposits and returns as Vendor Credits in QuickBooks Online
- Post your Toast sales data as a Journal Entry in QuickBooks Online
Note: By default, xtraCHEF does not sync documents uploaded as a receipt to QuickBooks Online. However, receipt extract for QuickBooks Online can be enabled by your Customer Care team. For more on receipt extracts, visit xtraCHEF: Receipt Extract for QuickBooks Online.
Connect xtraCHEF and QuickBooks Online
Note: This article will focus mainly on syncing sales and invoice information from Toast Web to QuickBooks Online through xtraCHEF. With the new Payroll Accounting Sync feature in Toast Web, payroll data can automatically sync to QuickBooks Online; sales and invoice data syncing will be supported in the near future.
During onboarding, your Onboarding Consultant will set up your account to properly support your QuickBooks Online integration. To properly configure your account after onboarding, reach out to support@xtrachef.com. Once enabled, follow the instructions below to complete your integration.
Connect With QuickBooks Online
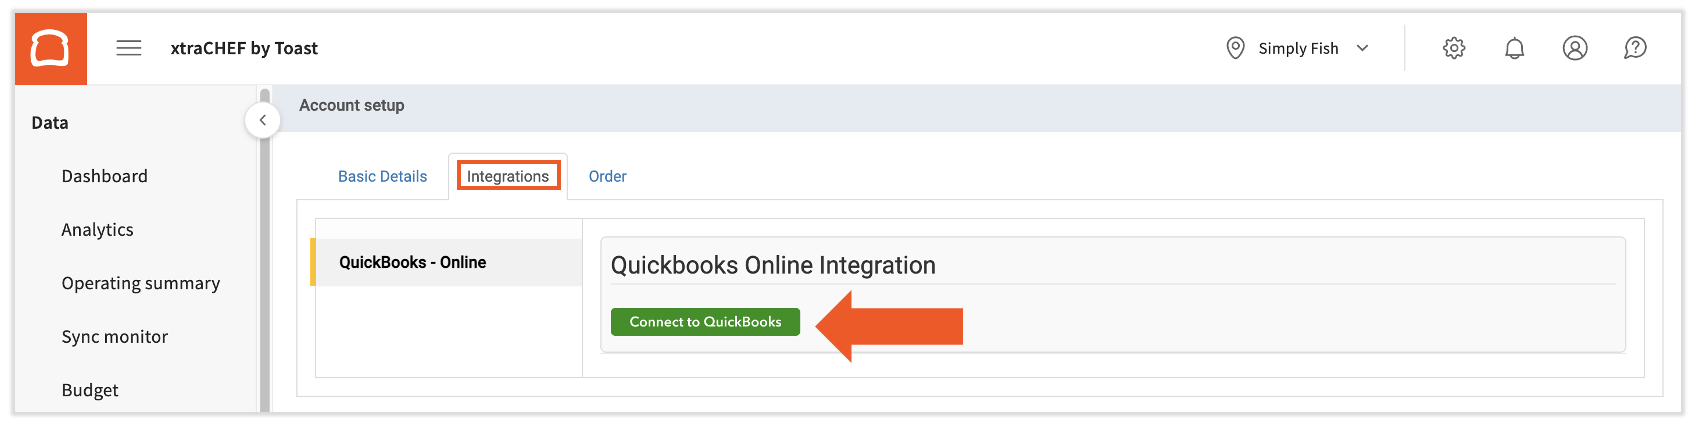
- Navigate to the gear icon in the top right corner and select Account setup from the drop-down menu. This will take you to the Tenant Configuration page.
- Select the Integrations tab and select the Connect to QuickBooks icon.
- You'll begin the integration wizard now. The first step asks you to log into your QuickBooks Online account, so select that button.
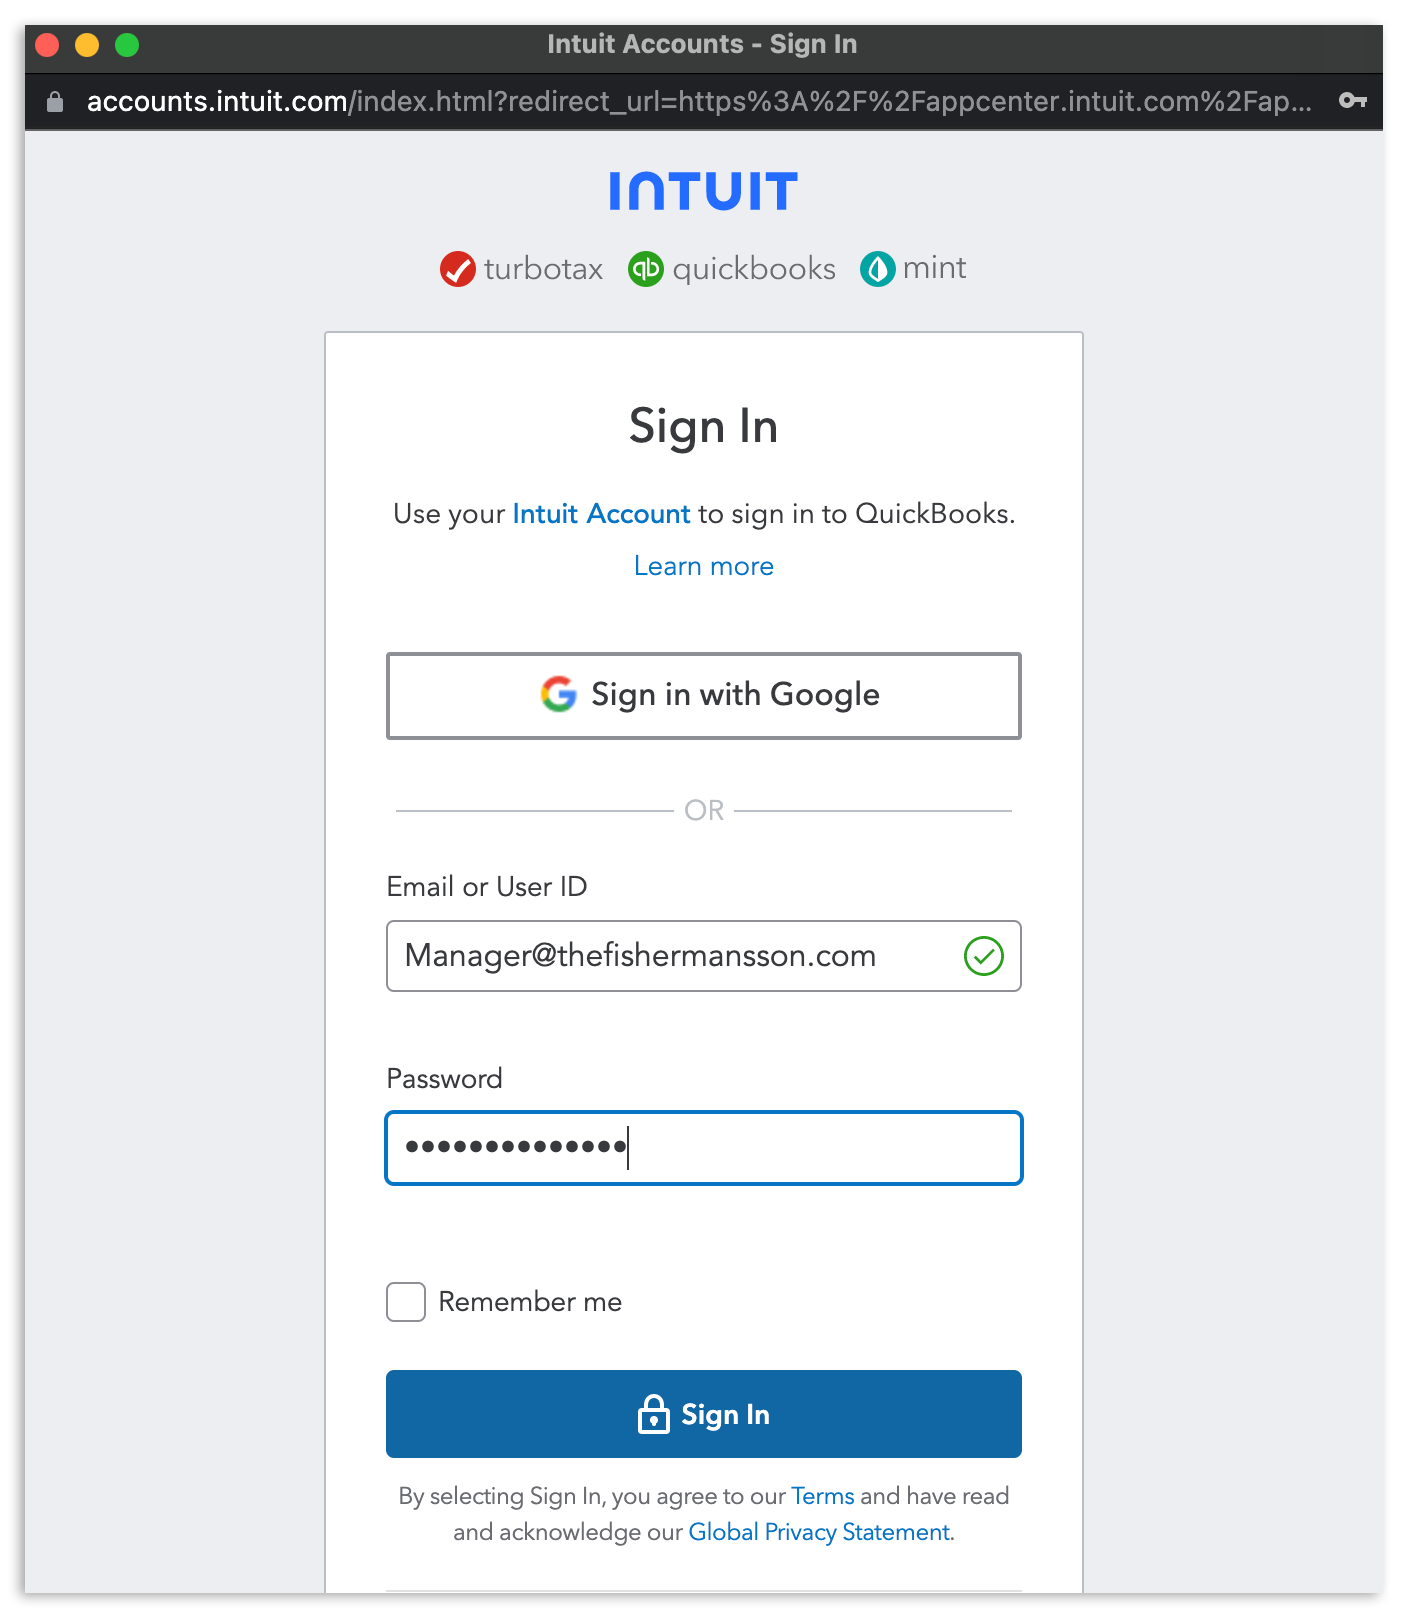
- This will launch a pop-up asking you to enter your QuickBooks Online login details. Enter your username and password before selecting Sign In and choosing the company you'd like to integrate with xtraCHEF.
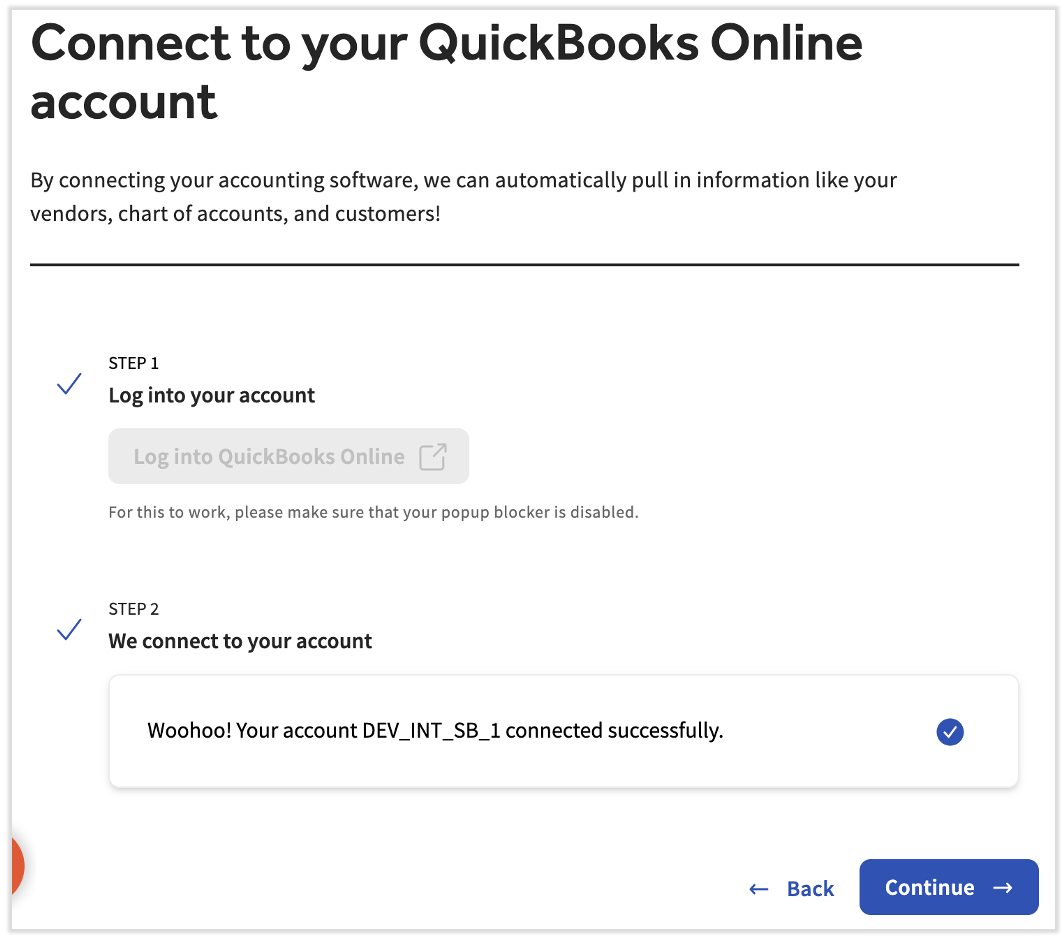
- At this time, a new window will open asking you to authorize Intuit to share your QuickBooks Online data with xtraCHEF. Select Authorize.
- You're finished when you see this screen with the Continue button in blue.
Sync GL Codes, Vendors, and More
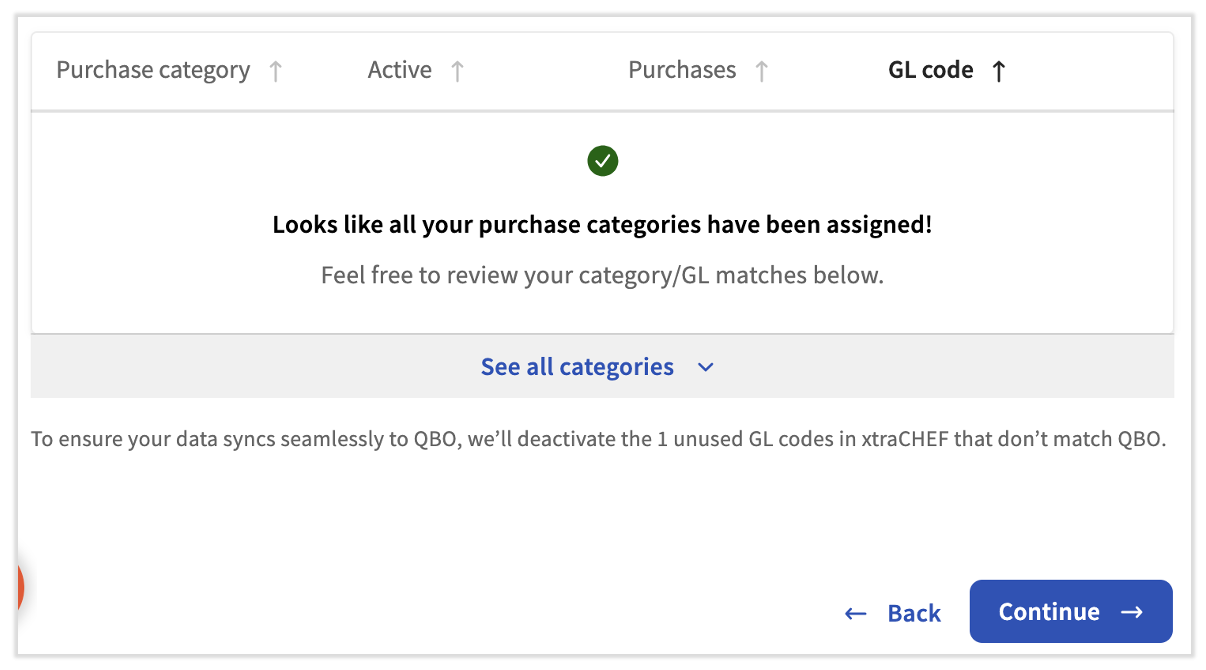
Once your xtraCHEF and QuickBooks Online accounts are connected, you can start syncing sales data between the two systems. The first step is to import your QuickBooks Online General Ledger (GL) Codes into xtraCHEF and match them to your xtraCHEF categories. xtraCHEF has 22 default categories for each tenant. We will auto-assign any GL codes that exactly match a default category or one you've created before, but you may still need to map some yourself. Some things to keep in mind:
- Select + Add category if you need to create one on the fly.
- In the GL code drop-down menu, select + Add GL Code to create one directly in QuickBooks Online.
- All active categories must be mapped to a GL codes before you can move on from this step. Some tips:
- You can deactivate a category if you have no plans to map purchase data to it. Deactivating a purchase category will unmap any items mapped to it.
- Use the Purchases column to identify categories you have not used yet.
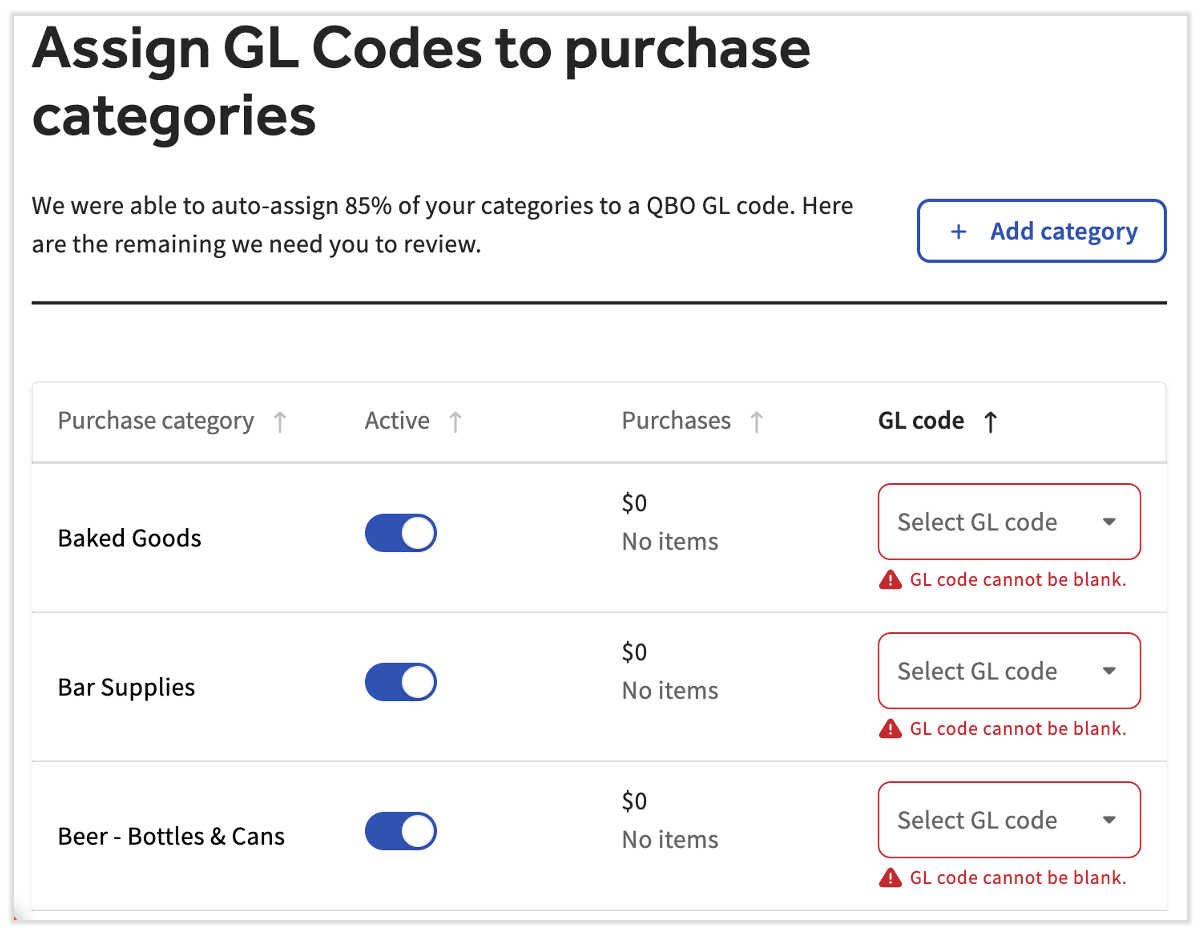
During this step, if you manually created GL codes before connecting to your accounting system, those will be deactivated. GL codes should come directly from your accounting system. We do not recommend adding GL codes into xtraCHEF directly.
Select Continue once all GL codes are assigned.
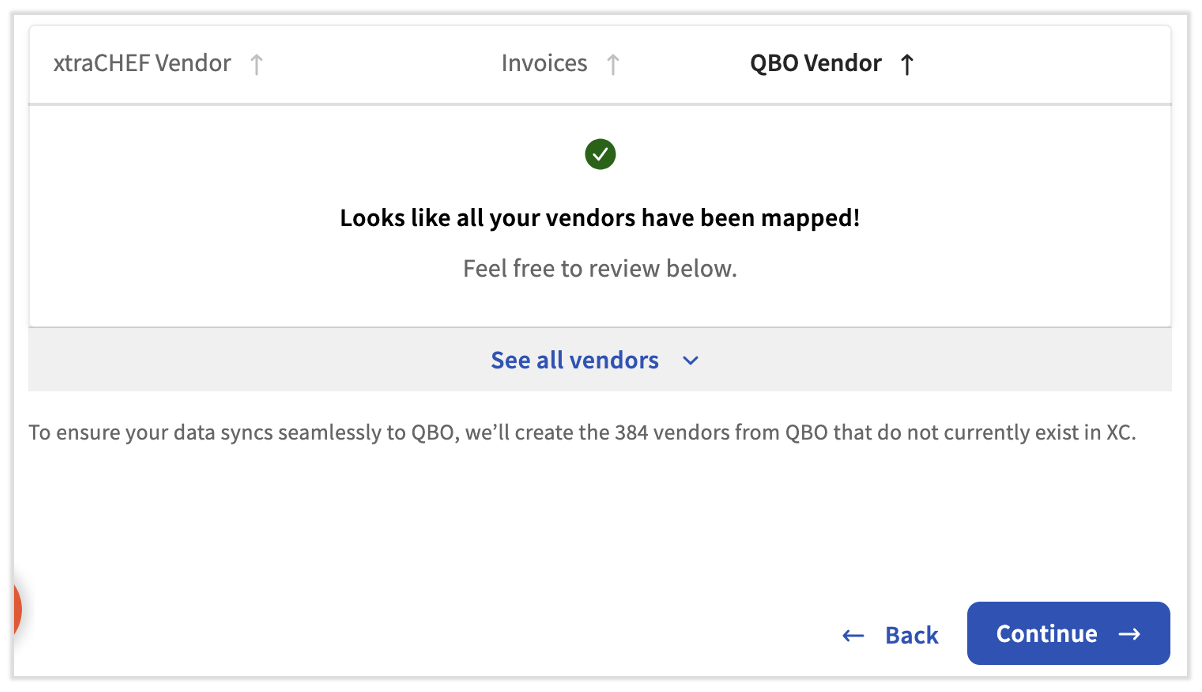
Next, you'll sync your vendors between the two products. Just like before, we will auto-assign any xtraCHEF vendors that exactly match a vendor in QuickBooks, but you may still need to assign some yourself. Select Add vendor to add a new vendor directly in QuickBooks Online.

Once all vendors have been mapped, select the blue Continue button.
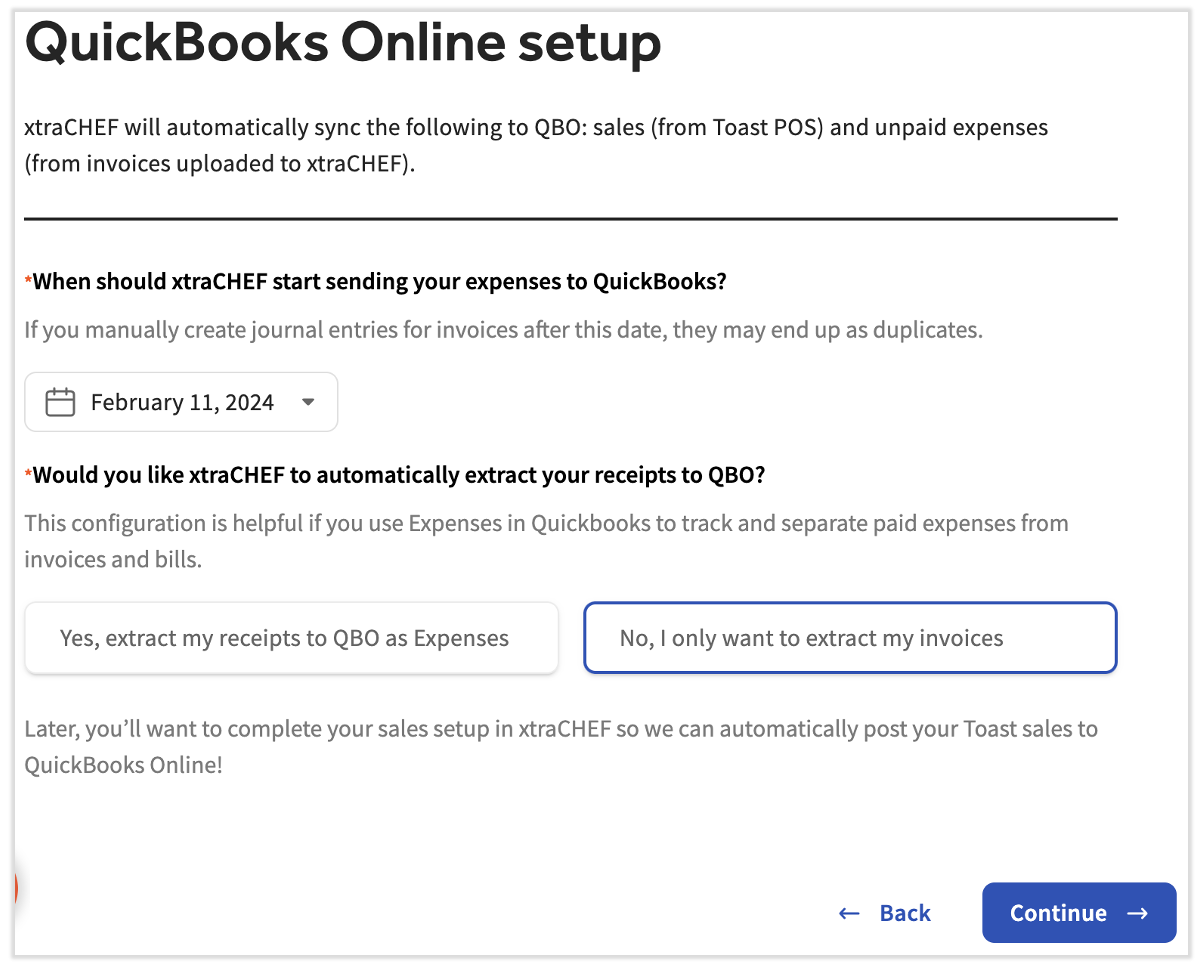
The last step includes two questions. The first asks when you'd like xtraCHEF to start sending expenses to QuickBooks. This date can be in the future or in the past. The second question will ask you if you'd like to extract receipts from xtraCHEF to QuickBooks. We recommend leaving this setting on No in order to lessen the confusion between invoices and receipts. Select Continue to finalize this process.
QuickBooks at Location Level
Note: Skip this section if you have one location on xtraCHEF or if QuickBooks Online at the Location Level is not enabled (default).
In the event that your businesses have separate Company Files under one QuickBooks Online account, your integration can be set up at the location level. If this is the case, your Onboarding Consultant will need to first configure your account for a location-level QuickBooks extract.
Note: In order for QuickBooks Integrations to work properly at the location level, your businesses must have an identical Chart of Accounts (General Ledger Codes) and identical Vendor Codes. If your business accounting is different, your Onboarding Consultant will create more than one tenant to support AP automation.
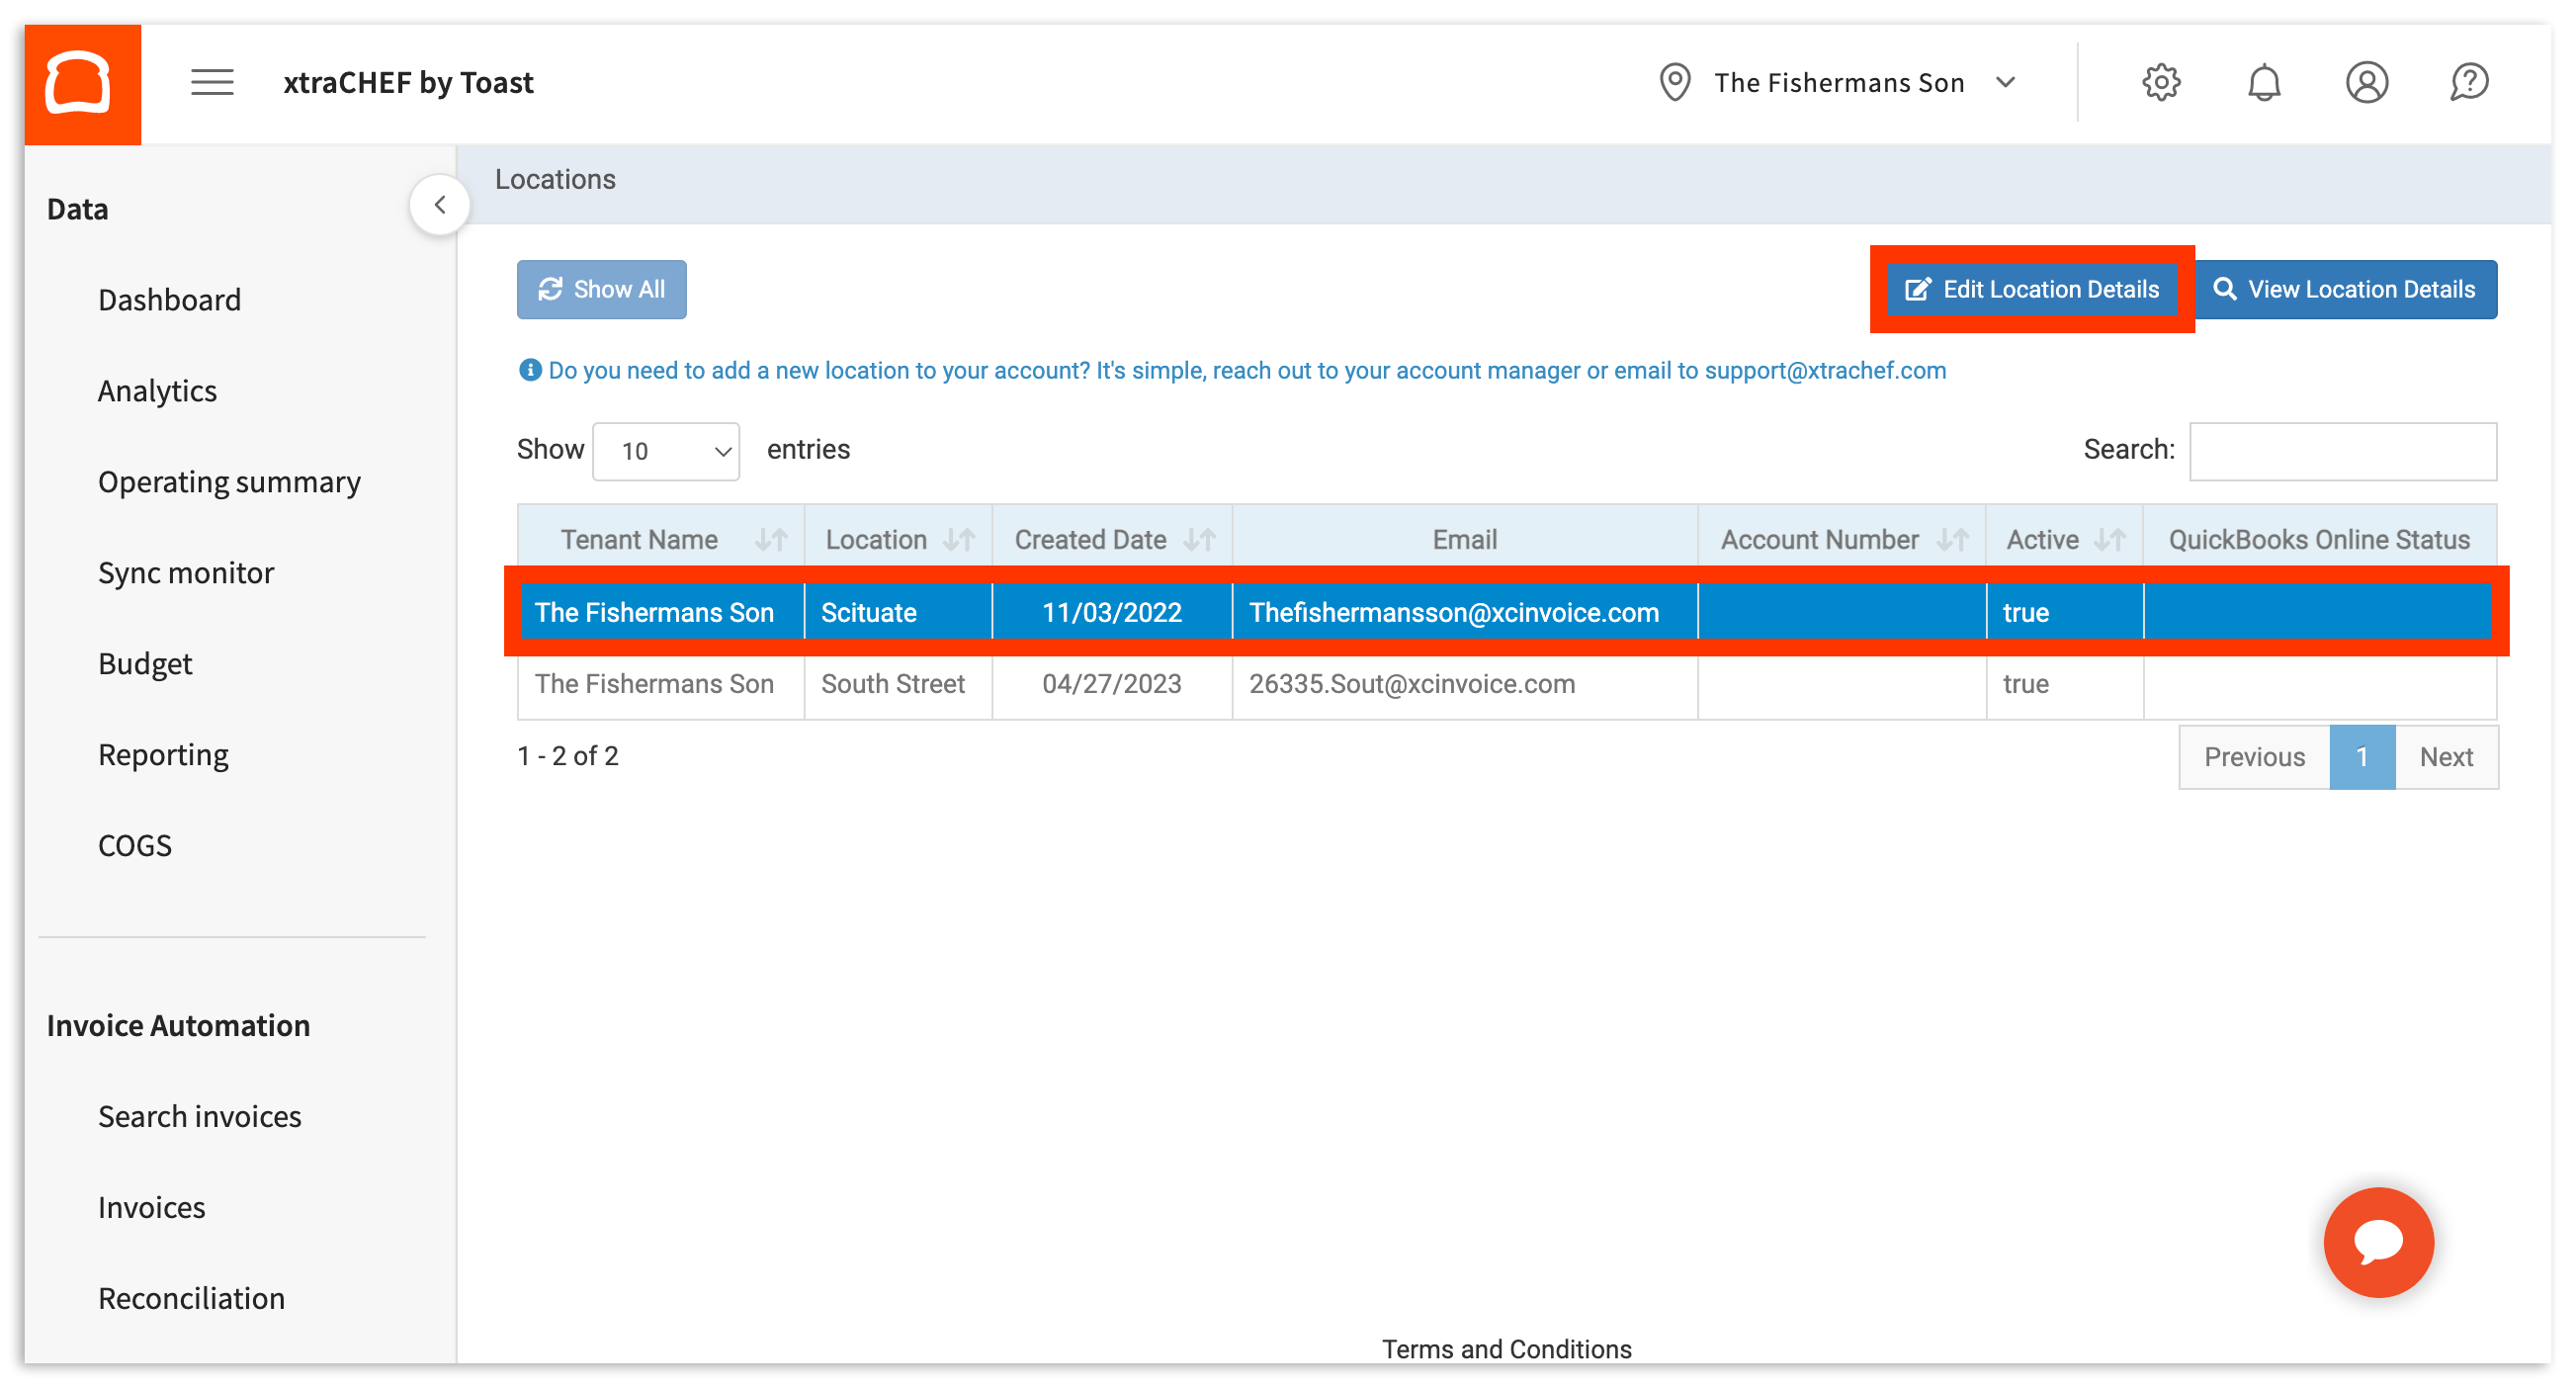
Once configured, you're able to connect each location to its corresponding QuickBooks Online account. To do this, select the Gear Icon in the top right corner of your xtraCHEF account. Then, select Locations. This will take you to the Locations page. From here, select the Location you need to integrate with QuickBooks Online. Then, select Edit Location Details.
Next, select the Integrations tab. Proceed by selecting Connect to QuickBooks. Lastly, sign into your QuickBooks Online account via the Intuit pop-up.
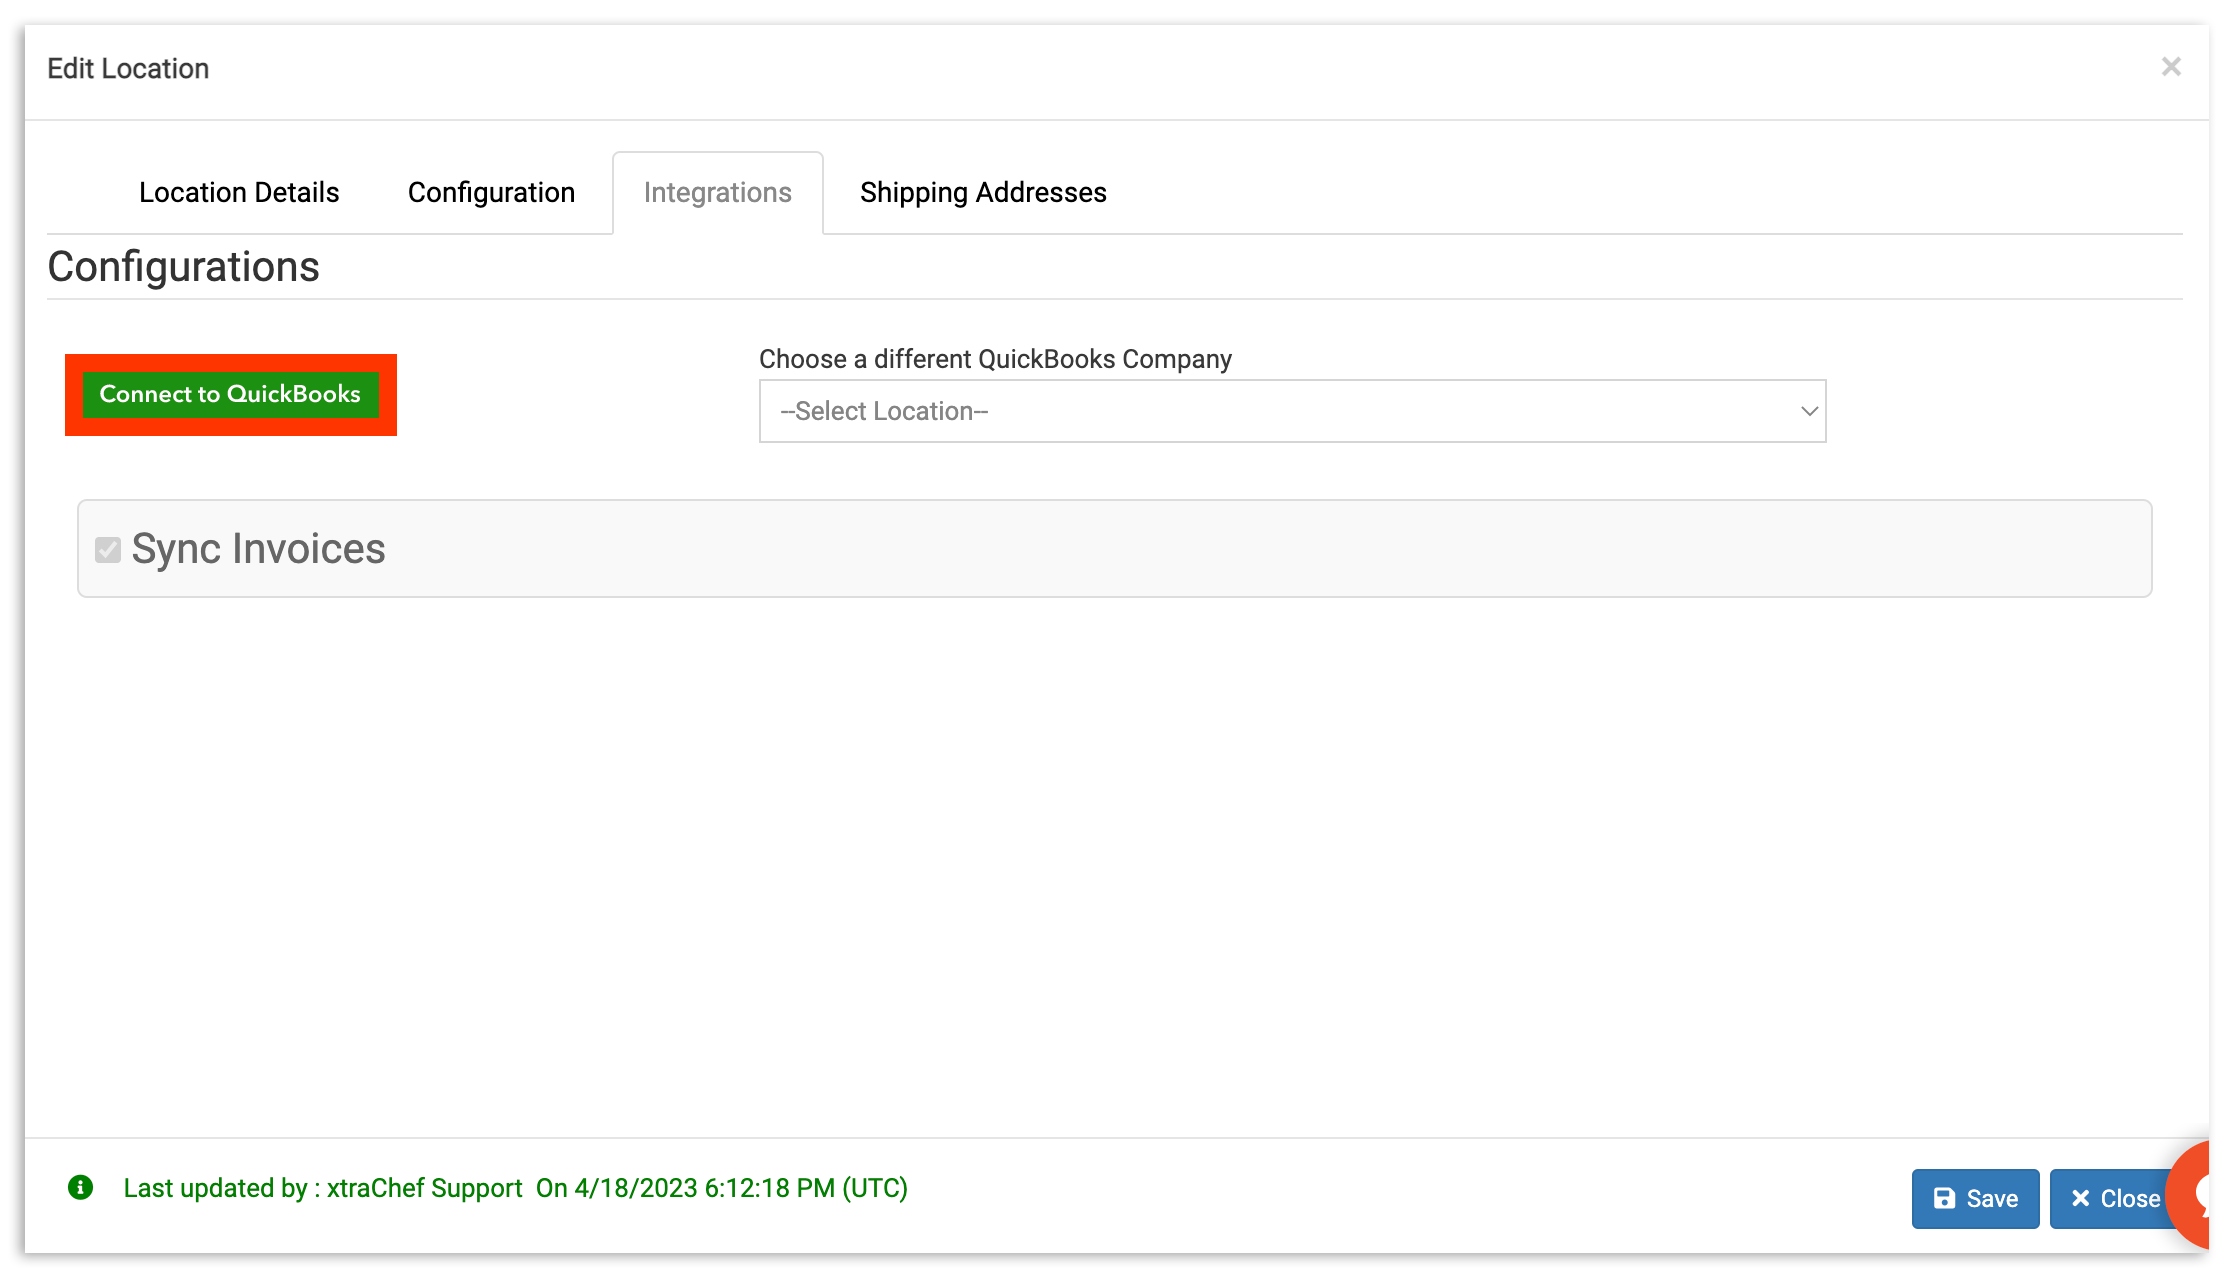
Once finished, select Save.
Invoice and Journal Entry Sync Examples
With QuickBooks Online integrated with your xtraCHEF account, reconciled invoices and daily sales journal entries can begin to sync with your accounting platform automatically (assuming your sync has not been disabled and that additional setup steps such as Sales Setup have been completed).
Invoice Syncs will include vital Invoice information such as an original invoice scan/photograph, general ledger information, vendor information, and more. The visual below represents how this sync will appear in your QuickBooks Online Account.

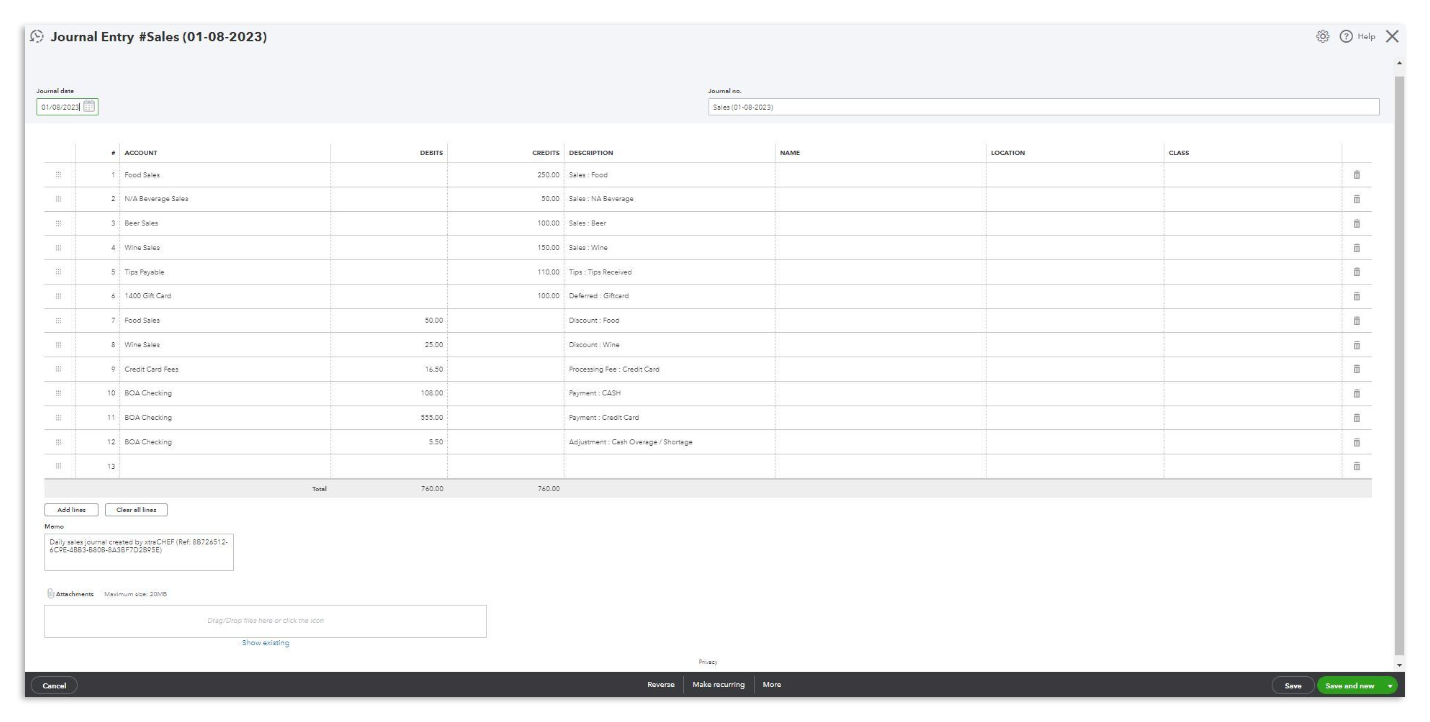
Similarly, daily sales Journal Entries will sync daily (once Sales Setup is complete). The visual below represents how this Journal Entry will appear in your QuickBooks Online Account.
Next Steps
Your QuickBooks Online integration creates the framework for syncs to occur automatically with your accounting platform. However, these syncs will only occur automatically if additional setup steps are completed and machine learning is built out in your account.
- Learn about the basic steps required to reconcile an invoice for QuickBooks Online extracts here: xtraCHEF: How to Reconcile Invoices. Or, begin our expert-led webinar series.
- Learn how to complete Sales Setup. Sales Setup creates the framework for xtraCHEF to automatically break out your sales data in more advanced reporting and push daily sales journal entries to your company file. Learn more via xtraCHEF: Sales Setup.
- To import vendors from QuickBooks Online to xtraCHEF, there are two ways:
- Select the gear icon > Account Setup > Integrations > select Vendor(s) button OR
- Select Vendors > Action > Import vendors from QuickBooks Online.