xtraCHEF: General Ledger (GL) Codes
Last updated: Jul 7, 2026, 2:41 PM
- General Ledger (GL) Basics
- Sync Your GL Codes
- Create GL Codes
- Manage Your GL Codes
- Import GL Codes from QuickBooks Online Extract
- Import GL Codes from QuickBooks Desktop
- Create Purchase Categories From GL Codes
General Ledger (GL) Basics
This 3-minute video discusses General Ledger (GL) Codes and how they come into play in xtraCHEF.
In the accounting world, General Ledger (GL) codes make up your Chart of Accounts (COA) and are used to easily track where your money is going to and coming from. Typically, GL Codes consist of a numerical code and description, for example, 1001- Food Purchases. This allows you, your bookkeeper, or your accountant to quickly track where money is being spent and earned.
GL codes are also broken out by account types such as assets, liabilities, revenue, equity, cost of goods sold (COGS), and expenses. A detailed list of examples can be found below.
| Account Type | General Ledger |
|---|---|
| Cost of Goods Sold (COGS) | Food Purchases |
| Cost of Goods Sold (COGS) | Beverage Purchases |
| Cost of Goods Sold (COGS) | Non-Alcoholic Beverage Purchases |
| Cost of Goods Sold (COGS) | Bar Supplies |
| Expense | Equipment Purchase |
| Expense | Laundry, Linen & Uniforms |
| Expense | Utilities |
| Revenue | Food Sales |
| Revenue | Beverage Sales |
| Revenue | Non-Alcoholic Beverage Sales |
| Fixed Asset | Equipment |
| Current Liability | Undistributed Tips |
Note: GL codes can vary significantly from restaurant to restaurant and range from simple to quite complex. For restaurants building a new Chart of Accounts from scratch, it's important to create this framework according to your needs and operation. For this reason, Customer Care Agents are unable to assign, recommend or modify GL codes.
Sync Your GL Codes
- If you already have a Chart of Accounts for your restaurant and are a QuickBooks Online or Desktop User, you can sync your COA by connecting with xtraCHEF. Detailed Instructions on this step can be found here: Connecting xtraCHEF and QuickBooks Online or Connecting xtraCHEF and QuickBooks Desktop.
- If you already have a Chart of Accounts for your restaurant and do not use QuickBooks for accounting, your Onboarding Consultant can upload it into your account on your behalf. You can also add your COA to xtraCHEF by creating GL codes. Detailed instructions on this step can be found here: How to Create General Ledger Codes.
- If you do not have a Chart of Accounts for your restaurant, you can build one as you go by creating GL codes. Detailed instructions can be found in the section below.
Create GL Codes
If you do not use QuickBooks, you can always create or add a new GL code. To proceed, please complete the steps below.
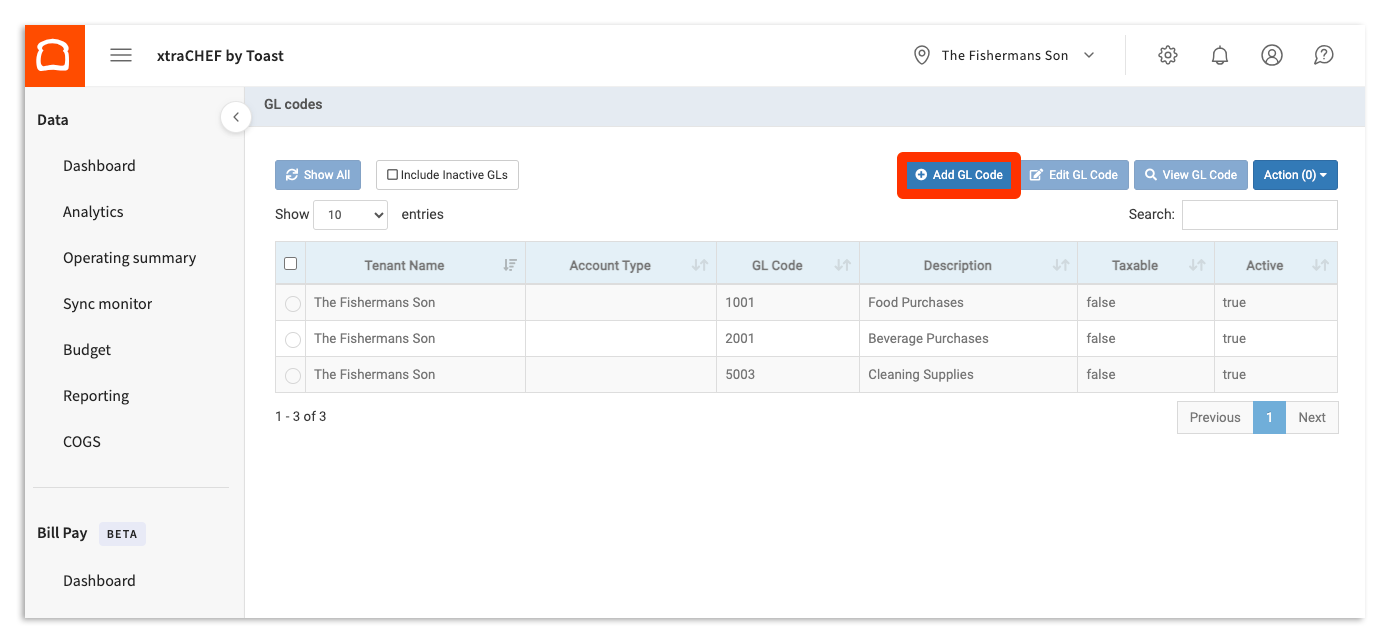
- Select the gear icon > GL codes in the top-right corner of xtraCHEF.
- To create a new GL code select + Add GL Code.
- This will prompt you to assign details for this new GL code. Assign a GL Code and a Description to continue. You can also indicate the account type and whether the item is taxable or not here as well.
- Note: GL Code and Description are required fields. If you do not use a numerical coding system for your GL codes, you can simply repeat the Description in both spaces.
- Note: GL Code and Description are required fields. If you do not use a numerical coding system for your GL codes, you can simply repeat the Description in both spaces.
- When you're ready, select + Add. If your GL code is active, you'll see it listed on the GL codes page immediately.

Manage Your GL Codes
Sometimes names change or perhaps you've discontinued an inventory item and no longer need the associated GL code. To make edits and updates to your GL codes, return to the GL codes page (gear icon > GL codes) and select the code you'd like to edit.
Select a GL Code and then select Edit GL Code on the top menu bar.
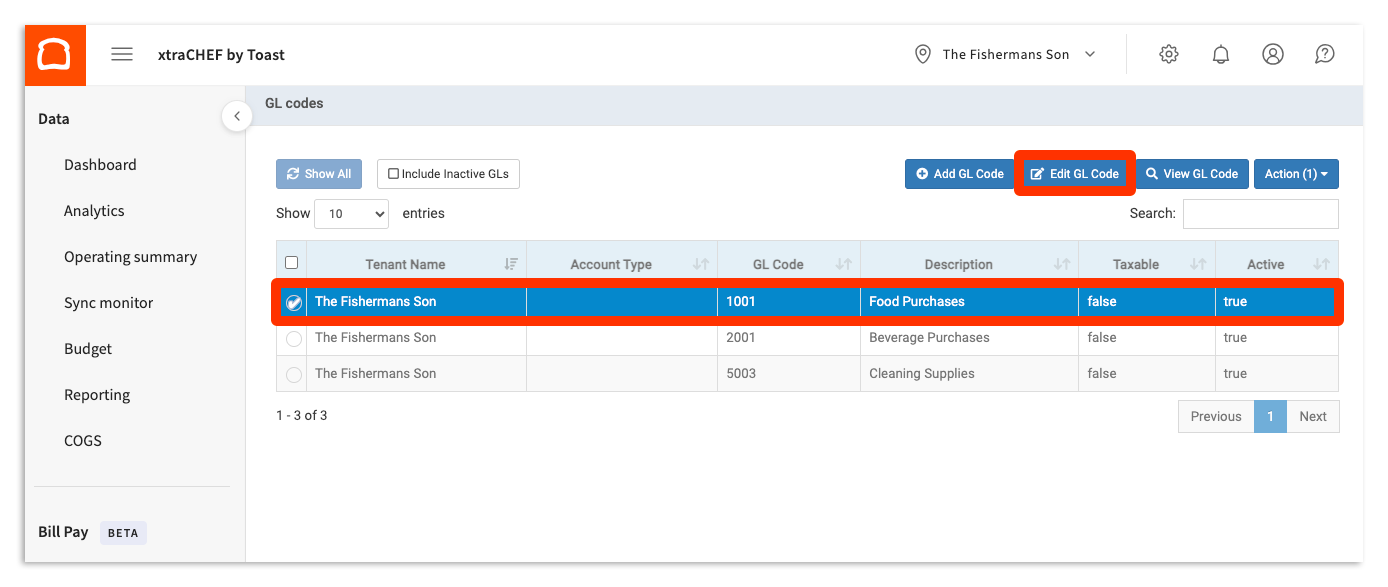
To edit the code, fill in the form with your new or updated information. If you need to deactivate a GL Code, simply deselect the Active checkbox in the pop-up. You can also select Actions and then Deactivate on the GL codes page. All changes will take effect as soon as you select Save.
Import GL Codes from QuickBooks Online Extract
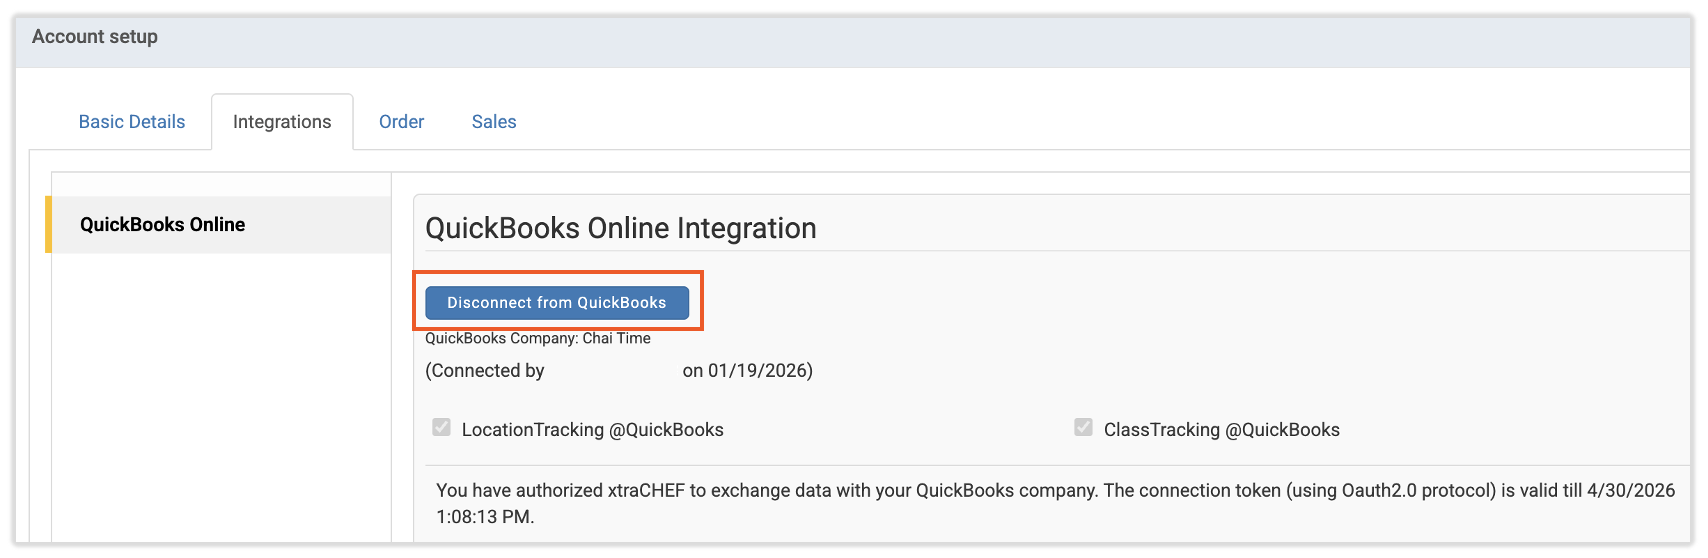
- Navigate to the gear icon > Account setup page in xtraCHEF.
- Select the Integrations tab.
- If you do not see the Integrations tab, either QuickBooks is not enabled on your account or you have a configuration that we call "QuickBooks at location level."
- If you have the "QuickBooks at location level" setup, you have more than one location in your xtraCHEF tenant and you use one or multiple QuickBooks file(s). Instead, navigate to the gear icon > Locations. Select a location to turn it blue and then select Edit Location Details. You should see a QuickBooks location name in the Account Details field if QuickBooks is properly set up.
- If you do not see the Integrations tab, either QuickBooks is not enabled on your account or you have a configuration that we call "QuickBooks at location level."
- If QuickBooks has been properly set up, you'll see a Disconnect from QuickBooks button.
- If you are unable to view QuickBooks from the integrations list, you must disconnect and reconnect QuickBooks before importing GL codes from QuickBooks.
- If you are unable to view QuickBooks from the integrations list, you must disconnect and reconnect QuickBooks before importing GL codes from QuickBooks.
- To import the GL codes, navigate to the gear icon > GL codes > Import GL from QuickBooks Online > Import.
- Next, select the GL codes that you wish to import into xtraCHEF.
- Then, select the Import button. Once done, all GL codes will automatically be imported into xtraCHEF.
Import GL Codes from QuickBooks Desktop
- In xtraCHEF, select the gear icon > Account setup and navigate to the Integrations tab.
- Next, select from the two options under GL Sync Frequency.
- Defined Intervals: This option allows you to set the frequency in which xtraCHEF can sync with your QuickBooks Desktop file.
- On Demand: This enables you to sync your QuickBooks GL to xtraCHEF the next time you connect to QuickBooks
- After a selection is made, select the Save button at the bottom of the page.
- Lastly, you must sync the GL codes to xtraCHEF by running the Web Connector in QuickBooks Desktop. This process includes selecting the invoice .QWC file and the "Update Selected" button in the Web Connector.

Creating Purchase Categories from GL Codes
Learn how to create purchase categories from existing GL codes within your xtraCHEF account.
- Navigate to the gear icon > GL Codes.
- Highlight the GL code that you would like to create a purchase category for.
- Select the Action button in the upper-right corner and select Create Purchase Category.
Once completed, the system will automatically create a category that can be assigned to line items in your Map Invoice Items queue. It may take 2-3 minutes to create and reflect the new category.