Primeros pasos con la pantalla de confirmación de pedidos avanzada
Última actualización: 26 jun 2026, 3:39 p.m.
Obtén información sobre cómo configurar la pantalla de confirmación de pedidos avanzada. Permite que tus clientes de drive-thru vean su pedido en tiempo real, directamente en su pantalla de confirmación avanzada de pedidos de drive-thru.
Este artículo cubre la versión más reciente de la pantalla de confirmación del pedido y su configuración de personalización en Toast Web. Para obtener información sobre la versión anterior de la Pantalla de confirmación del pedido, consulta Primero pasos con la Pantalla de confirmación del pedido.
- Resumen avanzado de la pantalla de confirmación del pedido
- Configurar una pantalla avanzada de confirmación del pedido
- Configurar la pantalla de confirmación de pedidos avanzada en un dispositivo POS de Toast
- Configuración avanzada de la pantalla de confirmación del pedido en Toast Web
- Gestionar pantallas
Resumen avanzado de la pantalla de confirmación de pedidos
| Por el momento, Toast Drive-Thru solo está disponible para clientes con 15 o más ubicaciones. |
Toast ofrece diversas soluciones de hardware y software para las ubicaciones de Toast, incluida la pantalla de confirmación avanzada de pedidos. La pantalla de confirmación de pedidos avanzada se puede usar con otros equipos de Toast para ayudar a aumentar la precisión de los pedidos en el drive-thru y mejorar la experiencia del cliente.
Las ventajas de la pantalla inalámbrica de confirmación avanzada de pedidos incluyen:
- Configura diseños personalizados de pantallas avanzadas de confirmación de pedidos.
- Funciona de forma inalámbrica sin codificador de video.
- Asigna diferentes dispositivos de POS para tomar y enviar pedidos a la pantalla de confirmación avanzada de pedidos.
- Configura pantallas para una o varias ubicaciones.
Requisitos avanzados de la pantalla de confirmación de pedidos
Para usar la pantalla de confirmación avanzada de pedidos, se requiere lo siguiente:
- Un acuerdo de venta completamente pagado firmado por el cliente de Delphi. Ponte en contacto con tu representante de ventas de Toast Drive-thru para obtener más información.
- Un reproductor multimedia Toast HDBT de Delphi. Por el momento, la pantalla de confirmación de pedidos avanzada solo está disponible para su uso con reproductores multimedia Toast HDBT y paneles de menú digitales Toast compatibles al aire libre. En este momento, no está disponible la compatibilidad con reproductores iBasemedia y pantallas de confirmación de pedidos independientes.
- Al menos 1 panel de menú digital exterior Toast de Delphi.
| Se requiere una licencia y una cuenta de la plataforma Toast Insight Engage si vas a usar la pantalla de confirmación de pedidos avanzada con un panel de menús digital de Toast. Para obtener más información, consulta Primeros pasos con la plataforma Insight Engage. Si tienes preguntas o comentarios, ponte en contacto con tu gerente de cuentas de Toast. |
Configurar una pantalla de confirmación de pedidos avanzada
Para usar la pantalla de confirmación de pedidos avanzada, debes hacer lo siguiente:
- Instala y configura el reproductor multimedia Toast HDBT para usar con el panel de menús digital exterior de Toast.
- Configura el contenido del menú en la plataforma Insight Engage para que aparezca en el panel del menú digital.
- Configura la pantalla de confirmación de pedidos por drive-thru en un dispositivo POS de Toast.
- Configura la pantalla de confirmación del pedido en Toast Web.
Configurar la pantalla de confirmación de pedidos avanzada en un POS de Toast
Para usar la Pantalla de confirmación de pedidos avanzada, debes habilitar la Pantalla de confirmación de pedidos por drive-thru en el POS de Toast. La configuración de pantalla de confirmación de pedidos de drive-thru te permite conectar un dispositivo POS a una pantalla de confirmación de pedidos avanzada en un panel de menú digital. Para habilitar la configuración:
- Accede a la pantalla de inicio del POS de Toast.
- Accede a la pantalla Configuración del dispositivo.
- En la sección Configuración, selecciona Configuración del dispositivo.
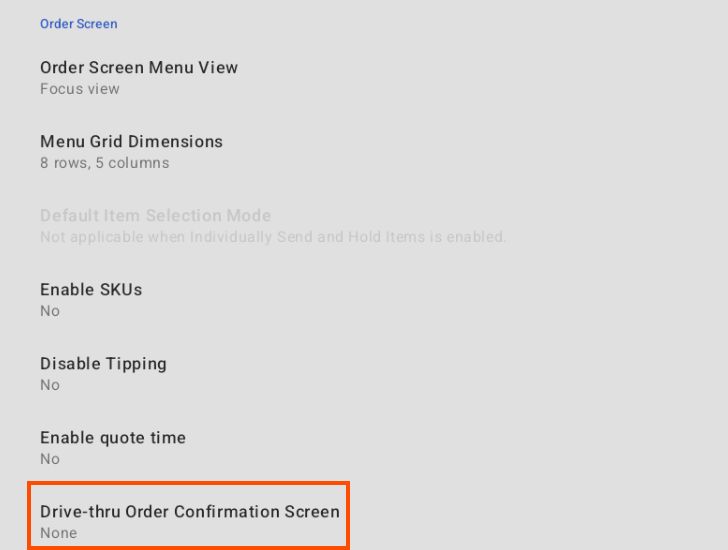
- Desplázate hacia abajo hasta la sección Pantalla de pedido y selecciona Pantalla de confirmación de pedido de drive-thru.
- Esto abre la pantalla Seleccionar tu pantalla de confirmación de pedido. La pantalla muestra automáticamente todos los carriles de drive-thru conectados a la ubicación de tu restaurante. Selecciona el carril en el que deseas mostrar la pantalla de confirmación del pedido o elige no mostrar la pantalla de confirmación del pedido.
- Selecciona el botón Guardar para guardar tu selección. Cuando se realiza una selección, la configuración de la Pantalla de confirmación de pedidos de drive-thru en la pantalla Configuración del dispositivo muestra el carril seleccionado o Ninguno para indicar que no se seleccionó ningún carril para mostrar la Pantalla de confirmación de pedidos.
Configuración avanzada de la pantalla de confirmación del pedido en Toast Web
| Para acceder a la configuración avanzada de la pantalla de confirmación de pedidos en Toast Web, debes tener el permiso 6.6 Configuración de operaciones del restaurante. Para obtener más información, consulta Referencia de permisos de acceso. |
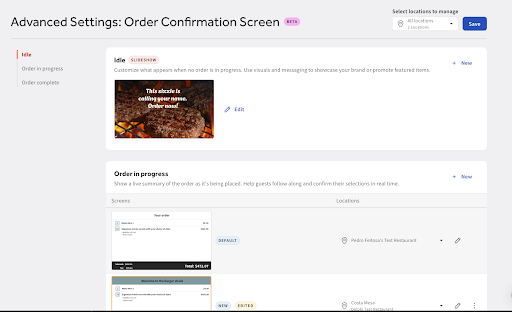
Puedes configurar la configuración avanzada de la pantalla de confirmación de pedidos en Toast Web. Ve a Adelante > Pantalla de confirmación del pedido > Configuración avanzadapara abrir la configuración avanzada: Página de la pantalla de confirmación del pedido.
En la configuración avanzada: Página Pantalla de confirmación del pedido, puedes ver y completar las siguientes acciones:
- Gestionar ubicaciones activadas en la pantalla de confirmación avanzada de pedidos
- Agregar un nuevo diseño de pantalla de confirmación de pedidos avanzado
- Editar diseños avanzados de la pantalla de confirmación de pedidos
- Gestionar ubicaciones asociadas con un diseño avanzado de pantalla de confirmación de pedidos
- Editar diseños avanzados de la pantalla de confirmación de pedidos
- Establece un diseño de pantalla como pantalla predeterminada
- Eliminar una pantalla
Agregar un nuevo de diseño de pantalla
| Una pantalla de confirmación de pedido de la plantilla está precargada en la configuración avanzada: Página de la pantalla de confirmación del pedido. Cuando agregas una nueva pantalla, la pantalla de la plantilla se configura como la pantalla predeterminada. |
En la configuración avanzada: Página Pantalla de confirmación del pedido, puedes crear un nuevo diseño de pantalla. Para crear una nueva pantalla:
- En la configuración avanzada: página Pantalla de confirmación del pedido, ve al tipo de pantalla. Elige entre:
- Ocioso
- Pedido en curso
- Pedido completo
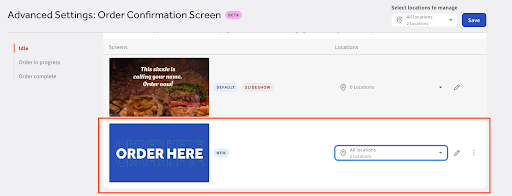
- Selecciona + Nuevo enlacew en la parte superior de la pantalla para agregar un nuevo diseño de pantalla. La nueva pantalla muestra una NUEVA etiqueta para indicar su estado.
- Selecciona el menú desplegable Ubicaciones junto a la nueva pantalla para abrir un cuadro de diálogo donde puedes elegir ubicaciones o grupos de restaurantes para los que activar la pantalla.
- Selecciona el botón Seleccionar ubicación para guardar los cambios. Las ubicaciones activadas se muestran junto a la nueva pantalla.
Gestionar pantallas
Puedes completar las siguientes acciones para una nueva pantalla:
- Gestiona las ubicaciones que mostrarán la pantalla
- Editar los diseños de una pantalla
- Establece un diseño de pantalla como pantalla predeterminada
- Eliminar un diseño de pantalla
Gestionar ubicaciones de la pantalla
Puedes gestionar las ubicaciones o grupos de restaurantes que usarán las pantallas seleccionando el menú desplegable Seleccionar ubicaciones para gestionar en la parte superior derecha de la Configuración avanzada: Página de la pantalla de confirmación del pedido. El menú desplegable muestra las ubicaciones asociadas con tu restaurante. Para asignar ubicaciones específicas a una pantalla, selecciona el ícono de menú desplegable junto a la pantalla.
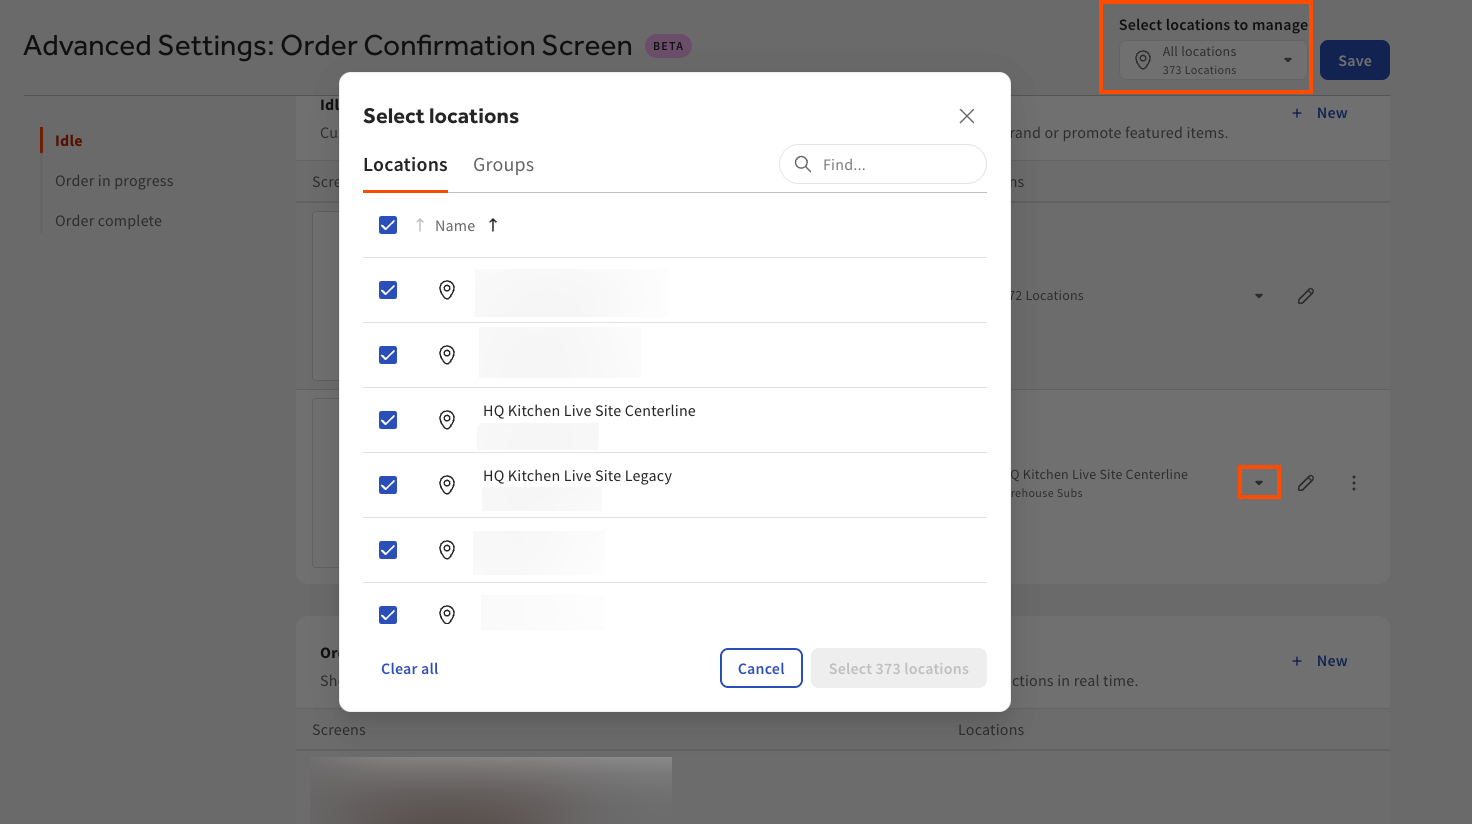
Para cambiar las ubicaciones de la pantalla:
- En la configuración avanzada: Página Pantalla de confirmación del pedido, ve al tipo de pantalla para el que deseas gestionar ubicaciones.
- Selecciona el menú desplegable para abrir un cuadro de diálogo en el que puedes elegir ubicaciones o grupos de restaurantes para habilitar la pantalla.
- Selecciona el botón Seleccionar ubicación para guardar los cambios o el botón Cancelar para cerrar el cuadro de diálogo.
Editar los de diseño de una pantalla
Puedes editar los diseños de una pantalla desde la configuración avanzada: Página de la pantalla de confirmación del pedido. Puedes editar los diseños para los siguientes tipos de pantalla:
- Ocioso: Esta pantalla se muestra cuando no hay pedidos en curso.
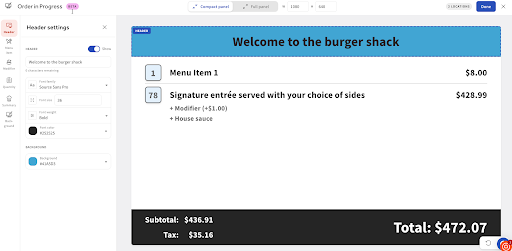
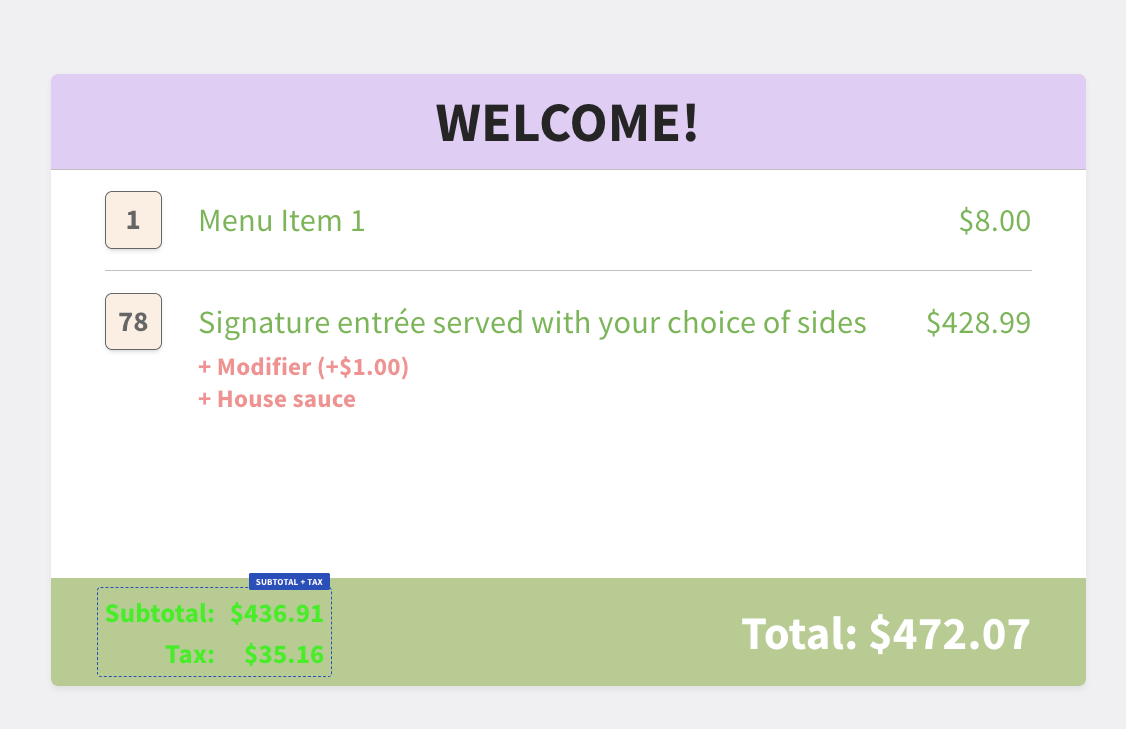
- Pedido en curso: Esta pantalla muestra un resumen en tiempo real del pedido mientras se realiza.
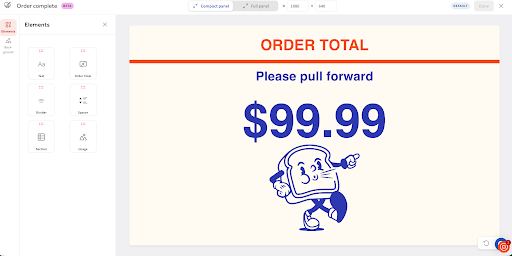
- Pedido completo: Esta pantalla muestra un mensaje de confirmación después de que se realiza el pedido.
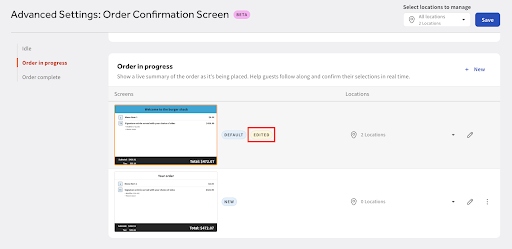
Para editar una pantalla, selecciona el enlace de edición (ícono de lápiz) junto a la pantalla o selecciona la pantalla. Esto abre la página de diseño de pantalla. La pantalla de diseño de pantalla se divide en dos secciones:
- Configuración personalizable y elementos de diseño: Esta sección muestra las distintas configuraciones persoalizadas y elementos de diseño disponibles para cada sección de la pantalla.
- Pantalla de vista previa: La pantalla de vista previa destaca las secciones personalizables. Esto permite ver y editar fácilmente los elementos de diseño.
| Una pantalla de confirmación de pedido de la plantilla está precargada en la configuración avanzada: Página de la pantalla de confirmación del pedido. Cuando agregas una nueva pantalla, la pantalla de la plantilla se configura como la pantalla predeterminada. |
Cuando realizas y guardas cambios en los diseños de una pantalla, aparece una etiqueta EDITADA junto al nombre de la pantalla en la configuración avanzada: Página de la pantalla de confirmación del pedido.
Editar la pantalla inactiva
Para editar los diseños de la pantalla inactiva, selecciona el ícono Editar junto a la pantalla para abrir la página inactiva. En la página Ocioso, puedes hacer lo siguiente:
- Diseño para pantallas compactas, de tamaño completo o personalizadas.
- Carga tus propias imágenes y gifs o elige uno de la biblioteca.
| Si eliminas una imagen, esta acción es permanente y no se puede deshacer. |
- Configura una presentación de diapositivas de las imágenes cargadas.
- Elige un color de fondo.
| Puedes configurar un color de fondo con una imagen si la imagen tiene un fondo transparente. |

Selecciona el botón Listo en la parte superior de la pantalla para volver a la Configuración avanzada: Página de la pantalla de confirmación del pedido. Selecciona el botón Guardar para guardar los cambios. Si eliges configurar y guardar una presentación de diapositivas, aparecerá una etiqueta PRESENTACIÓN junto al nombre de la pantalla en Configuración avanzada: Página de la pantalla de confirmación del pedido.
Editar la pantalla Pedido en curso
Para editar los diseños de la pantalla Pedido en curso, selecciona el ícono Editar junto a la pantalla para abrir la página Pedido en curso. En la página Pedido en curso, puedes configurar lo siguiente:
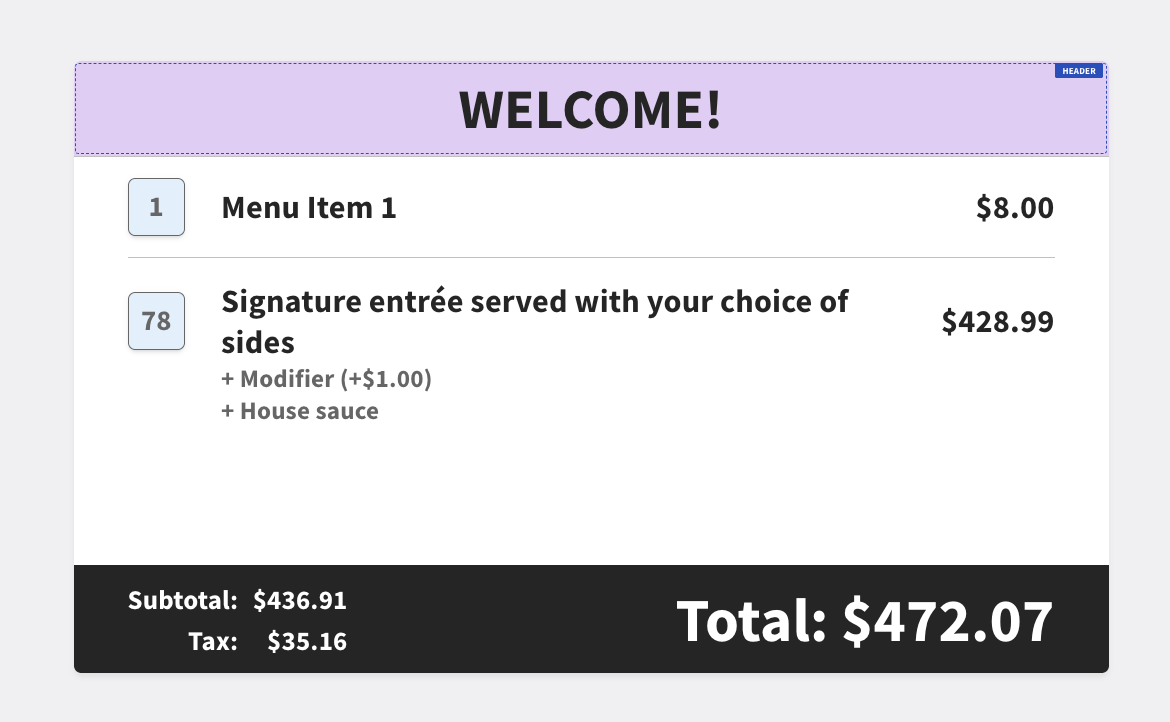
- Encabezado: Esta sección te permite personalizar el contenido del encabezado en la pantalla.
- Subencabezado: Esta opción solo está disponible para diseños de panel completo. Esta sección te permite elegir mostrar y personalizar el contenido del subencabezado en la pantalla. Esta sección tiene la misma configuración de personalización que la sección de encabezado.
- Logo: Esta opción solo está disponible para diseños de panel completo.
- Artículo del menú: Esta sección te permite personalizar el contenido del artículo del menú en la pantalla.
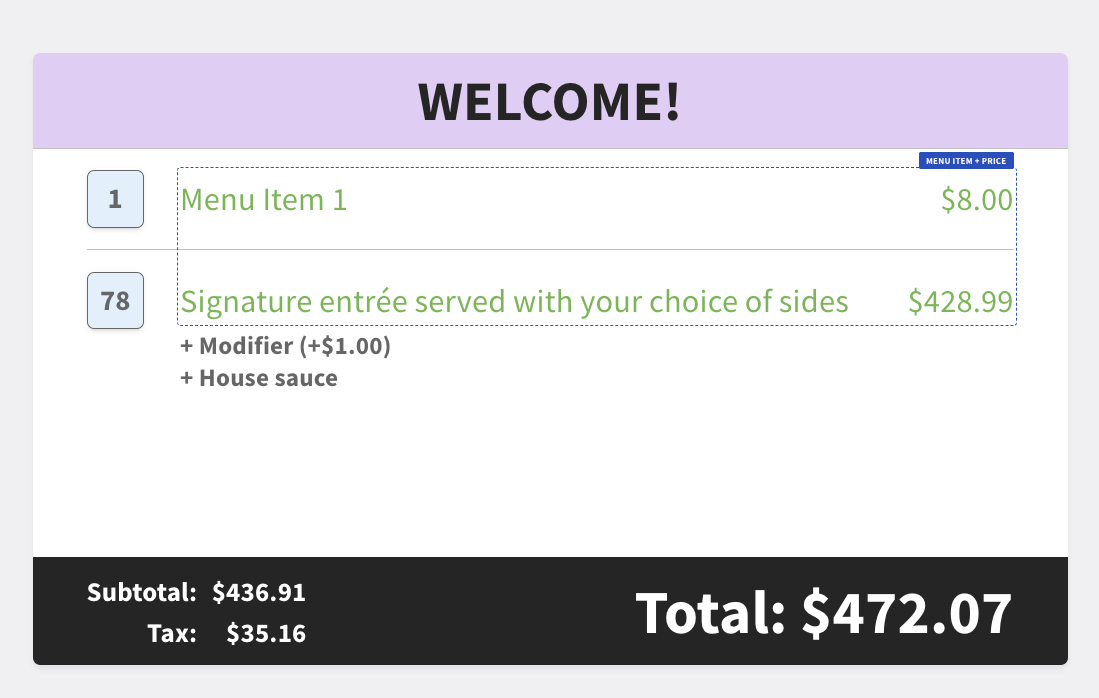
- Modificador: Esta sección te permite personalizar el contenido de los modificadores en la pantalla.
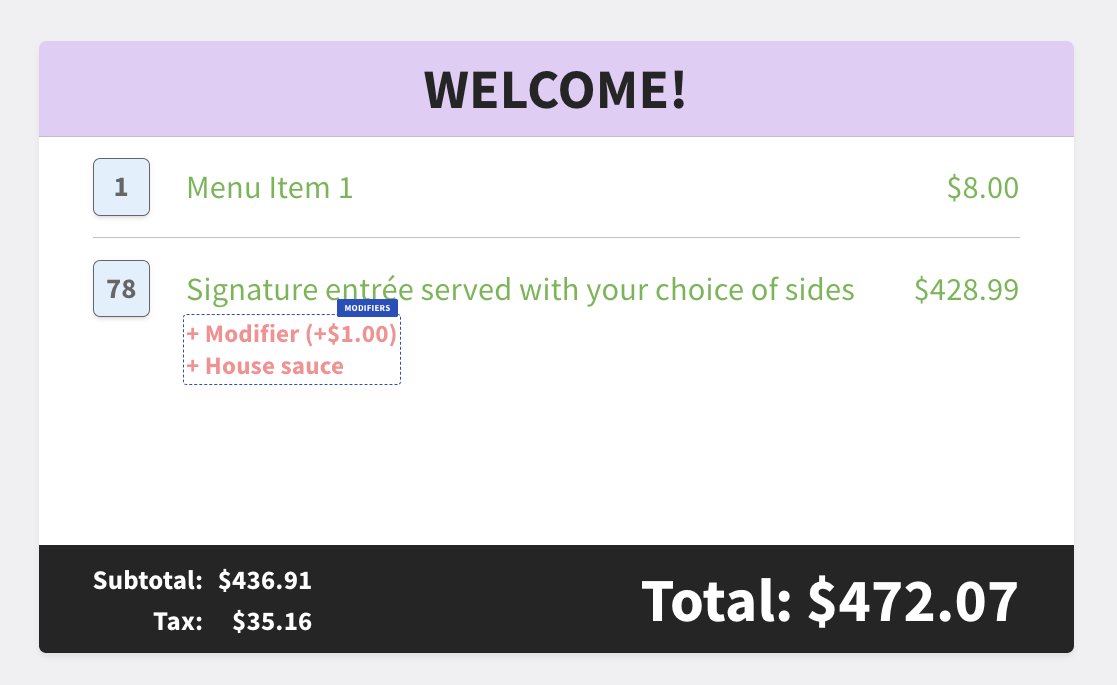
- Cantidad: Esta sección te permite personalizar el contenido de la cantidad en la pantalla.
- Resumen: Esta sección te permite personalizar el contenido del resumen en pantalla.
- Fondo: Esta sección te permite personalizar el contenido de fondo en la pantalla.
Selecciona el botón Listo en la parte superior de la pantalla para guardar los cambios.
Editar la pantalla Pedido completo
Para editar los diseños de la pantalla Pedido completo, selecciona el ícono Editar junto a la pantalla para abrir la página Pedido completo. En la página Pedido completo, puedes hacer lo siguiente:
- Agrega los siguientes elementos de diseño:
- Texto
- Total del pedido
- Divisor
- Separador
- Sección
- Imagen
Selecciona el elemento de diseño y arrástralo hasta la pantalla de vista previa. El elemento de diseño se agrega a la vista previa. Para editar el elemento de diseño, selecciona el elemento de diseño en la pantalla de vista previa o el elemento de diseño para abrir configuraciones persoalizadas.
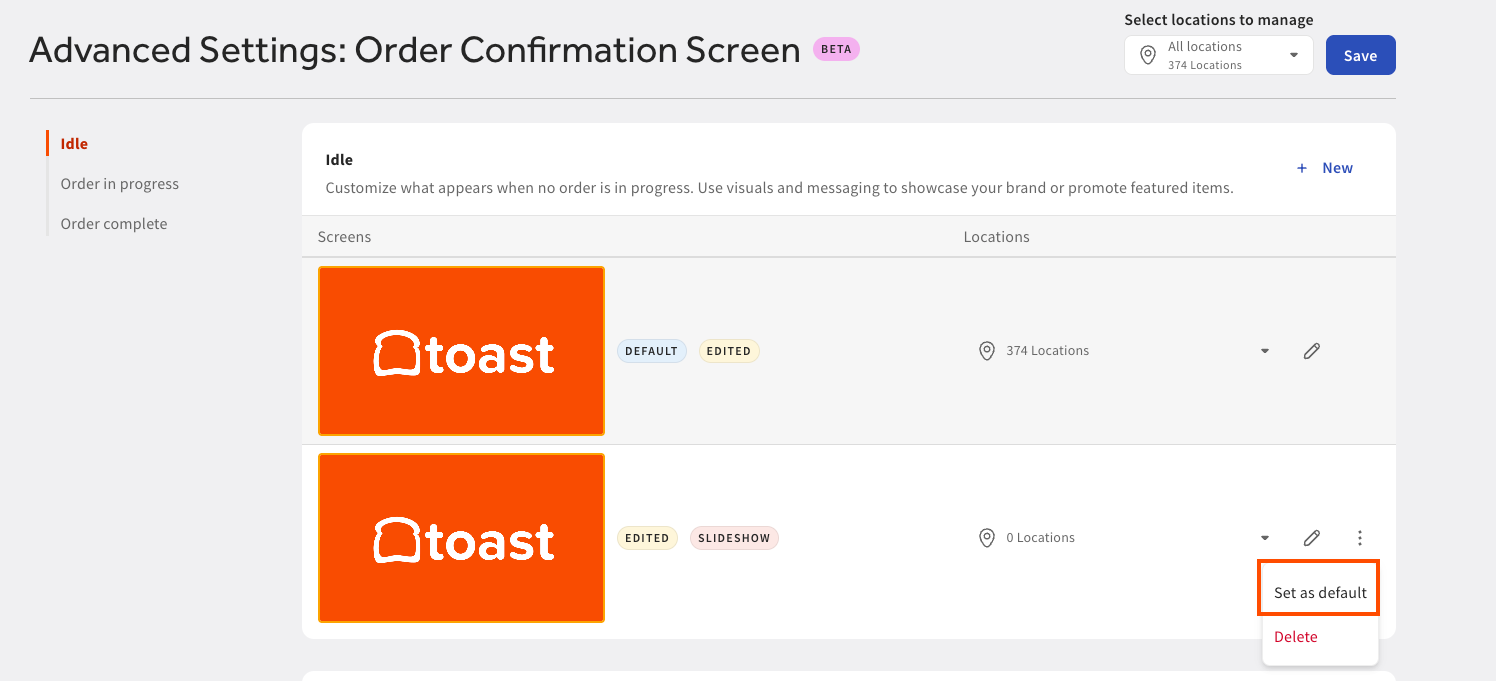
Configurar una pantalla como de pantalla predeterminada
En la configuración avanzada: Página Pantalla de confirmación del pedido, puedes elegir configurar una pantalla como pantalla predeterminada para todas las ubicaciones admitidas. Para seleccionar una pantalla como predeterminada, selecciona el menú de desbordamiento y abre un menú desplegable. Selecciona Configurar como predeterminado para configurar la pantalla como predeterminada.
| Cuando cambies las pantallas predeterminadas, todas las ubicaciones asignadas al valor predeterminado anterior se transferirán al nuevo valor predeterminado. |
Eliminar una pantalla
En la configuración avanzada: Página Pantalla de confirmación del pedido, puedes elegir eliminar el diseño de una pantalla. Selecciona el menú de desbordamiento para abrir un menú desplegable. Selecciona Eliminar para abrir un cuadro de diálogo de confirmación. Confirma la eliminación seleccionando el botón Eliminar.