xtraCHEF:同步监控器
上次更新时间:2026年7月7日 15:48
同步监控器摘要
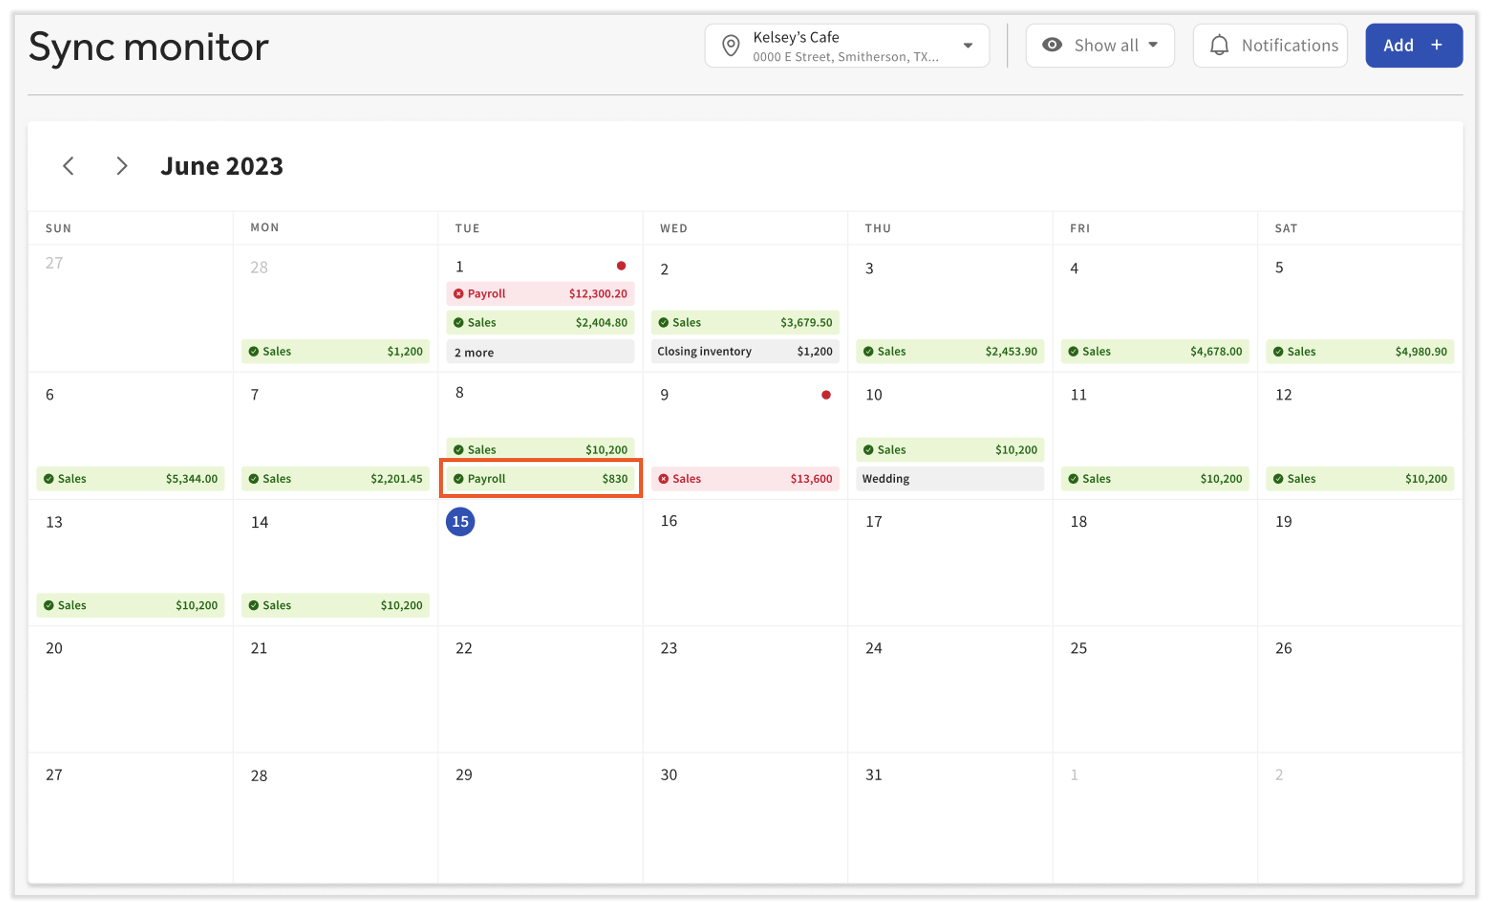
在 xtraCHEF 中,同步监控器允许您查看从 Toast 同步的数据并记录相关事件。这也是 xtraCHEF 记录您向 QuickBooks 进行销售和工资同步的地方。 要访问此产品,请导航至左侧导航菜单上的 同步监控器。 为了方便起见,同步监控器中的数据条目将进行颜色编码:
- 绿色颜色和勾选图标 表示数据已在 xtraCHEF 中,并已成功同步到相关的会计系统。
- 红色和 X 图标 表示将数据同步到相应的会计系统时出错。
- 灰色且无图标 表示数据已成功添加到 xtraCHEF,但未配置同步到任何地方。

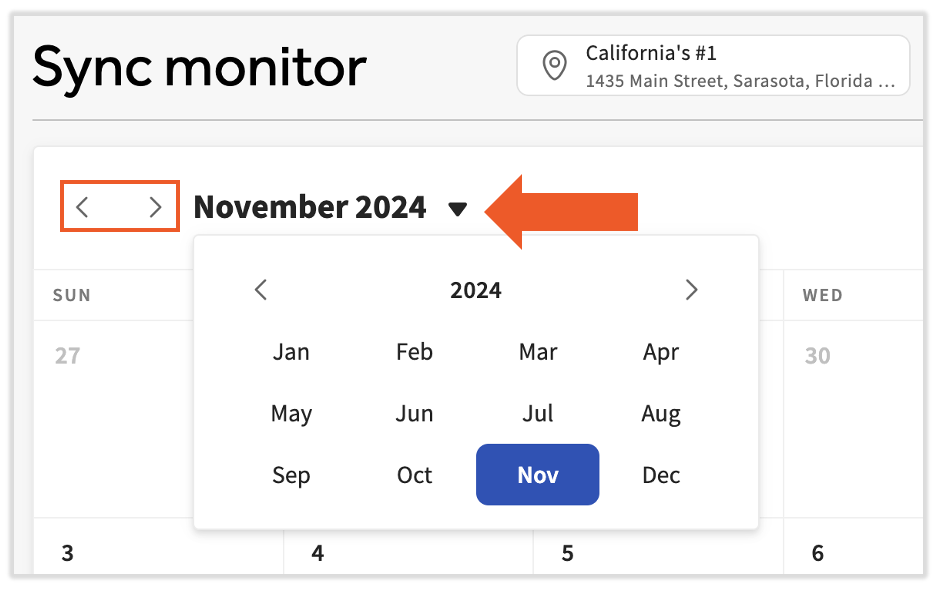
默认情况下,您将看到当前月份以及您第一个列出地点的所有数据。要更新地点,请选择 地点 下拉菜单。您一次只能查看一个地点。 要更改日期,请选择 前进 或 后退箭头 在月份之间切换。或者,您可以选择 月份 下拉菜单来选择更远的月份。
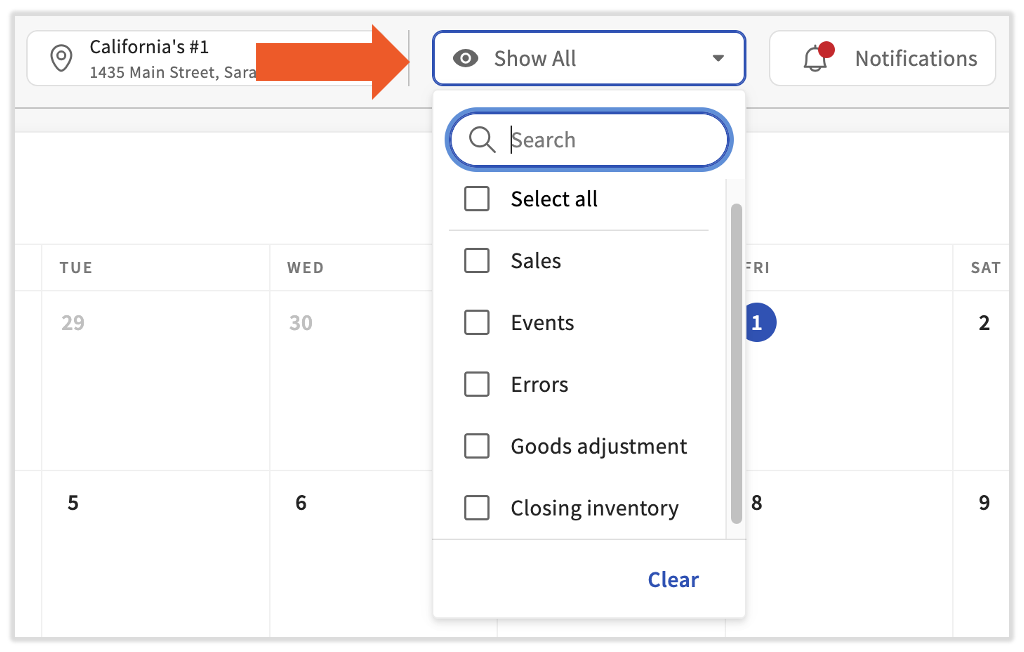
此外,您可以通过选择 显示全部 下拉菜单来筛选结果,仅显示特定类别。筛选选项包括销售额、工资单、事件、错误、商品调整和期末库存。
同步监控器操作
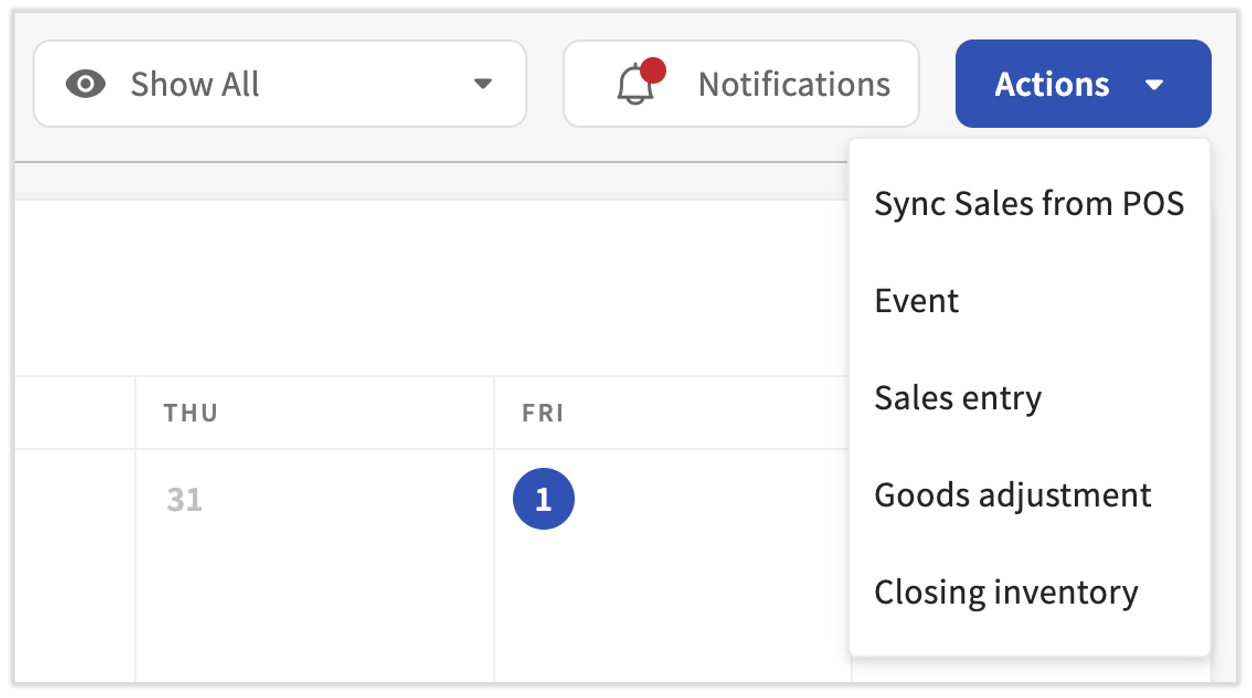
- 在同步监控器的右上角,您可以找到更多选项。如果您有需要查看的项目,通知 按钮上会出现一个红点。
- 使用 操作 按钮从 POS 同步销售额,或创建新的事件、销售条目、商品调整或期末库存值。
- 如果您正在使用 xtraCHEF 库存模块进行盘点,可以通过导航至 库存 > 报告 > 按销货成本划分的库存 直接将库存添加到同步监控器。选择一个盘点日期并选择 过账到同步监控。
事件管理
假设您餐厅上周六的销售额比之前的最高纪录多出 1000 美元以上。仅仅查看当天的销售数据并不能为您提供销售额为何如此之高的背景信息,这可能会让您无法获知如何复制该成功经验。
使用 Events 功能来标记您所在地点的重要日子(如筹款活动、包场、买一送一促销),以帮助您了解某些日子销售额异常的原因。您甚至可以使用事件来追踪诸如暴风雪或水管破裂等导致销售额低于预期的情况。
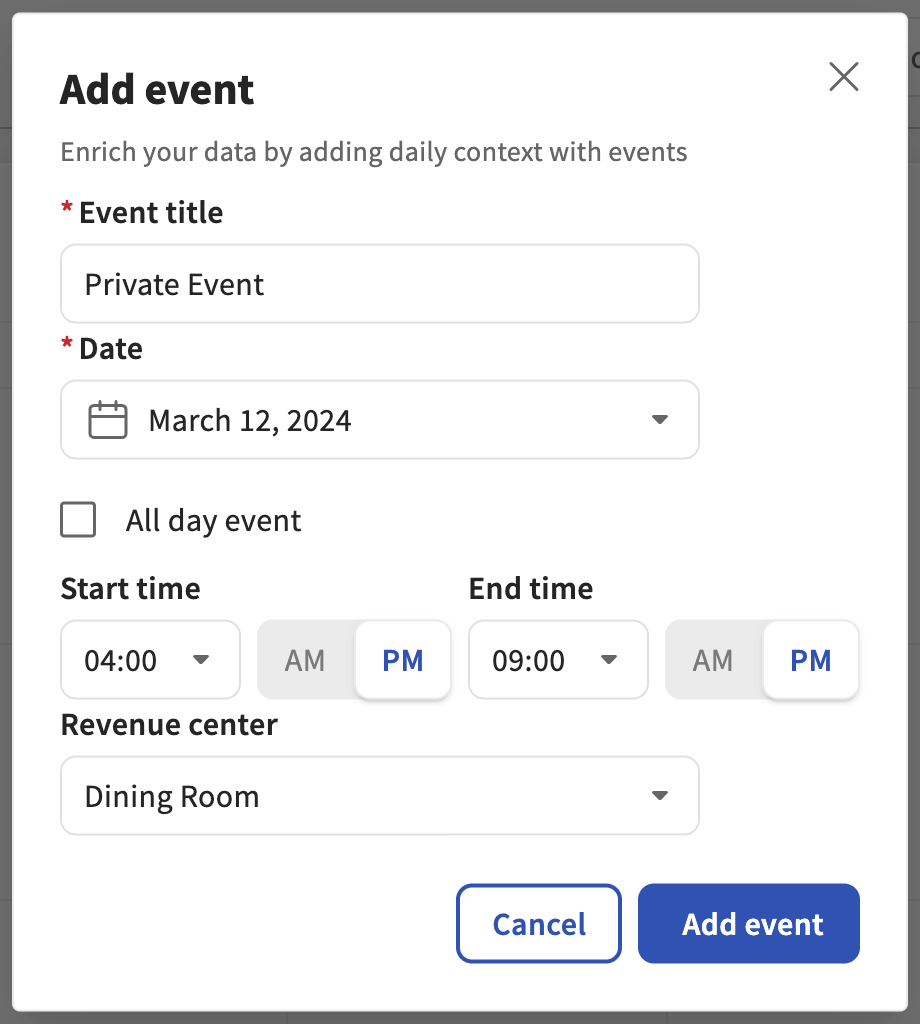
要开始使用,请从同步监控中选择 操作 > Event。所有事件都必须有一个标题。接下来,选择您的日期和时间,然后选择 添加事件。您将立即在同步监控日历上看到它。选择该事件以进行编辑或删除。
添加库存
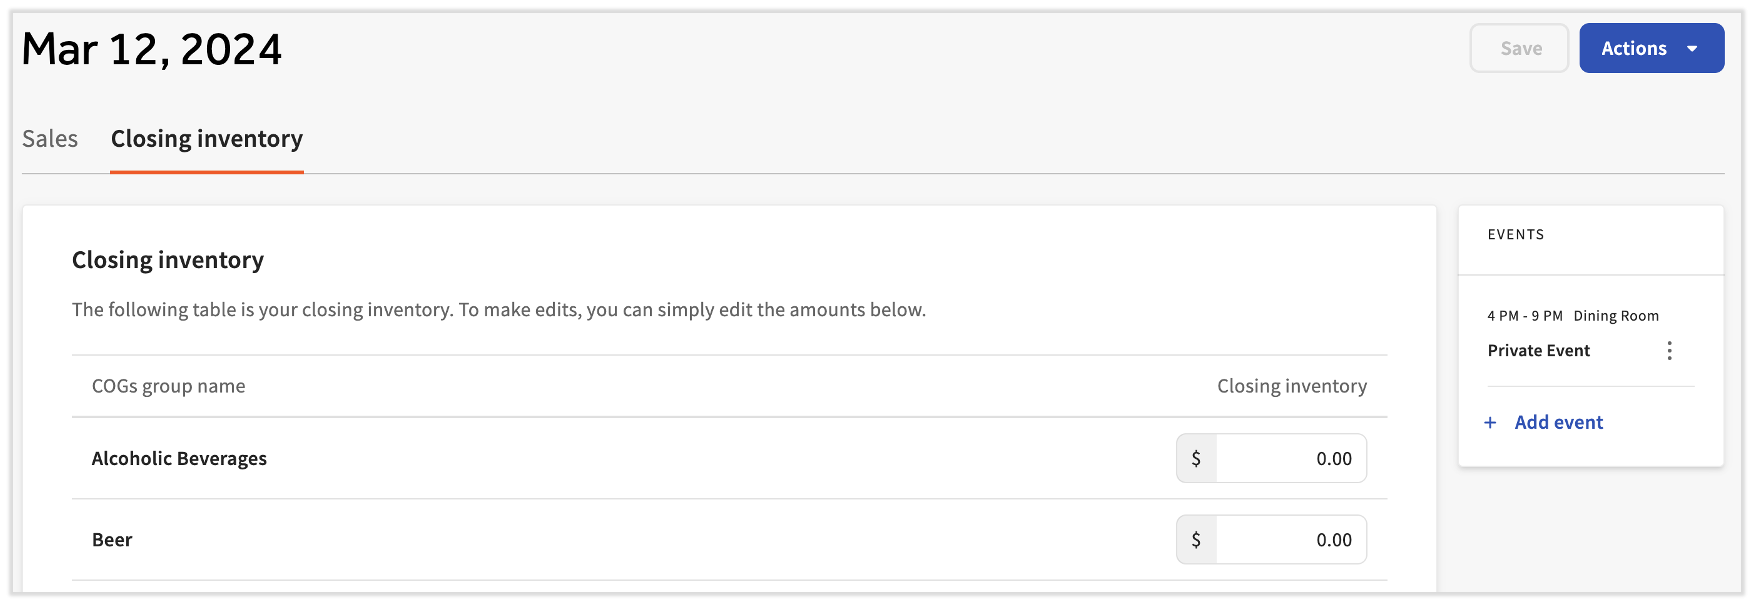
添加期末库存值将为您餐厅的利润率提供更深入的见解。在同步监控中,选择 操作 > 期末库存 并选择一个日期。现在,您可以按销货成本 (COGS) 组输入期末库存,然后选择 保存。在右侧,您甚至可以查看并添加当天发生的任何事件。
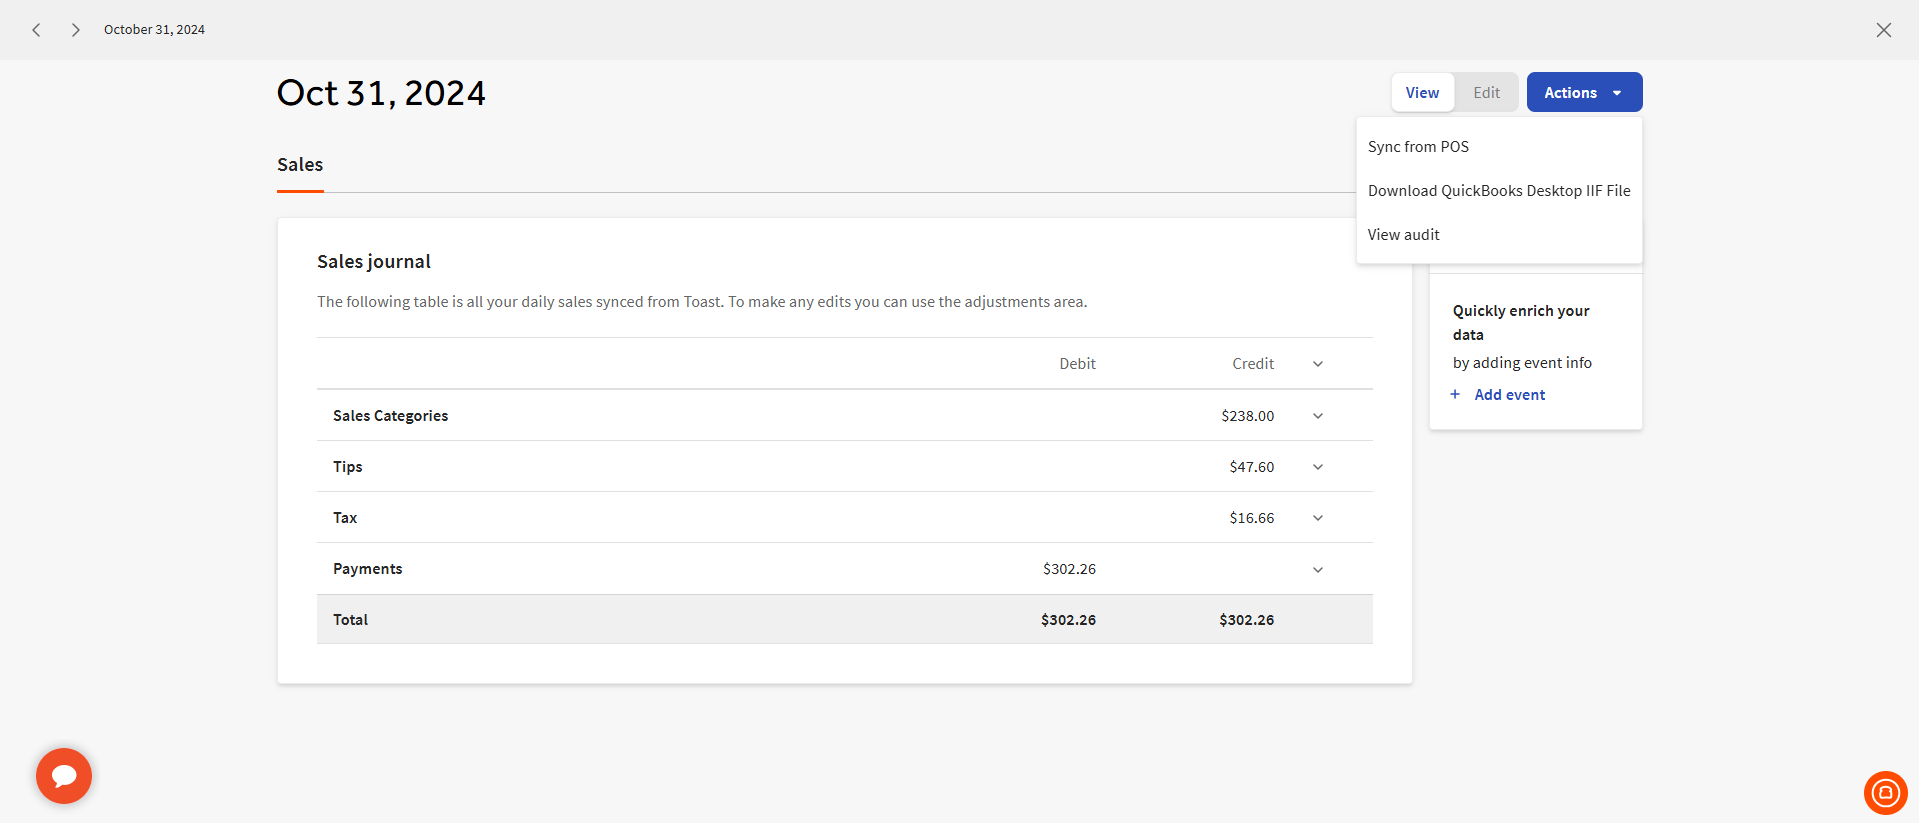
选择 操作 > 查看审计 以查看您的销售日记账审计。选择 销售 选项卡以查看该日期的销售日记账。
注意: 为了正确记录您的期末库存价值以进行销货成本 (COGS) 报告,请确保将其添加到您 会计期间 的最后一天。在现有会计期间之外记录的库存条目将不会计入您的销货成本报告。期末库存会自动用作下一个会计期间周期的期初库存。
如果您使用 xtraCHEF Pro,这些库存金额可以在完成库存盘点后从您的 按销货成本计算的库存报告 中同步过来。在报告中,选择 发布到同步监控器 按钮来执行此操作。保存后,您的数据将在同步监控器日历上可用(首先,您需要按 期末库存 进行筛选)。您可以使用此选项将您的销售额与库存进行比较。
添加商品调整
如果您需要核算额外采购或调拨的库存,可以选择在同步监控器中添加商品调整。为此,请选择 操作 > 商品调整。选择您想要应用该调整的日期。
对于任何已收到的商品(来自其他地点或供应商),请将其添加到 商品入库 部分。对于任何调出的库存(或用于核算损耗),您应将其记录为 商品出库。注意:商品调整仅用于 xtraCHEF 中的报告(例如 按销货成本计算的库存报告);此数据不会同步到会计系统。

通知
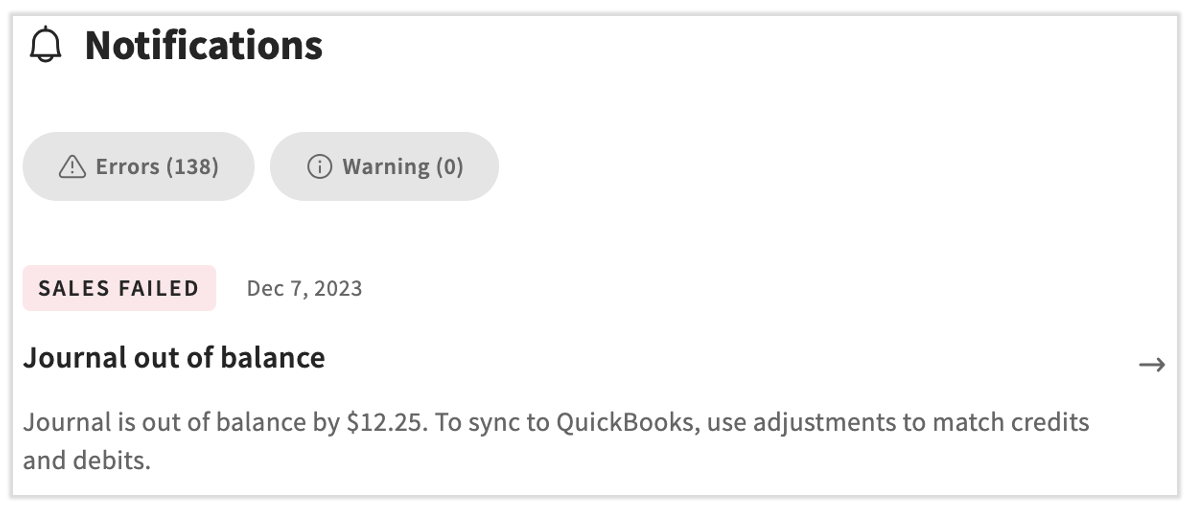
要查看所有待处理事项,请选择同步监控器上的 通知 按钮。在此处,您将找到一个弹出窗口,其中按时间顺序列出了 xtraCHEF 系统标记的所有项目。选择一条通知以打开其详细信息并进行建议的更改。
销售同步至会计系统
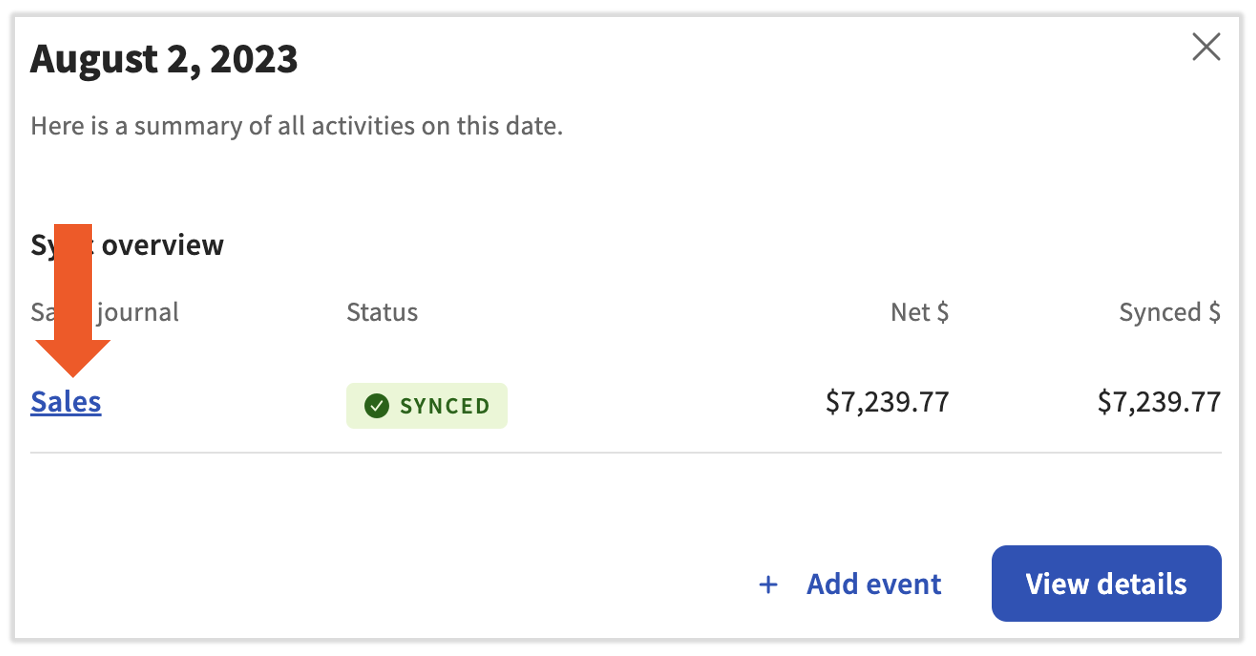
除了记录 Toast 销售额、事件、库存等信息外,同步监控还是同步至您的 QuickBooks 账户的中心。成功的同步以绿色突出显示,不成功的同步以红色突出显示。要查看同步至 QuickBooks 的数据详情,请在您的“同步监控”中选择一个日期,然后选择超链接以查看已过账至您的 QuickBooks Online 账户的日记账分录。
查看审计
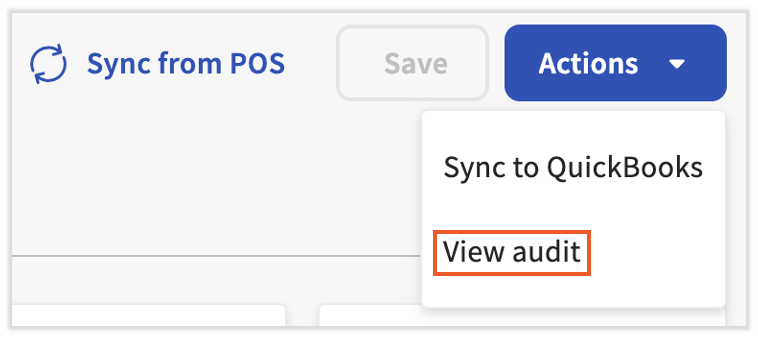
在“销售”或“销售同步”视图中,选择操作,然后选择查看审计。这样做可以让您查看手动更改的时间记录以及更改的操作人。
同步至 QuickBooks
如果同步失败,在“同步监控”中选择日期将突出显示同步失败的原因。在下方的截图中,日记账无法过账,因为在 QuickBooks 账户中未找到匹配的 GL 代码。
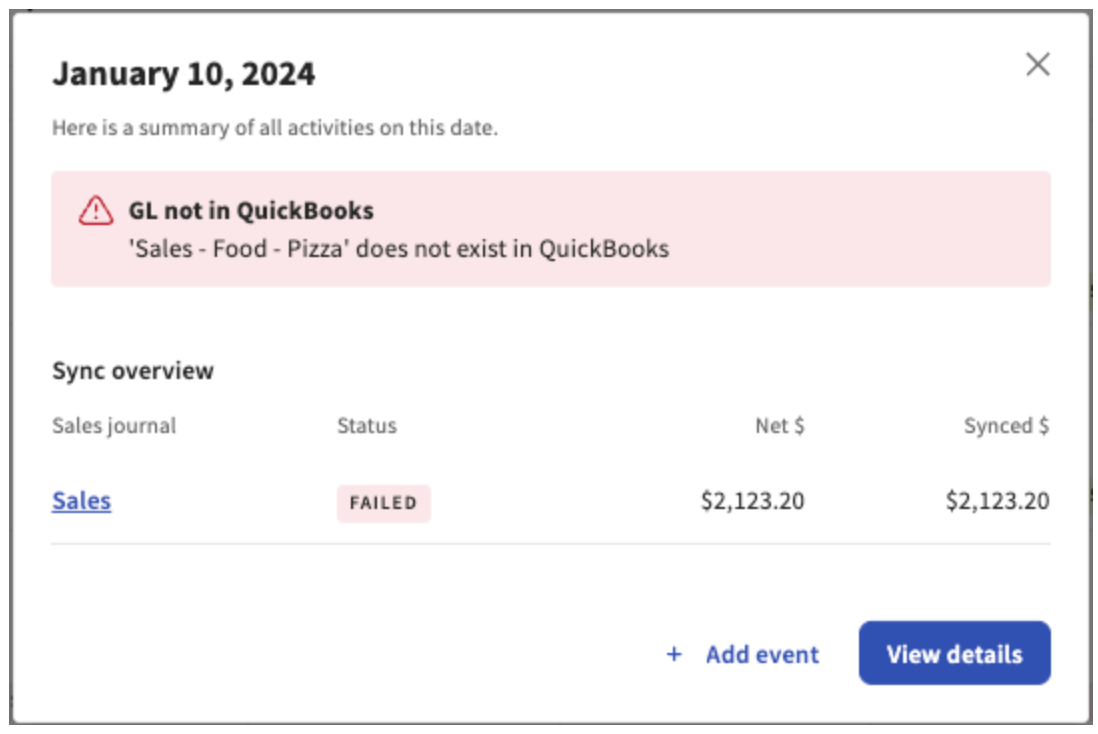
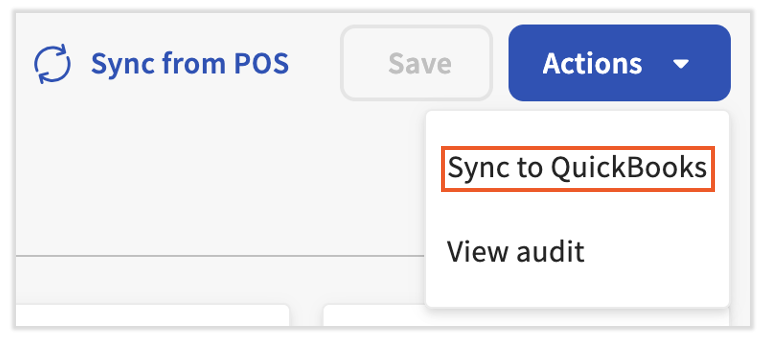
要重新同步,您需要修复这些问题(通过在 xtraCHEF 中更新 GL 代码名称或在 QuickBooks 中添加匹配的 GL 代码),然后选择操作 > 同步至 QuickBooks。
同步多个日期
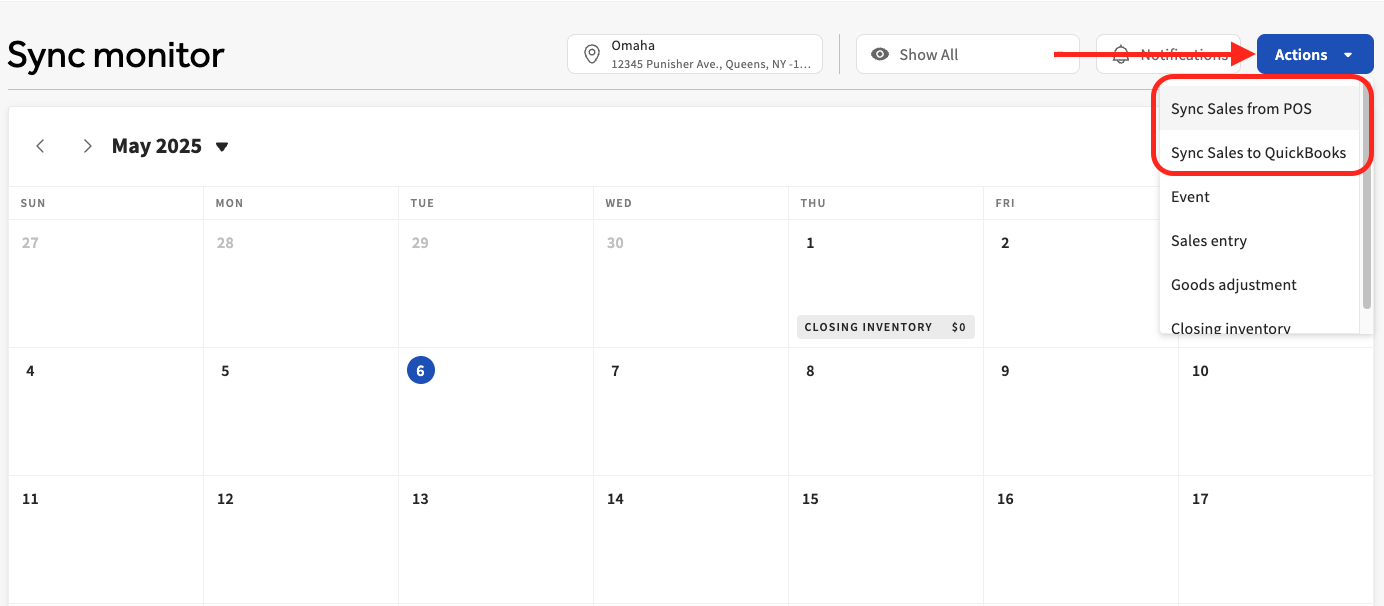
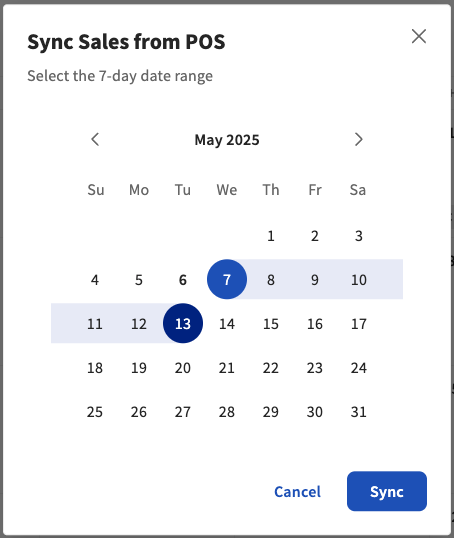
您现在可以通过“操作”按钮一次同步最多 7 天的数据(从 Toast POS 同步或同步至您的 QuickBooks 账户)。
- 选择同步监控器右上角的 操作 按钮。
- 选择 从 POS 同步销售 或 将销售同步到 Quickbooks。
- 选择最长 7 天的日期范围,然后选择 同步。系统随后将开始同步所选日期的数据。注意:这可能需要几分钟才能完成。
工资单同步到会计系统
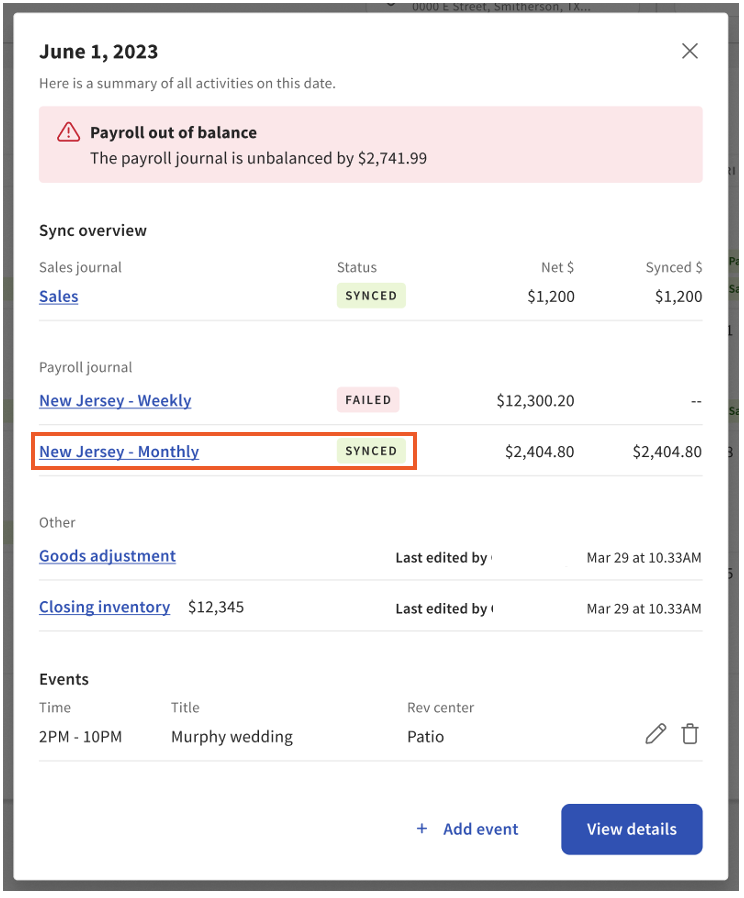
如果您已将 xtraCHEF 账户与 Toast 工资单集成,工资单同步也将填充到您的同步监控器中。 您可以通过选择 工资单同步日期 来查看更详细的信息。
然后,选择相应的工资单超链接(在此示例中,选择一个已同步的工资单)。
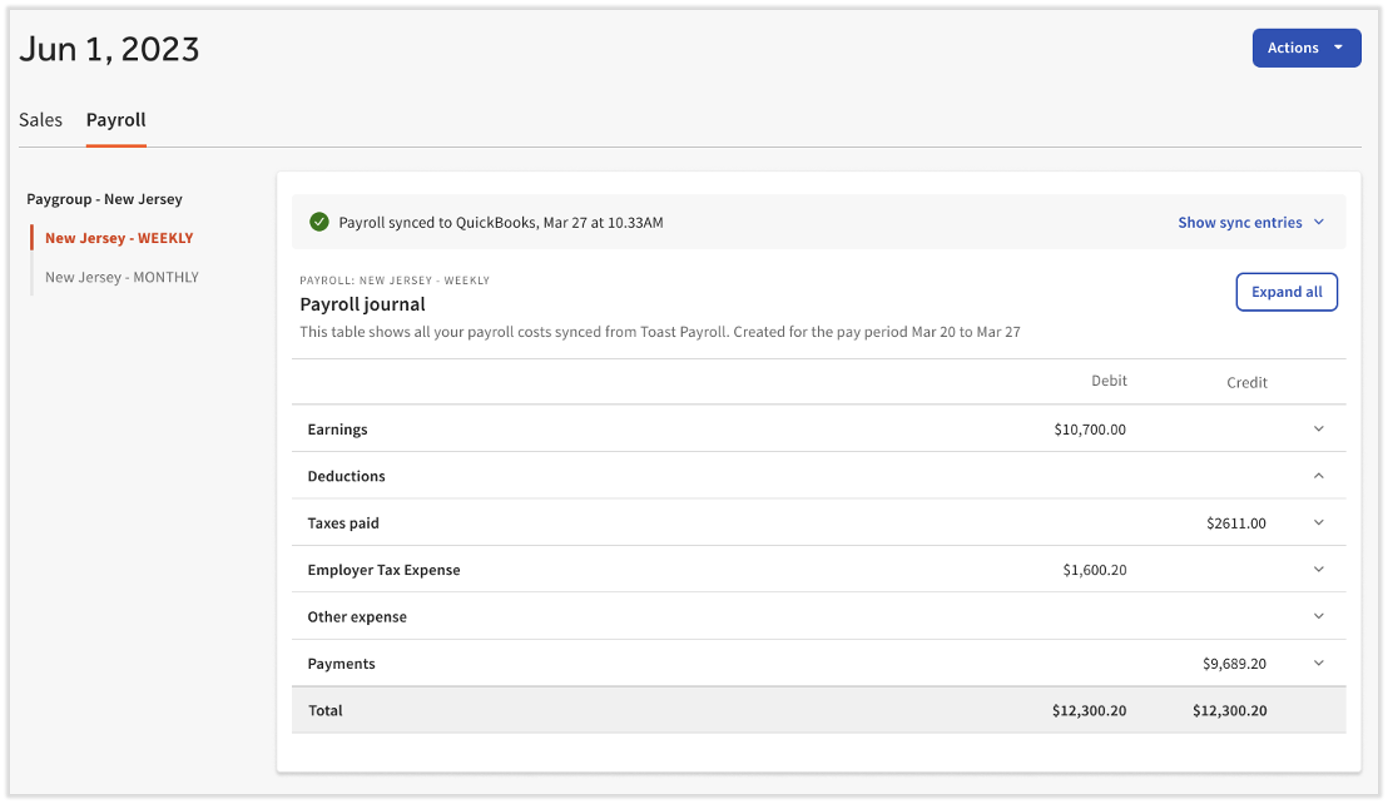
在此处,您的 工资单日记账分录 将会填充。然后,与销售同步类似,您可以选择 操作 以 查看审计 或 导出为 CSV。根据您的 QuickBooks 版本(在线版或桌面版),您还将看到一个会计特定的选项。
注意: 若要为您的 QuickBooks 账户提取 工资单同步,您需要已集成 QuickBooks 和 Toast 工资单,并已完成 工资单设置。要了解有关此步骤的更多信息,请考虑阅读 Toast 工资单 + xtraCHEF 集成。
QuickBooks Online
| Toast 已发布从 Toast Web 到 QuickBooks Online 的直接 仅工资单 同步功能。未来,此集成还将包括销售同步和其他会计软件。阅读 开始使用工资单会计同步 以了解更多信息。 |
配置完成后,您的工资单与 QuickBooks Online 的同步将自动进行。如果 工资单同步 提取失败,您可以手动重新启动 同步至 QuickBooks。这样做将提示 xtraCHEF 尝试再次同步。您可以通过在 工资单日记账分录 视图中选择 操作 来执行此操作。然后,选择 同步至 QuickBooks。
QuickBooks Desktop
配置完成后,您的工资单与 QuickBooks Desktop 的同步将通过可下载的 IIF 文件进行,该文件可上传至您的会计软件。您可以通过选择 操作 > 下载 QuickBooks Desktop IIF 文件 来执行此操作。