Toast Payroll: Make an LOA Status Change
Last updated: Apr 8, 2026, 11:45 AM
Question
- How do I change an employee's status to Leave of Absence (LOA)?
- Will I be charged for employees with a leave of absence (LOA) status?
Answer
To update an employee's status to Leave of Absence, follow these steps:
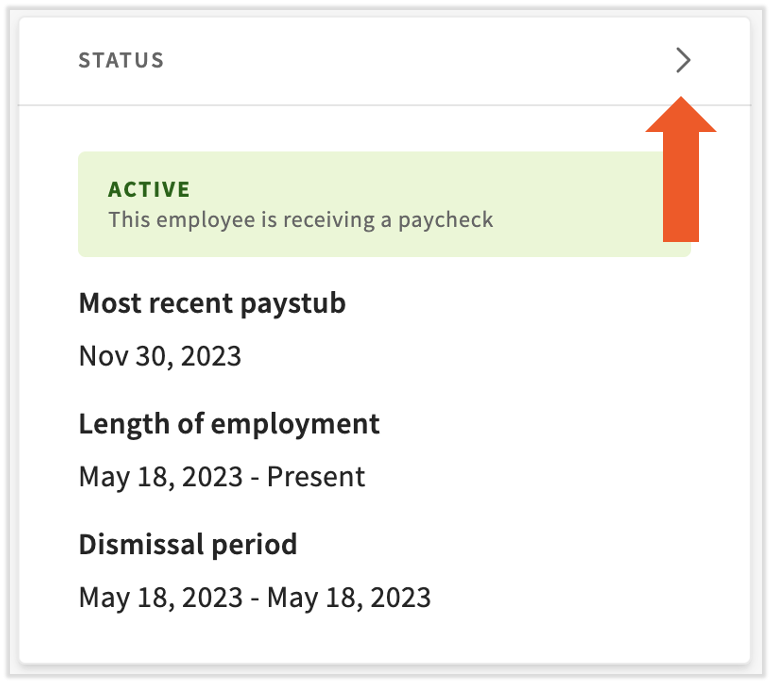
- To add a Leave of Absence record, navigate to an employee's profile and select the carat > icon in the Status tile.
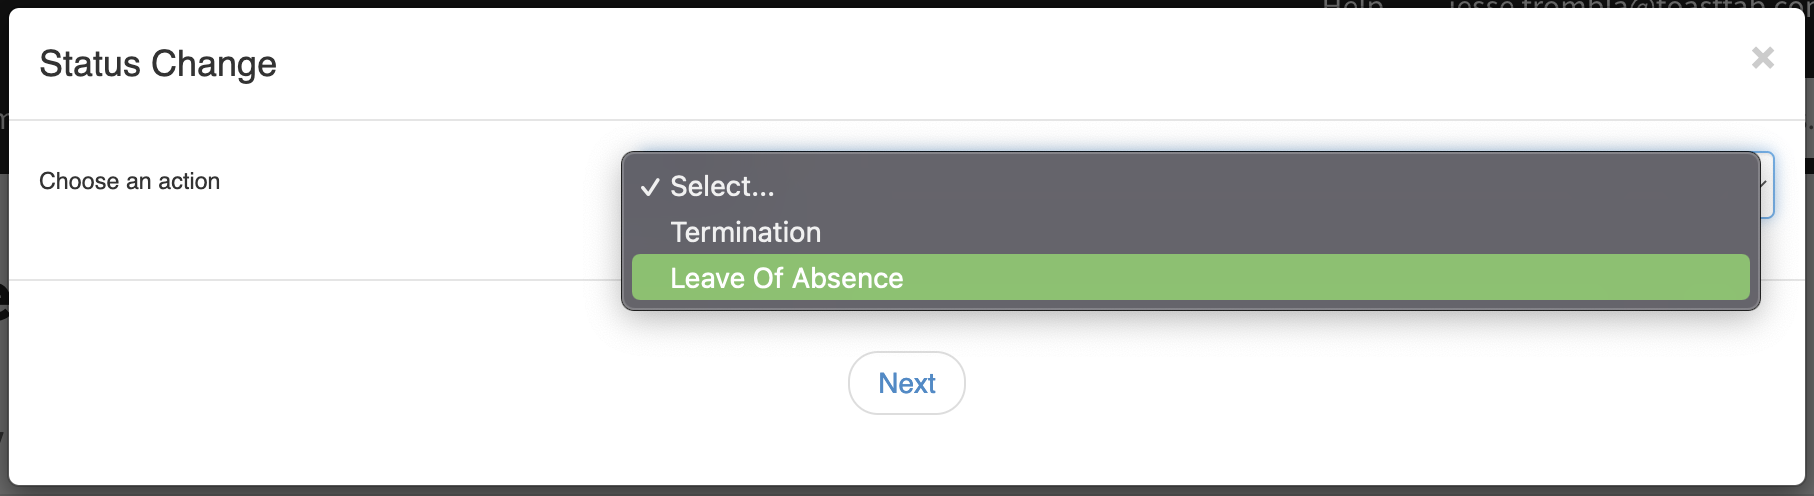
- On the first step, select Leave of Absence as your action and press Next. If you only see Rehire on this step, this employee is currently terminated and cannot be put on a leave of absence until they have been rehired.
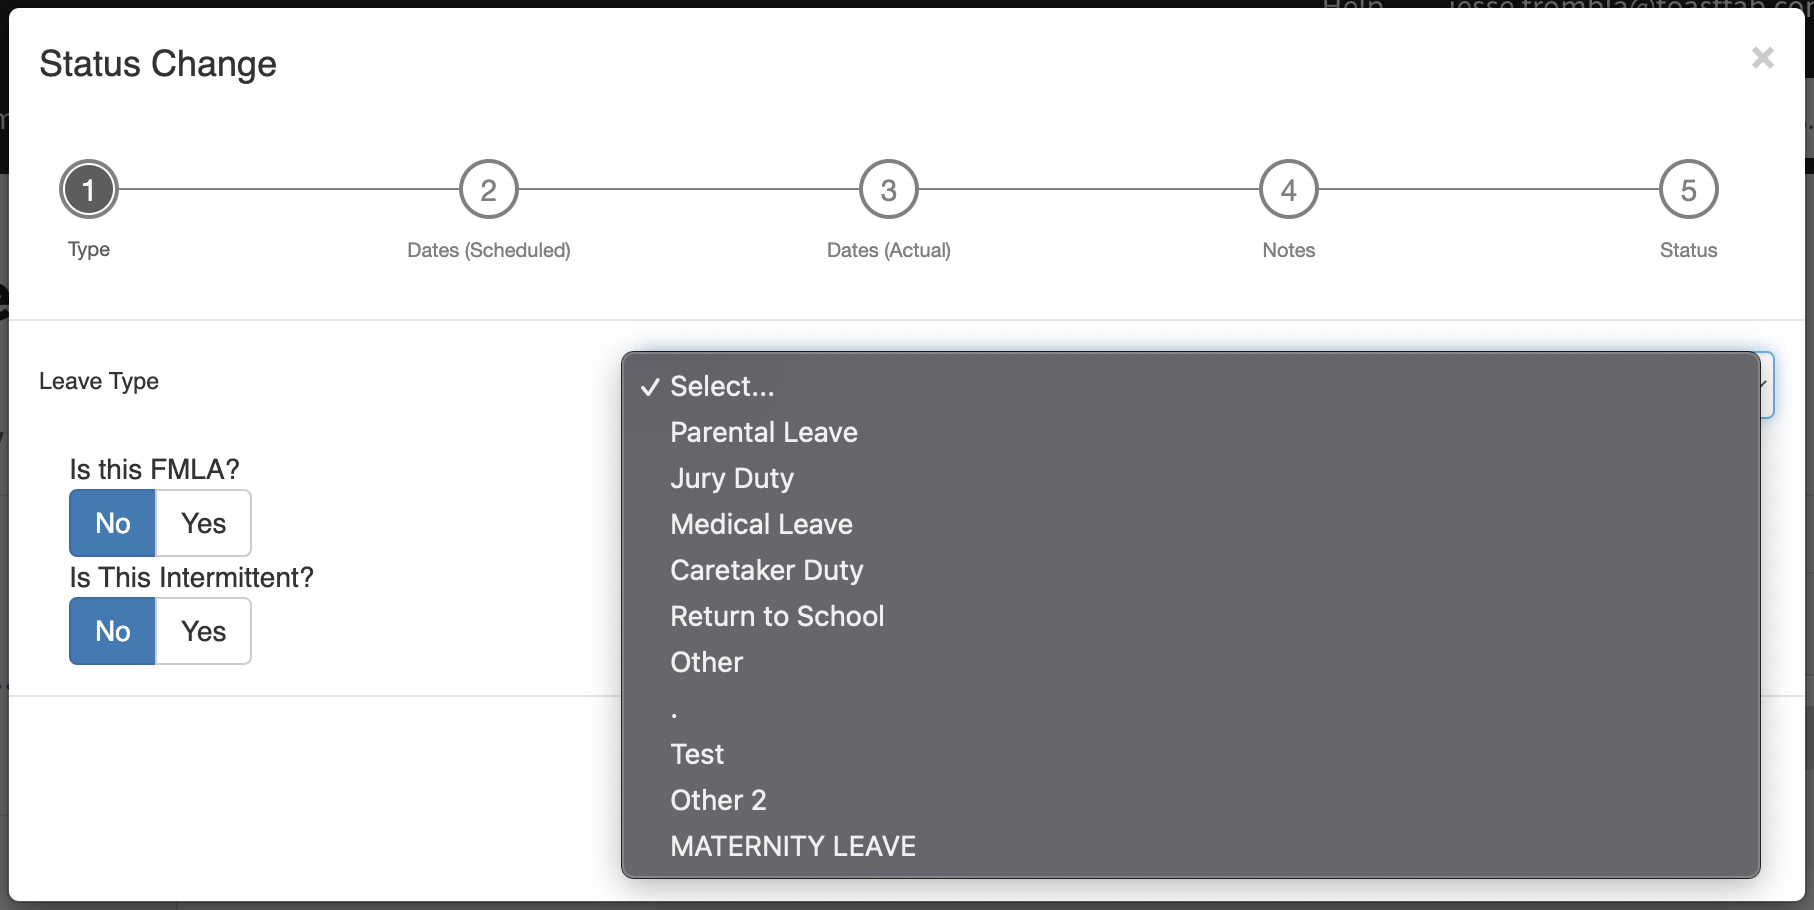
- Your next step is to select a Leave Type that indicates why the employee is going on leave. Additionally, indicate if this is part of FMLA or if this leave is intermittent. All this information will be kept on-file in the employee's profile. Select Next to continue.
- Leave Types are customizable, and you may not see the types listed in this screenshot. If you do not see any Leave Types in the drop-down menu, you can leave it blank and enter a reason in the notes (step 6 of this guide). Toast can also add Leave Types for your restaurant if you contact Customer Care by selecting the blue chat button in the lower-right corner of any Toast Payroll page.
- Leave Types are customizable, and you may not see the types listed in this screenshot. If you do not see any Leave Types in the drop-down menu, you can leave it blank and enter a reason in the notes (step 6 of this guide). Toast can also add Leave Types for your restaurant if you contact Customer Care by selecting the blue chat button in the lower-right corner of any Toast Payroll page.
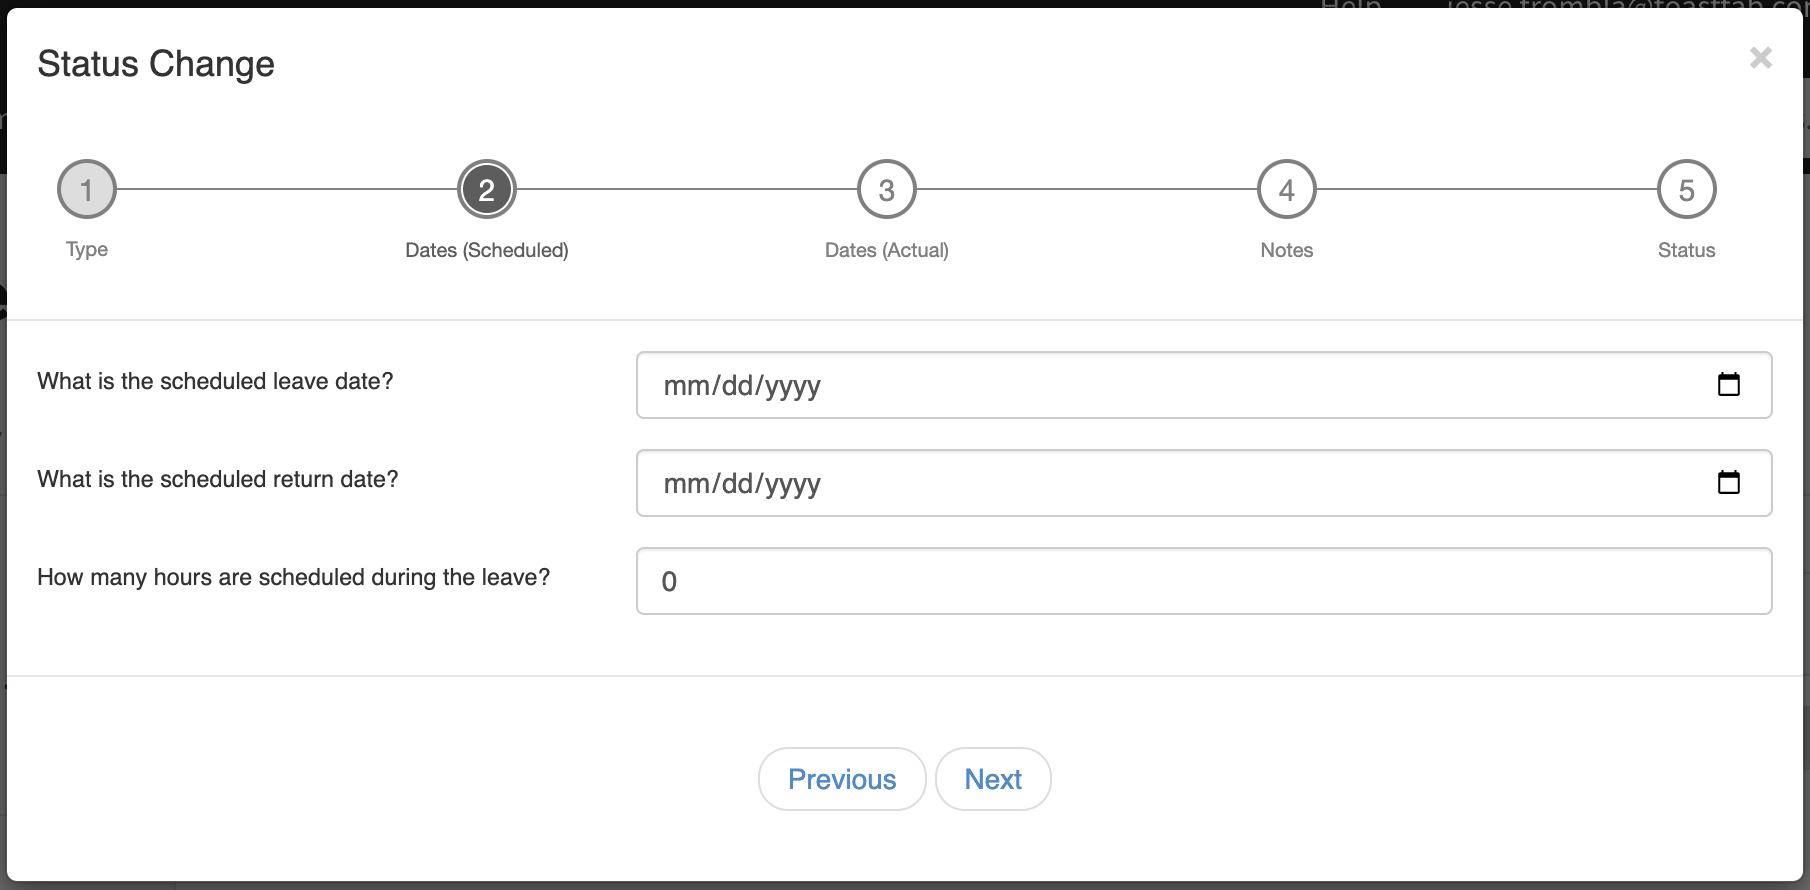
- On the next step, enter the scheduled leave and return dates and the number of scheduled hours. If you do not have this information, this step can be skipped by selecting Next.
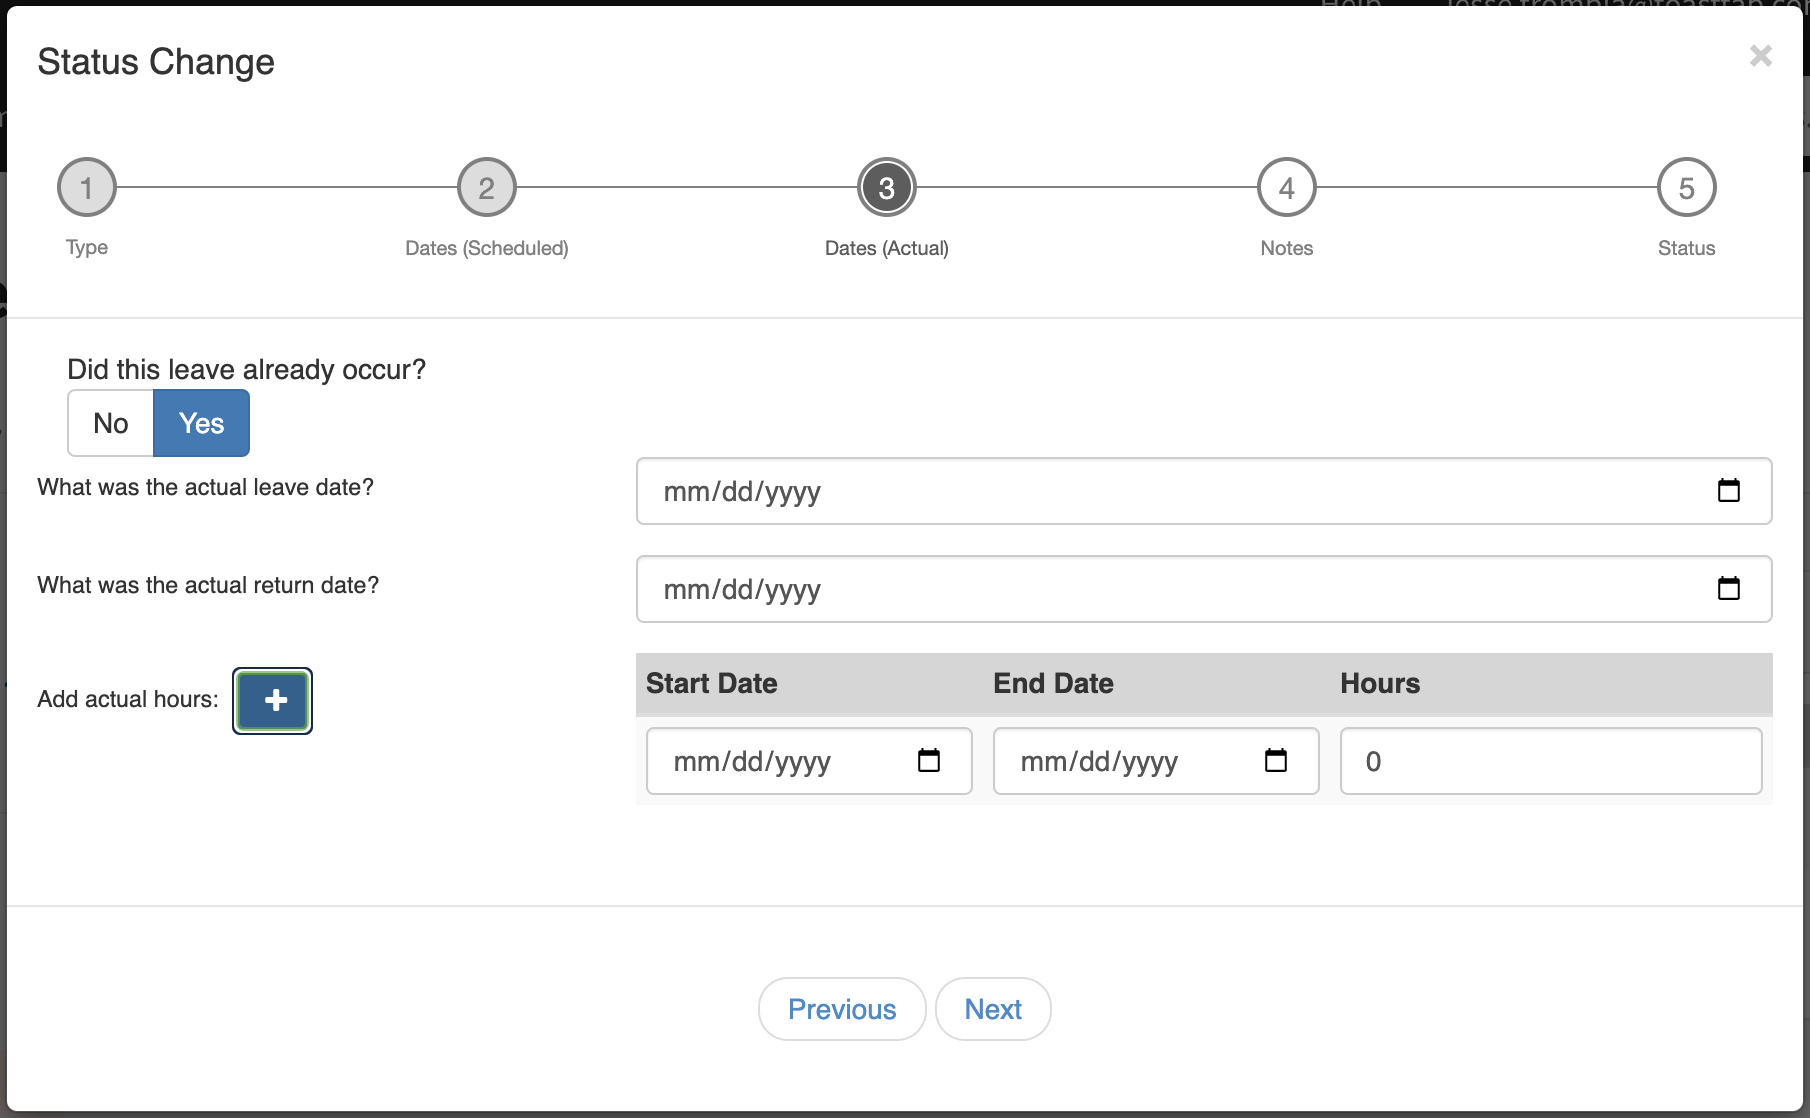
- If the leave has already occurred, choose Yes and enter timing details on this step. Select the + button to enter one or more date ranges with actual hours of leave. These will be added to the payroll during which the leave occurs on. Select Next to continue.
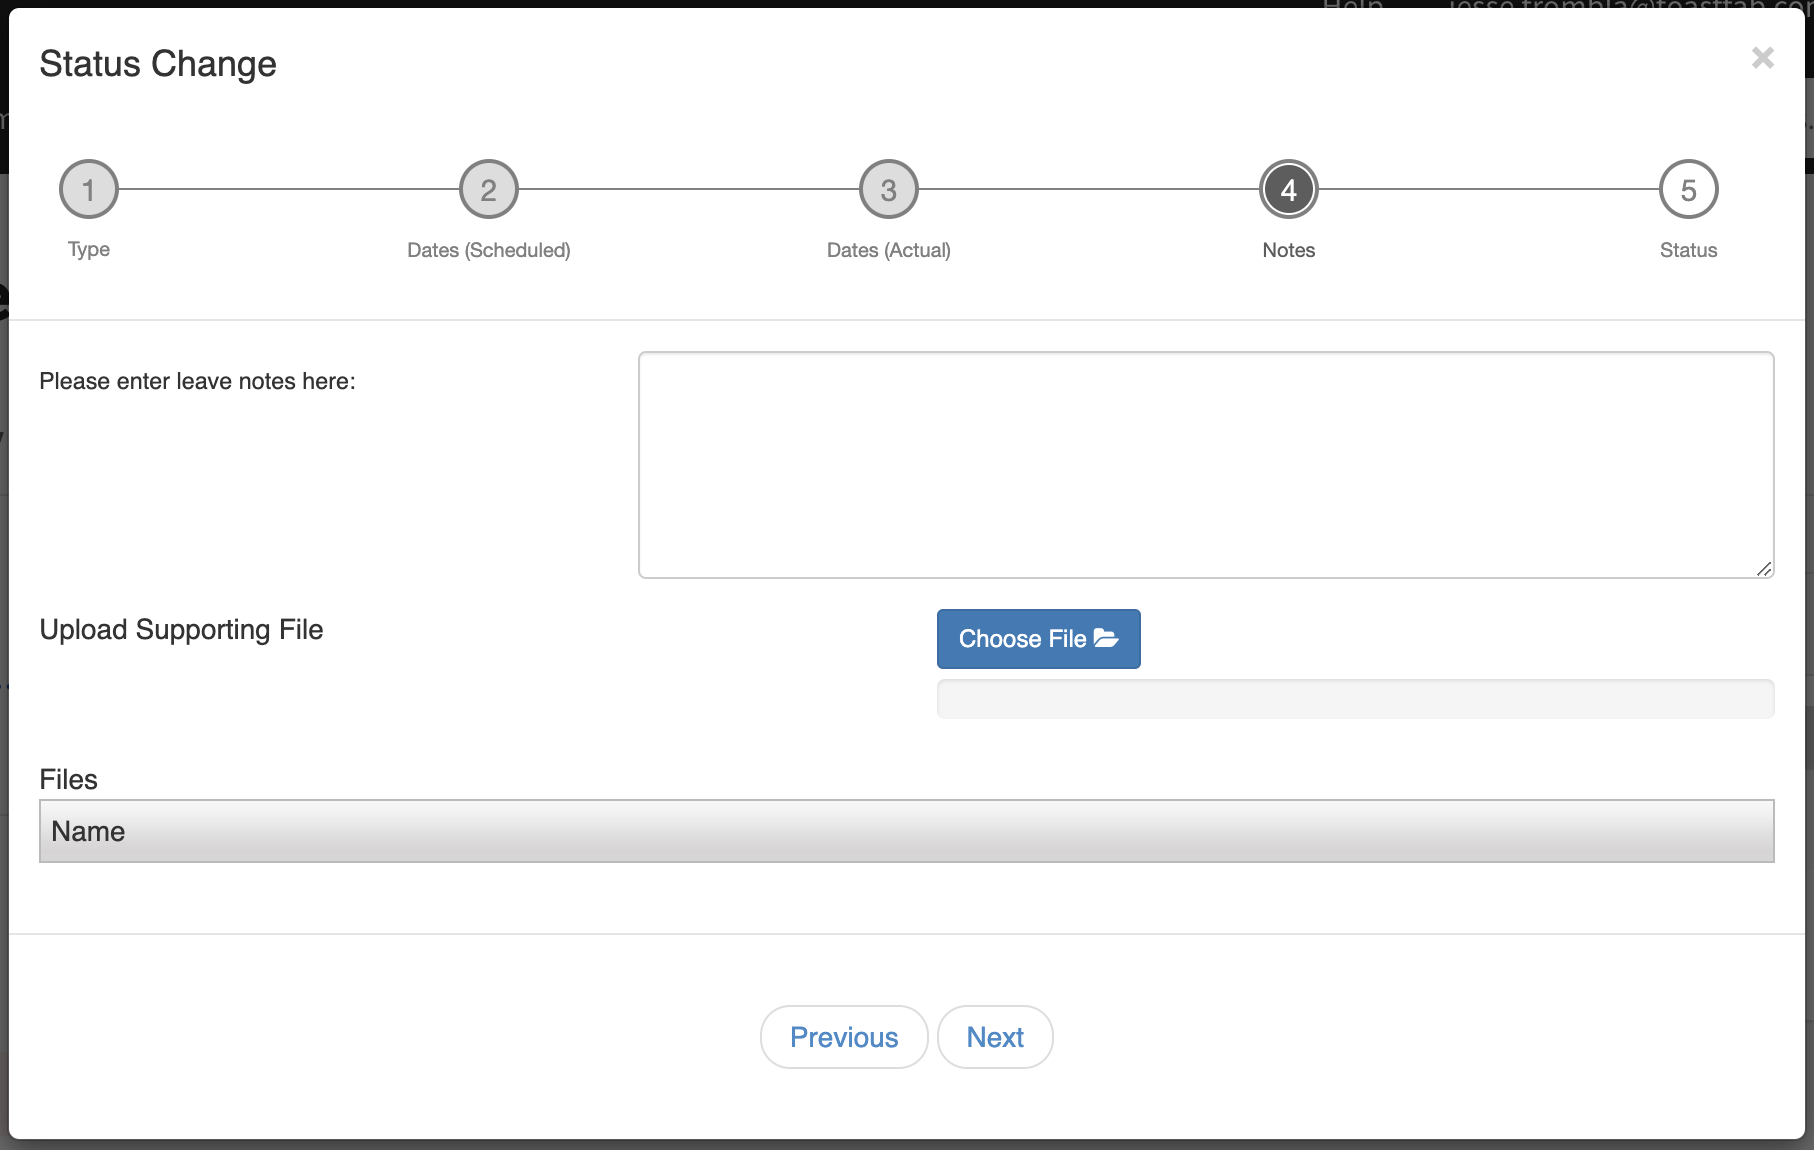
- Now, enter any notes or upload supporting documents related to the leave on this step. Uploaded files will appear at the bottom of the pop-up and will be placed into the employee's Company Documents page. This step is optional. Press Next for the last step.
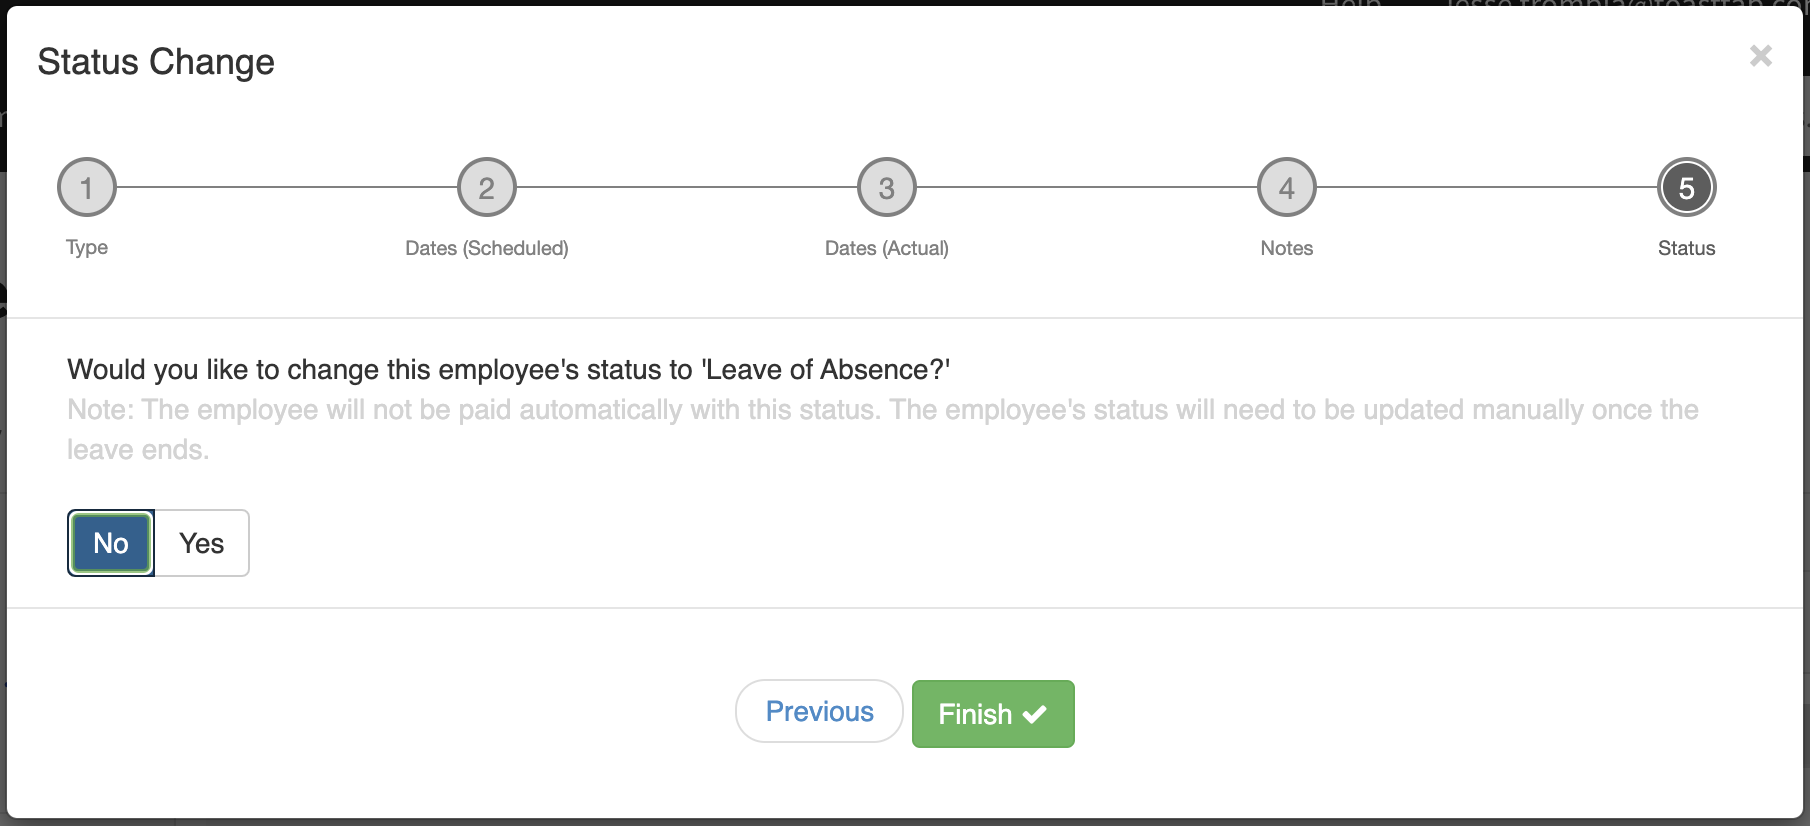
- Lastly, choose to change an employee's status to Leave of Absence on the final step. The status change will take effect immediately, regardless of the scheduled dates that were entered. Keep in mind that an employee's status will also need to be changed away from Leave of Absence when the leave ends. This can be achieved by navigating back to the Status Changes page once the leave is finished. Select Add and then Return from Leave to change the employee's status back to Active.
- An employee with a Leave of Absence status will appear on payroll, but without any recurring earnings. This is so that any recurring deductions can still be recorded (i.e. benefit costs).
- An employee with a Leave of Absence status will appear on payroll, but without any recurring earnings. This is so that any recurring deductions can still be recorded (i.e. benefit costs).
- You are not charged for employees who are on leave of absence (LOA). Only active employees on the first pay date of the month contribute to a per employee per month (PEPM) charge.
This content is for informational purposes and is not intended as legal, HR, tax, or any other professional advice. Please contact an attorney or other professional for advice.